Creating a risk in the Risk Registers
Learn how to create risks within the 6clicks Risk Registers
This article discusses the creation of a single risk in the registers, and all its details and linkages.
For bulk importing risks into your registers, head here.
For creating risks in your risk libraries, so that they can be added to your registers if & when they need to be actioned, head here.
Table of contents:
Getting started
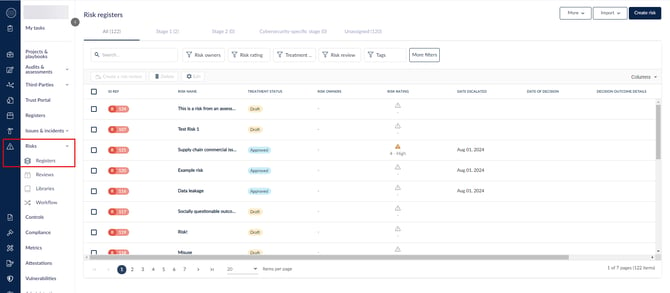
Head to Risks > Registers.
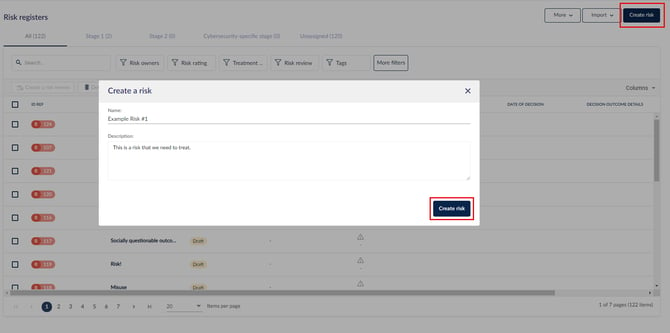
Your Risk Registers contain all the relevant risks identified by your organization. To create a new risk, click on Create risk.
Give the risk a name and an optional description, and click Create risk when you are done
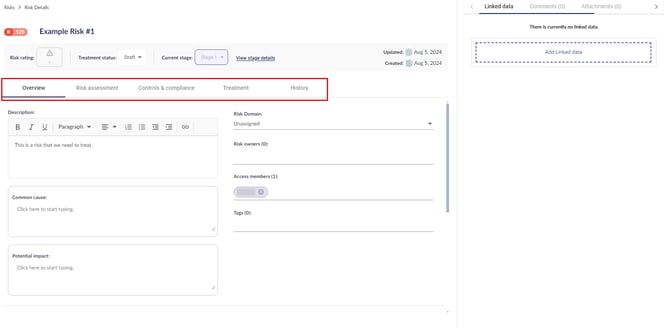
You can go into the risk and see all its details and linkages. These are divided into tabs.
Above the tabs, important pieces of information are displayed regardless of which tab you are in. These include:
- Name: Click on the risk name to edit it; click elsewhere or hit Enter to save
- Risk rating: Assign a severity to the risk; manage it in the Risk assessments tab
- Treatment status: Assign a progress status to the risk's ongoing treatment plan; manage more in the Treatment tab
- Current stage: Move the risk throughout the risk workflow stages according to its lifecycle
- Created and updated by dates and users: see more in the History tab
Overview
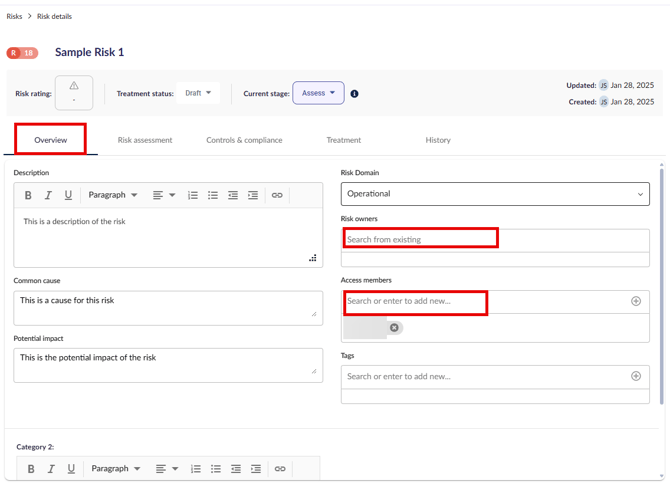
The Overview tab provides high-level details of a risk. This section has several fields for categorizing and managing a risk.
- Description
- Common cause & Potential impact: Used to provide more contextual information on the risk; they can get carried over if the risk already has these filled out in the library
- Risk Domain: The category of the risk; learn how to customize the default list
- Risk owners: User(s) responsible for the risk from a governance perspective; learn more about the differences between record owners and assigned members
- Access members: The users who are given specific access to this risk; learn more here
- Tags: Tags allow you to group risks together; use them to report on and filter risks
If you have any risk custom fields, they will be shown under the above default fields. Custom fields are used to better capture any data that the default fields cannot. There are different custom field types to suit the needs of your organization.
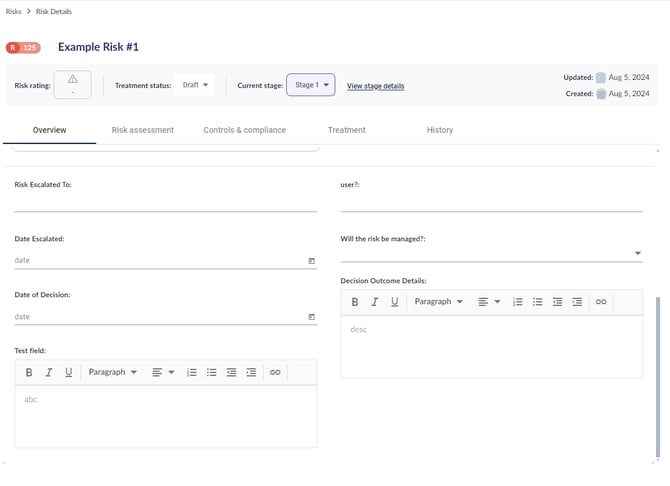
In the below example, there is a custom risk field of the type Date called Date Escalated, which may be necessary for risks with high impact.
To learn more about custom risk fields, head here.
Linked data
In the Linked data tab in the side panel, you can link assets, issues/incidents, third-parties, and other items from across the 6clicks platform to a risk.
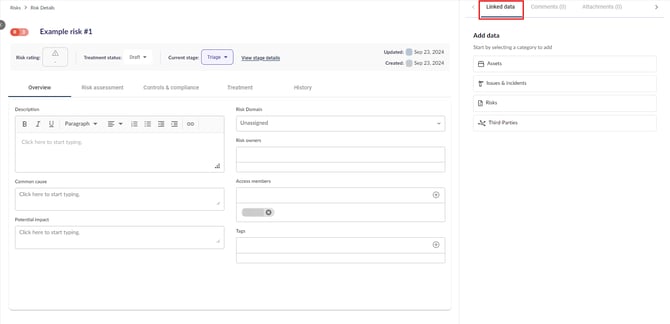
Click on the data type that you want to link and then the link icon to access the list of items available.
Click on + Add data to add other types of data. Switch between each data type by clicking on its corresponding icon in the top left.
To learn more about linking risks to each other, head here.
Attachments
Attachments can be uploaded to a risk by navigating to the relevant risk record. In the right-hand side panel, select the Attachments tab, located alongside Linked Data and Comments. Users with the appropriate permissions can view existing attachments, upload new files, and download available attachments.

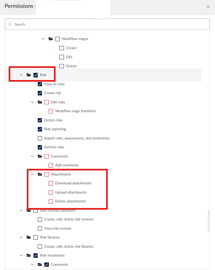
Permissions governing attachment visibility, upload rights, and download access can be configured within Role Permissions or User Permissions, as illustrated below.
Comments
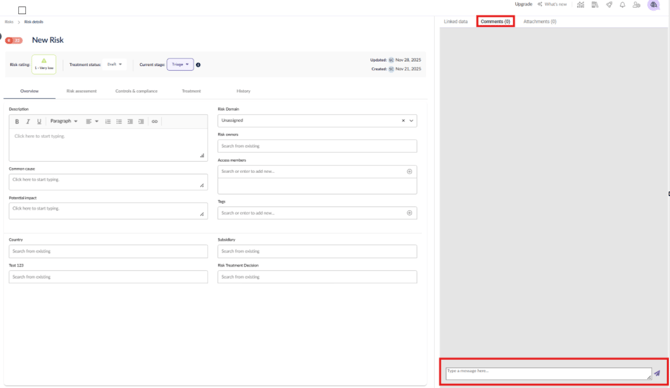
Users with the appropriate permissions to access the Risk module, or who have been assigned to a specific risk, are able to view and add comments. Comments can be added by navigating to the relevant risk record. In the right-hand side panel, the Comments tab will be displayed alongside Linked Data and Attachments. From this tab, users can read existing comments and submit new ones.
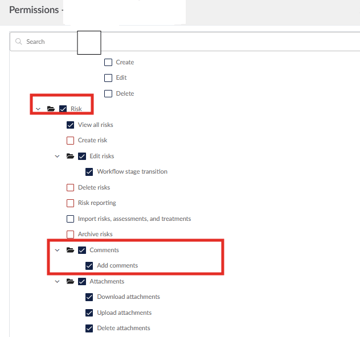
Permissions governing comment visibility and access can be configured within Role Permissions or User Permissions, as illustrated below.
Risk assessment
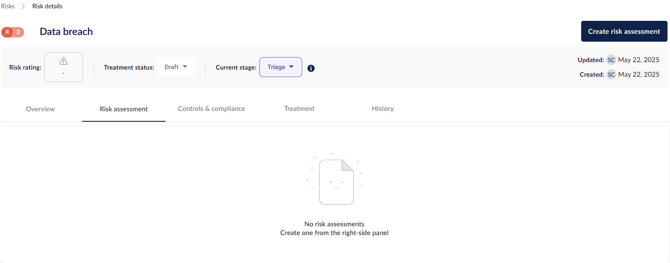
The Risk assessment tab is where you can run risk assessments to determine what actions are needed to address the risk.
You can assess one risk or multiple risks.
Creating a singular risk assessment
To assess a single risk, begin by navigating to the Risk assessment tab and select Create. You will be prompted to choose a risk assessment label and confirm by clicking Create. The system will automatically pre-fill the name of the assessment based on the current date and time.
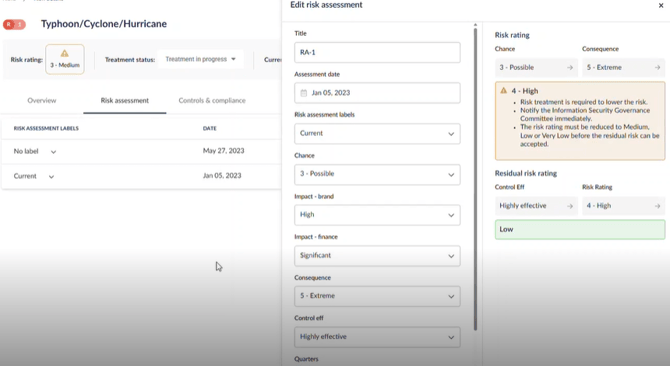
Once the assessment is created, you can specify the relevant Likelihood and Impact values directly within the risk assessment table. The system will then calculate the corresponding Risk rating, which will appear both in the table and near the top of the assessment view.
When a spoke includes custom fields, the view layout will adjust to a two-column format. In this layout, the left column is dedicated to selection fields, while the right column displays the corresponding results.
It's important to note that the risk assessment functionality may be restricted under certain conditions. Specifically, assessments cannot be created or edited when the risk is undergoing an active risk review or if the risk is in a workflow state that does not permit risk assessment activity.
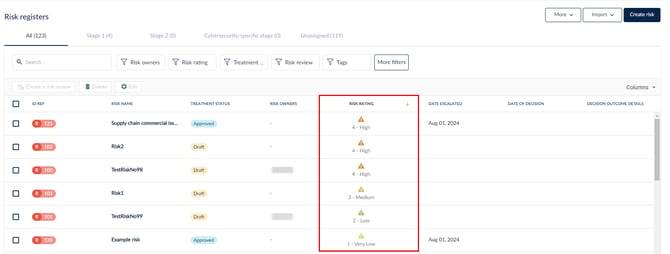
The Risk Rating is also shown in the Risk Registers if you choose to show it as a column.
If this risk has been assessed multiple times, you can choose to display a risk rating that is not the latest result by clicking the star next to the assessment in which the rating was assigned; click the star again to let this risk display its latest rating by default.
Choose which risk assessment fields are shown as columns in this table by clicking on the Manage columns icon. Use the side panel to add, reorder or remove columns.
Assessing multiple risks via import
To assess multiple risks at once, you can import risk assessments using an Excel spreadsheet.
You can also bulk update existing risk assessments.
Controls & Compliance
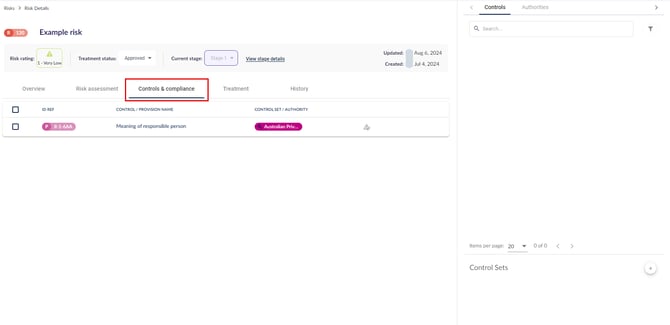
The Controls & compliance tab allows you to link controls from control sets and provisions from authorities to a risk.
You can perform the following actions here.
Linking a control to a risk
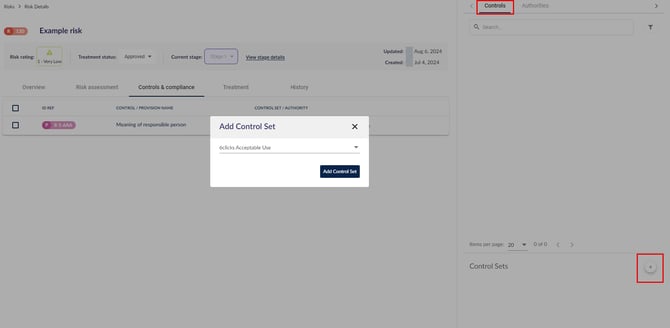
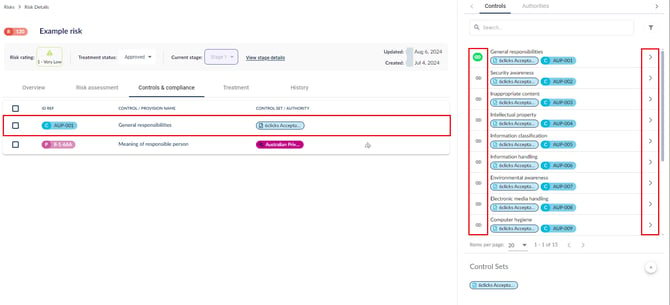
To link a control, first link the control set it belongs to. Make sure you are in the Controls tab in the side panel. Click the + next to Control Sets (or what you renamed them to) and select the control set containing the control you want to link from the dropdown.
After you have added a control set, all the controls under that set will appear on the side panel. Link a control by clicking the link icon to its left, or check its Control details by clicking the arrow to its right.
Linked controls will appear in the Controls & compliance table.
The Control Details side panel shown above has the following tabs.
- Overview - An overview of the details of the control as well as any information on authority documents that are linked to this particular control
- Issues - Issues linked to this control; historical or current that are linked to this specific control; by default the last 31 days are shown, but you can adjust this using the filters
- Assessments - Requirement-Based Assessments (RBAs) that have been performed on this control; by default the last 6 months are shown, but you can adjust this using the filters
- Responsibilities - Responsibility tasks that have been created relating to this control
You can also find these details in this control in its own module.
Linking a provision to a risk
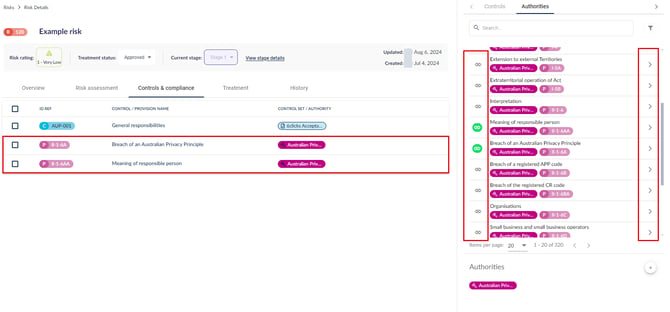
To link a provision, first link the authority document it belongs to. Make sure you are in the Authorities tab in the side panel. Click the + next to Authorities and select the authority document containing the provision you want to link from the dropdown.

After you have added an authority, all the provisions under it will appear on the side panel. Link a provision by clicking the link icon to its left, or check its Provision details by clicking the arrow to its right.
Linked provisions will appear in the Controls & compliance table.
Assessment linkages
Once a control/provision is linked to a part of an assessment (a requirement in an RBA, or a question in a QBA), the control/provision will automatically be linked.
When something is linked to this risk using an assessment, you can see a corresponding icon next to it in the Controls & compliance table.
Unlink any control/provision from this risk by clicking the 3 dots to its right and selecting Unlink.
Treatment
Under the Treatment tab, you can create, assign, and manage risk treatments.
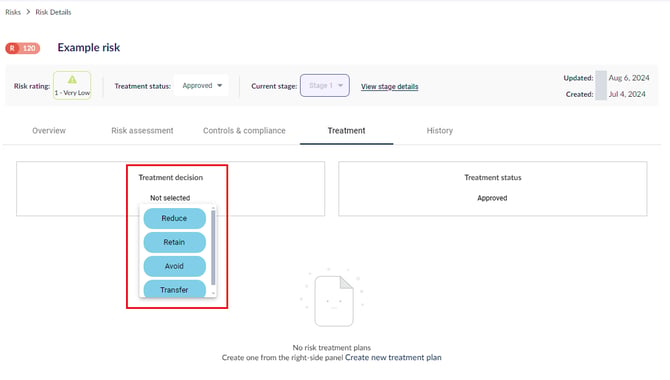
The Treatment decision is the next step your organization will take to address the risk. Click it to change between different decisions.
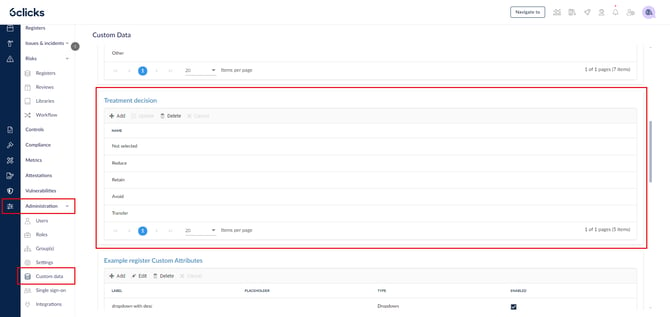
You can customize the options in this list to suit the needs of your organization. To do this, head to Administration > Custom data and find the Treatment decision table.
Select an option to Delete it. Double-click an option to edit it and click Update to save. Add an option by clicking Add.
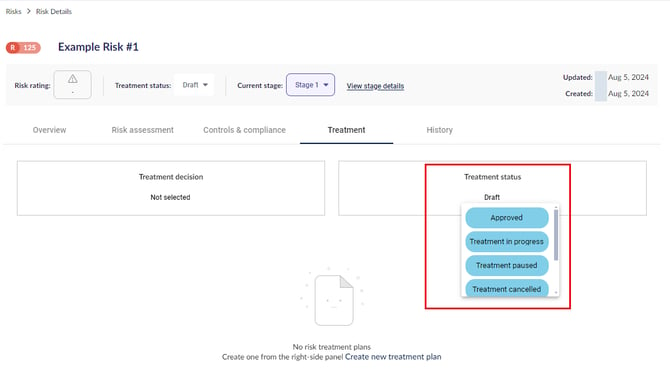
The Treatment Status indicates the current stage of the risk treatment. Click it to change between different options, and the selected status will be displayed near the top.
Learn more about risk treatment plans.
History
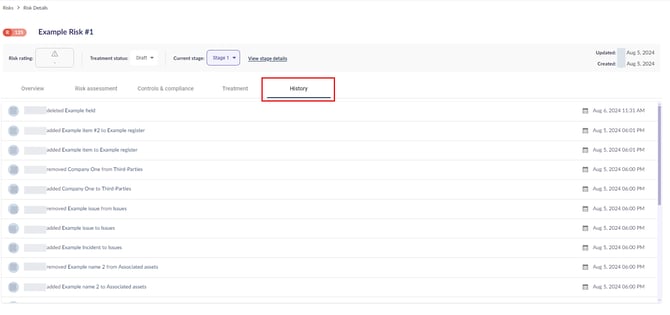
The History tab shows an audit trail for the risk, including:
- The user who made the change
- The type of change that was made
- Date of change
- Time of change
