This article discusses bulk importing risk assessments using an Excel spreadsheet. To learn more about creating risk assessments natively in the Risk Registers, head here.
After importing risks, you can import risk assessments into the Risk Registers as well so that you can start actioning them straight away. An alternative is to import or add risk templates into Risk Libraries so that you have these risks ready to be added into the Registers if and when you need to combat them.
After importing risk assessments, your next step may be importing risk treatment plans.
Table of contents:
- Preparing your import template
- Importing risk assessments
- Exporting risk assessments
- Permission needed
Preparing your import template
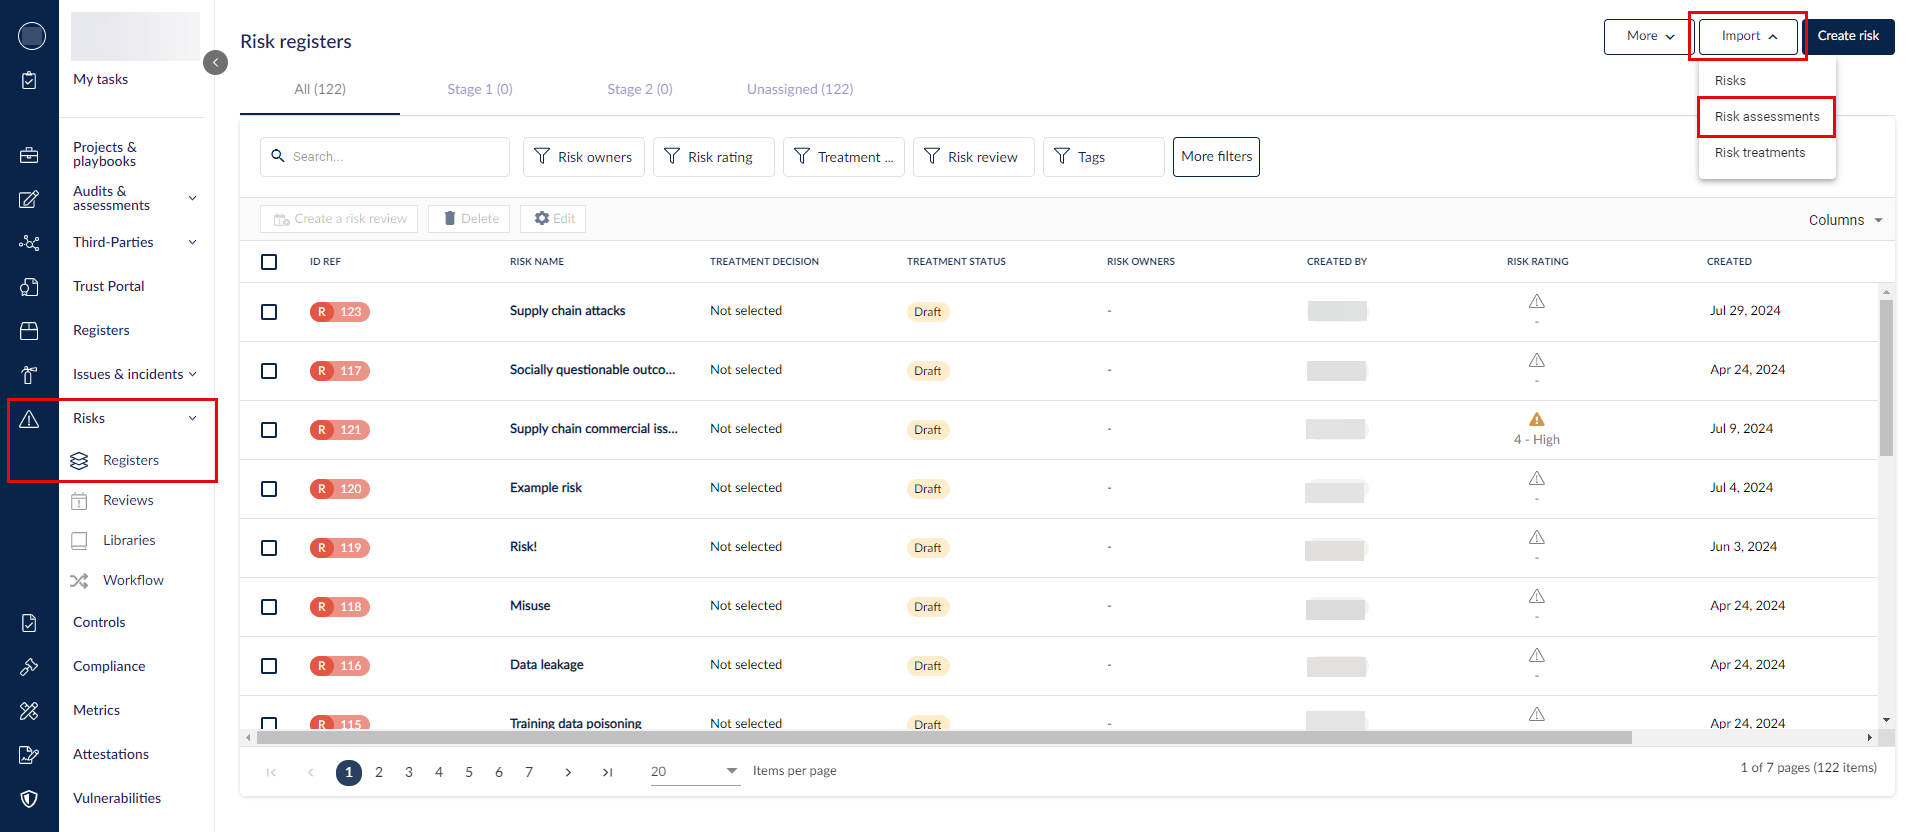
Go to Risks > Registers and click on Import > Risk assessments.
If you don't see this, check your permission.
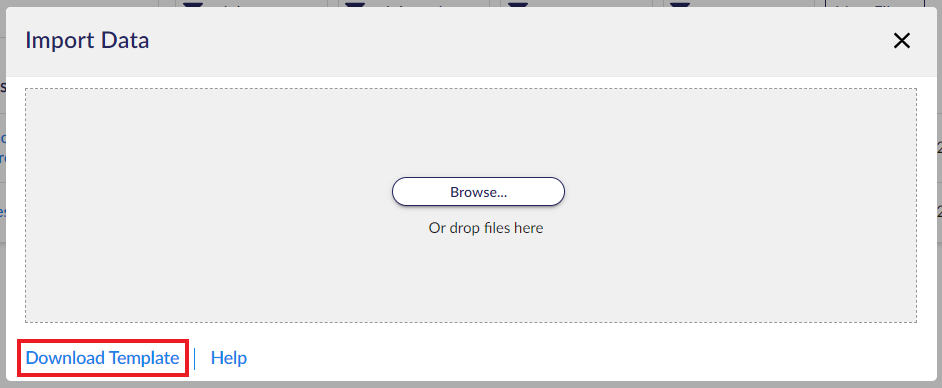
Click on Download Template.
Fill out the template, one line for each risk assessment.
If you want to add multiple risk assessments to a risk, add each risk assessment as its own row in the template.
The template has the below column headings.
ID Ref: Mandatory. Add the ID of the risk that the risk assessment will be linked to.
Risk Assessment Title: Mandatory. Add the name of the risk assessment.
Risk Assessment Date: Add the date that the risk assessment was conducted. Use DD/MM/YYYY and make sure the cell format is text, e.g. 31/08/2024.
Risk Assessment Label: Choose from the dropdown.
Likelihood: Add the likelihood of the risk for the given risk assessment.
Impact: Add the impact of the risk for the given risk assessment.
You can customize the fields Risk Assessment Label, Likelihood, and Impact.

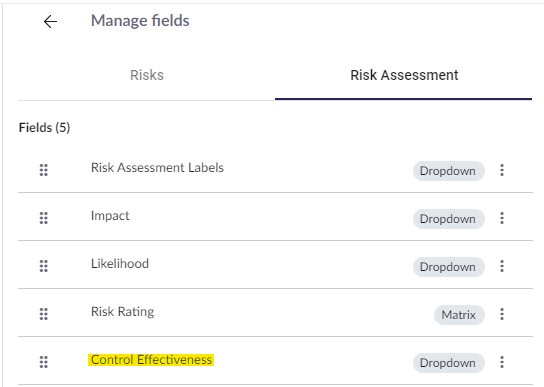
Custom fields
If you are looking to import data into custom risk assessment fields, these fields need to be configured first. To learn more, head here.
Once custom fields are configured, they will be generated in the import template automatically.
The below example includes the custom field 'Control Effectiveness'.

Do not change the formatting of the template or move around the columns.
Ensure that data is entered correctly for custom fields according to the below list.
- Dropdown: enter a selectable option as defined by the field. The text must match identically and is case-sensitive.
- Multiselect Dropdown: enter selectable option(s) as defined by the field, separate multiple option(s) with a comma (,). The text must match identically and is case-sensitive.
- Long Text: enter any text.
- Date: use DD/MM/YYYY and make sure the cell format is text, e.g. 31/07/2024.
Matrix or formulaic custom fields are not in the import template since they will be generated within 6clicks at import.
Importing risk assessments
To import your risk assessments, select Import > Risk assessments, then select the Browse button or drag and drop the import file directly. Once the file says 'Ready to upload', select Upload.

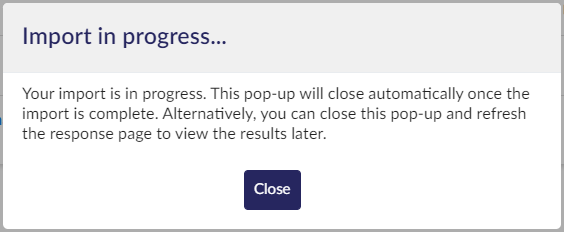
6clicks will notify you via popup once the import has started and once it has completed successfully.
Once completed, you will now see the risk assessments for each risk.
6clicks will notify you if the import is unsuccessful. A popup will display information on the error to allow you to troubleshoot and fix the import template.
In the case of an error, the import is cancelled, and no change is made to the Risk Registers.
Below are common causes of import errors:
- Mandatory fields not populated
- Incorrect data detected
- ID Ref not found within the Register (when updating existing risk assessments)
Bulk updating existing risk assessments via import
Existing risk assessments can also be updated in bulk via import; this requires you to manipulate the template.
Updating existing risk assessments via import requires manipulation of the import template and can lead to import errors or deletion of data if not done correctly.
- Include a first column to the import template labelled 'Assessment ID (Internal)'.

- Export your risk assessments to help you fill out the update template.
- Remove any columns that do not need to be updated.
- Add data to the remaining columns.

For example, the below template will only update the Risk Assessment Title and Risk Assessment Date.

Do not remove ID Ref and Risk Assessment Title, or the import will fail with an absent field error.
Leaving a field blank will update the risk with a blank value. If this is not the intention, this will result in either an import error (if the field is required) or deletion of data.
Only include a column if you wish to update this field for all risks in the template. Otherwise, copy and paste any existing data you wish to remain the same into the template.
Once the updated template is completed, import it as you would a regular import template.
Exporting risk assessments
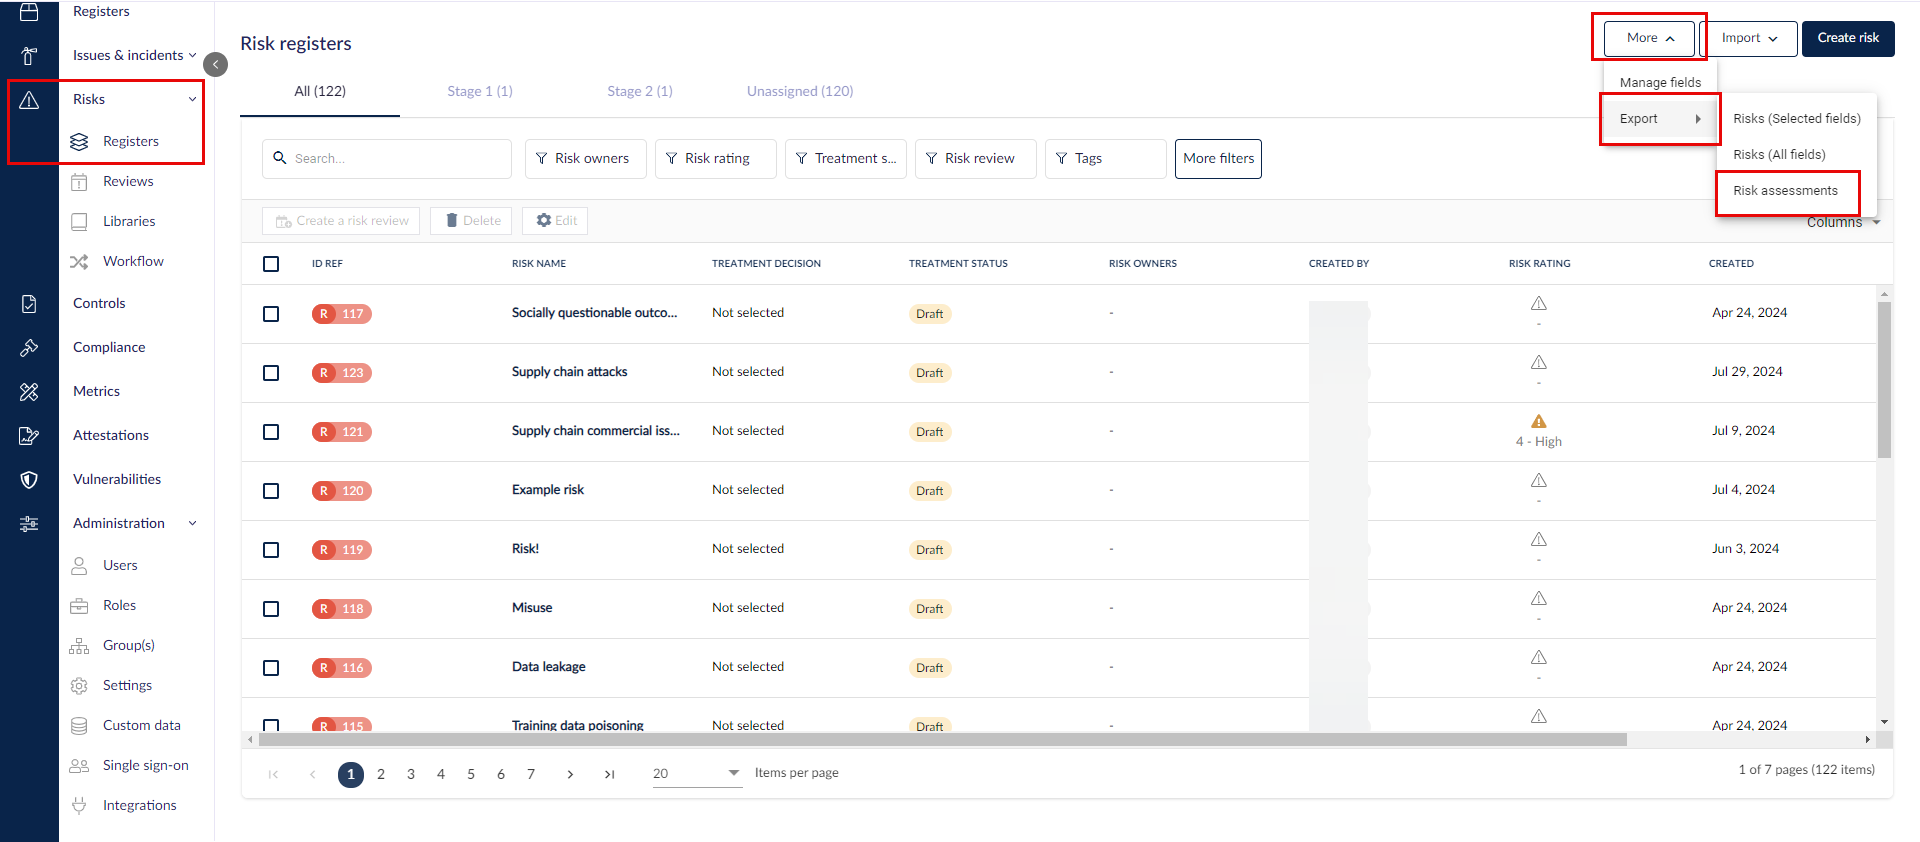
Go to Risks > Registers and click on More > Export > Risk assessments.
If you are bulk updating risk assessments, you can find the Assessment ID (Internal) column populated in this export.

Permission needed
You need the permission Import Risks, Assessments, Treatments to see and use the import function in the Risk Registers.
By default, Administrators and Advisors have this permission on.
Learn more on Creating a Risk Register, Assigning Tags to Risks, and Risk Register Reporting.