Table of contents
- Getting started
- Editing an existing field
- Creating a new field
- Deleting an existing field
- Enabling or disabling fields
- Managing answers for dropdowns and multi-select dropdowns
- Managing drop-down formulas for output fields
- Editing matrix fields
- Example: Multiple impact fields
- Example: Multiple risk matrices
- Example: Residual risk matrix
Getting started
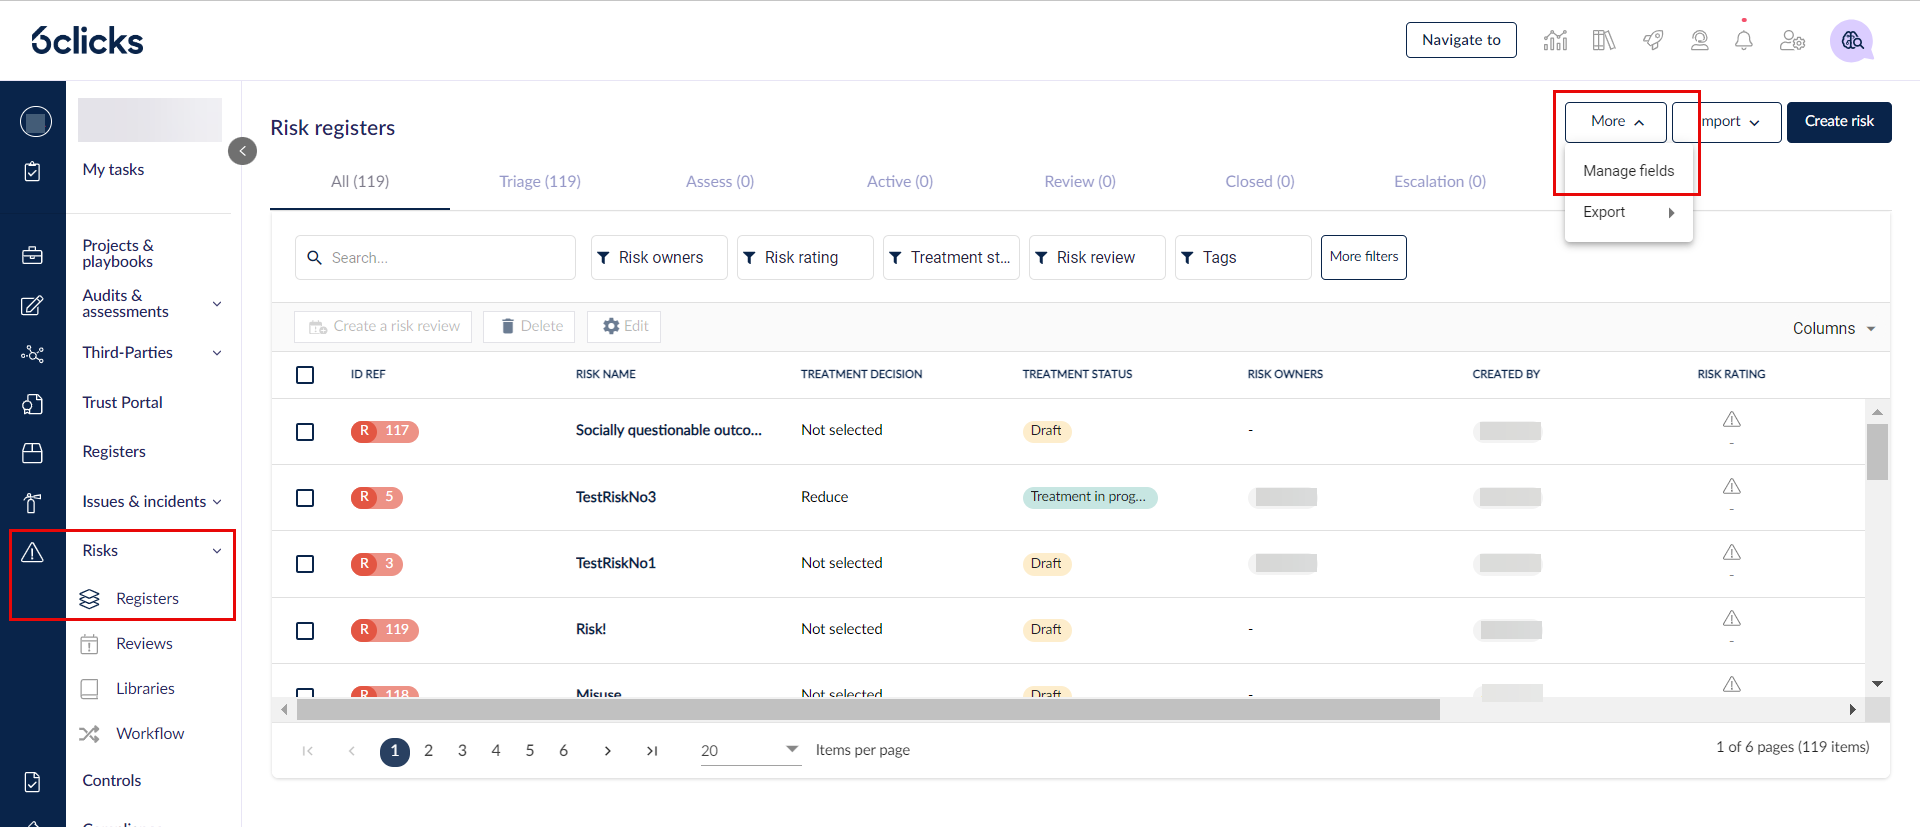
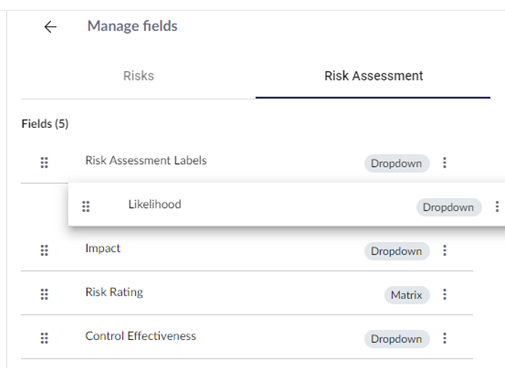
To manage your risk assessment attributes, go to Risks > Registers and select More > Manage fields.
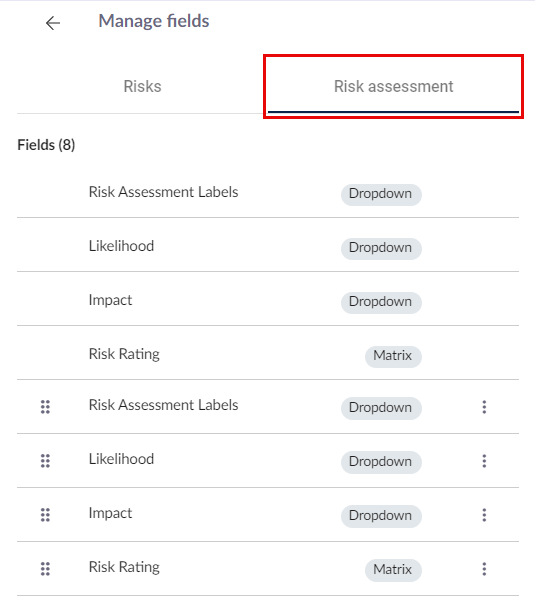
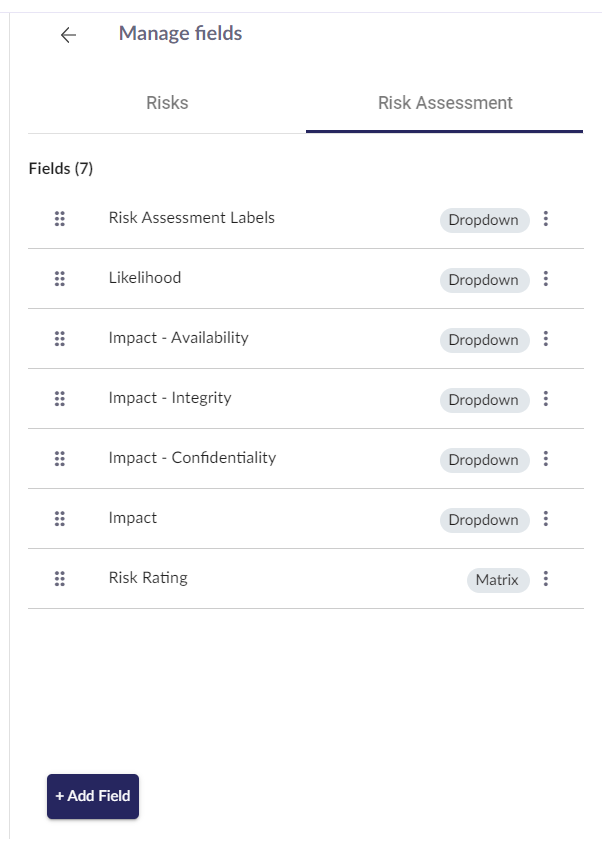
The Manage fields modal will then open. Select the Risk assessment tab.
Editing an existing field
If a field appears read-only, it may be managed at the hub level. Learn more here.
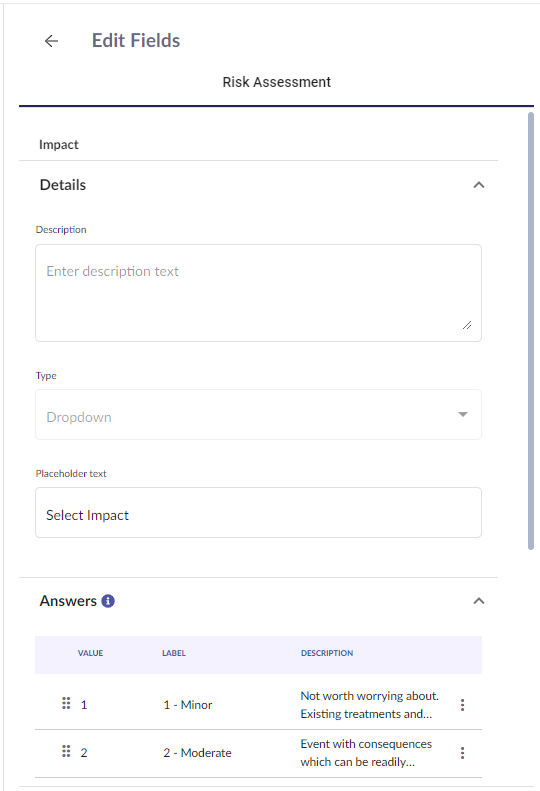
To edit an existing field, click the name of the field, or click the vertical ellipsis icon to the right of the field name and select Edit.
You can then change the Field Title (double click), Description, and Placeholder Text. Once done, click Save to update the field.
To reorder the fields, click and hold the drag handle icon to the left of the name of the field you want to reposition, then drag and drop it in the desired location. This will change the order in which the fields will appear to users completing risk assessments.
Creating a new field
If you don't see + Add field, that means that all your risk assessment fields are managed at the hub level. Learn more here.
To create a new field, click + Add Field from the Manage Fields modal. This will open the Add Field column. Enter the Field Title, then hit Enter on your keyboard to save the new field.
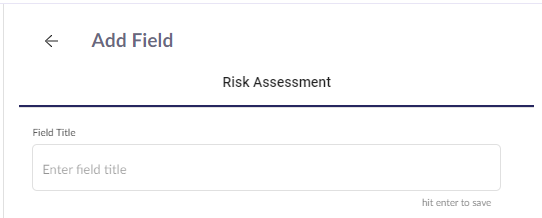
After that, define the Description, Type, and Placeholder text of the field.
The Type allows you to define whether the field will be a dropdown, text input, risk matrix, or multi-select dropdown. These will be discussed later in this article.
The Placeholder text is what the user sees before they select an option.
Click Save to complete creating the new field.
Deleting an existing field
You cannot delete a default field or a field used as a reference for another field.
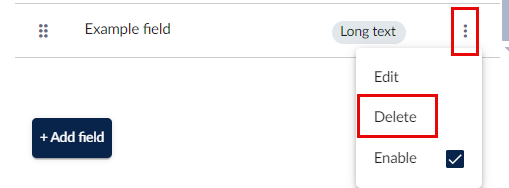
To delete a field, go back to the Manage fields modal, click the vertical ellipsis icon to the right of the field name, and select Delete.
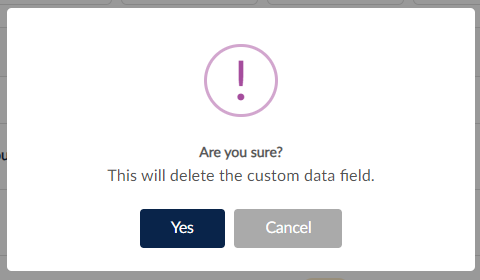
A warning dialogue box will appear to confirm that you wish to delete this field and all data contained within it. Click Yes to proceed.
You can also disable custom fields should you wish to retain the field and the data within it. This is recommended if you are not sure if you want to delete it, as it can be re-enabled at any time.
Enabling or disabling fields
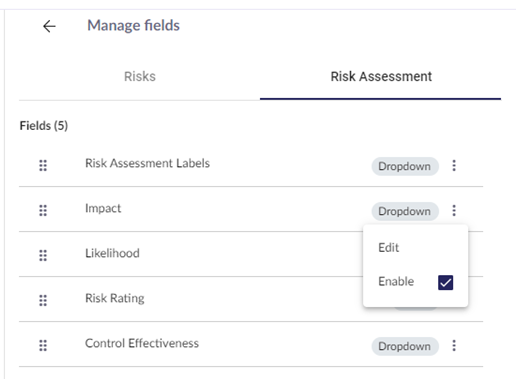
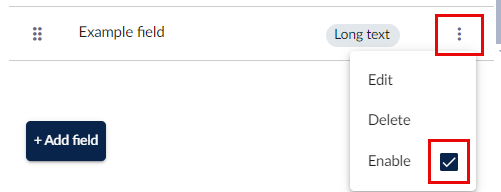
To enable or disable a field, click the vertical ellipsis icon next to the field name and check or uncheck the box next to Enable.
Managing answers for dropdowns and multi-select dropdowns
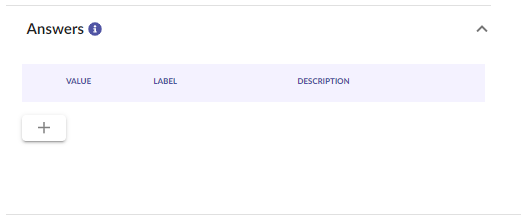
If you have chosen a dropdown or multi-select dropdown as the Input Type for a specific field, you can specify the answer options. To add a new answer to a drop-down field, edit the field from the Manage Fields modal then click the + icon below Answers.
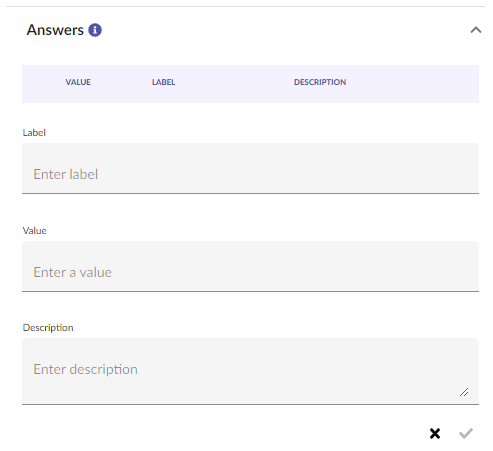
You can now enter the Label, Value, and Description of the answer option. Once done, click the checkmark icon to save the answer. Do this for every answer option required for the field.
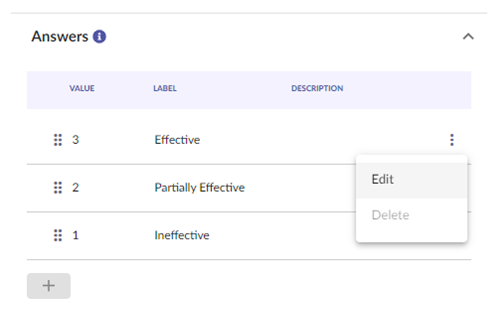
Once you have created all the answer options for the field, they will be displayed under Answers. You can edit the details for each by clicking the vertical ellipsis icon next to the answer option and selecting Edit.
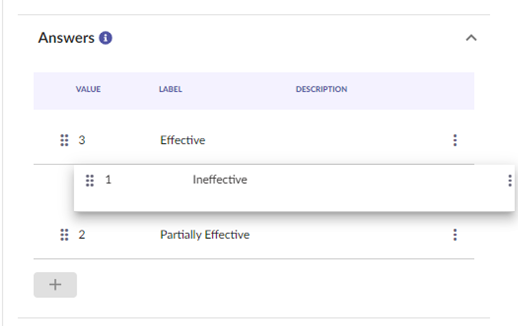
You can also reorder how answer options are displayed by clicking and holding the drag handle icon to the left of the name of the answer, and then dragging and dropping it in a new position. Once done, click Save to update the field.
Managing drop-down formulas for output fields
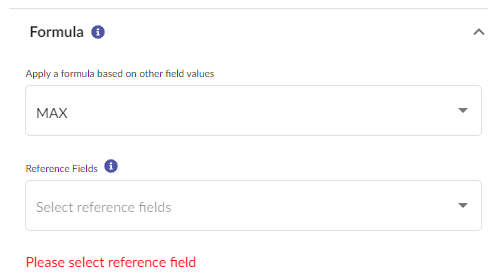
An output field is a drop-down field with a value that is automatically calculated based on the values of other dropdowns or input fields. To create an output field, you need to create a drop-down field, select a Formula, and define the Reference Fields that will drive the drop-down answer.
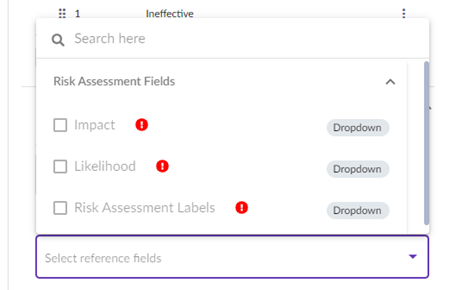
Only fields with the exact same number and values of answers can be selected as reference fields. Select one or more reference fields by ticking the box next to the field name.
Below is a description of all available Formulas:
- MAX - this will take the highest-value answer from all reference fields and return the answer within the dropdown of equivalent value.
Editing matrix fields
If you have chosen a risk matrix as the Input Type for a specific field, you can set the field as the x- and y-axes of a risk matrix.

The x- and y-axes are locked as Likelihood and Impact for the standard risk matrix, but can be customized for custom matrix fields.
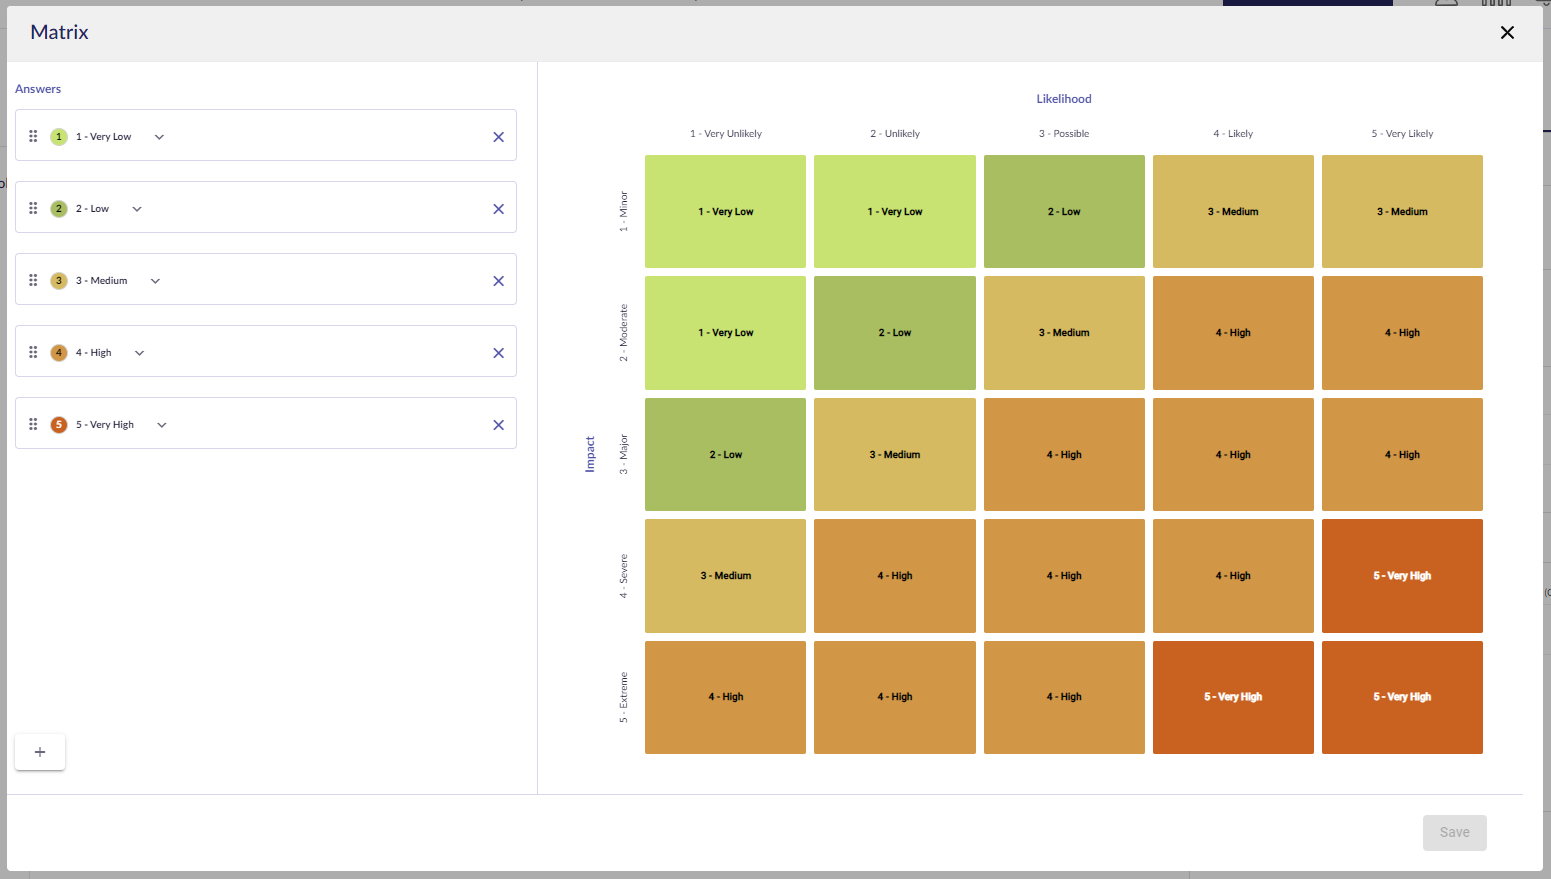
Once the axes have been defined, click Configure matrix. From here, the answers can be configured and then applied to specific coordinates of the matrix.
The matrix becomes read-only and cannot be edited if any risk workflow stage requirements are dependent on it.
Expand an answer to edit its Color, Value, Title, and Description.
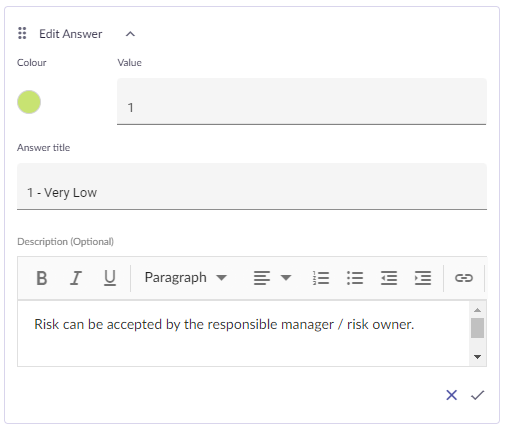
Click the checkmark icon to save the answer.
You can also perform the following actions:
- Click the + icon to add a new answer
- Click the x icon next to an answer to delete it
- Drag and drop an answer to reorder it
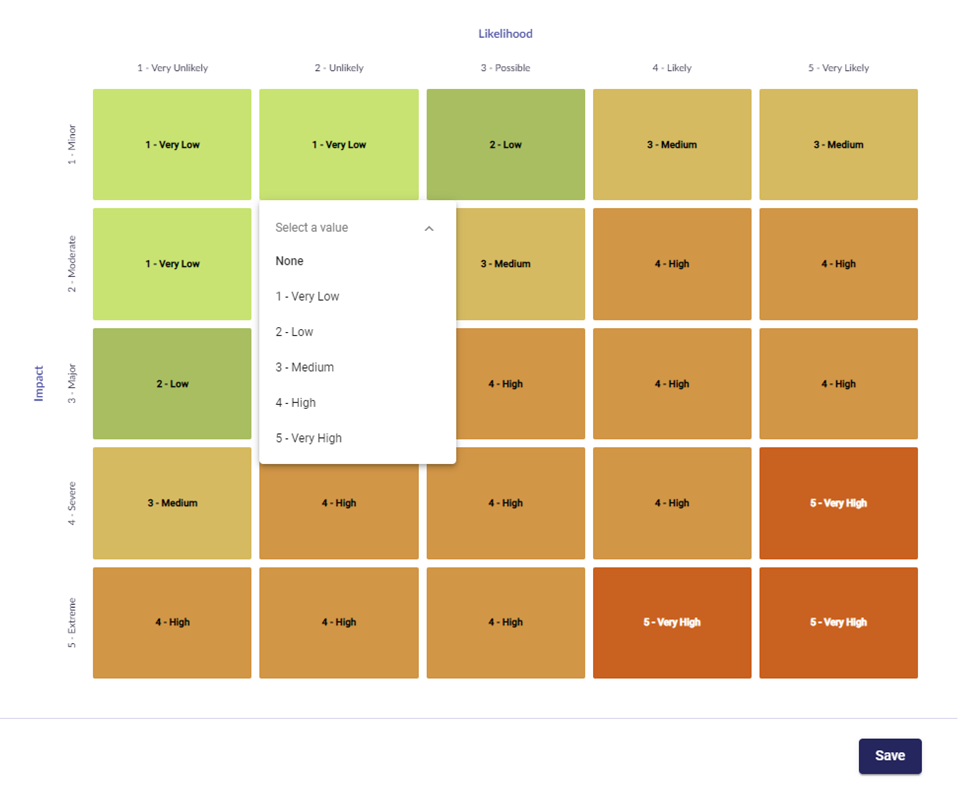
Answers can be applied to each coordinate in the matrix by clicking the coordinate and selecting the appropriate value.
Click Save to update the field.
Example: Multiple impact fields
6clicks supports the use of multiple impact/consequence fields that will calculate into an overall impact result. This makes use of the dropdown and formula functionality described above.
To start, leave the existing standard Impact field as is, then create multiple input impact fields. Once completed, it should look something like this:
You can reorder these as needed using the drag handle icons.
The other input impact fields must have the same number of answers and values as the overall impact field.
Once the input impact fields have been configured, you can edit the output impact field. Select a Formula to derive the output calculation.
In this example, we will use the MAX formula. You can then select your input impact fields as the reference fields for this formula. Once completed, it should look like the example below:

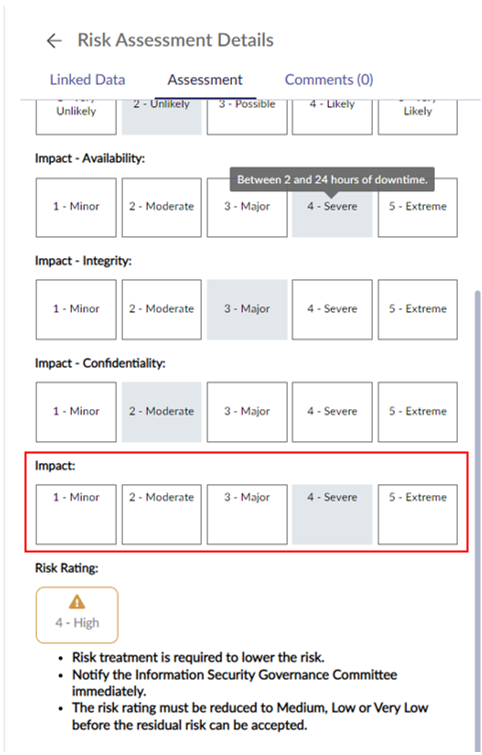
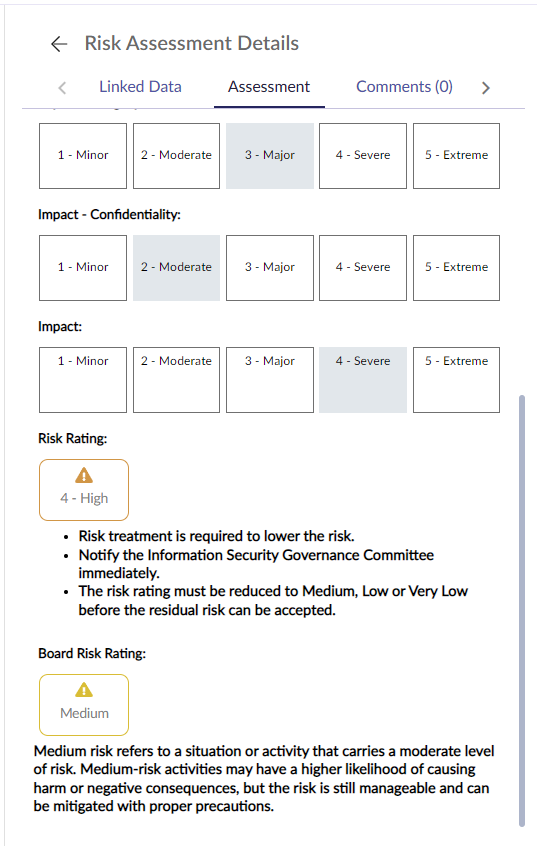
Users can now use multiple input impact fields to derive an overall result for the impact in the risk assessment. Below is what this will look like when conducting a risk assessment:
Example: Multiple matrices
6clicks supports multiple matrices to be used within the same risk assessment framework. This is useful when your organization needs to report risks differently for different audiences.
In this example, we will cover creating a new risk matrix for board reporting alongside the standard one above. This new matrix will have 3 key differences:
- Inverted x- and y-axes
- Fewer risk ratings
- Alternative risk ratings for each coordinate
To do this, start by creating a new risk matrix field.
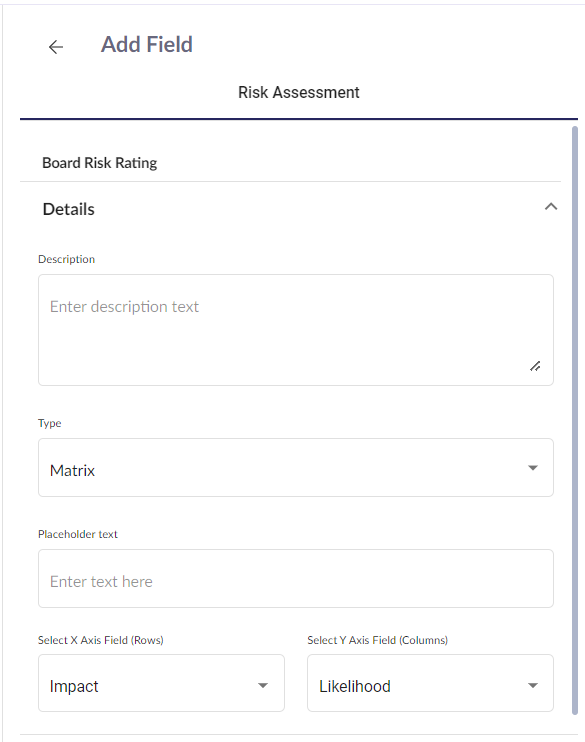
Configure the new risk matrix field by setting up the x- and y-axes. In this example, the x- and y-axes will be Impact and Likelihood respectively:
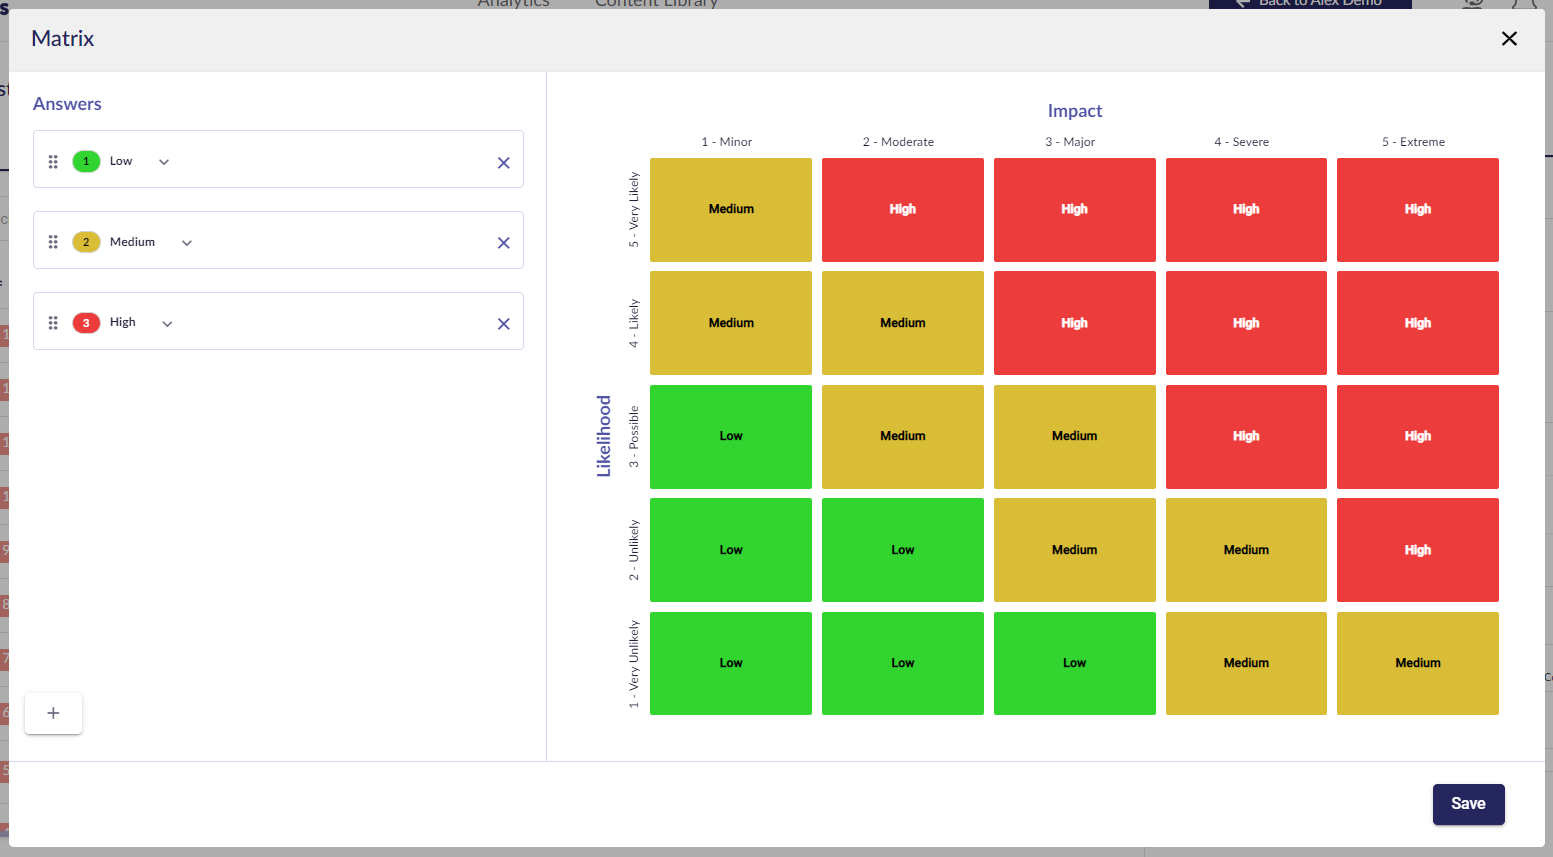
Next, select Configure matrix to enter the desired risk rating options and set the coordinates within the matrix. This example will use the below configuration:
Now that the new risk matrix has been configured, every risk will automatically include a new risk rating within the risk assessment:
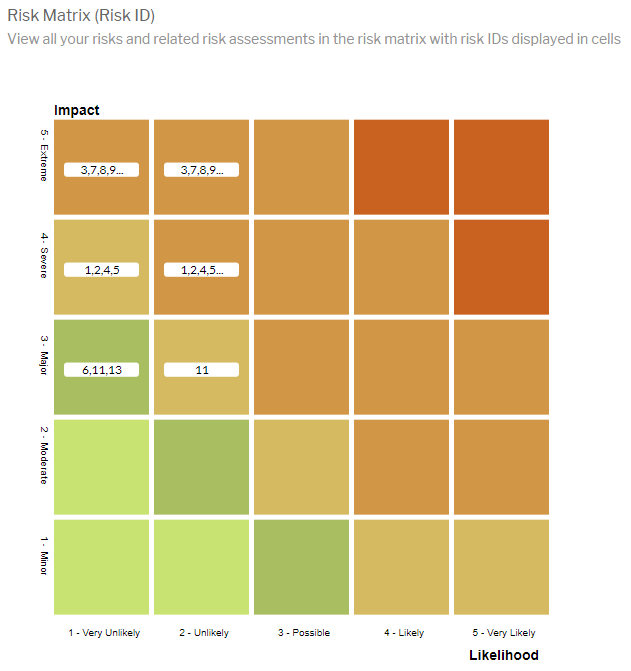
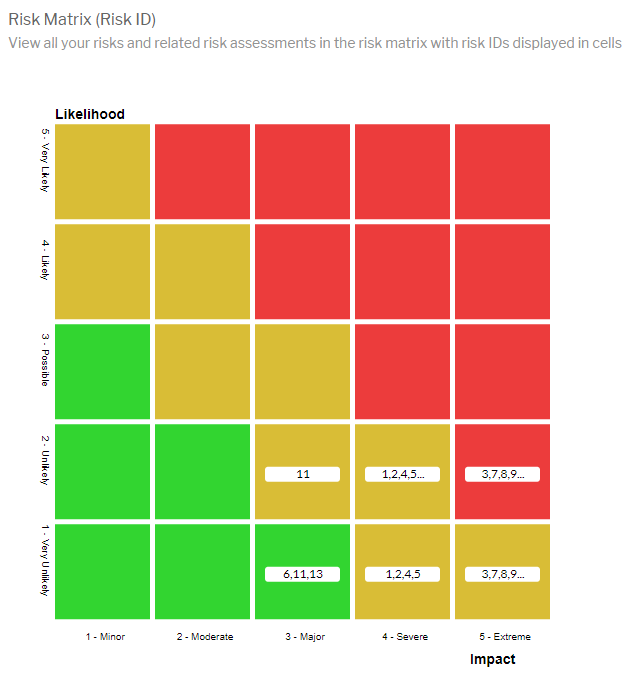
Furthermore, the new risk matrix can be reported on separately:
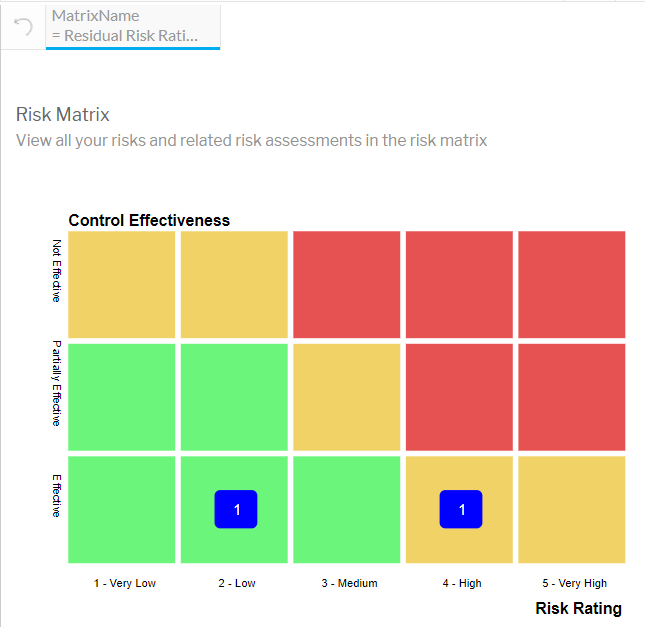
Example: Residual risk matrix
6clicks supports risk assessments that include a residual risk matrix based on risk rating and control effectiveness.
To start, create a drop-down field for control effectiveness, which needs to be completed during risk assessment.
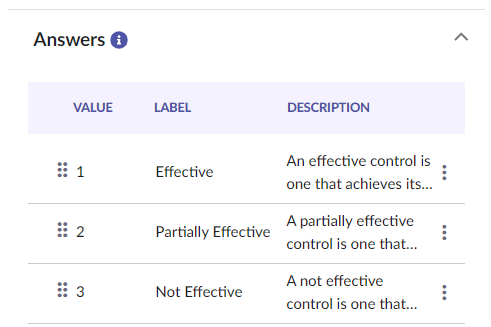
In this example, we will use the below dropdown answer options for the Control Effectiveness field:
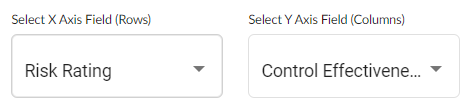
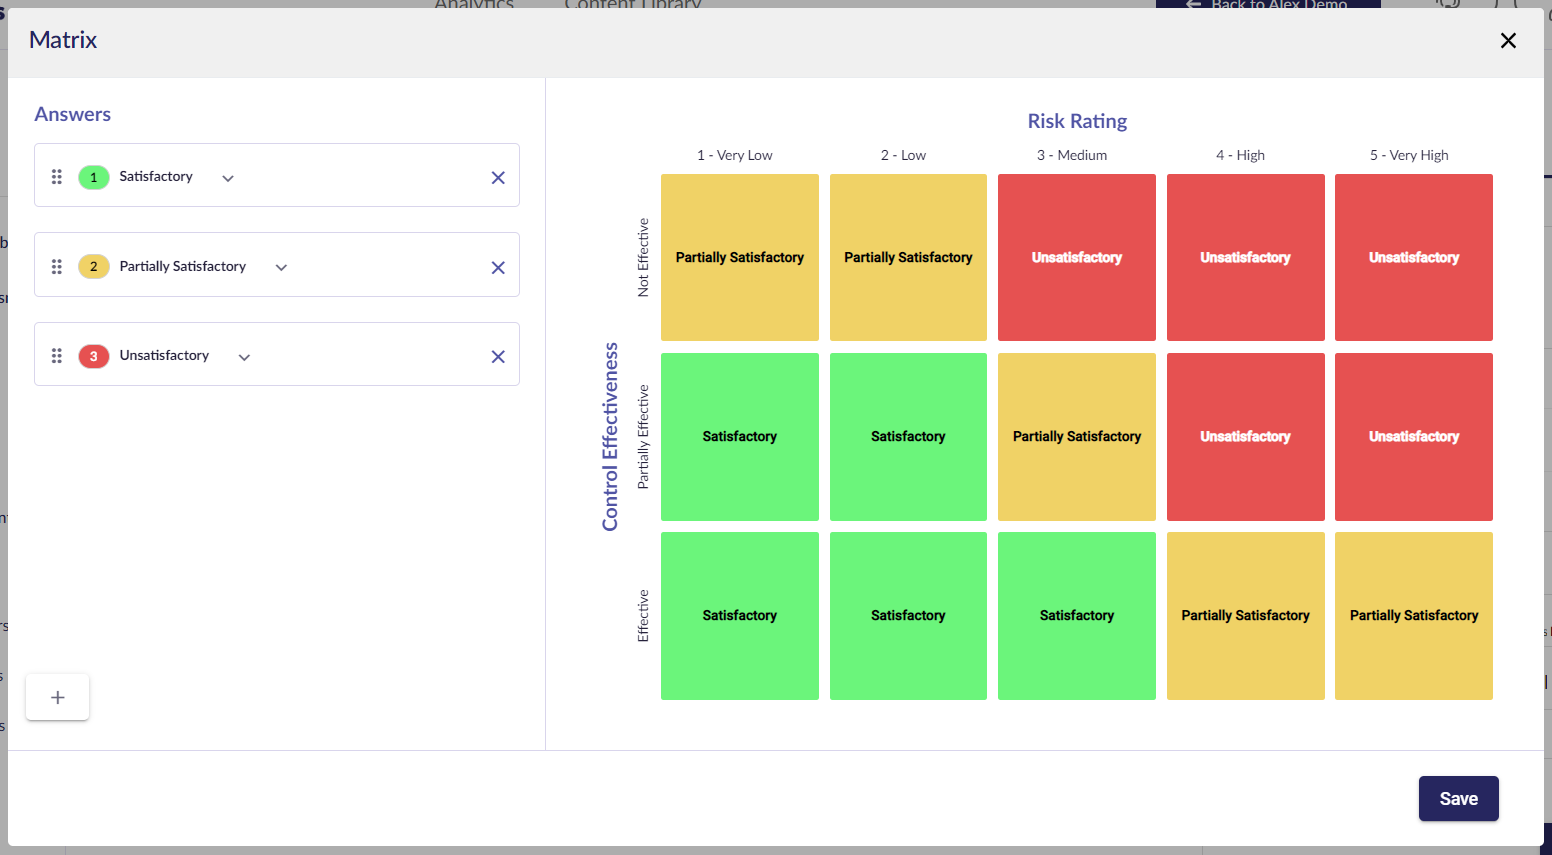
Next, create a new risk matrix field called Residual Risk Matrix. In this example, the x- and y-axes are set as Risk Rating and Control Effectiveness respectively:
The residual risk matrix will then be configured as below:
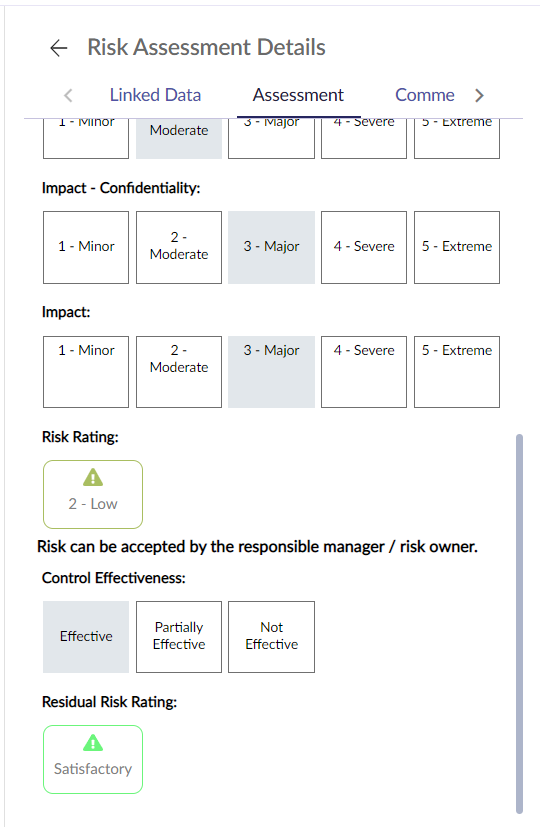
Now that the residual risk matrix has been configured, residual risk can be calculated based on risk rating and control effectiveness:
Furthermore, the residual risk matrix can be reported on separately: