
This article is about setting up the tests register in the Registers module. Head here for an everyday user guide for an already configured tests register.
Table of contents
- Getting started
- What is it?
- Where is it?
- Editing register settings
- Creating custom fields
- Register tab
- Insights tab
- Viewer tab
- Creating tests
- Importing tests
- Configuration
- Test set-up
- Automated evidence validation & validation guide
- Test logs
- Overview
- Scope
- Comments
- Linking controls and other data
- Permissions
- Next steps
Getting started
What is it?
The tests register captures the scope and records the execution results of control tests to support assurance and compliance monitoring.
Tests should be linked to controls as well as tasks for optimal workflow.
Where is it?
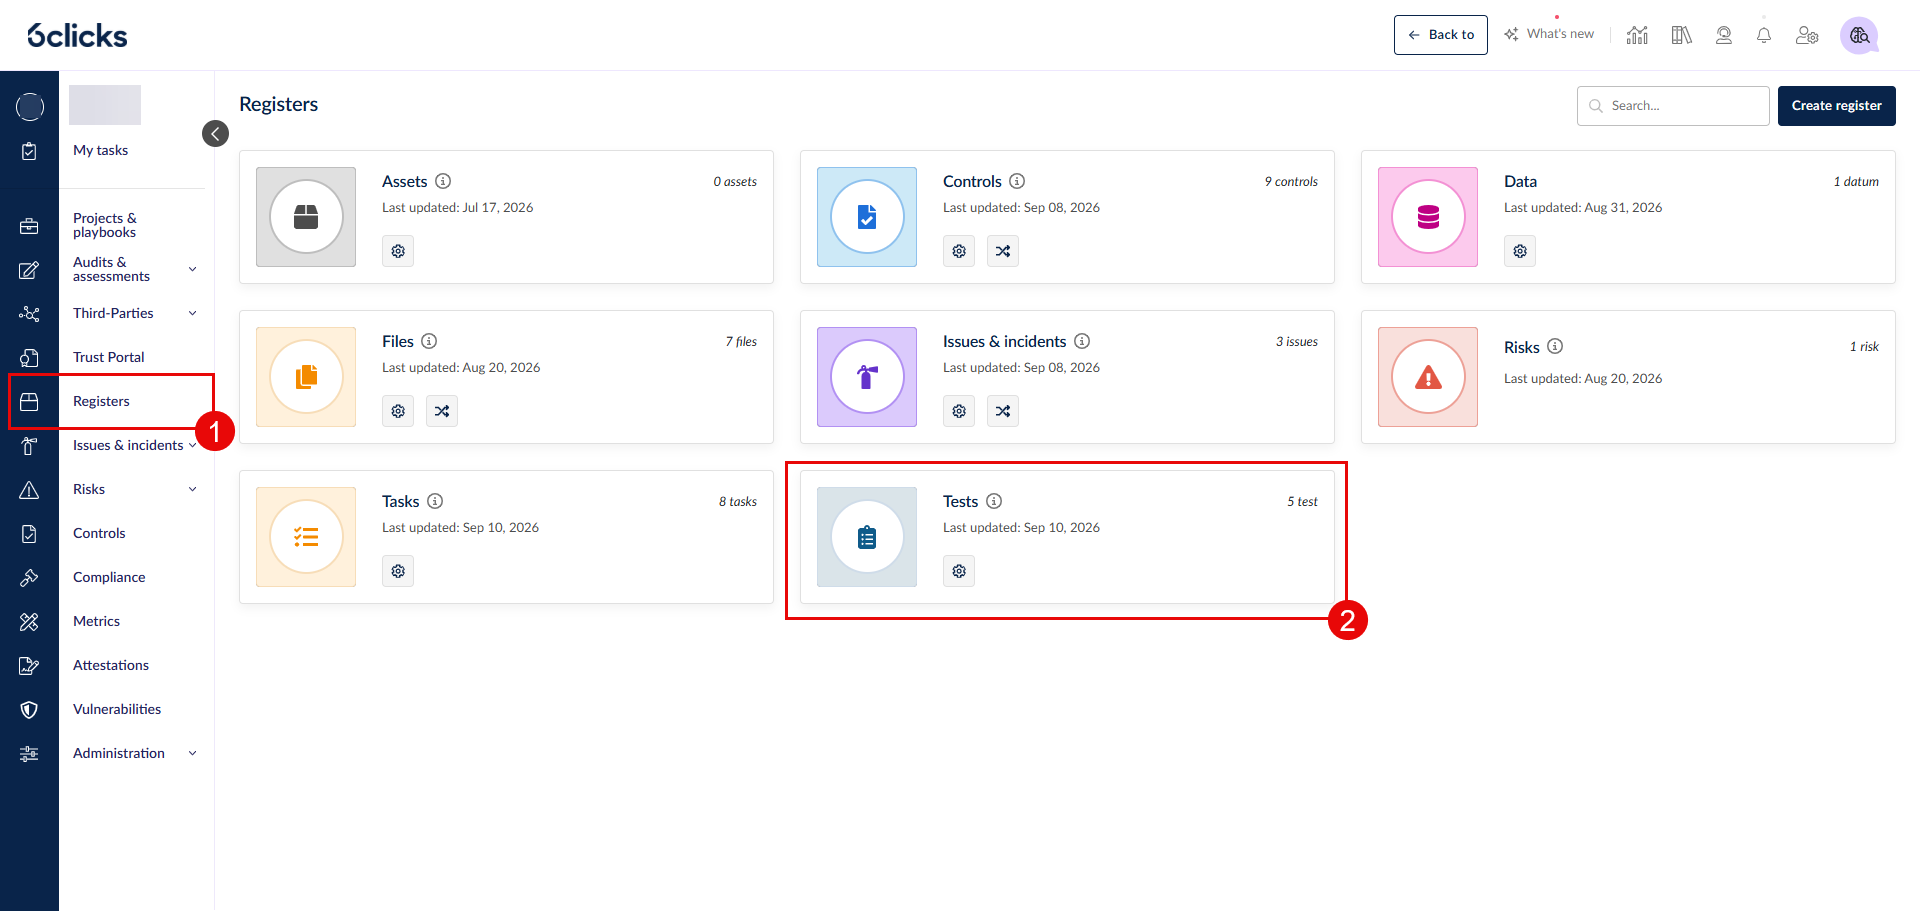
Using the left navigation menu, head to the Registers (1) module. Here you can find the tests register (2) in the list.
Editing register settings
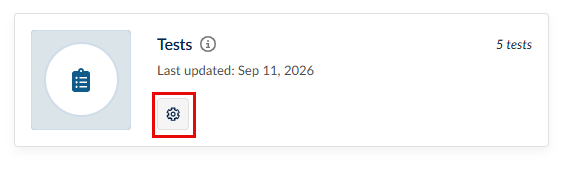
Click on the gear icon to access the tests register's settings.
In the settings page, click on the pencil icon next to each section to edit it.
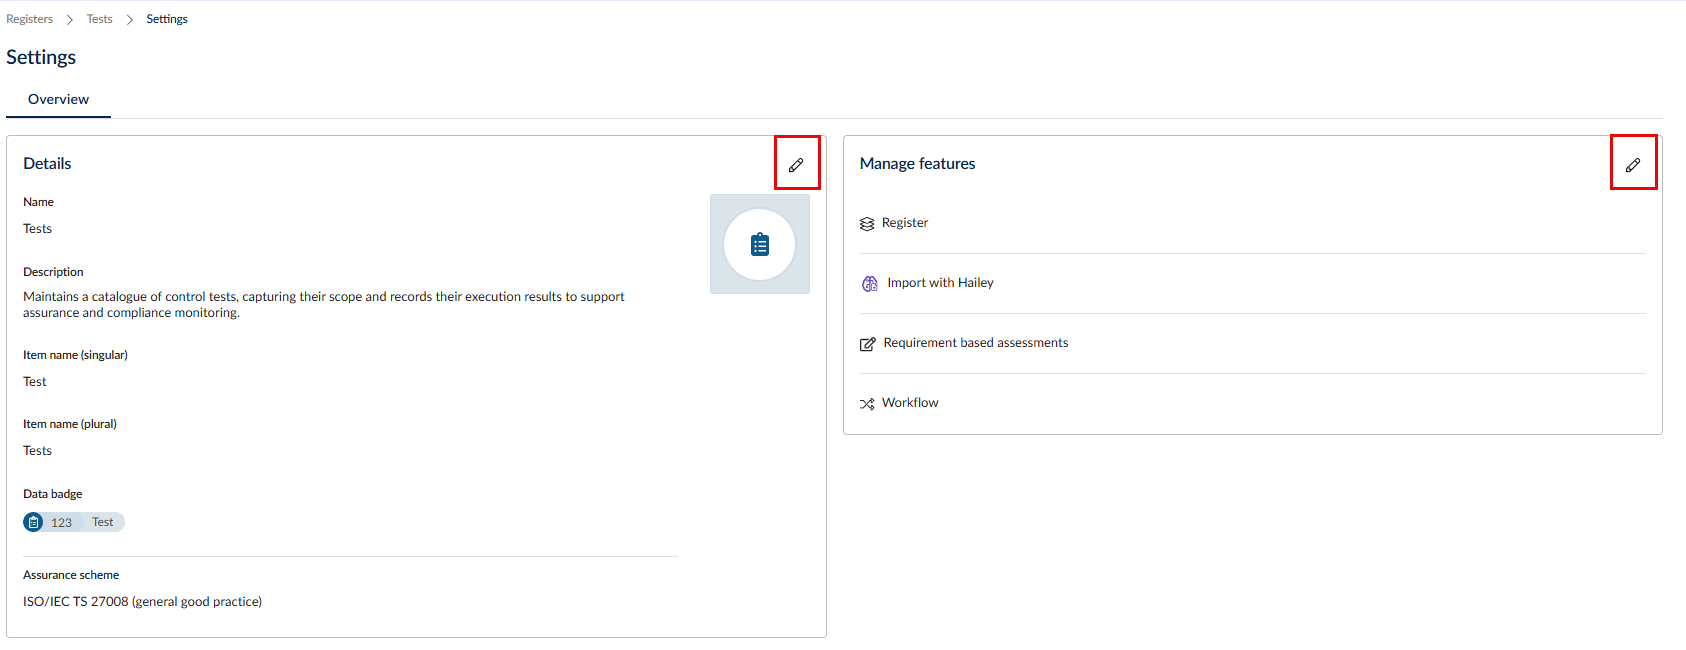
- Assurance scheme
- Import with Hailey - allows users to import tests into the register using Hailey AI.
- Requirement based assessments -allows users to create RBAs based on tests in the register.
When done, click Save to confirm the changes.
Creating custom fields
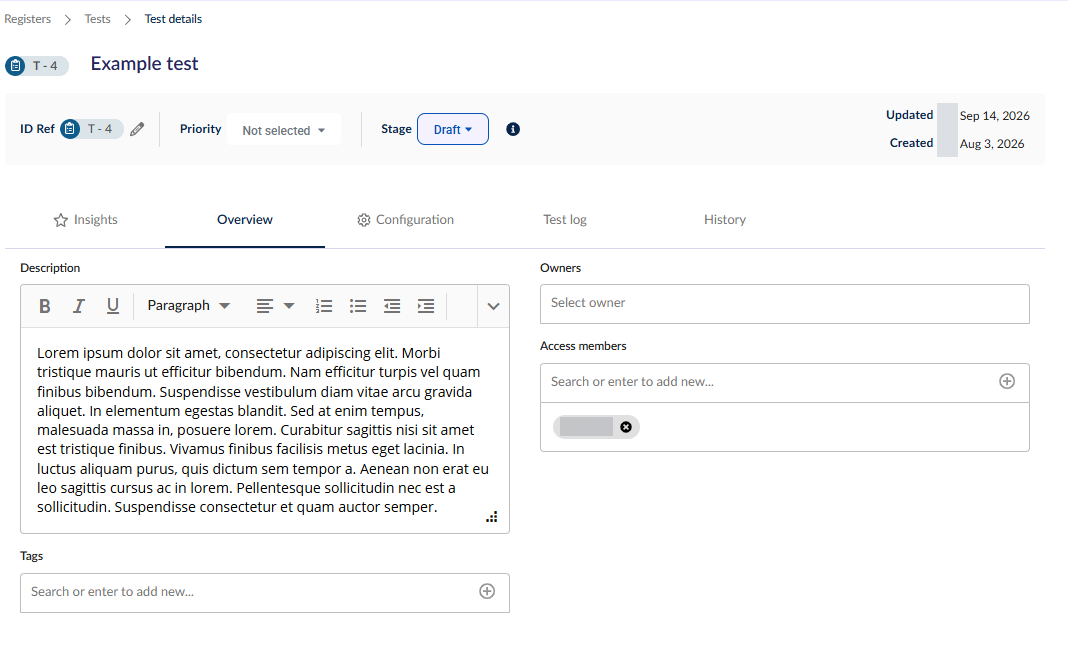
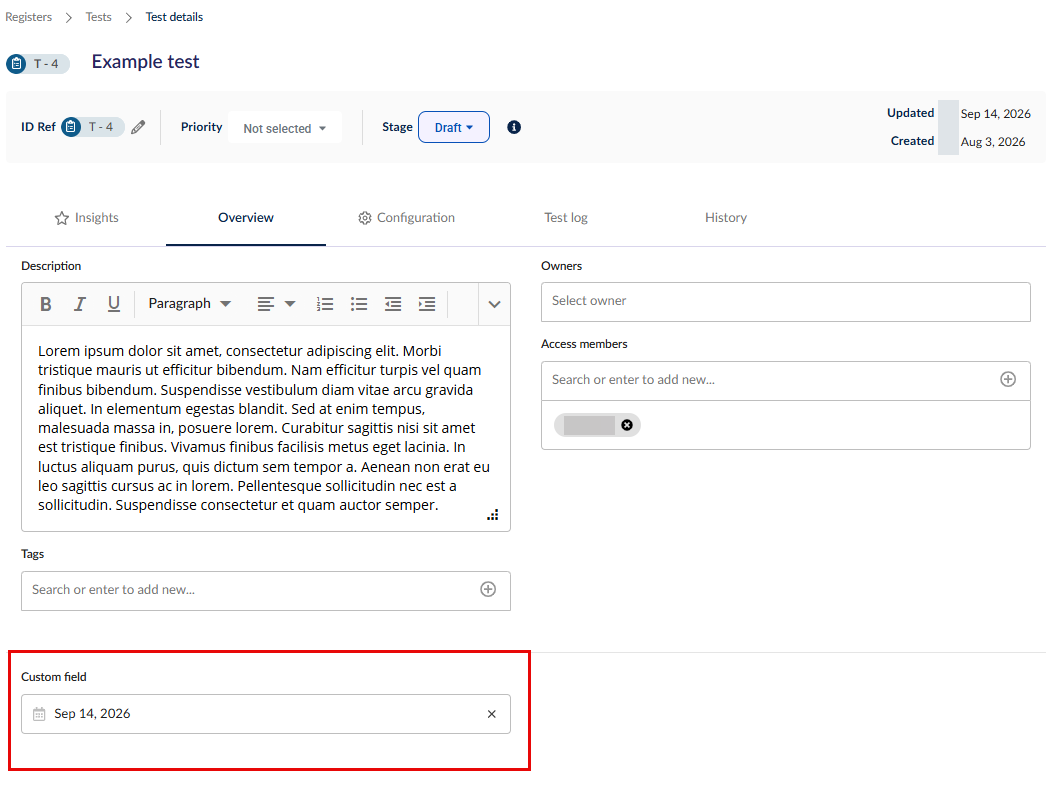
By default, a test comes with the below fields in the Overview tab.
- ID Ref
- Name
- Description - this can be used to generate the validation guide.
- Tags
- Owners
- Access members
You can create custom fields or edit default field options in Administration > Custom data > Tests custom attributes.
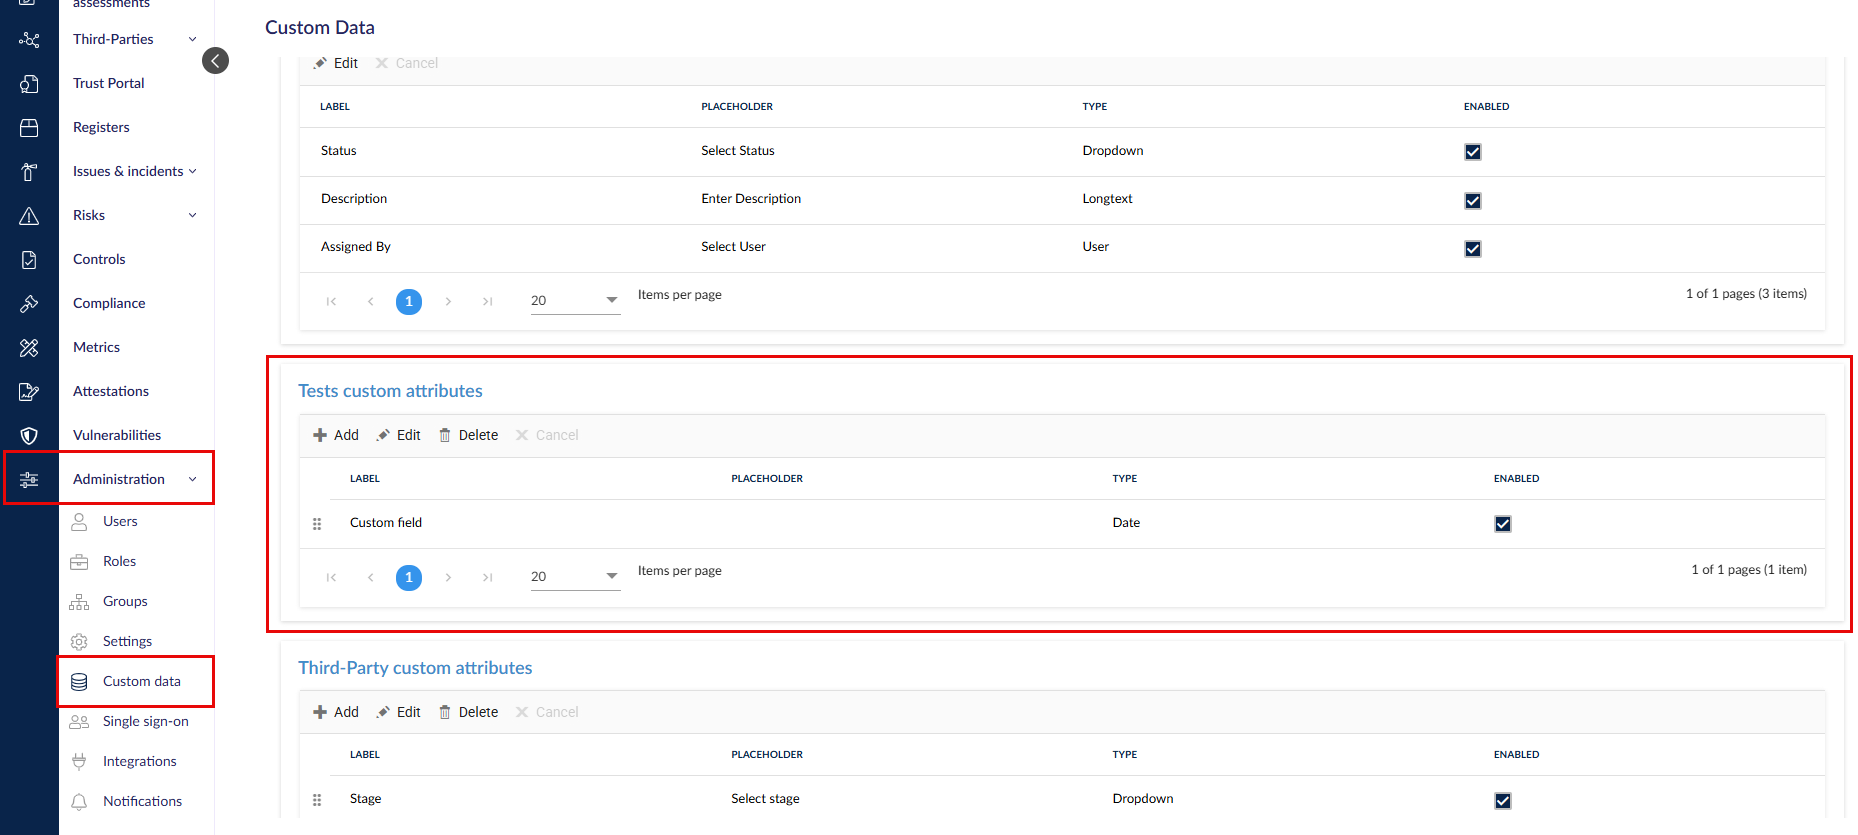
For dropdown or multiselect dropdown type fields, double click on the label to edit selectable options.
For step-by-step instructions, head here.
Enabled custom fields apply across all tests and appear below the default fields in the overview tab.
Register tab
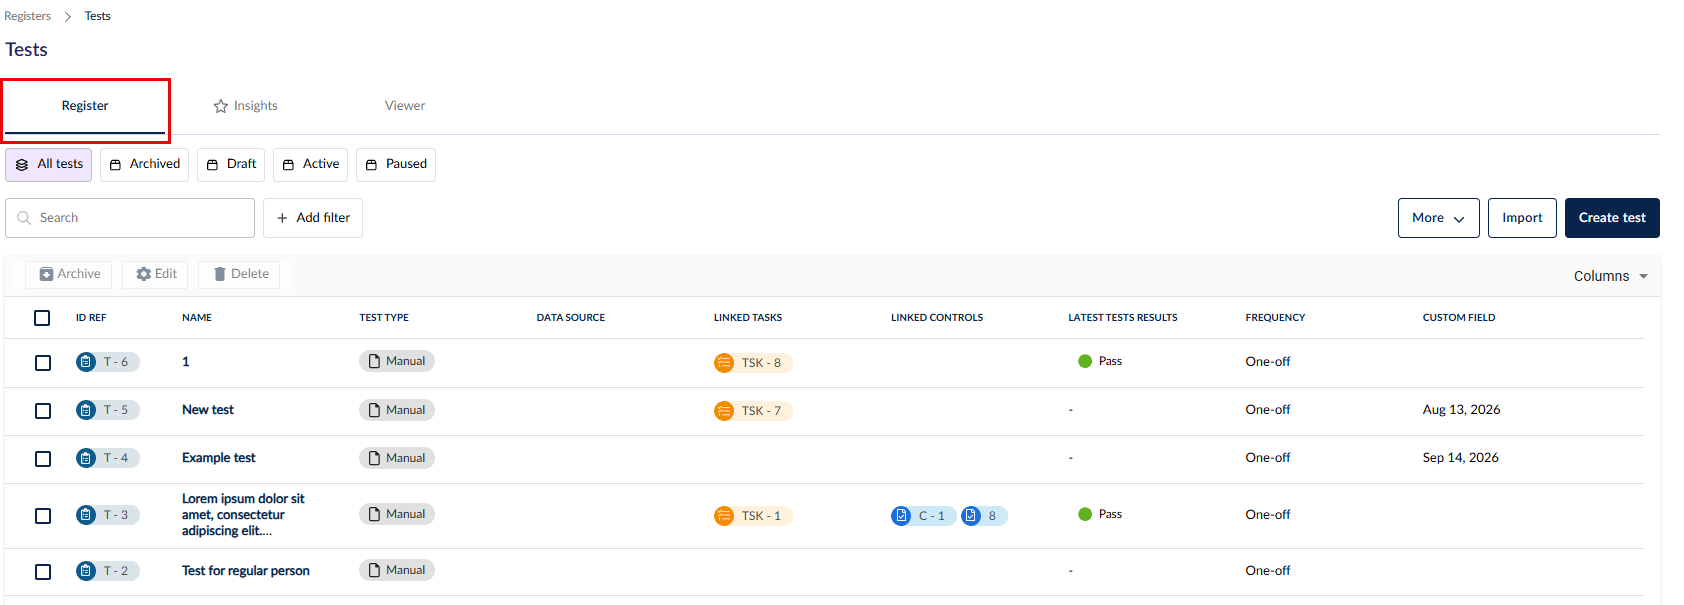
Click on the register name to access the register. By default, you will be taken to the register tab where all the tests are listed.
Head here to learn more about the search & filter functionalities.
Insights tab
This feature is under construction.
Viewer tab
This feature is under construction.
Creating tests
To create tests from scratch in the platform, click on Create test in the top right corner in the Register tab to get started.
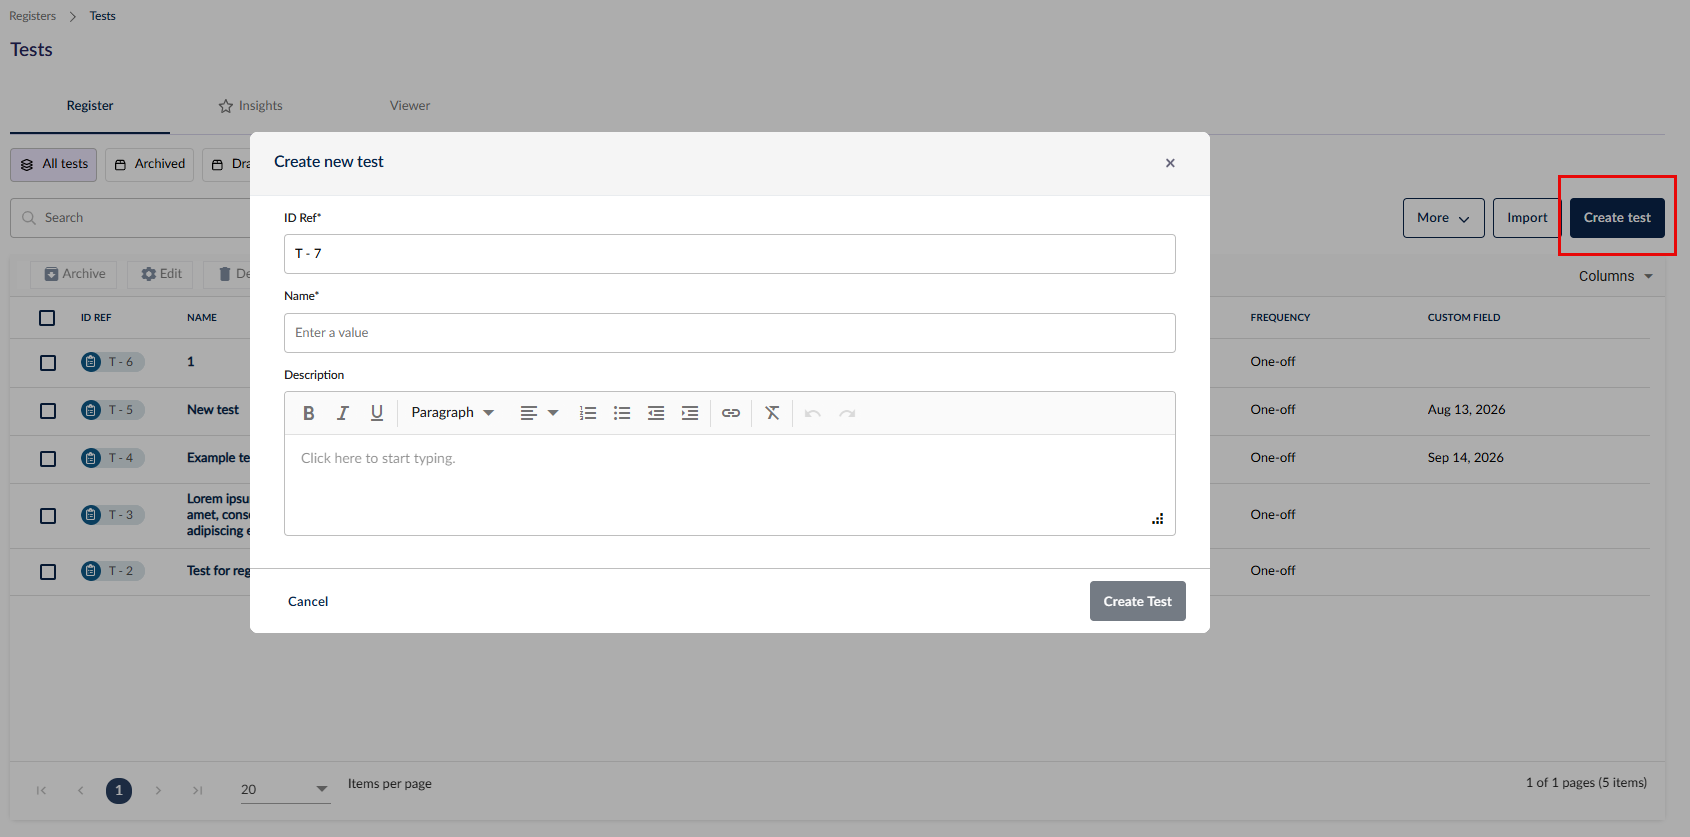
When creating or importing tests, you can customize the ID to better suit the needs of your organization. The custom ID can be edited/updated after the test is created.
Once a test is created, it should be linked to a control and a task.
Importing tests
If you have existing tests for your controls already, you can either use a template or Hailey to import them into the register. Click on Import then select the option that suits your data format.
-
Import via template - If you have a spreadsheet, copy your existing columns into the given template outlined below.
-
Import with Hailey - If you have control documents, Hailey can try to interpret the document and parse each control test as a test register item.
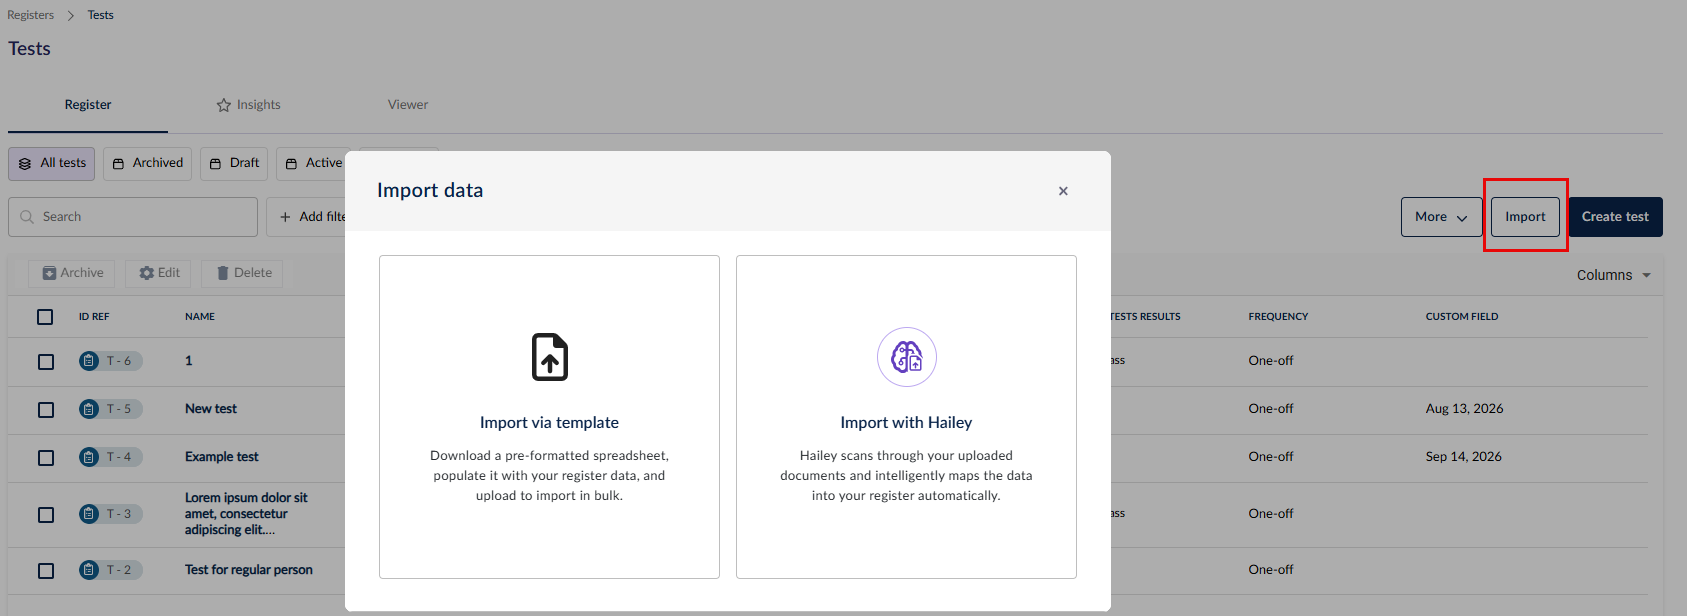
To import using the template, click on Import via template then Download Template.
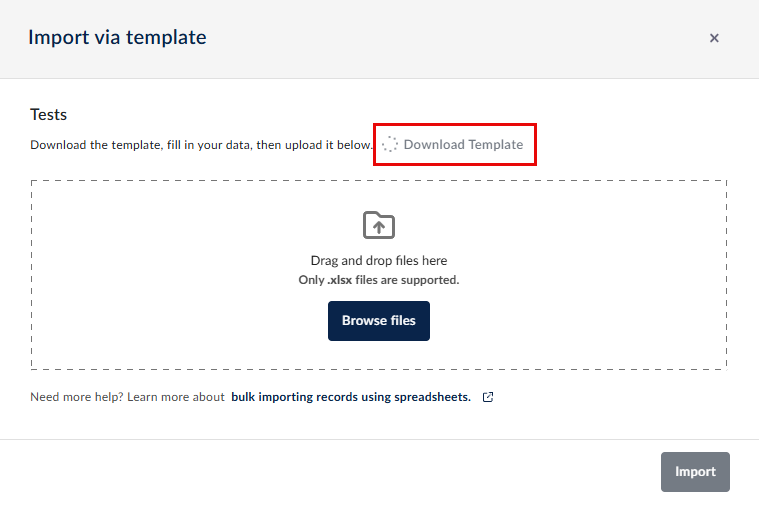
The template includes the below default field columns.
- ID Ref - this has to be unique. If existing IDs are used, the imported information will overwrite the existing register item. You will see a confirmation message if existing IDs are detected.
- Name
- Description
- Stage - this is the workflow stage.
- Owners - use the user's email address, separated by commas. To set users in an user group as owners, enter the group's name.
- Assignees - the email address of the user who will be completing the test, separated by commas.
- Access members - users who will have view access to this register item; use the user's email address, separated by commas. To give view access to a user group, enter the group's name.
- Tags - separate multiple tags by comma.
- Due Date - use DD/MM/YYYY (e.g. 24/08/2026) or MMM dd, YYYY (e.g. Aug 24, 2026). Refer to Configuration > Test set-up under any in-app test register item; the time difference between start date and due date will be used for future tests if recurring is set to yes.
- Comments - all text will be imported as one comment with no line break.
- Test Type
- Manual (use this option if you don't have a Wiz or Microsoft Defender for Cloud integration)
- Automatic
- Data Source
- Wiz
- Microsoft Defender for Cloud
- leave blank if neither apply and use 'Manual' for test type.
- Start Date - use DD/MM/YYYY (e.g. 24/08/2026) or MMM dd, YYYY (e.g. Aug 24, 2026). Refer to Configuration > Test set-up under any in-app test register item; the time differerence between start date and due date will be used for future tests if repeat is set to yes.
- Repeat
- Yes
- No
- Frequency - if repeat is set to 'yes', refer to the available options in-app according to the Configuration > Test set-up dropdown under any in-app test register item; use exact wording shown.
Any custom fields will also appear as additional columns on the template.
- For free text type fields, you can add any text you like.
- For dropdown type fields, you must enter the name of a selectable option in the defined dropdown list. The text must match identically and is case-sensitive.
- For multiselect type fields, you must enter the name(s) of the selectable option(s) in the defined dropdown list separated by a comma (,). The text must match identically and is case-sensitive.
- For long text type fields, you can add any text you like.
- For date type fields, use DD/MM/YYYY (e.g. 24/08/2026) or MMM dd, YYYY (e.g. Aug 24, 2026).
- For number type fields, use any number, including decimals. Text and special characters are not allowed.
- For user type fields, use the user's email address.
Configuration
Once a test is created or imported, its configuration tab will include information on the schedule that this test will have (if automatic/repeating), as well as how Hailey will validate the evidence submitted for it.
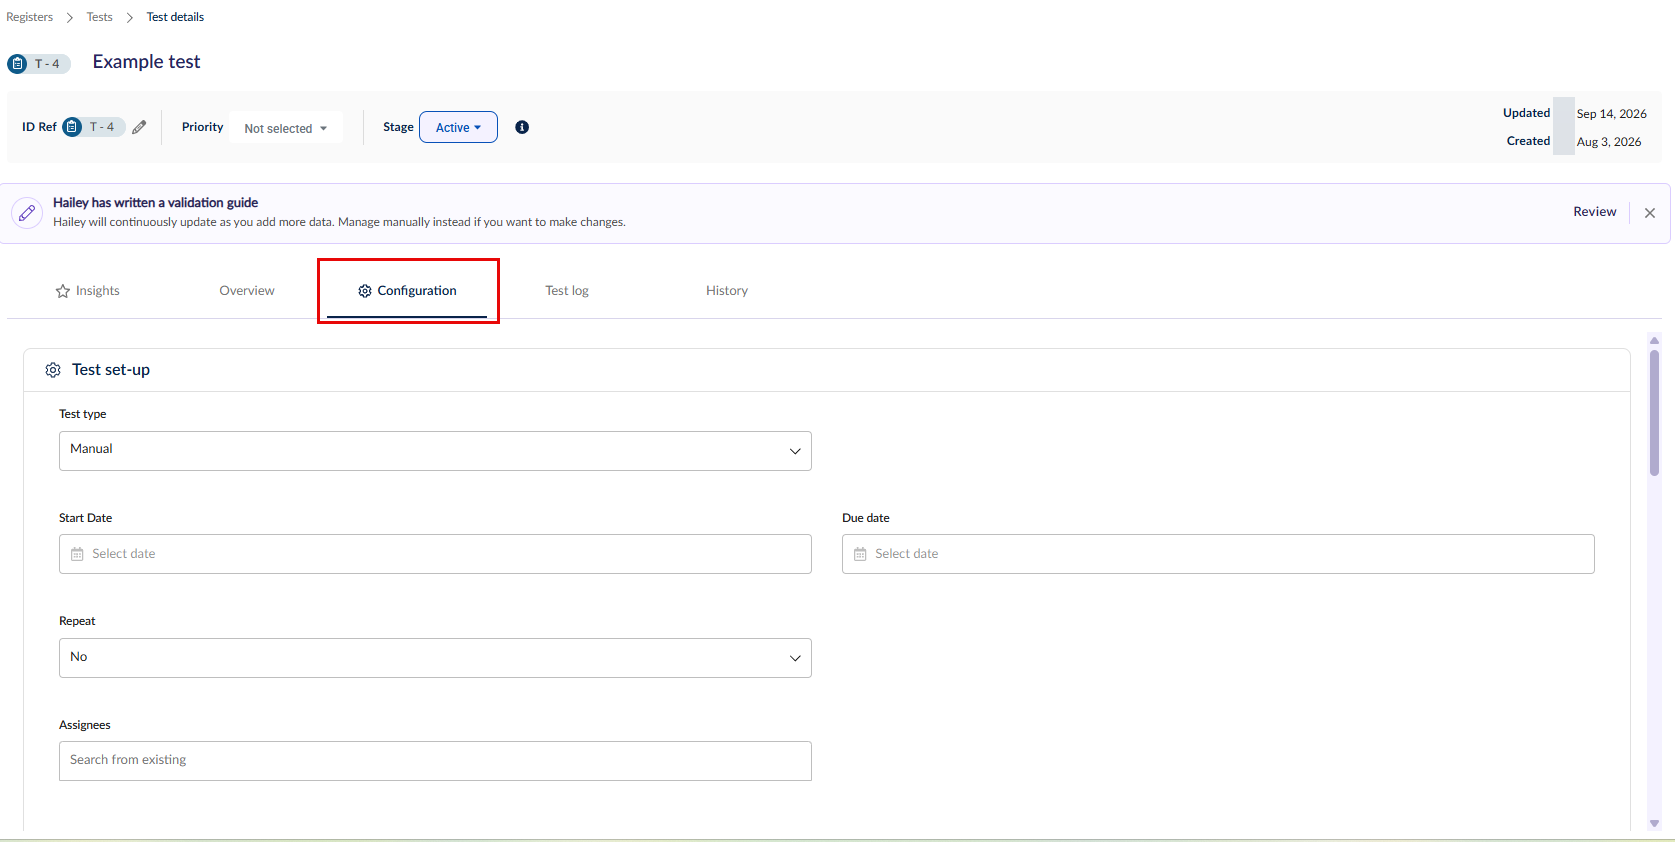
Test set-up
The test set-up section includes the below fields.
- Test type
- 'Manual' means that this test isn't connected to an integration; it can still recur/generate new test logs on a schedule, but the generated test logs and linked tasks will need to be filled out or completed by an assignee.
- 'Automatic' means that this test is connected to a Wiz or Microsoft Defender for Cloud integration. Integrations are set up in Administration > Integrations.
- Start date
- If the test is a one-off, this is the date that you will want your assignee to receive a notification email for the task so they know to start working on it.
- If the test repeats on a schedule, this is the date that you will want the test to start generating logs.
- Due date
- If the test is a one-off, this is the date that the test log will need to be completed by.
- If the test repeats on the schedule, the time between the first start date and first due date will be used for future logs. For example, if a test repeats on a weekly schedule and I set the start date to next Monday and the due date to next Tuesday, in the future every Monday the assignees will be notified that a new test log is available for them to complete, and every Tuesday the assignees will be notified that the test log is due.
- Repeat
- Frequency
- Assignees
Automated evidence validation & validation guide
As part of the evidence submission & validation workflow, any evidence the assignees upload against this test will be automatically checked by Hailey against the validation guide. For this to work, enable this setting using the toggle.
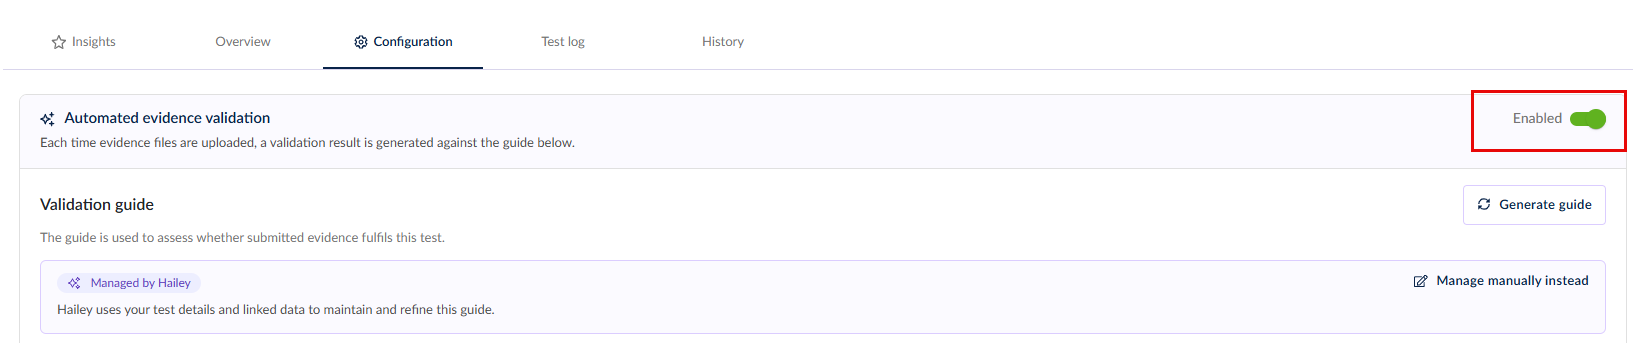
If this setting is disabled, the assignees can still choose to ask Hailey about the evidence they submit if they are unsure about its validity against the test, but the process won't be automatic.
Hailey will use the test evidence validation guide to generate a response. The more detailed the guide, the better Hailey can guide test assignees to complete their tests.
The validation guide can either be managed by Hailey or manually updated. You can switch a test between these modes anytime.
Managed by Hailey
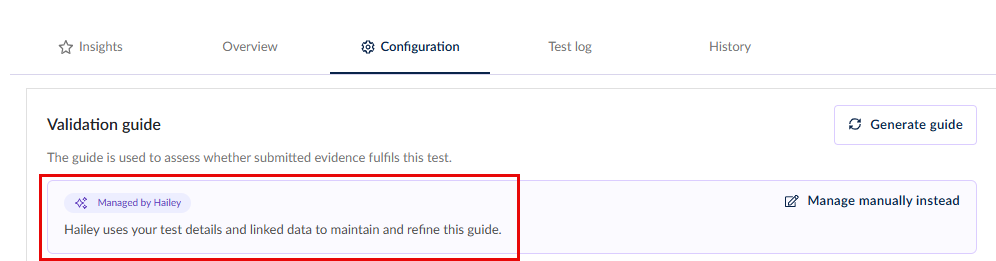
When a validation guide is managed by Hailey, it will be automatically updated when you add linked data (scope) to the test as well as change the test description in the overview tab. You can also ask Hailey to generate another guide at anytime using the Generate guide button.
Head here to learn more about how Hailey validates evidence.
Managed manually
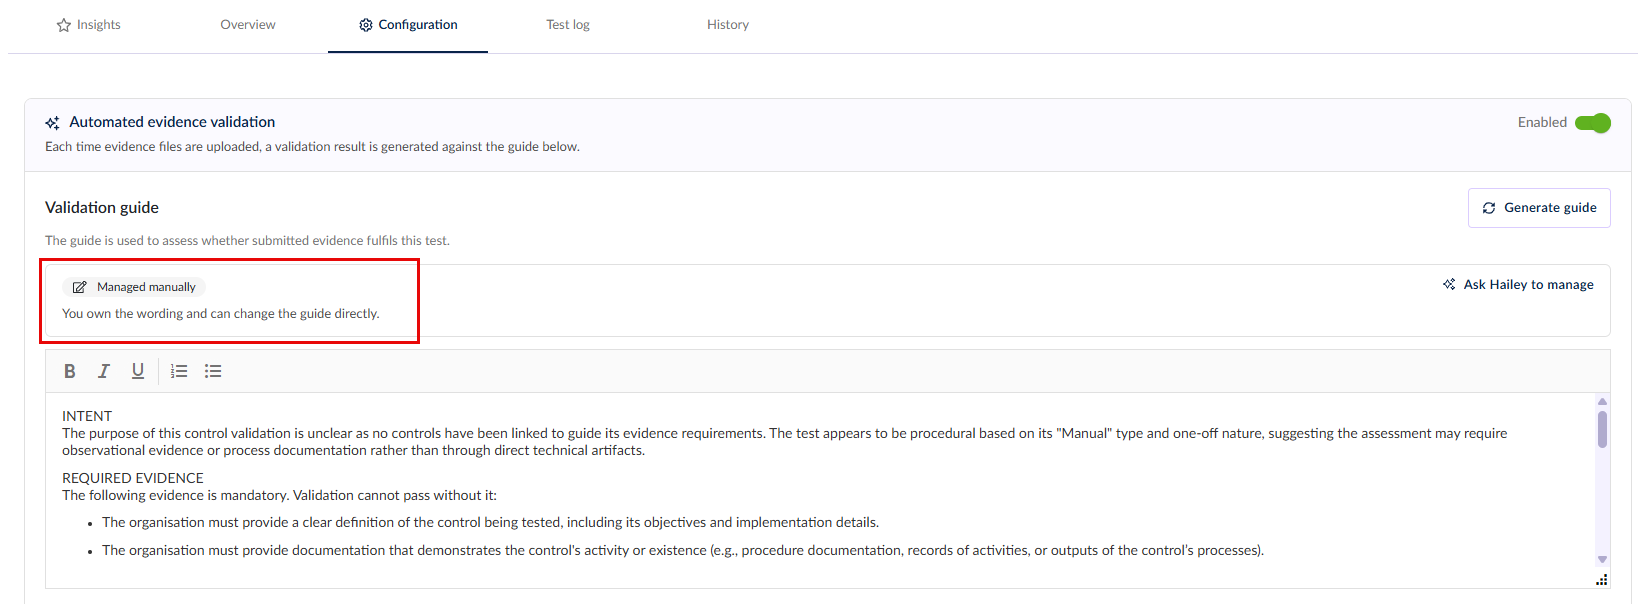
You can still ask Hailey to generate you a guide when managing the guide manually, but it won't automatically update everytime you make changes to the test.
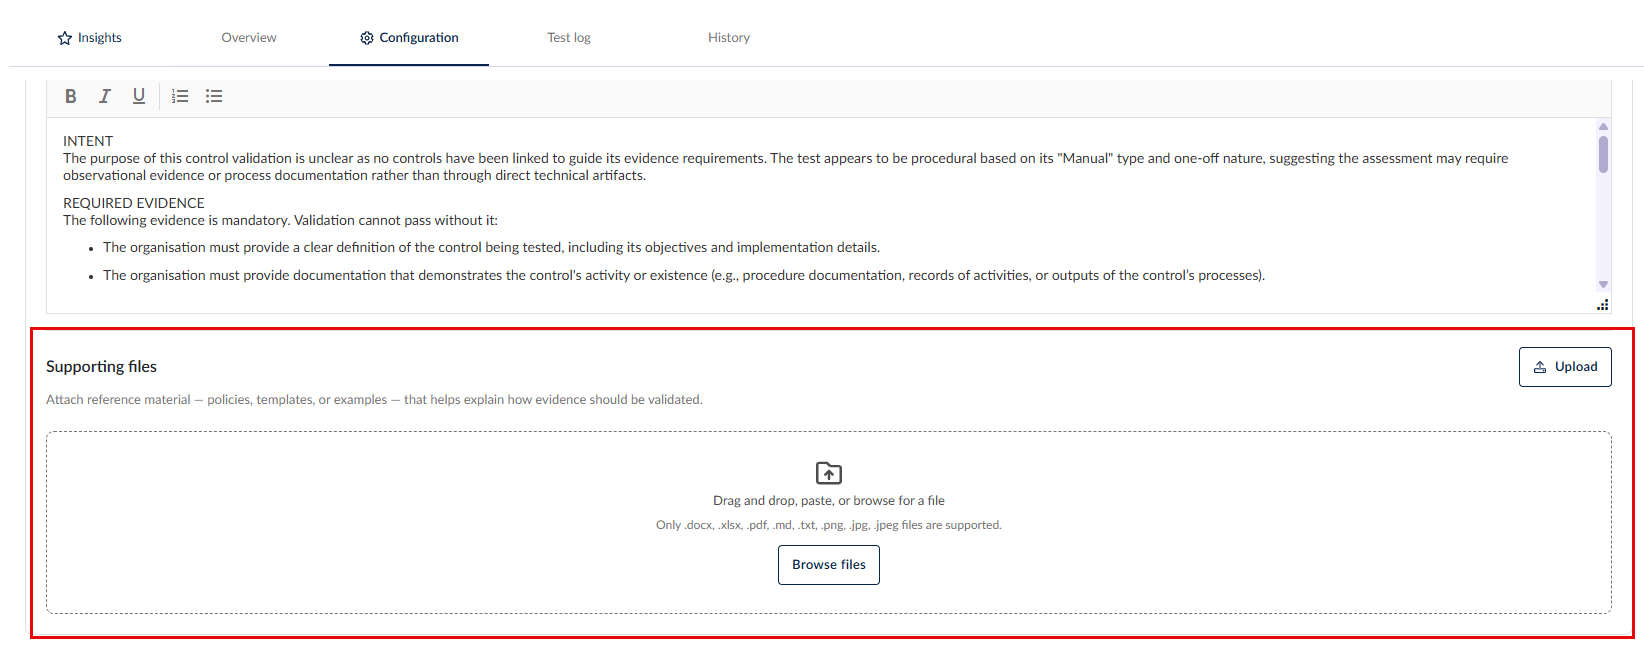
Supporting files
If you have existing documents for how the test should be validated, you can upload them at the bottom of the page. Throughout the evidence validation workflow, Hailey will take the content of these documents into consideration.
To see this workflow in action from end to end, head here.
Test logs
Once a test is configured and active, it will generate a test log on the start date. You can find test logs in the Test log tab in a table and view more details for each test log in the side panel.
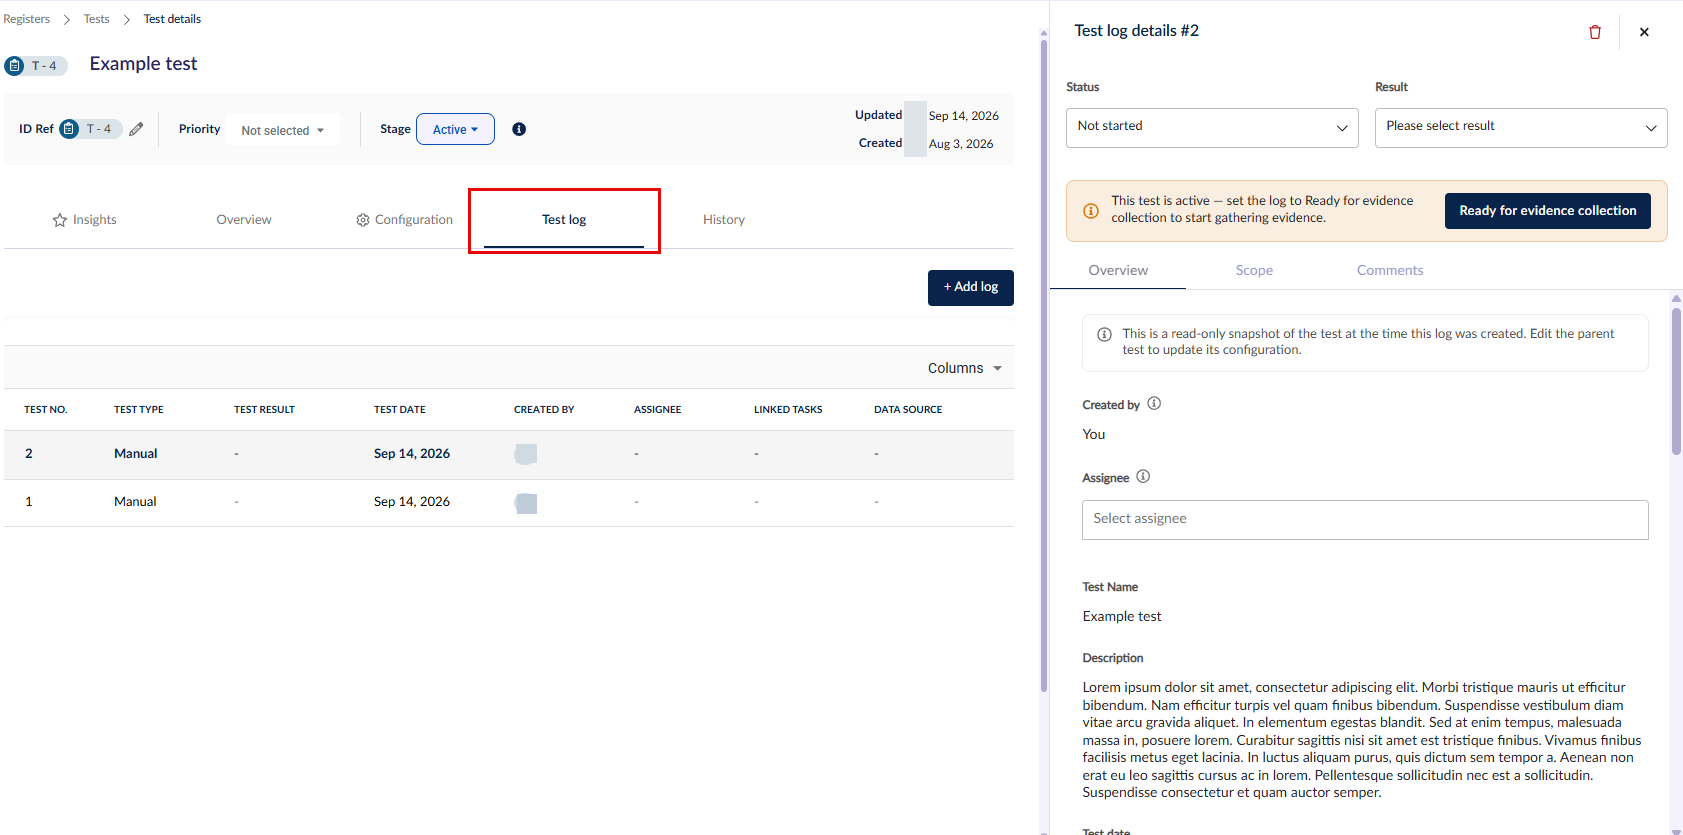
A test log has the below sections before its status is set to Ready for evidence collection.
Overview
Some overview details such as the name and description are inherited from the overview tab and cannot be edited at the test log level. Others such as test type and frequency are generated according to the configuration tab. This area serves as complete context for the particular test log at the time of its generation.
- Created by
- Assignee - if a particular log needs to be completed by someone who is not the regular assignee, you can make this change to that log only
- Test name
- Description
- Test date
- Due date
- Test type
- Frequency
- Validation guide
Scope
This is a read-only view of records linked to the test at the time when this test log was generated, such as the controls, tasks and other register items which this test is related to. The scope of the test informs Hailey's evidence validation as well.
Comments
The comments under a test log's detail is connected to its evidence collection task. Users can mention each other as well as any files from the files register in the comments tab to communicate regarding their work on the test/task.
Linking controls and other data
You can get the most out of the evidence submission & validation workflow by linking a test to a control as well as a task.
To do so, head to the Overview tab of a test and the linked data side panel.
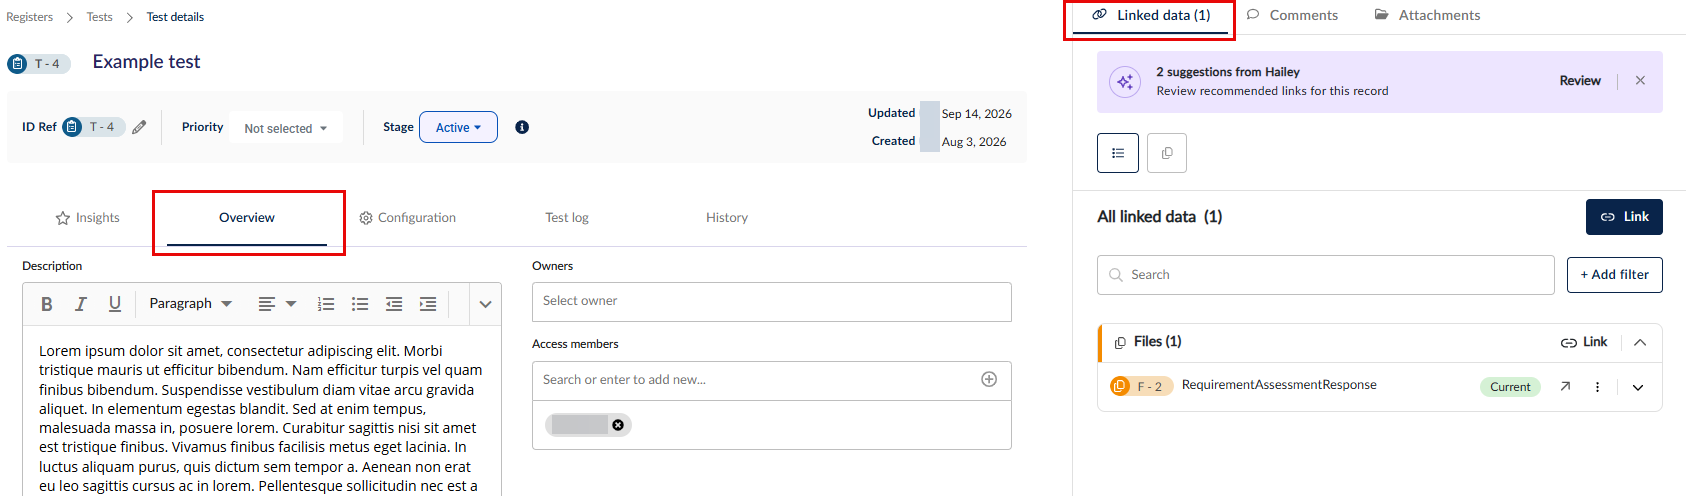
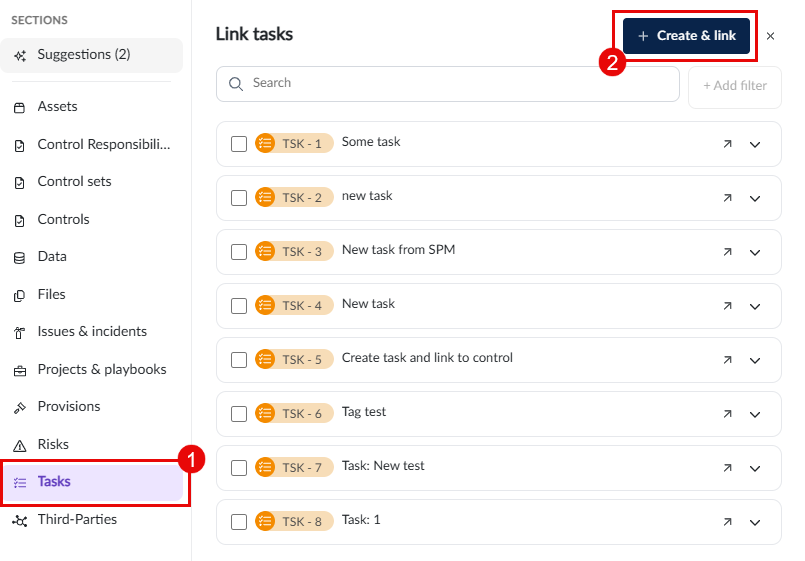
To link existing items, click on the link button. To create and link a new item, select the register you want to create the item in (1) and then click on Create & link (2).
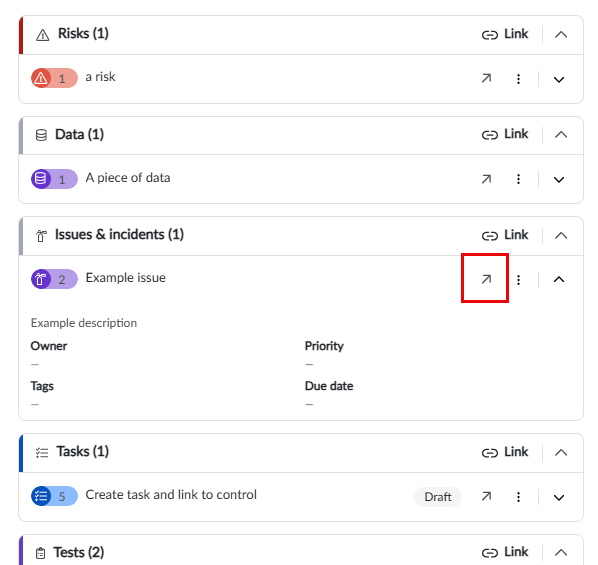
Once created with a name and description, the item will be automatically linked. You will be able to add moe details to it by clicking on the arrow next to it in the side panel's Linked data tab.
Head here to learn more about Hailey's suggestions.
Permissions
The tests register comes with its own set of granular permissions.
To update a role's permissions related to the tests register, head to Administration (1) > Roles (2) and select the role you want to edit (3). Here you can find the tests register permission folder in the Permissions tab (4).
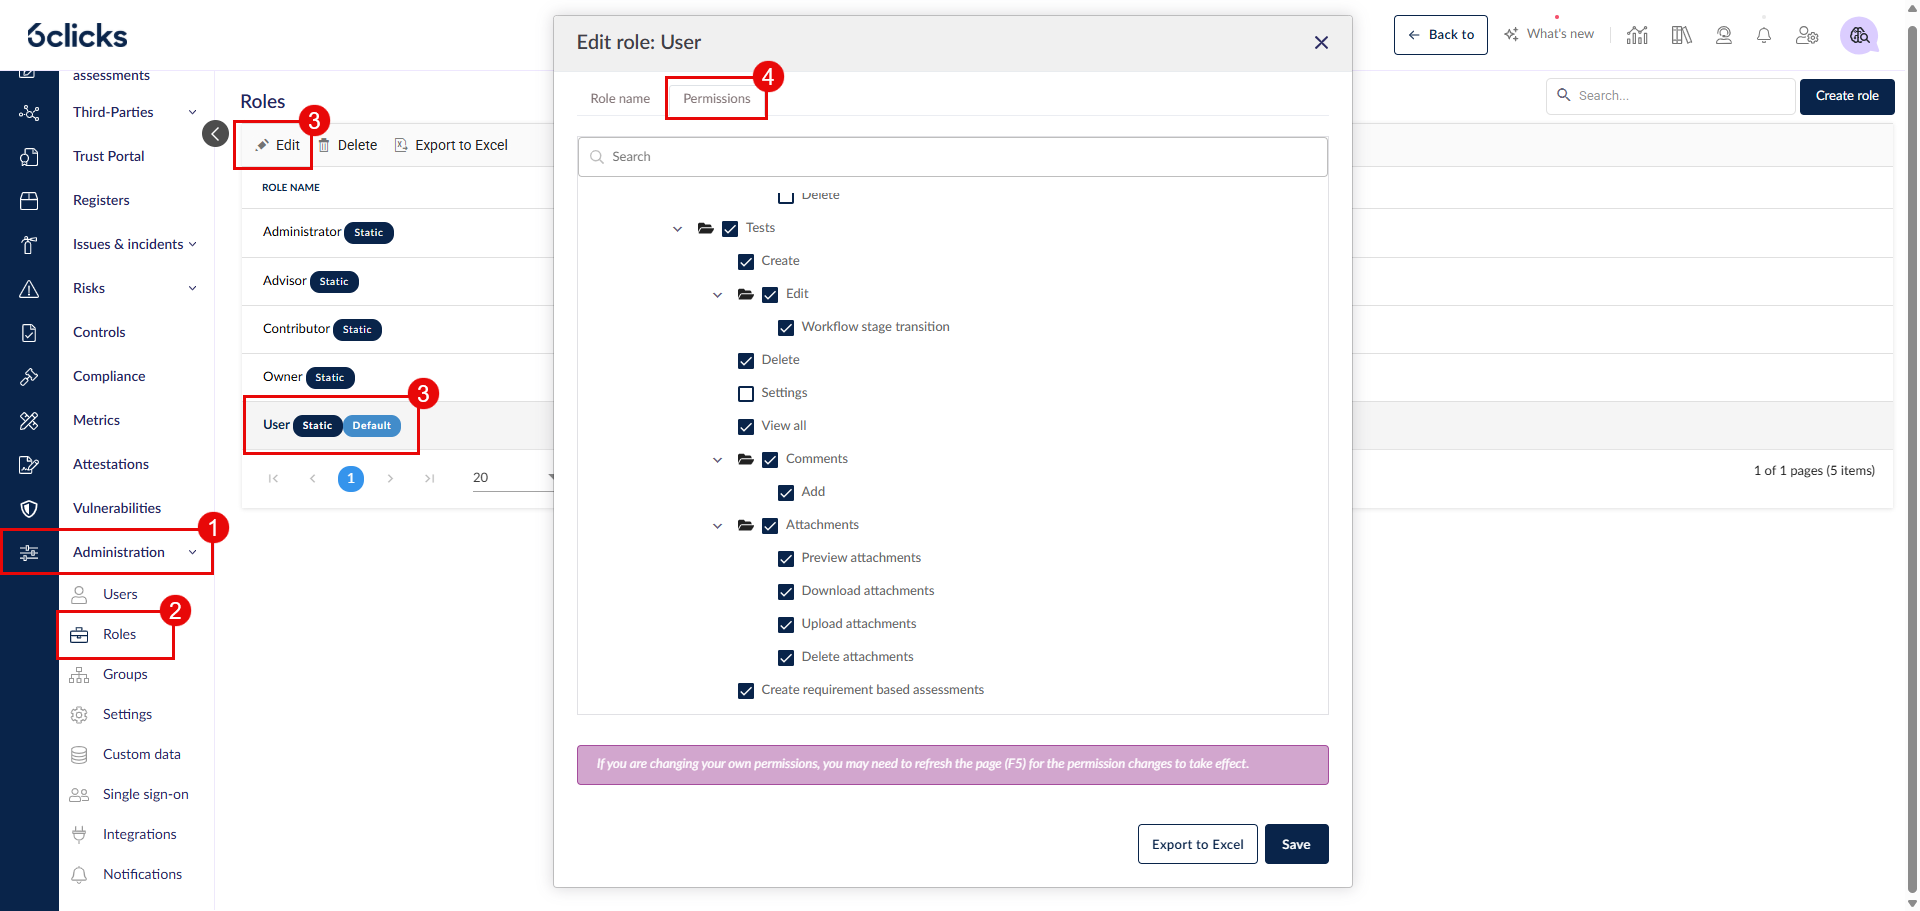
Head here for further details on each permission.
Next steps
- Using the tests register
- Configuring the controls and tasks registers