This article discusses custom and asset registers. For issues & incidents, & risks, head to their respective articles.
You can use custom registers to streamline reporting and enhance visibility into key compliance areas according to your organization's specific regulatory, operational, or compliance requirements.
You can create your own custom registers for events or items like breaches, gifts, or conflicts of interest.
Head to the Registers module using the menu on the left to get started.
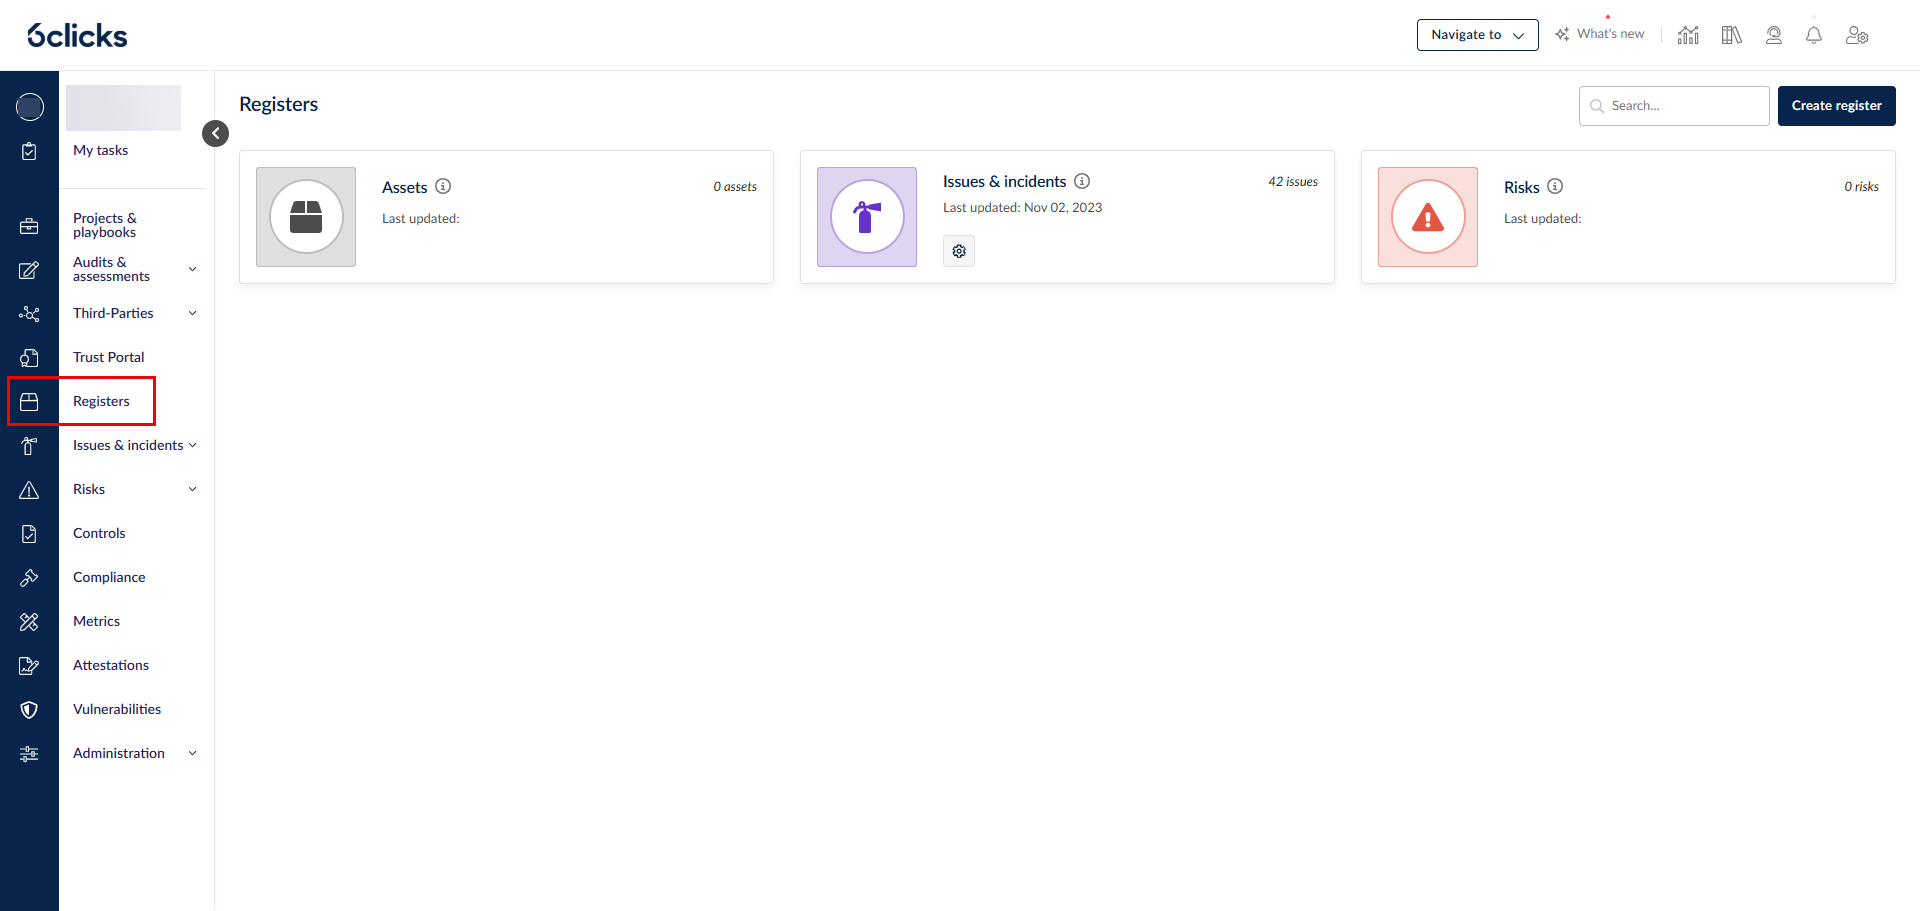
Table of contents:
Creating a custom register
Select Create register, and enter a Name and Description (optional) for the new register.
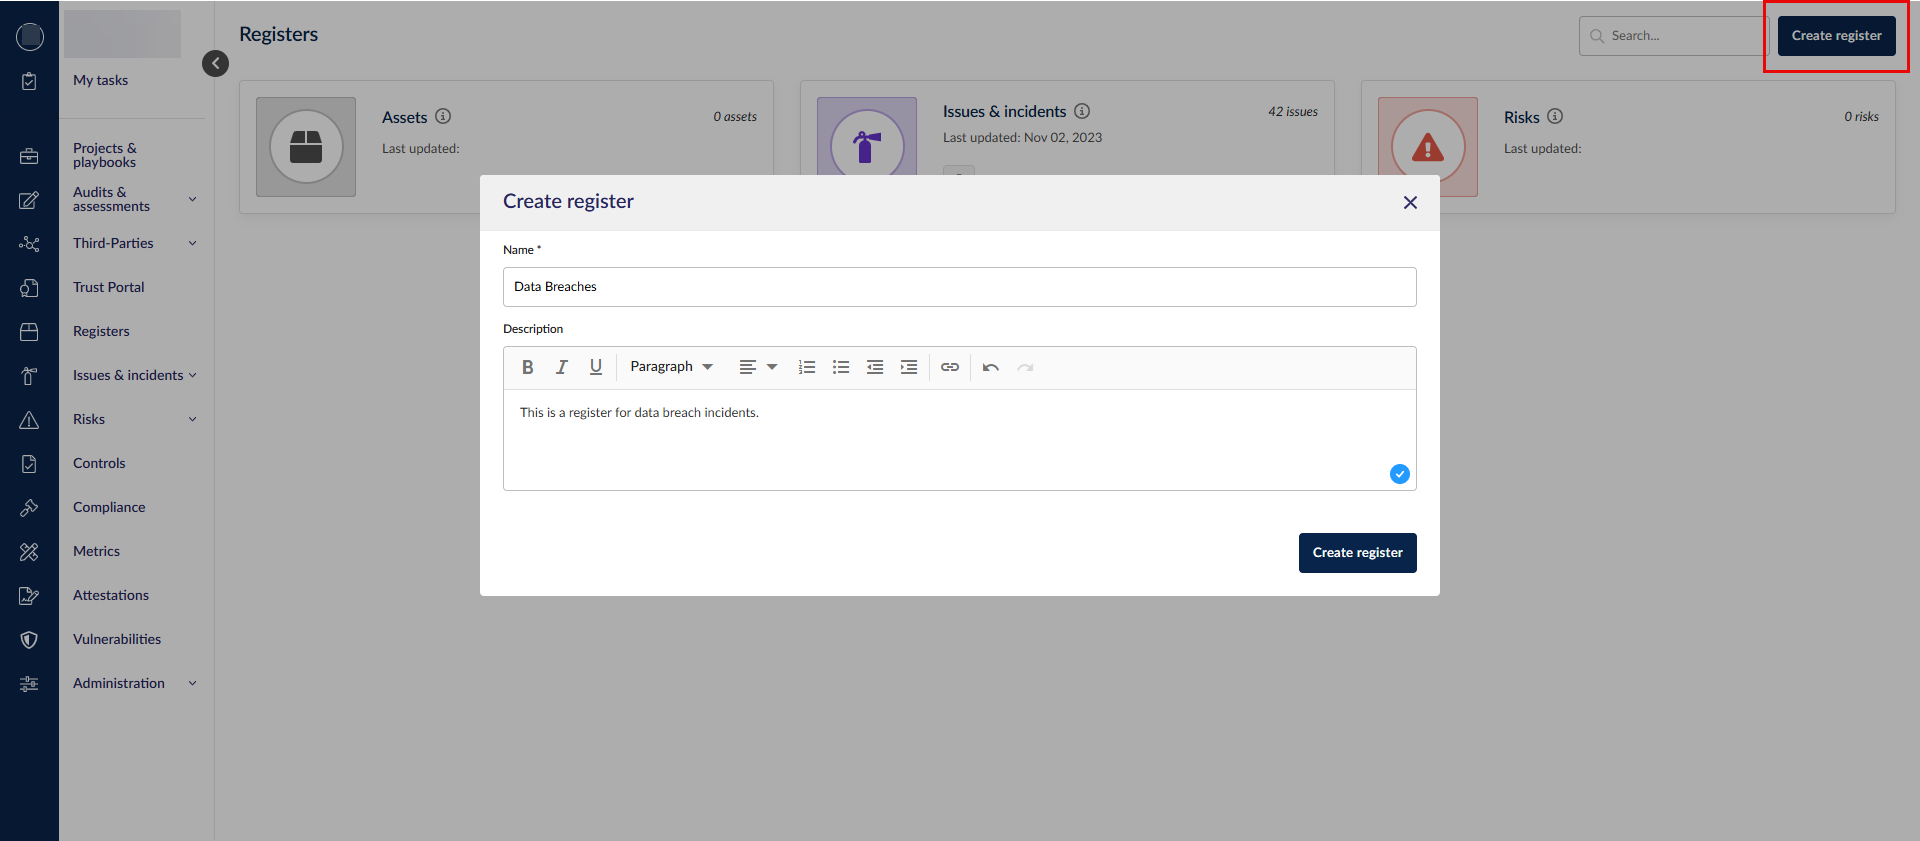
Click Create register to save.
Every custom register has its own set of permissions as soon as it is created so that you can fine-tune the access users have to that register and its records.
Registers are listed alphabetically in the module.
The main differences between the assets register and custom registers are:
- The assets register cannot be deleted.
- The assets register comes with 2 default fields, Host IP and Domain. Multiple assets cannot have the same values for these fields.
- The assets register comes with 4 custom fields, which you can find in Administration > Custom data > Asset custom attributes. These are Type, Availability, Confidentiality, and Integrity. You can delete or edit them like other custom fields.
Otherwise, the assets register functions similarly to a custom register and you can perform similar actions in them, such as managing custom fields and importing items.
Settings
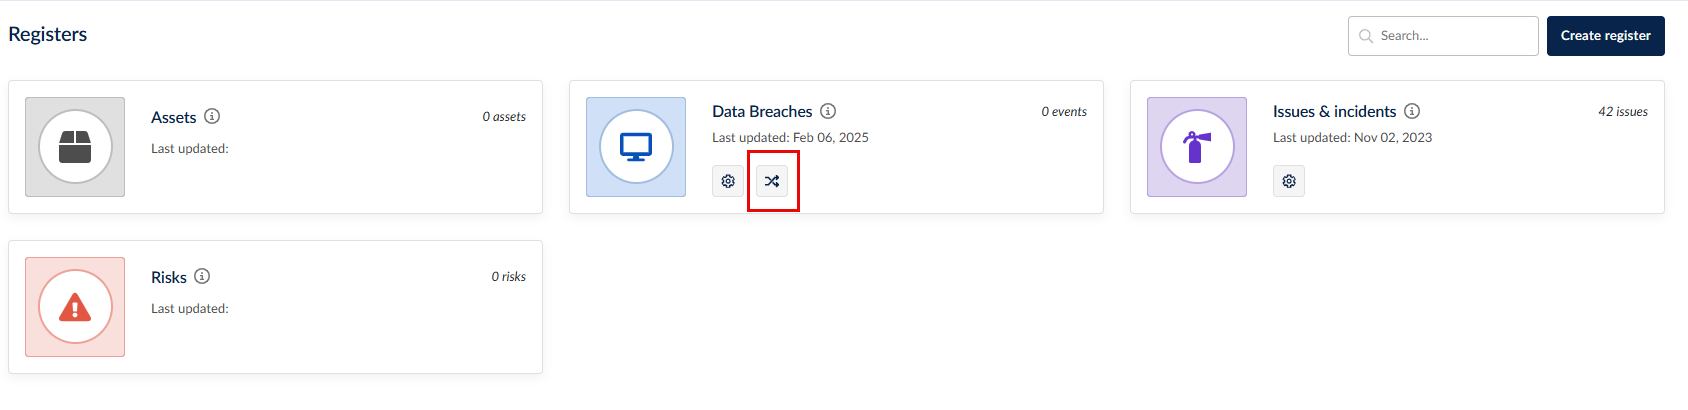
The cog icon takes you to the register's settings where you can edit its Details and Features. You can also Delete the register here.
To edit the register, Click the pencil in the top right corner for each section and click Save when you are done.
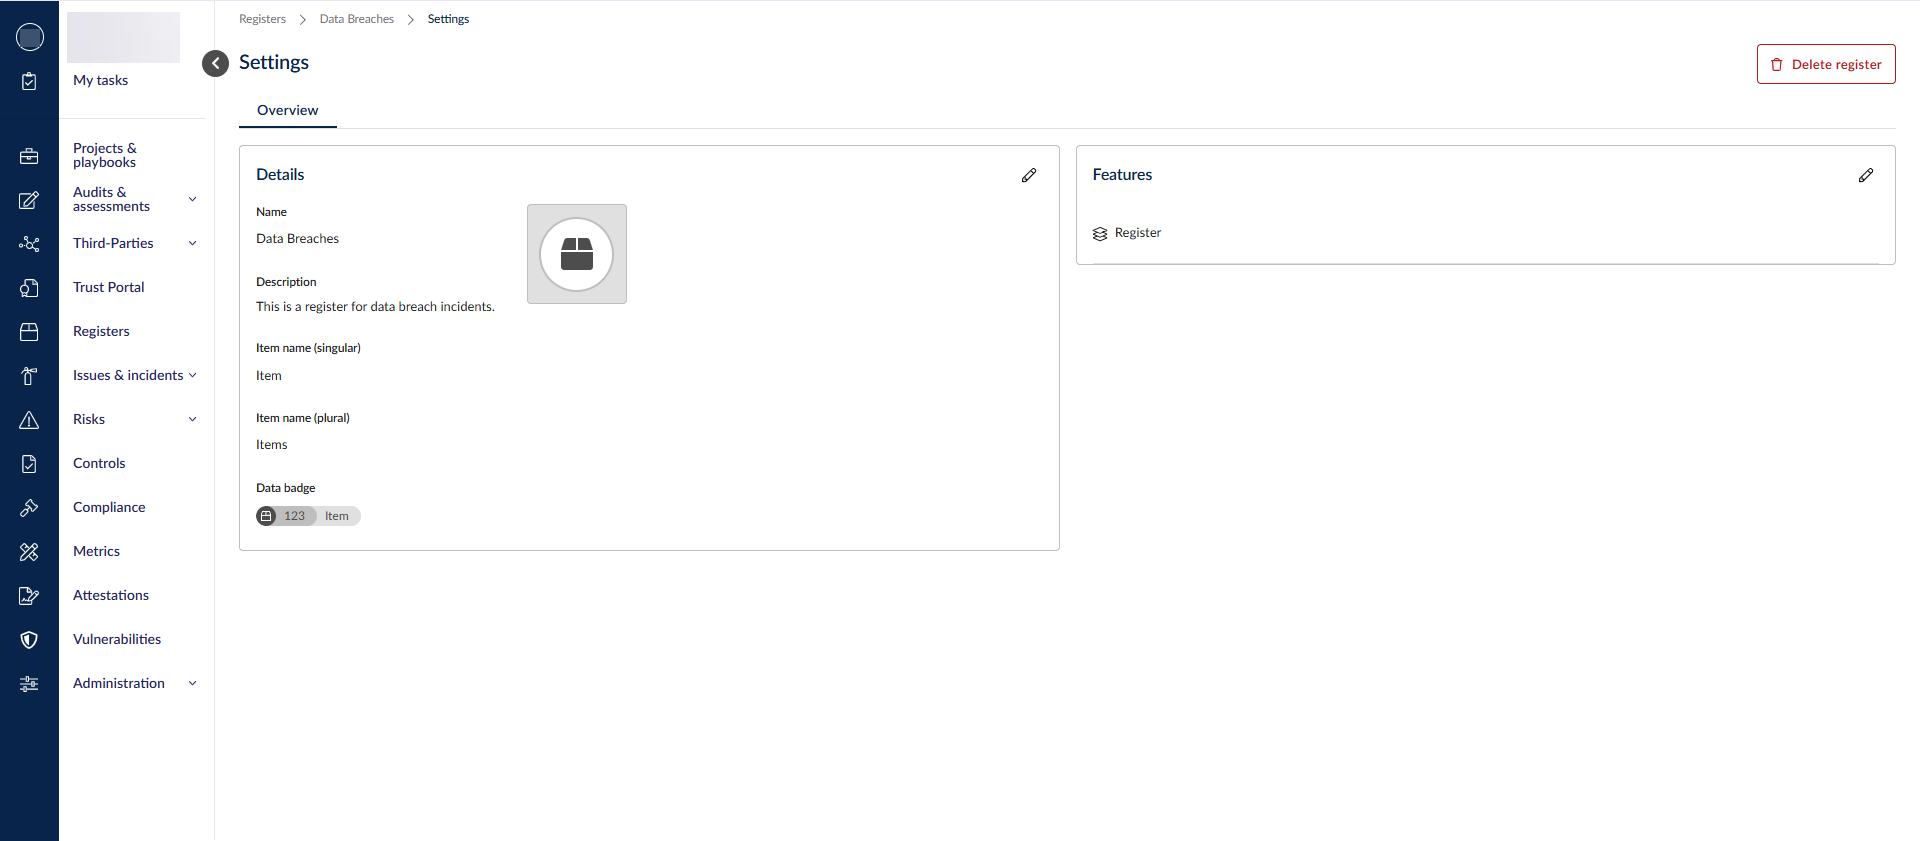
Details
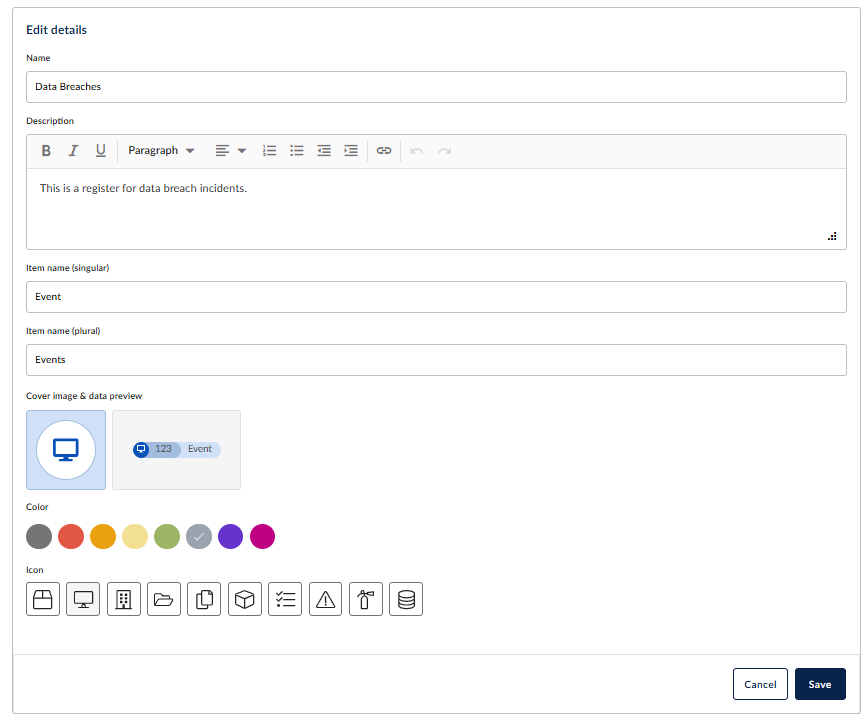
- Name
- Description
- Item name (singular) - The word that the 6clicks platform will use to refer to a record within this register.

- Item name (plural) - The word that the 6clicks platform will use to refer to multiple records within this register.

- Cover image & data preview - Give the register a distinct colour and icon so you can easily recognize its records when working in other modules.


Features
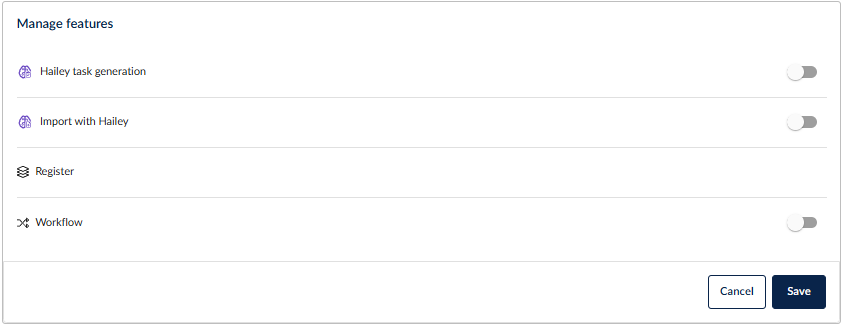
You can enable/disable the workflow feature here by using the toggle next to it.
Workflow
If the workflow feature is toggled on in Settings > Features, an additional workflow button will be shown next to the register if you have the necessary permissions.
Here you can set up & manage workflow stages for the records in this register. When the workflow feature is enabled and no stages exist, any existing records in the register will become 'Unassigned'.
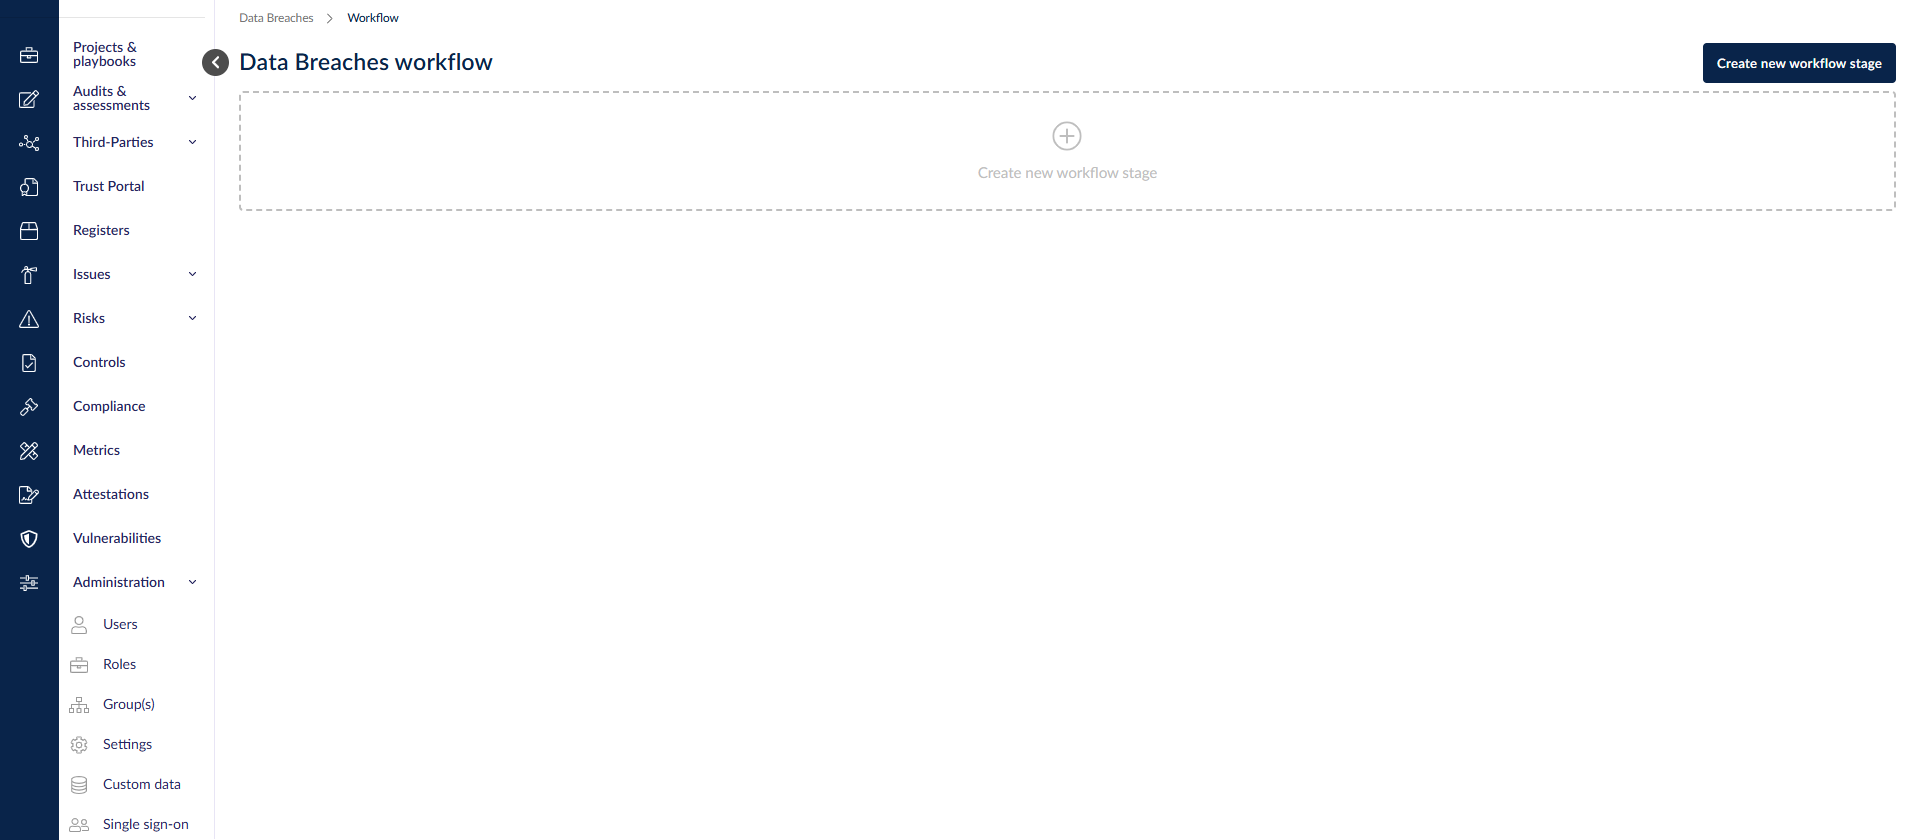
Select Create new workflow stage.
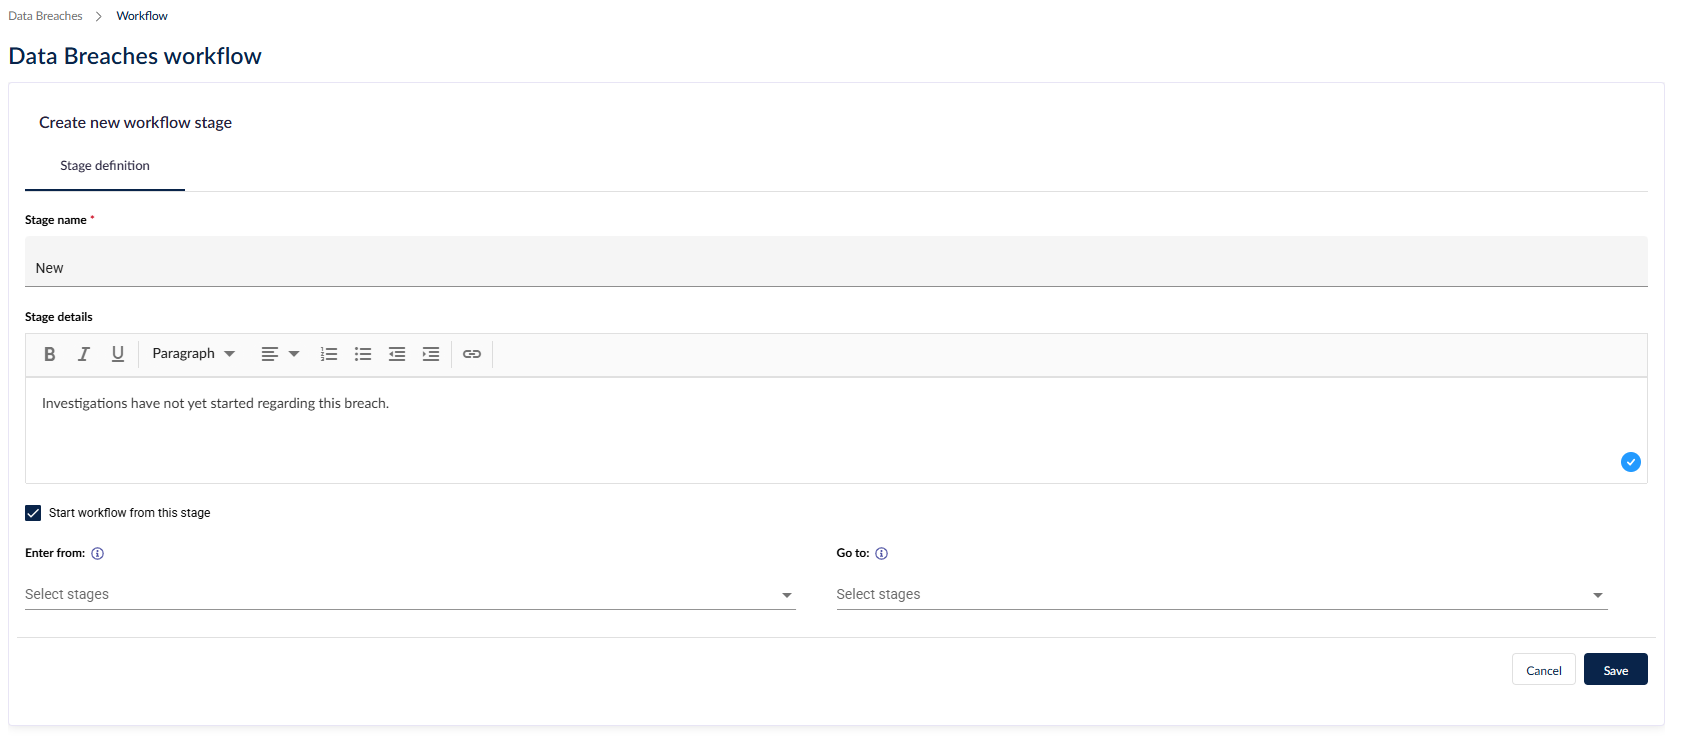
- Stage name
- Stage details
- Start workflow from this stage - tick this if it is the first stage for the records in this register
- Enter from - if this is not the first stage, select stage(s) that can lead to this stage
- Go to - if this is not the last stage, select stage(s) that this stage leads to
Add as many stages as your organization deems necessary.
Click the arrow next to a stage's name to show or hide its description, the pencil to edit it, and the red bin to delete it. Reorder stages by holding the 6 dots to the left and dragging them.
Register table overview
View the records of a custom register by clicking on its name or using the Register button.
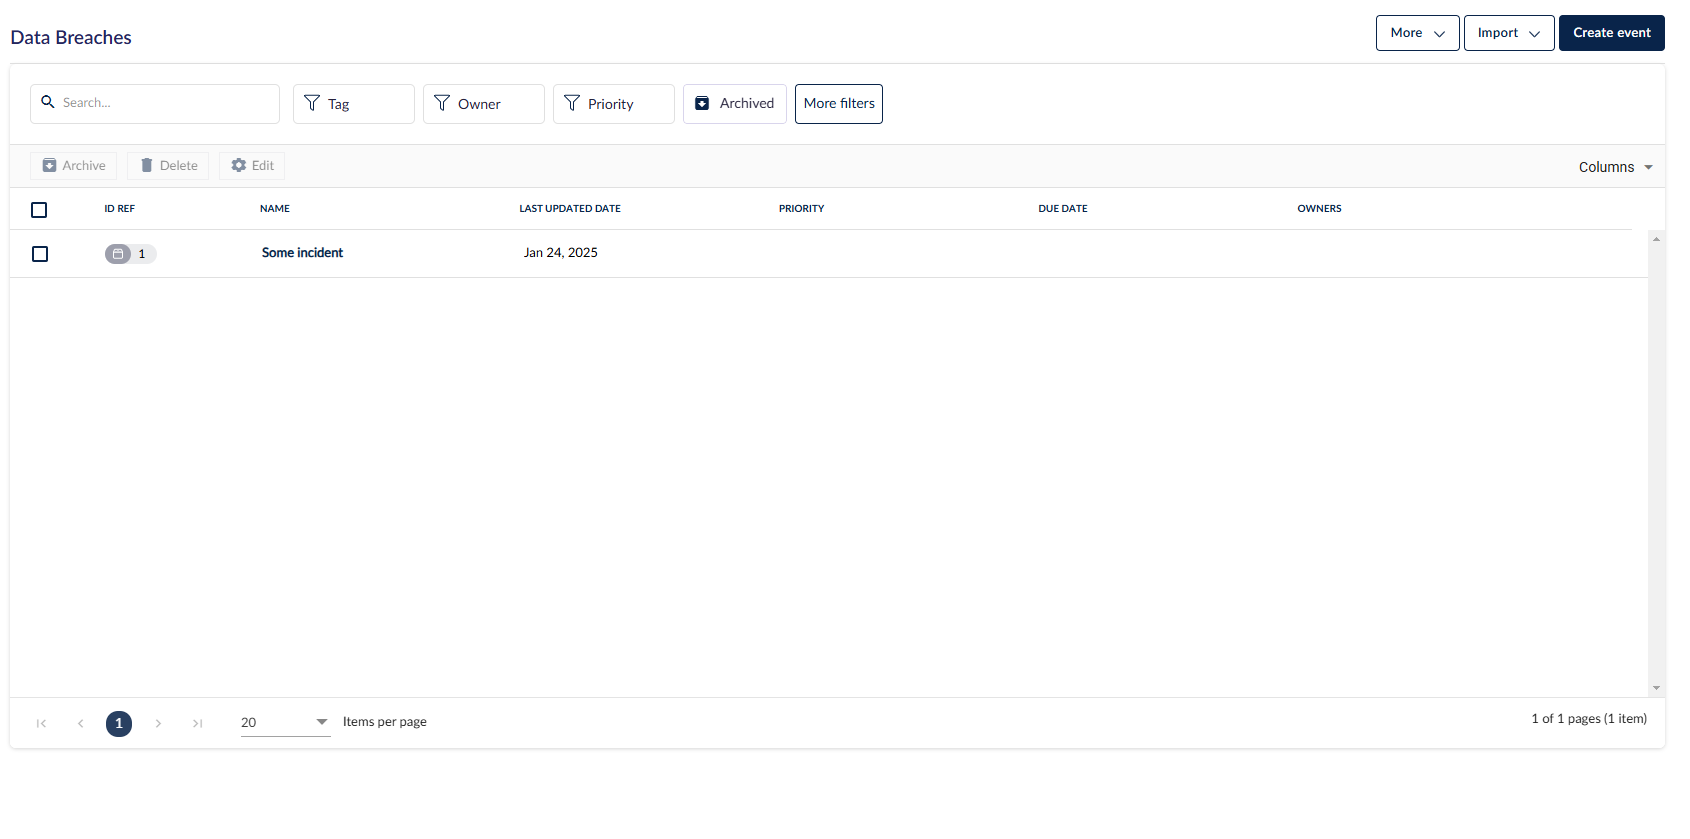
You can do the following in the register table overview.
- Search & Filter - select the Archived filter to see all the archived records; click it again to go back to the normal view
- Archive/Delete/Edit - select at least one record to perform these actions
- Columns - select the fields that you want to be visible in the register, including custom fields
- More
- View my tasks - this takes you to your 'My Tasks' with a filter applied for the particular register that you were in
- Export - All fields exports all fields, including default & custom fields, for all records (excluding archived) on this register in an XLSX file. Selected fields exports all fields that are currently shown as columns for all records (excluding archived) on this register in an XLSX file.
- Import - import records or tasks using spreadsheets
- Create item (or whatever the record is renamed to in the register settings)
If workflows are enabled, each stage will have its own tab so you can easily navigate between pages which display all records on the same stage.

Creating a custom register record
Select Create item (or whatever it was renamed to) to create a new record.
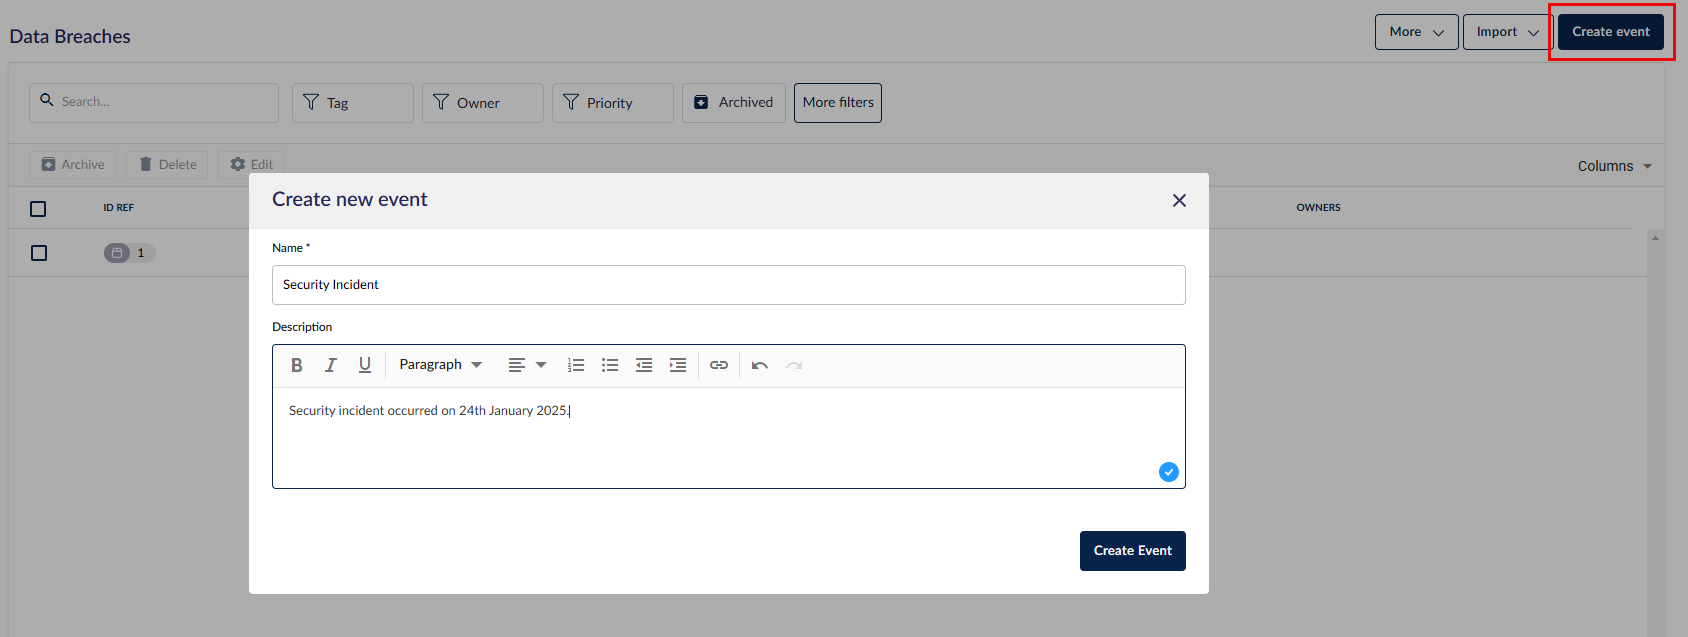
Once you give the record a name and description (optional), you can add more information to it.

Custom fields for custom registers
You can add custom fields to specific custom registers to capture additional information in Administration > Custom data > (the name of the register) custom attributes.
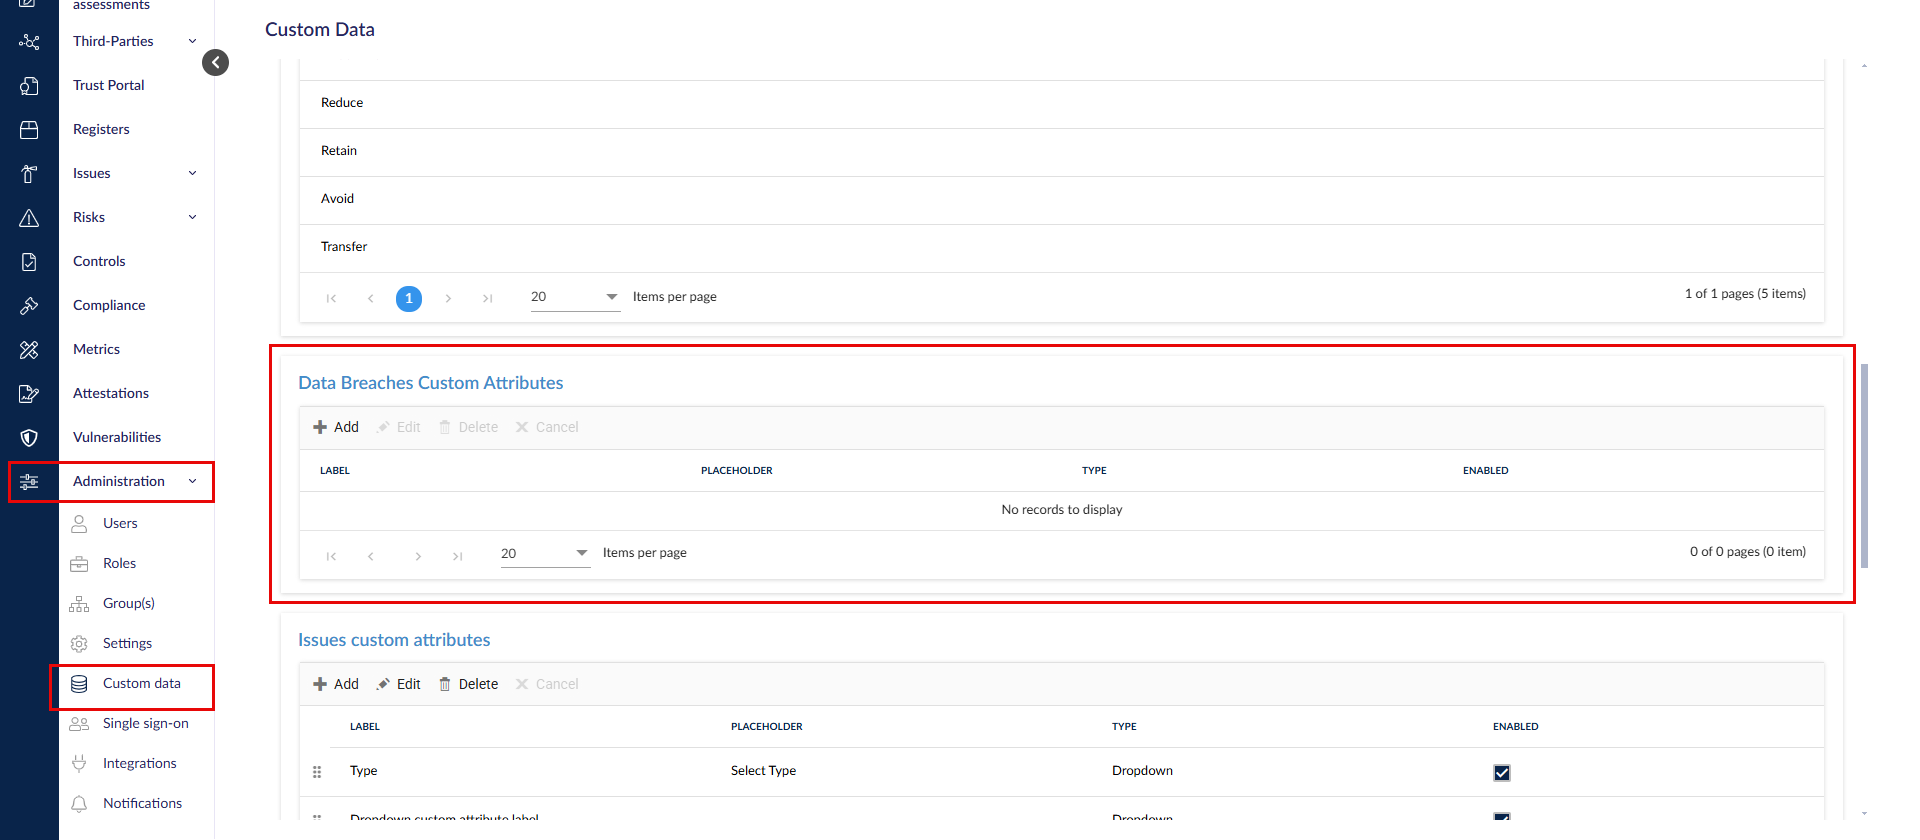
For step-by-step instructions, head here.
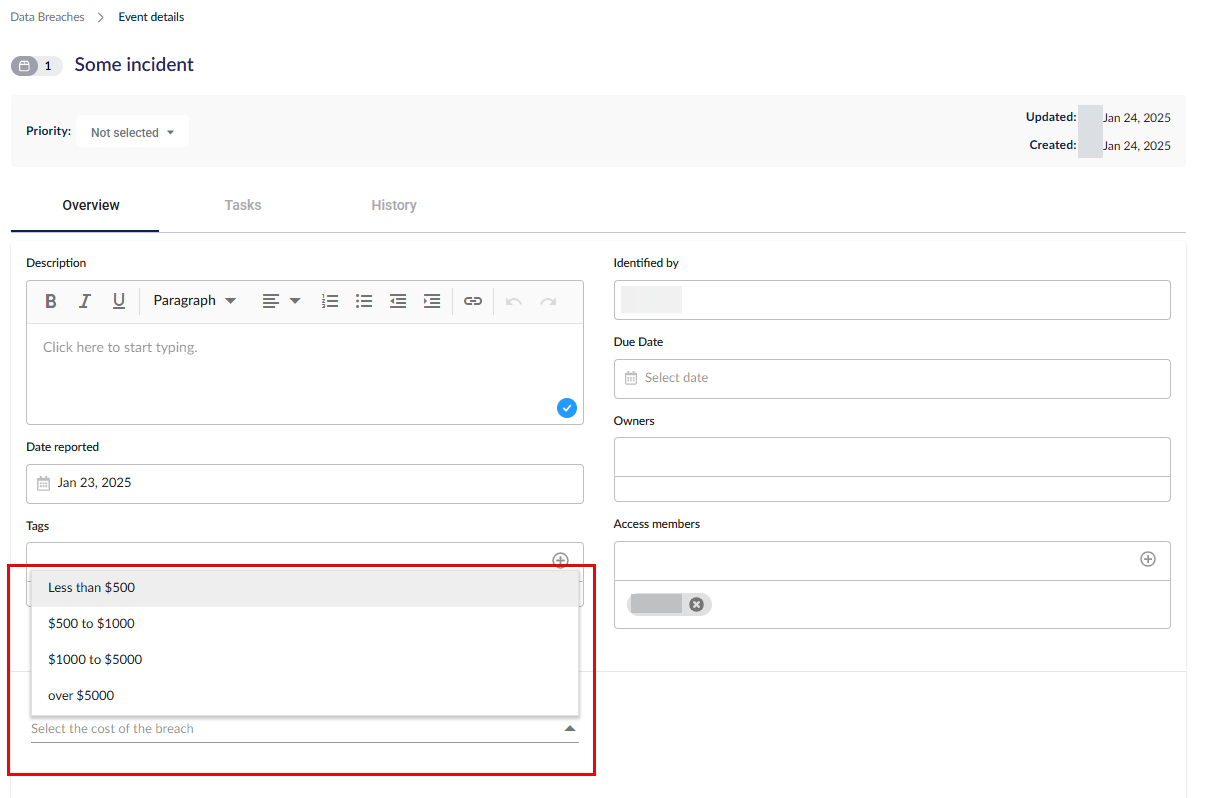
In this example, we have added a dropdown field to the custom register called Cost.
If enabled, this field will be visible and ready for use in each record in this register.
You can add as many custom fields and reorder as necessary in Administration > Custom data. They will be displayed below the default fields.
Overview
The overview tab contains the default fields of the record and any custom fields this custom register may have.
In the top banner, the priority of the record is displayed if any, and the workflow stage of the record is displayed if enabled.

In the side panel menu to the right, you can link data to this record in the Linked data tab, such as issues, assets, risks, or records from other custom registers, or attach documents to the record in the Attachments tab.
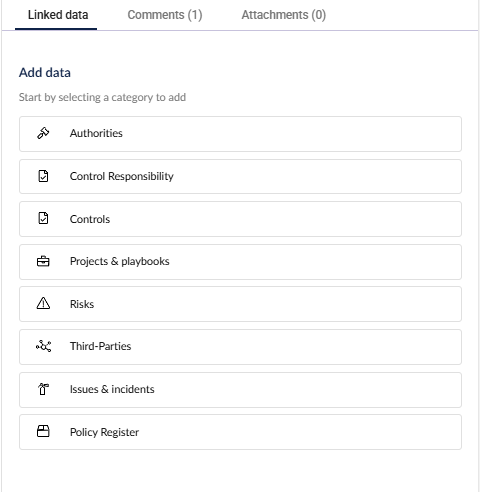
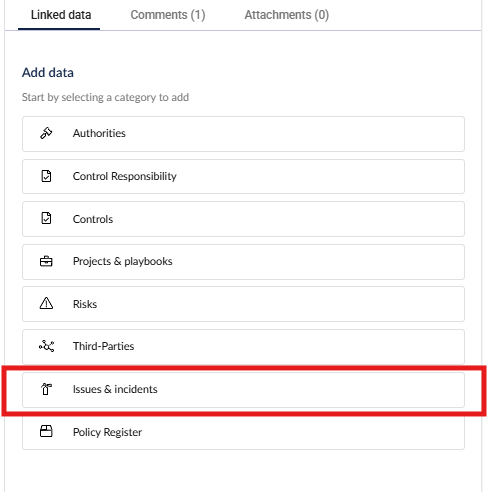
Linked data
If there is currently no data linked to a record, the Linked data tab will look like the below. In this example, we are linking this record to an issue and select Issues.
On the next screen, you can perform the below actions.

- Issue icon - when there are multiple types of data linked to the record, use the icons to navigate between the different data types.
- + Add data - click here to add another type of data, such as assessments, controls, risks, a different custom register, etc.
- x - remove all linked issues or, if there are no linked issues, back out of this menu.
- Link icon - click here to link issues.

After clicking on the link icon, we can then select issue/s to link to this record.
Use the search function or the all/linked filters to find the issues you are after, and select the link icon to the left of the issue title to link it to this data. When you are done, click the back arrow to return to the Linked data main menu.

You can now see that the issue you selected is linked to the record. Depending on the data type, if you click on the linked data, it either takes you to it in a new tab or shows some more details.
Add as many links to data of the same or different types as necessary.
Tasks
Tasks share the same numbering system across the spoke, so the task's ID may not start from 1 if you already have existing tasks elsewhere in the platform.
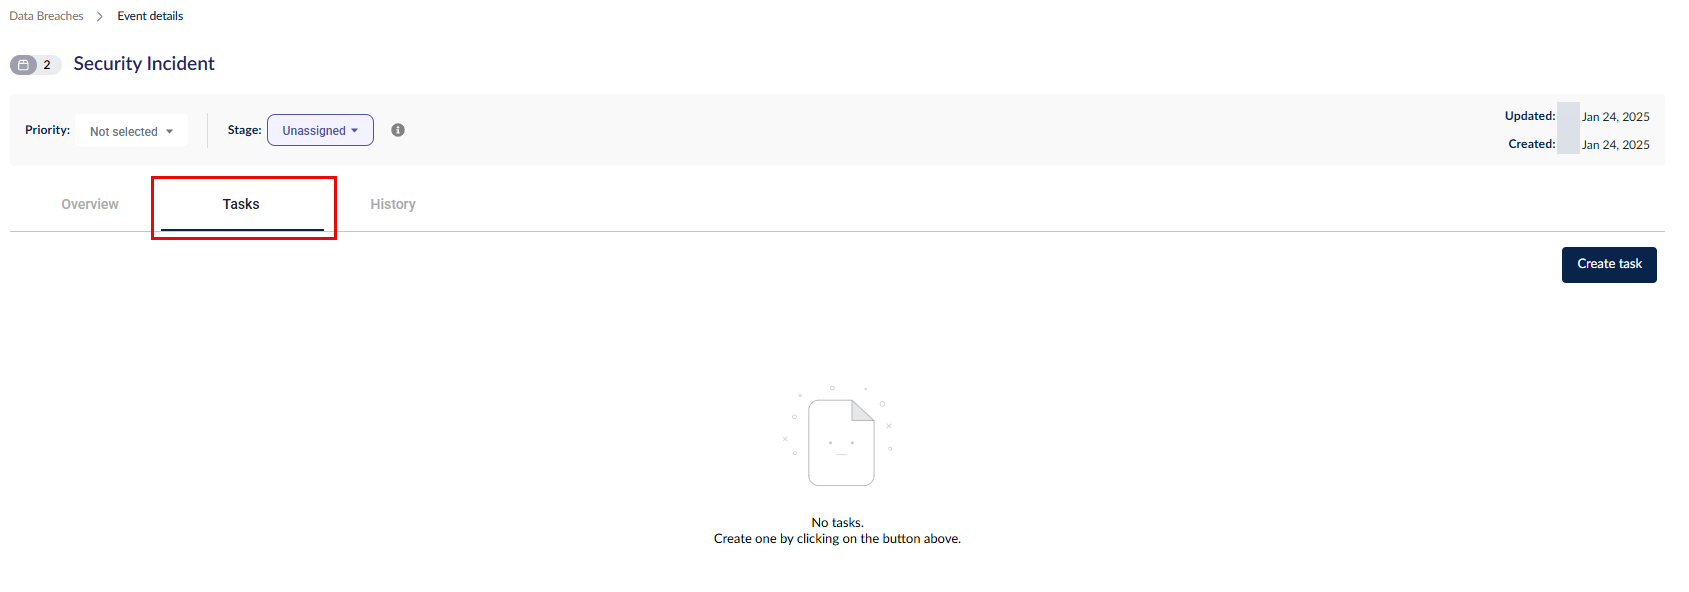
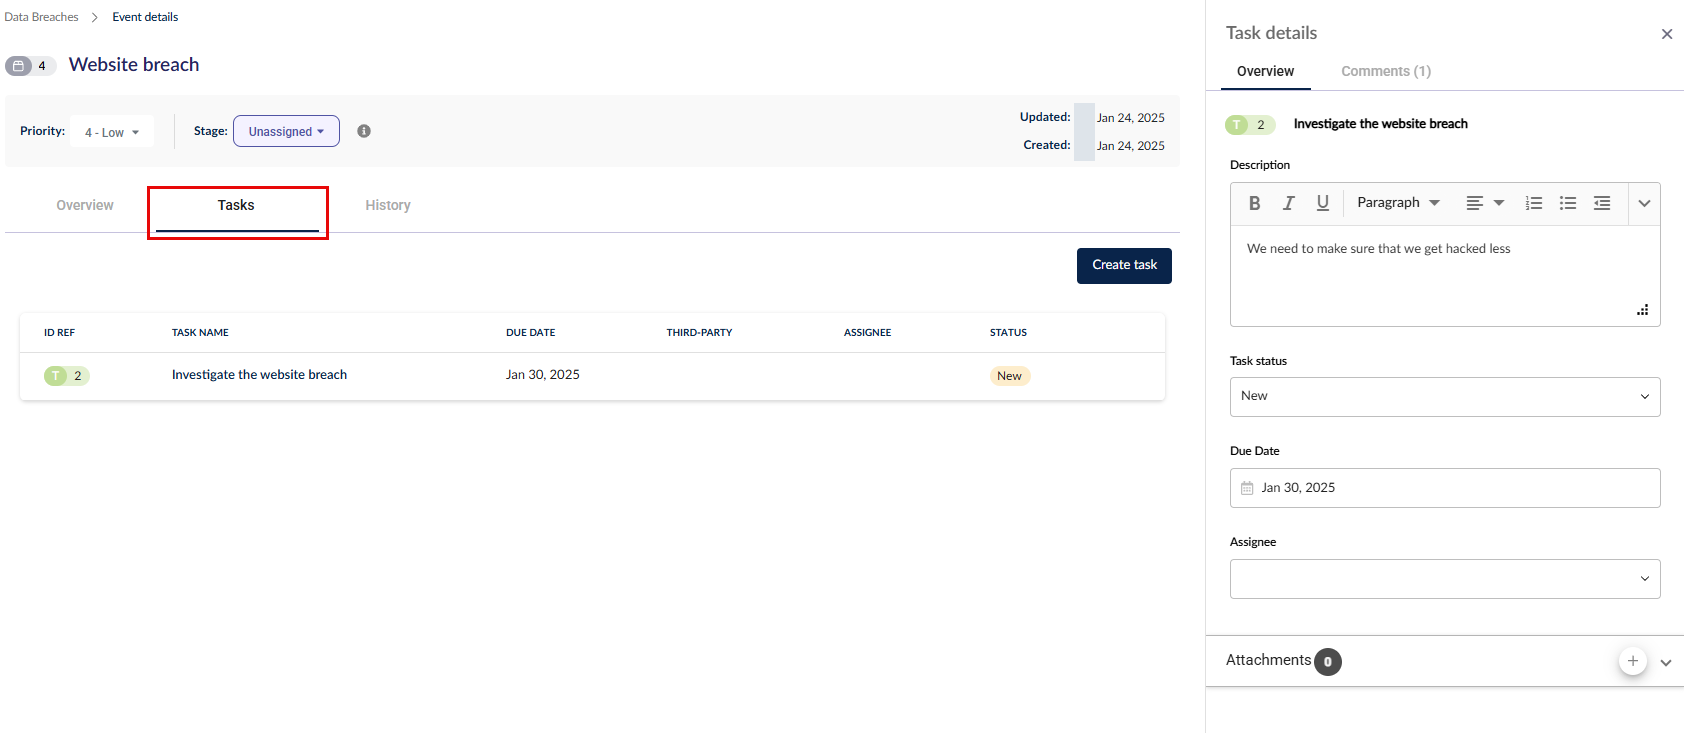
The next tab contains tasks regarding this record, if any. To create a new task, select Create task and give the new task a name in the side panel.
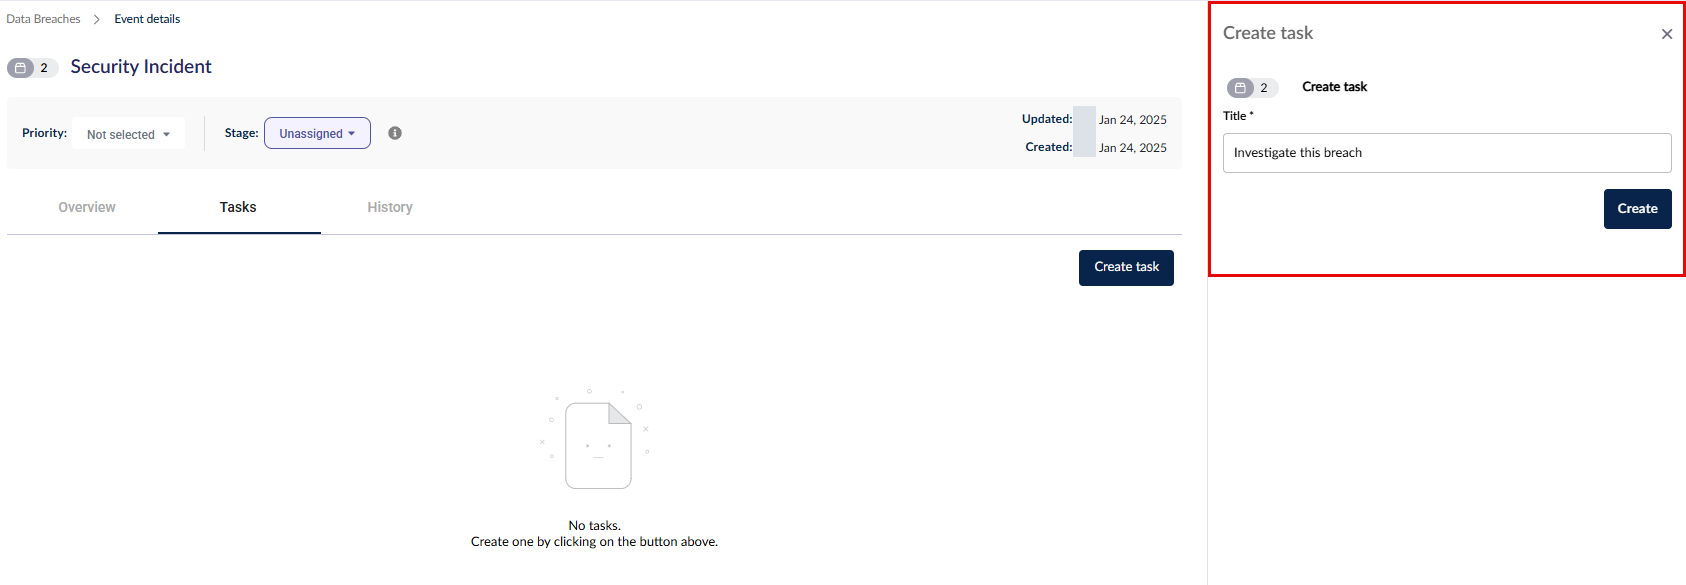
Once created, you can add more details, add attachments, or rename the task by clicking on its name (hit Enter to save the new title).
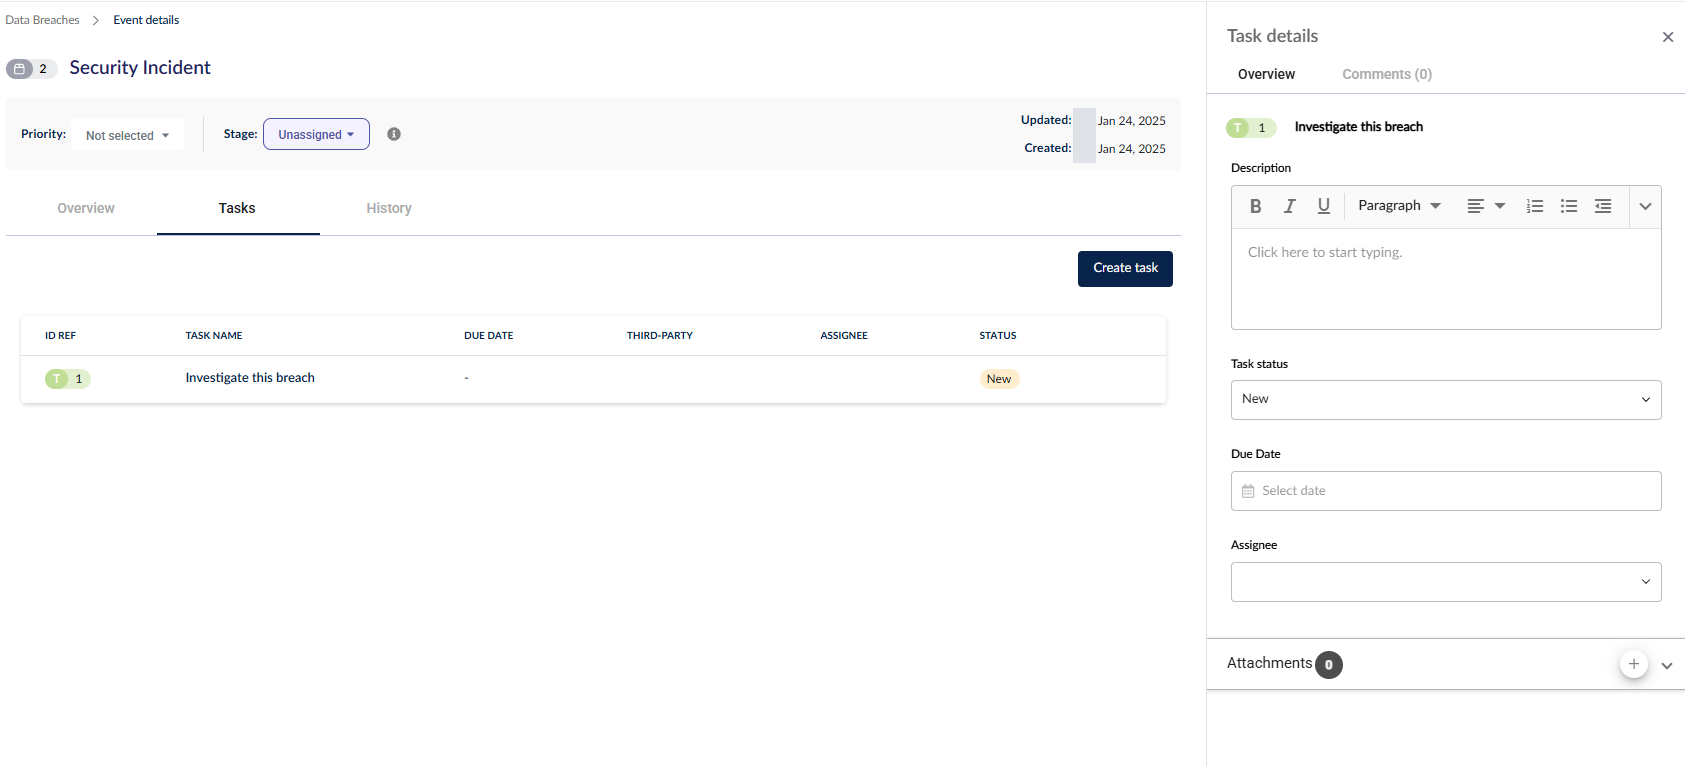
Add as many tasks as necessary, and they will all be displayed in the main tasks table.
Comments
Users with the appropriate permissions can either view comments only or both view and add comments.
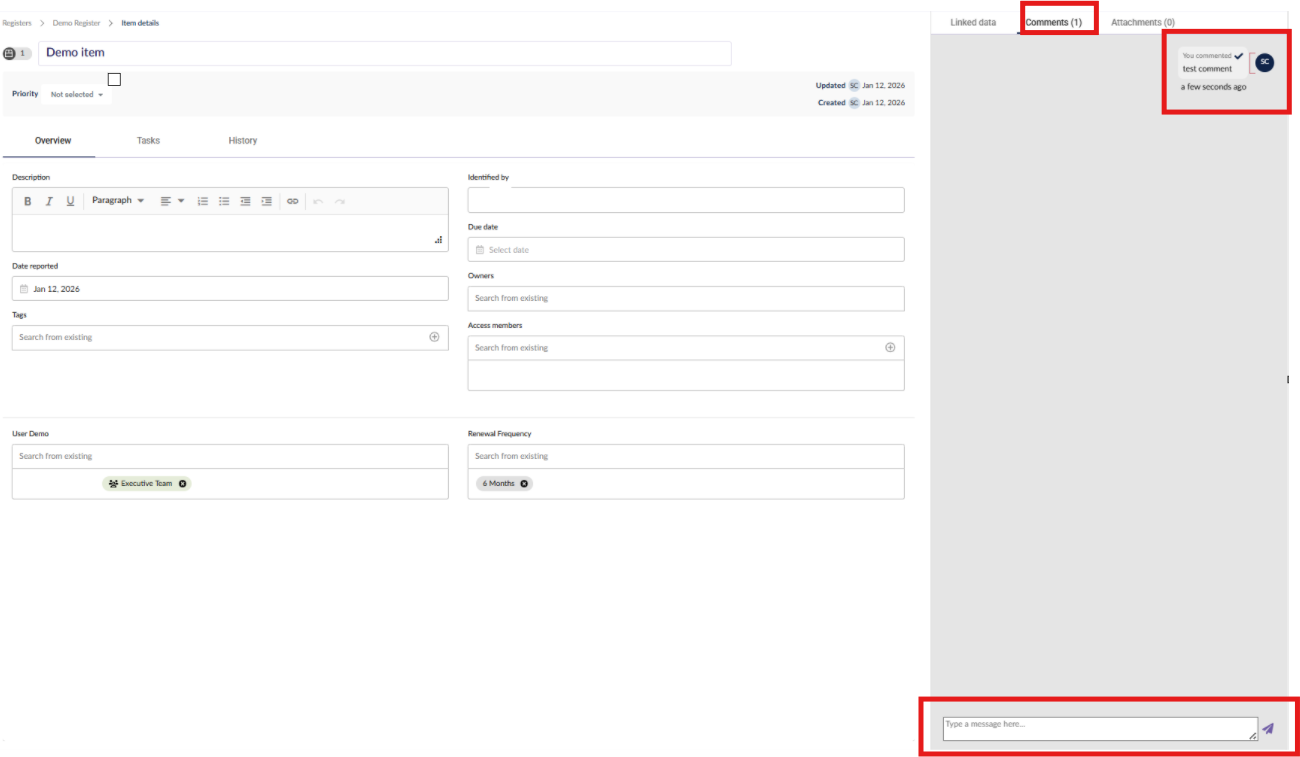
To add a comment:
-
Open the Comments tab
-
Enter your comment in the text field
-
Select the Send icon or press Enter to post your comment.
Posted comments are displayed with the user’s initials and the date and time the comment was added.
All previous comments remain visible in the Comments tab for reference.
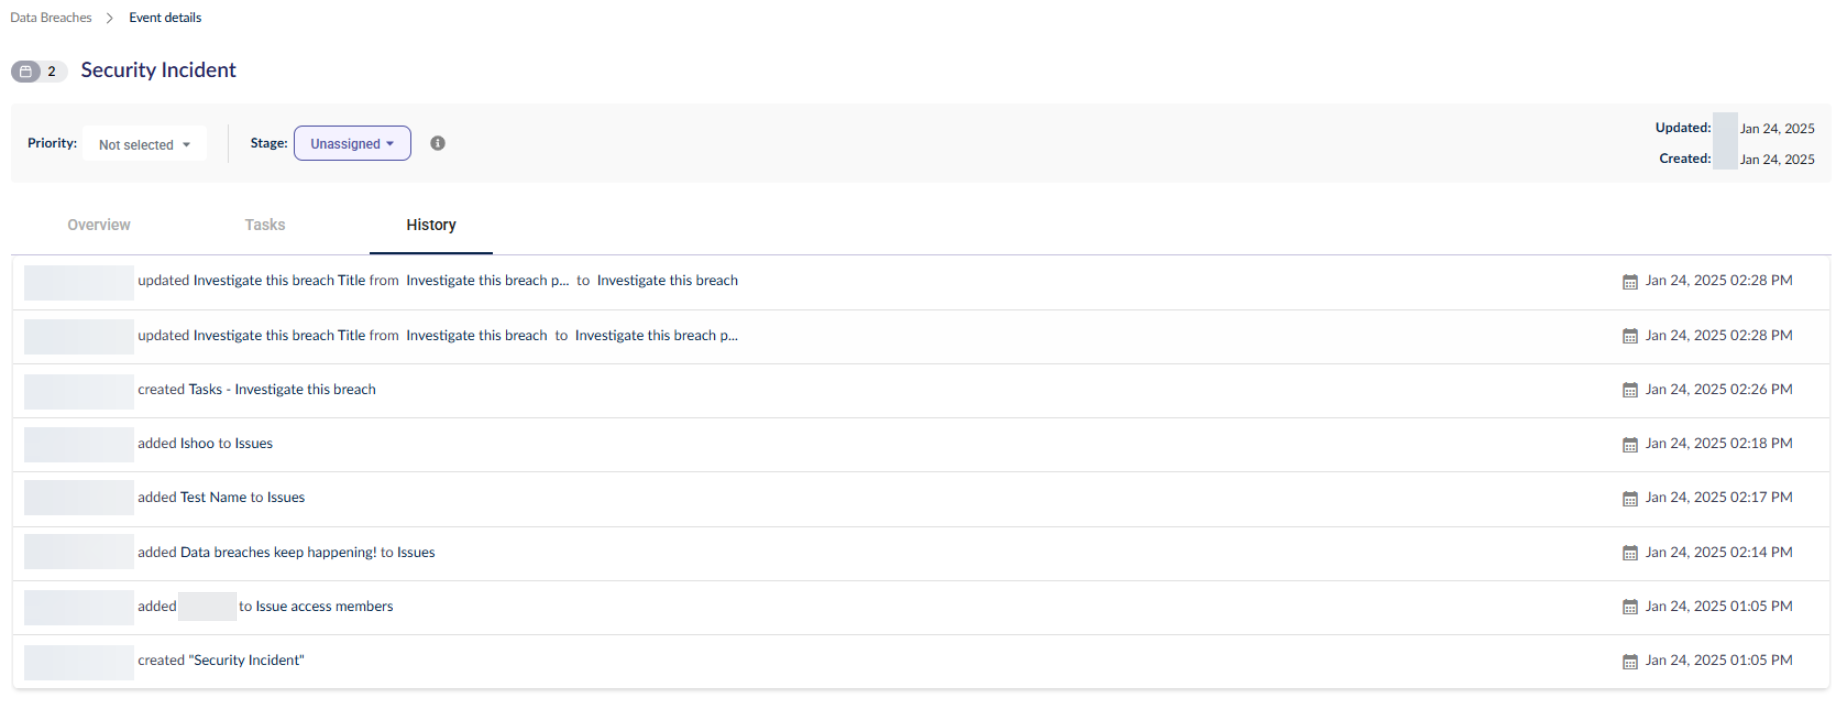
History
The history tab is read-only and shows the changes that have been made to this record.
Bulk importing records or tasks using spreadsheets
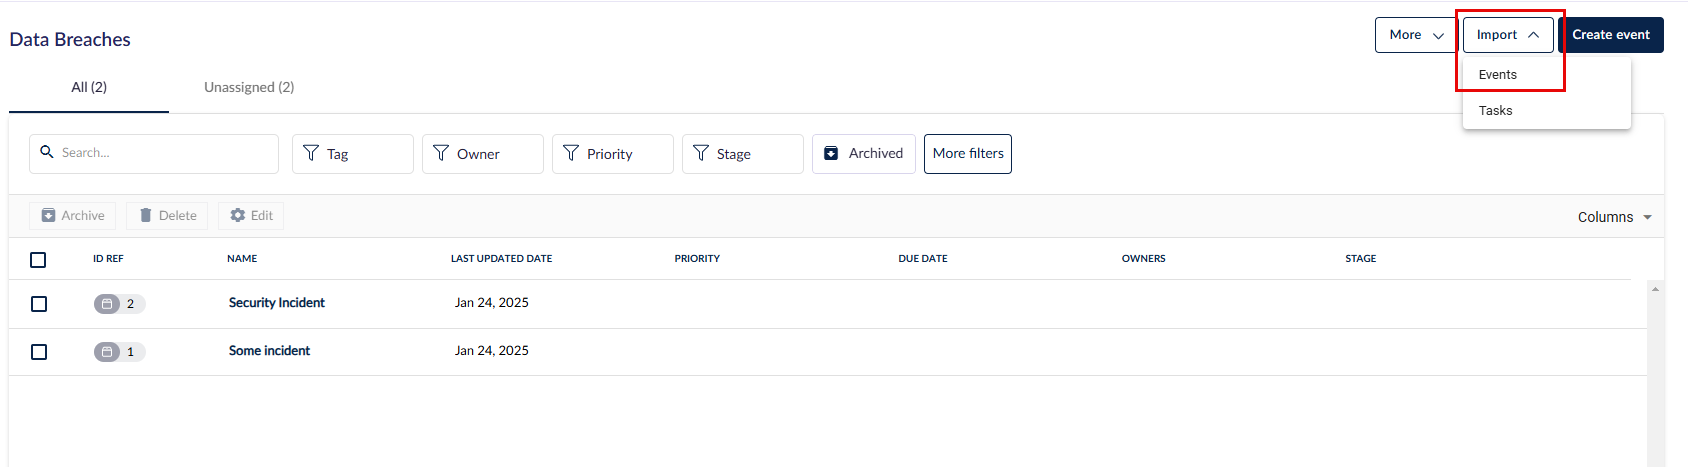
In the register where you want to import records, select Import > Items (or whatever it was renamed to).
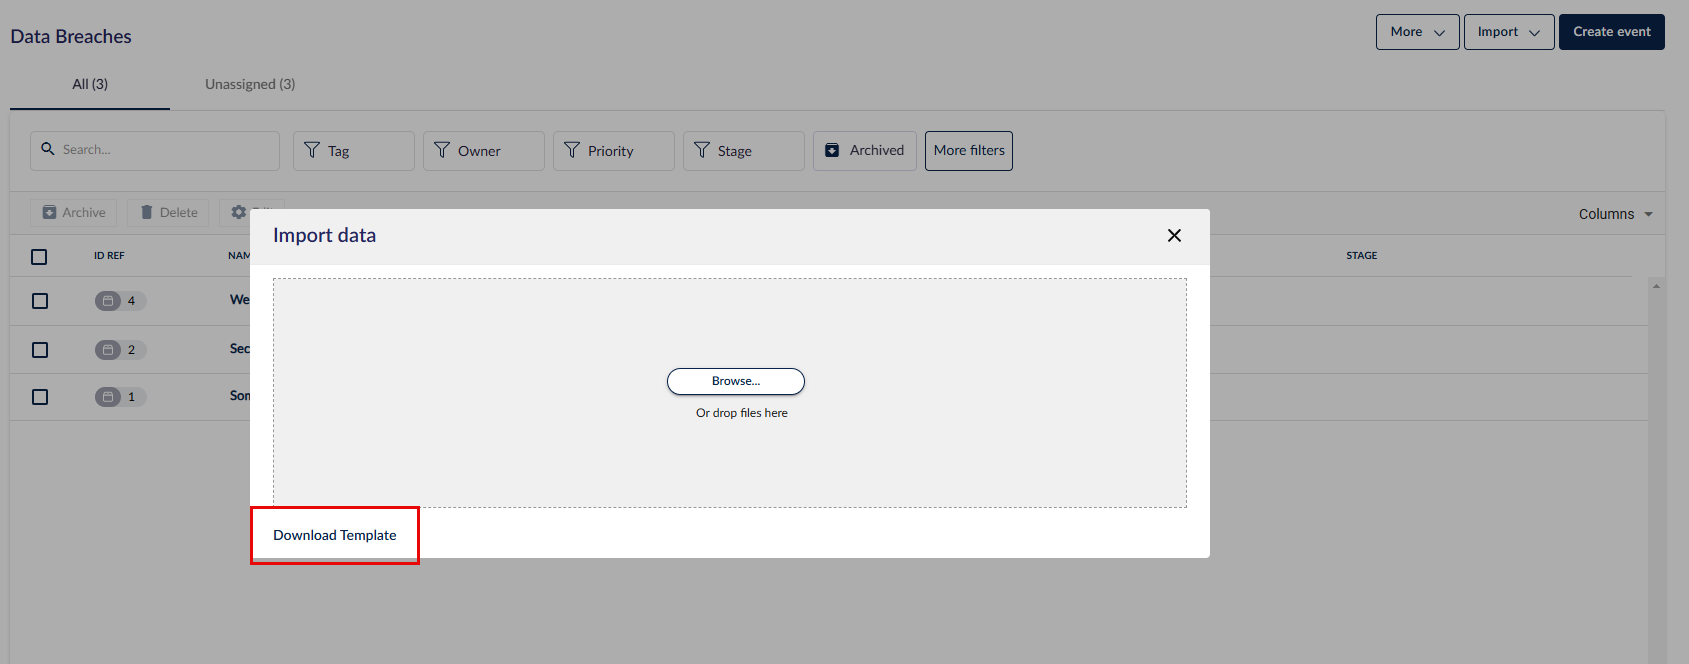
Select Download Template to grab the template.
The template will be dependent on the columns that are in the register. It has the following headings, but may have more if the register has custom fields.
- Name
- Description
- Stage: Use one of the values as defined in workflows if it's enabled; if this register does not have workflow, then this column will not exist in your template
- Identified By: This is a free text field
- Issue Owner: Add the email address of a user that already exists in your team. If the email of the user does not exist in your team, they will be invited to the platform. To learn the difference between record owners and assignees, head here.
- Associated Tag(s): Use a comma (,) as a separator between multiple tags.
- Date Reported: Add the date the issue was reported. Ensure the cell is in text format and the date is in DD/MM/YYYY, e.g. 27/07/2024.
- Priority: Use one of the existing options:
- Immediate
- High
- Medium
- Low
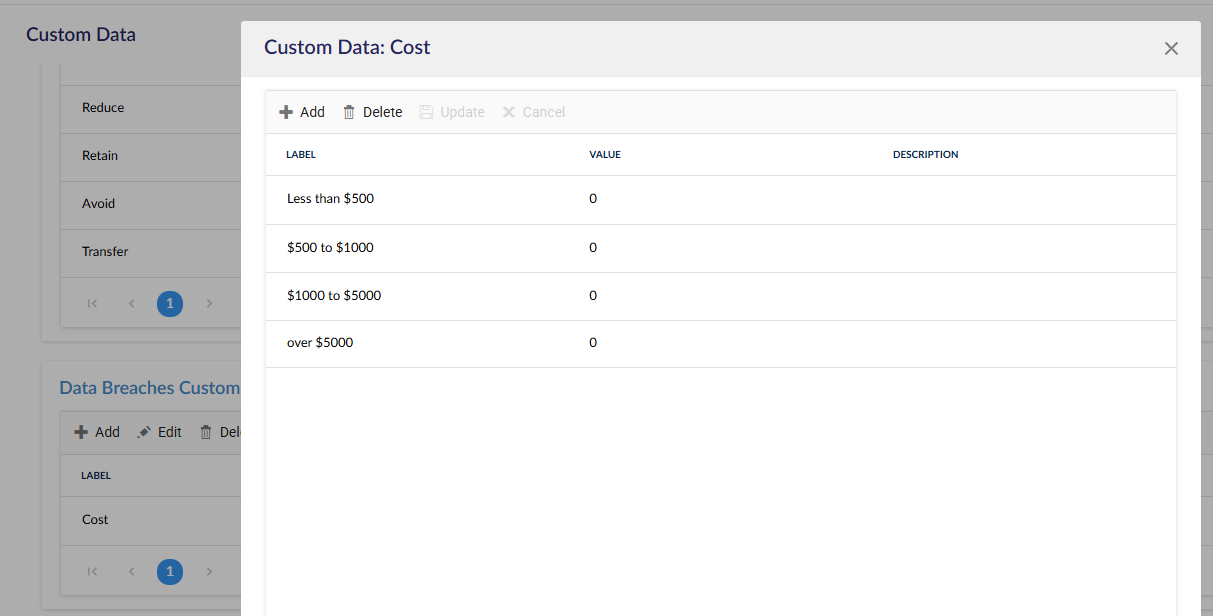
Custom fields will be populated as columns after default fields in the template. An an example, earlier in the article we added a custom field called 'Cost' of the type 'Dropdown', so in our template we will find the column Cost.
You can enter your data in each cell by following the below formatting.
- For free text type fields, you can add any text you like.
- For dropdown type fields, you must enter the name of a selectable option in the defined dropdown list. The text must match identically and is case-sensitive.
- For multiselect type fields, you must enter the name(s) of the selectable option(s) in the defined dropdown list separated by a comma (,). The text must match identically and is case-sensitive.
- For rich text type fields, you can add any text you like.
- For date type fields, use DD/MM/YYYY. Make sure the cell format is text e.g. 27/07/2024.
- For number type fields, use any number, including decimals. Text and special characters are not allowed.
Do not change the template's formatting or move the columns around as this may cause the import to fail.
When you are done, drag & drop or Browse to import the records into your register. Once the file is ready to be uploaded, it will show the file name below the Browse button with the text 'Ready to upload,' select Upload. When the import is complete, you may see a confirmation pop-up in the bottom left.

Refresh the page for the new records to populate the table.
To import tasks using a spreadsheet, first ensure that the records that you want to the tasks to be attached to already exist.
Next, select Import > Tasks and Download Template.

![]()
The template has 6 columns:
- Linked Register Item: Add the name of the record the task will be linked to. If you want to add multiple tasks to a record, add each task as its own row in the template.
- Status: Use one of the existing options without spaces i.e. In Progress should be "InProgress"
- Name
- Description
- Deadline: Due date; make sure the cell is in text format and the text is DD/MM/YYYY e.g. 27/07/2024.
- Assign Owner: Add the email address of a user that already exists in your team to populate the field Assignee. If the email of the user does not exist yet in your team, they will be invited to the platform.
Once you are done, select Import > Task again and add the populated file. Once the file is ready to be uploaded it will show the file name below the Browse button with the text 'Ready to upload', select Upload.
Once the import is complete, you will see a confirmation pop up at the bottom left. Click into a record that had tasks added to it via the import and you should find the task/s in the Tasks tab.
Hailey AI Import for Registers
The Hailey AI Import feature enables users to import register items directly from policy documents using AI-powered extraction. Supported document formats include PDF, DOCX, and XLSX files.
This feature uses the same Hailey import experience as other modules across the platform.
The Hailey AI Import option is available alongside the existing Excel-based import (via More > Import) and does not affect current import workflows.
Key Capabilities
- Import register items from policy documents using AI extraction
- Available for all custom registers
- Supports multiple file formats:
.doc,.docx,.pdf,.xlsx - Displays real-time progress, success, and error states
- Allows cancellation of in-progress imports
- Maintains consistency with existing Hailey import UI patterns
Enable Hailey AI Import (One-Time Setup)
Before using the feature, ensure that Hailey AI Import is enabled for the desired register:
- Navigate to Registers
- Locate the register you want to import data into
- Click the Settings icon for the selected register
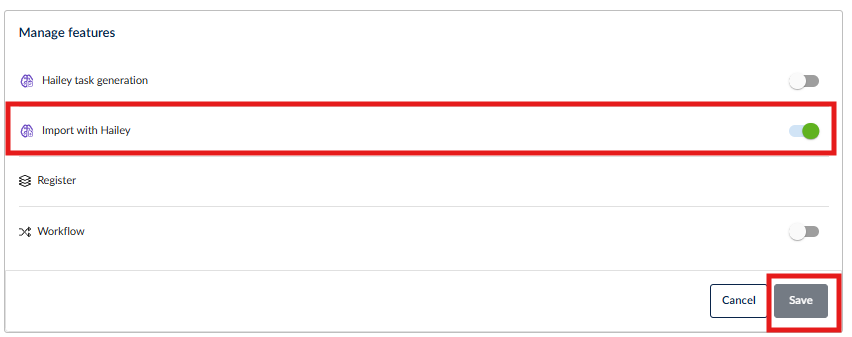
- In the Manage Features window, click the Edit (Pencil) icon
- Toggle Import with Hailey to On
- Click Save

Once enabled:
- Navigate back to the policy register
- Select Import, then Items
- Choose the Import with Hailey option
- Upload the file and select Import to proceed


Once the import is successful, the page will automatically refresh, and the extracted data will populate the appropriate register fields or columns.
Permissions
For an in-depth explanation of each permission, head here.
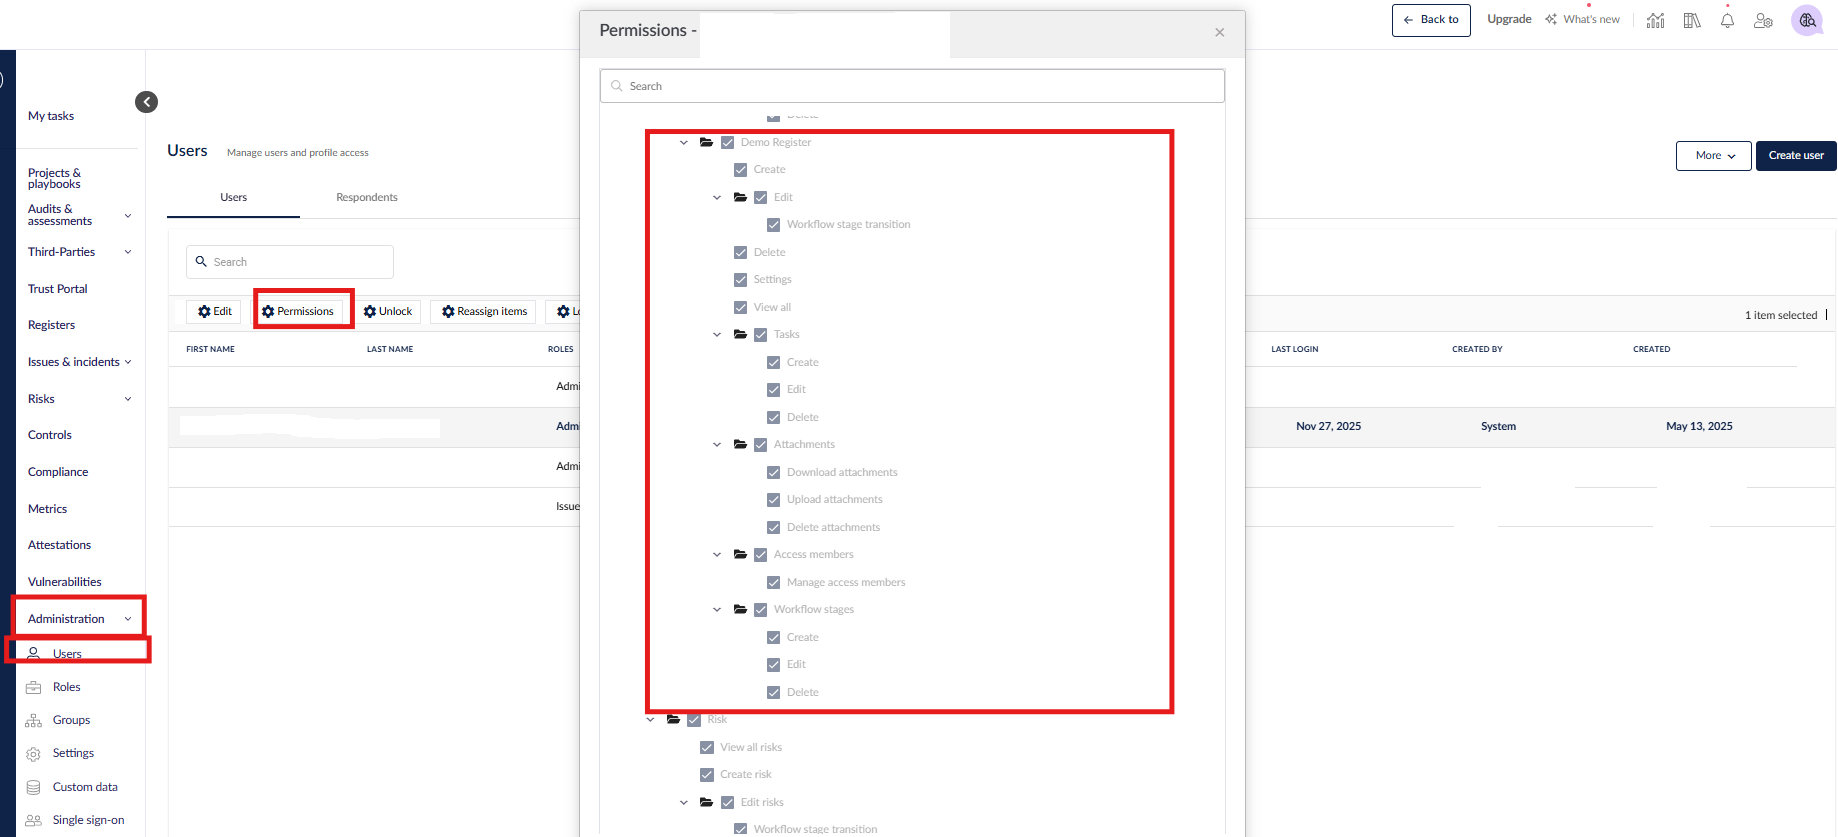
Go to Administration and then either Users to edit permissions for specific users, or Roles to edit permissions for all users with a particular role.
The permissions list is updated when a custom register is created, renamed, or deleted.
Each custom register has its own set of permissions.
Access to registers
Each custom register has the following access permissions.
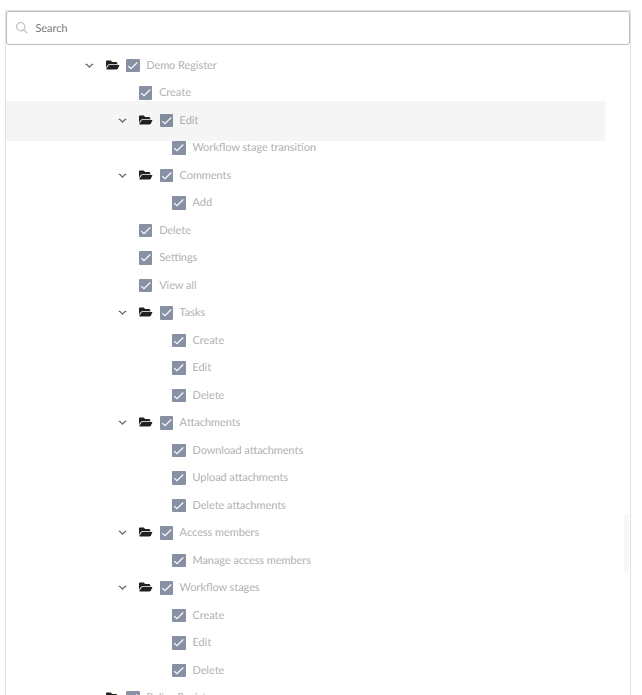
The permission folder named after the custom register allows the user to see the register in the Registers module.
The Settings permission allows the user to see the entire Settings page, including being able to use the toggle to enable/disable workflow stages for this register. However, this is separate from whether the user can click into the workflow stages screen.
The Tasks permission enables the Tasks tab for all records in the register. For example, you may want to turn off this permission for every role if tasks are not applicable to a specific register.
The Attachments permission controls a user’s ability to manage register attachments. This includes the ability to download, upload, and delete attachments. If all three permissions are enabled, the user will have full attachment management capabilities. If only specific permissions are granted, the user’s actions will be limited to those selected options.
The Comments permission controls a user's ability to view and submit comments.
Access to register records
The View all permission allows the user to see all the records within a custom register that they have access to. Without this permission, the user can only see the records to which they are assigned as access members.
The Access members permission allows the user to see the Access members field within a specific record. The Manage access members permission allows the user to edit the content of the field, i.e. adding or removing access members to the record.
Access to managing workflows
Each custom register has the below workflow permissions.
