User groups
Learn how to streamline managing access to records with user groups
This article will cover how to create and edit user groups. Groups streamline managing access to records by providing the ability to group users together and assign the group as a whole.
If your organization utilizes the Hub & Spoke architecture, you can use user groups at the Hub level to manage spoke access.
Table of contents:
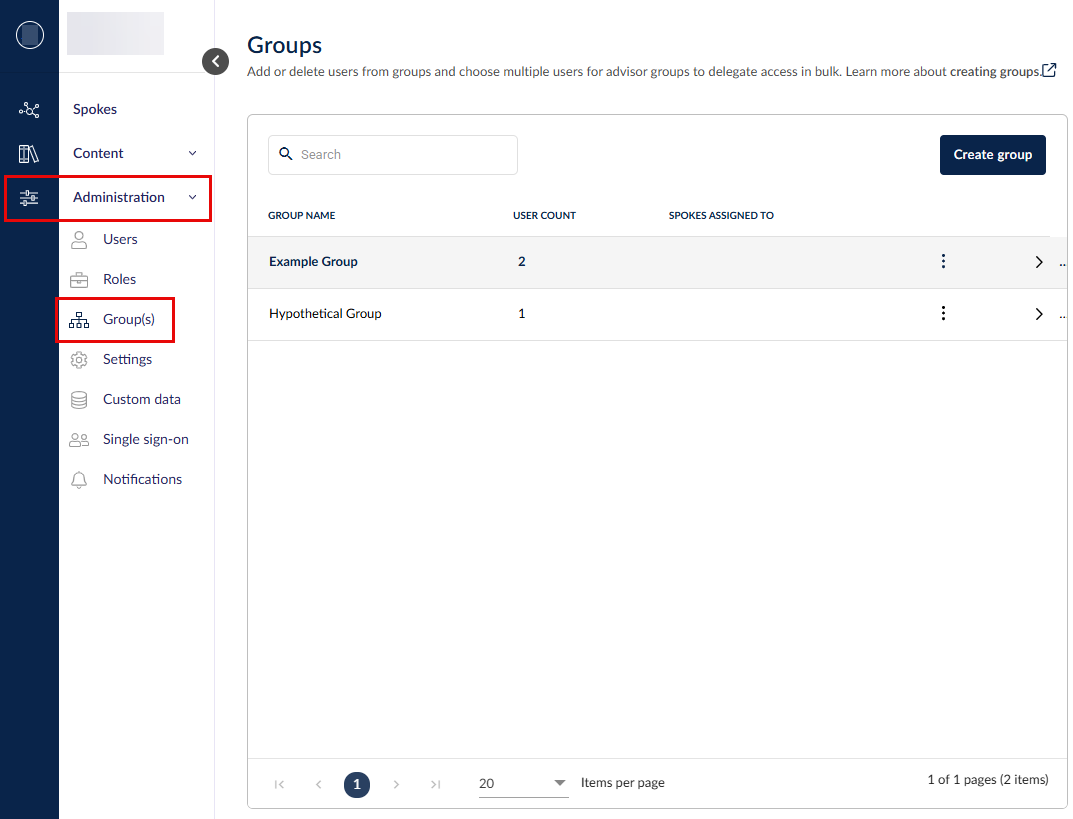
Select Administration > Group(s) on the left to get started.

Creating, editing, or deleting a group
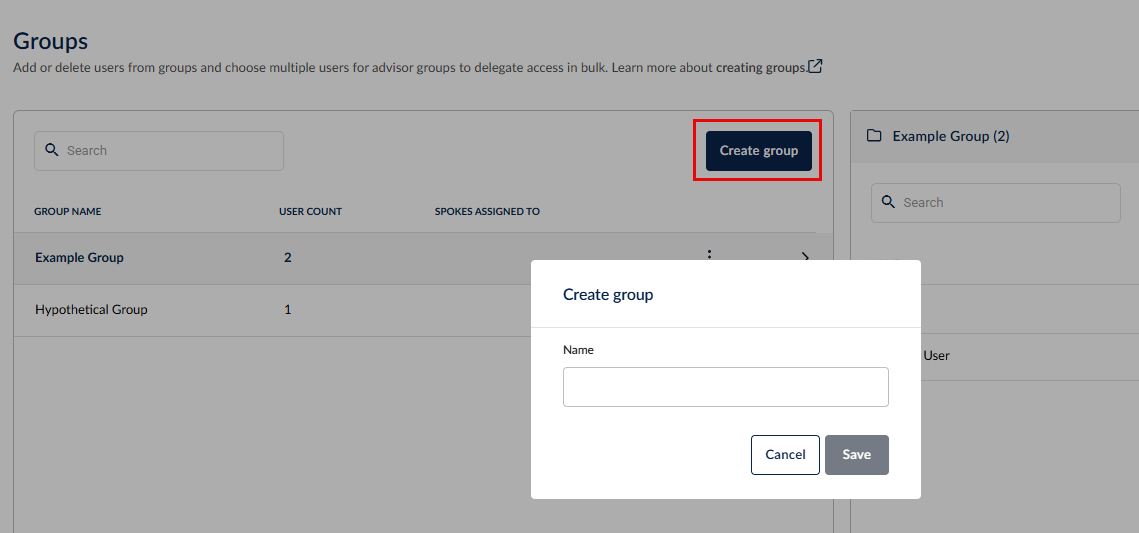
To create a group, click Create group and enter the name of the new group.

To edit or delete an existing group, click on the 3 dots to its right.
If you are deleting a group, you will see this warning.

To check the records that are assigned to a group, you can use the 'User Assignment Report' available in the Analytics module.
Managing group users
Select the relevant group to display all users assigned to that group.
To add a user(s) to a group, select the group, click Edit users, select the user(s) and then click Save at the bottom of the list to add them to this particular group.
To remove a user from a group, select Edit users, unselect them and Save.
Assigning a group
Groups can be assigned to records and custom registers using the relevant user dropdowns. You can also assign groups to one or more questions in an assessment or in an assessment template. If a group is assigned a question in an assessment template, notifications will not be sent to the group members until an assessment is created and published from that template.
To learn about the differences between owners and assigned members, head here.
If a group is assigned a task, e.g. a control responsibility, each user in the group will need to individually complete the task, i.e. one user from the group completing the task does not complete the tasks belonging to other users in the group.
For more information on managing users within 6clicks:
Learn how to create new users and handle inactive users here.
Learn how to manage user roles and permissions here.
For more information on how the 6clicks Hub & Spoke model supports user access management, click here.

