This article outlines user functionality in a Spoke.
If your organization utilizes the Hub & Spoke architecture, and you are working in the Hub, the only type of user at the Hub level is Users. See the instructions below for creating and managing Users for both Hub and Spoke and for creating and managing Advisors and Respondents in a Spoke.
The article for managing user access at the Hub provides more information for Hub users and how to provide advisor access to the spoke environments.
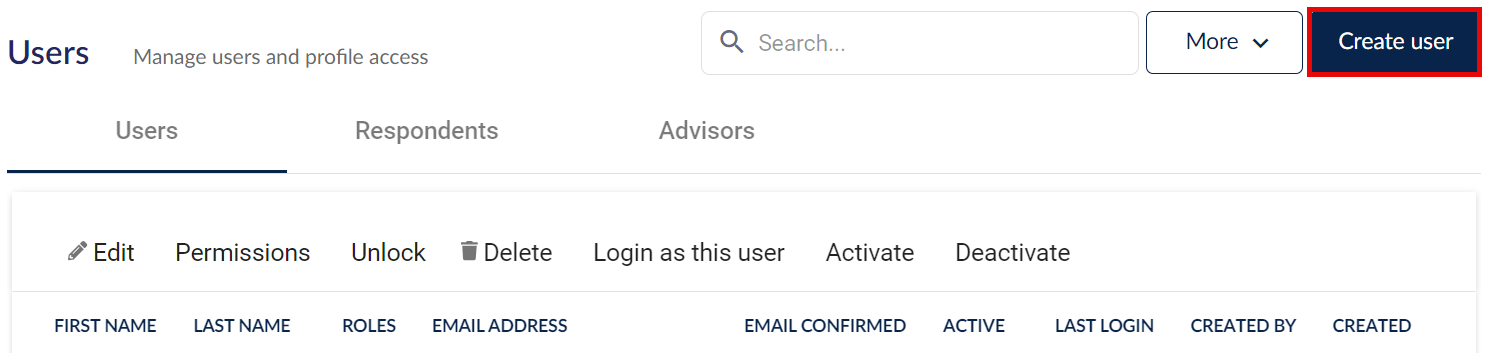
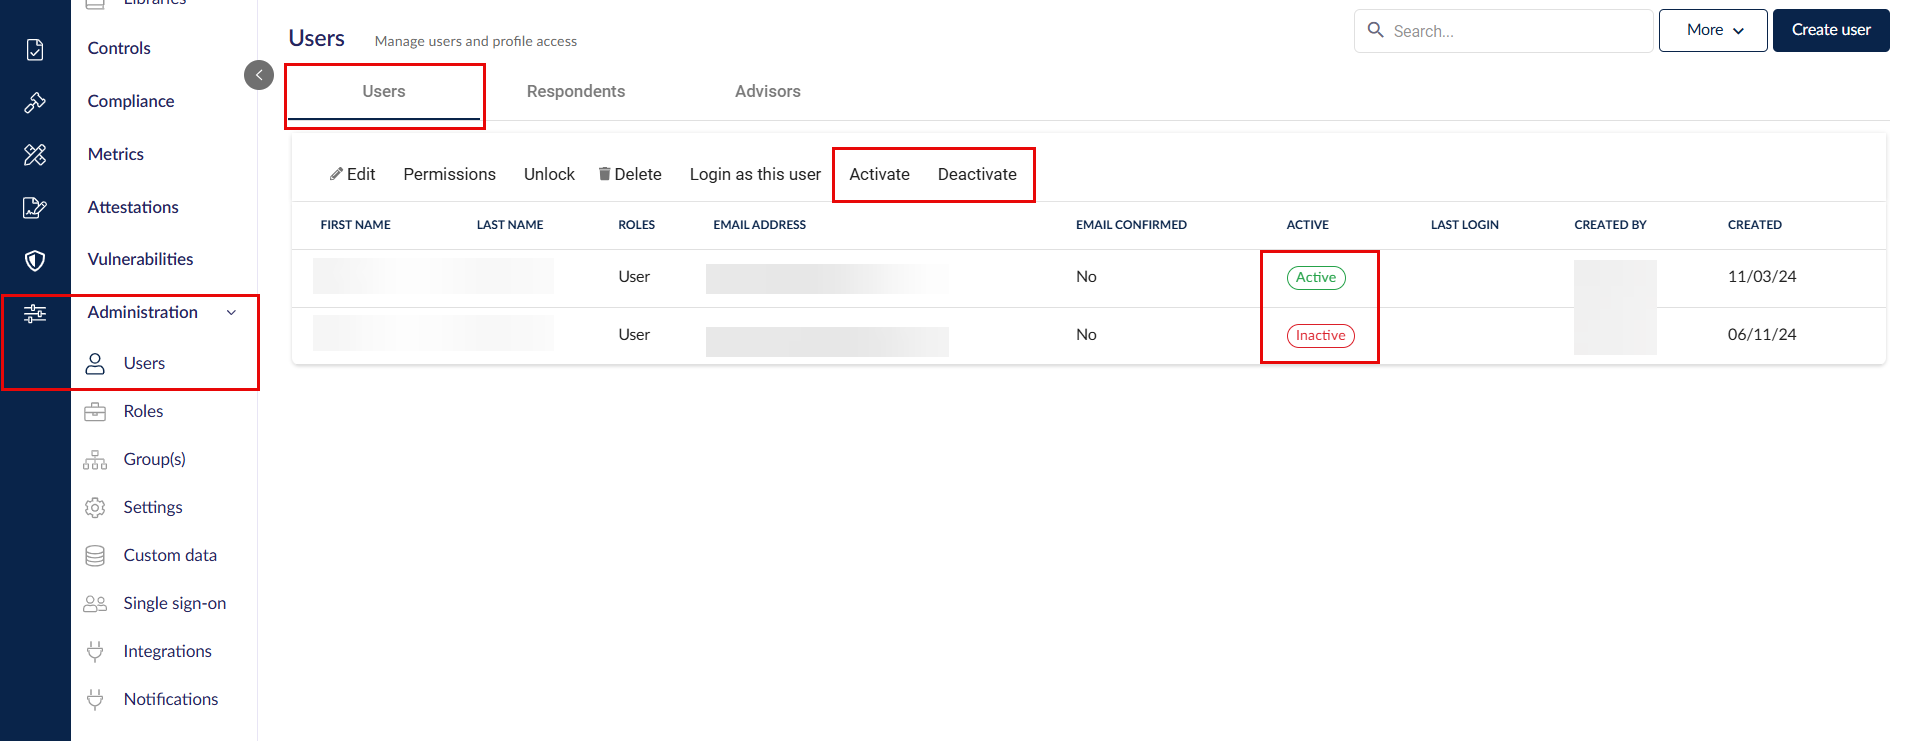
At the spoke level, you will find 3 types of users in their respective tabs in Administration > Users which are Users, Respondents, and Advisors. The Hub level has one type of account, Users.

A User can log into the spoke and work with the different modules within your environment. This article discusses this type of user only, in the 1st tab.
A Respondent is someone you wish to assign tasks within your tenant and can be someone internal or external to your organization. These respondents are considered response-only users and will only see the tasks assigned to them within your 6clicks spoke. This linked article will guide you through Managing respondents.
An Advisor is a user or administrator at your hub that you wish to have administer one or multiple spokes, depending upon your configuration. This linked article will guide you through providing advisor access to a spoke.
Creating new users
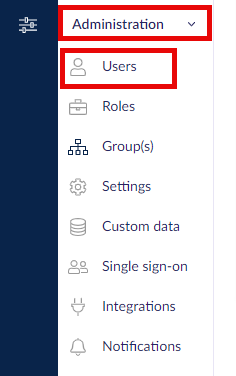
Select Administration, then Users from the left navigation panel.

From the Users screen, select New User at the right of the top panel.
Add first name, last name and email address.
Default options are ticked, change only if required.
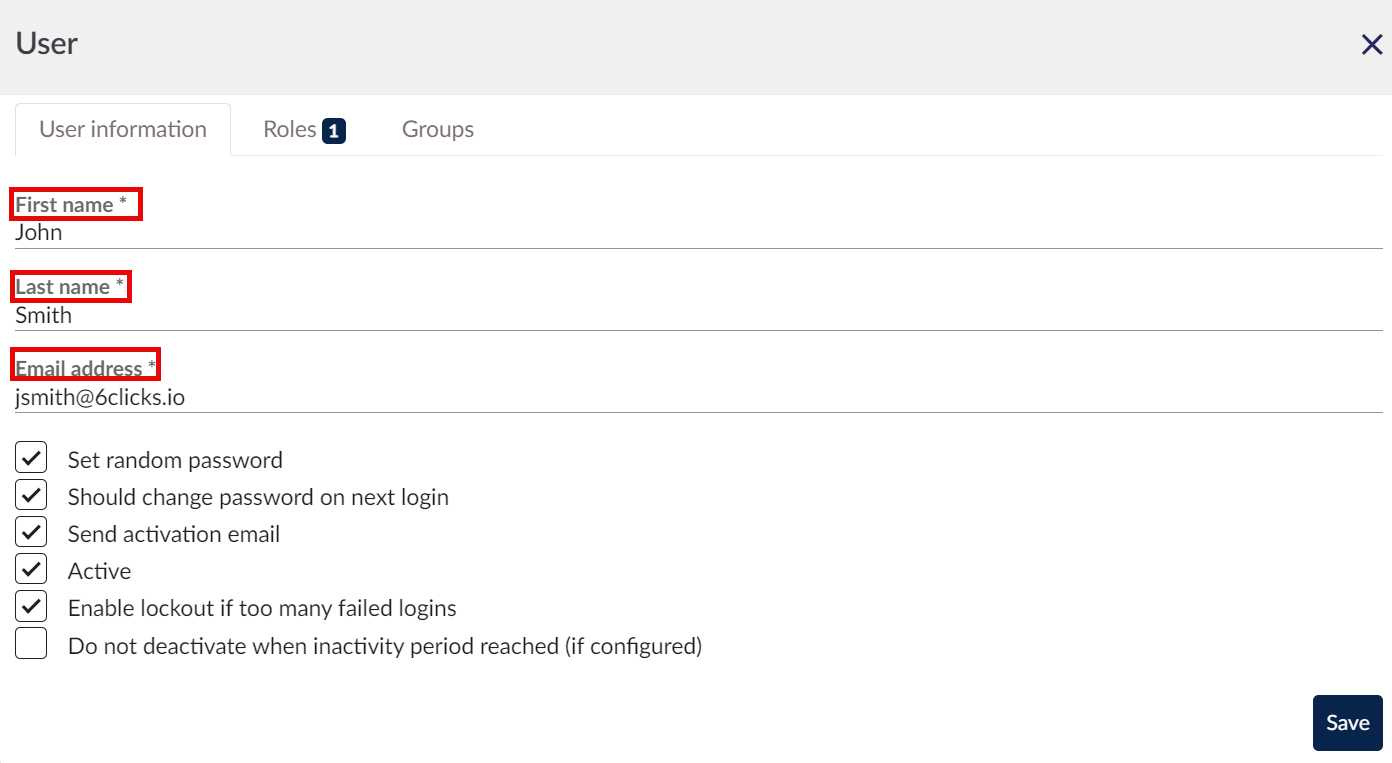
Ensure Active is ticked if the user is to access 6clicks from the activation email without any further steps required.
After clicking Save, the new user will appear in the Users List and the user will be sent an activation email.
Bulk importing new users
Select Administration, then Users from the left navigation panel.
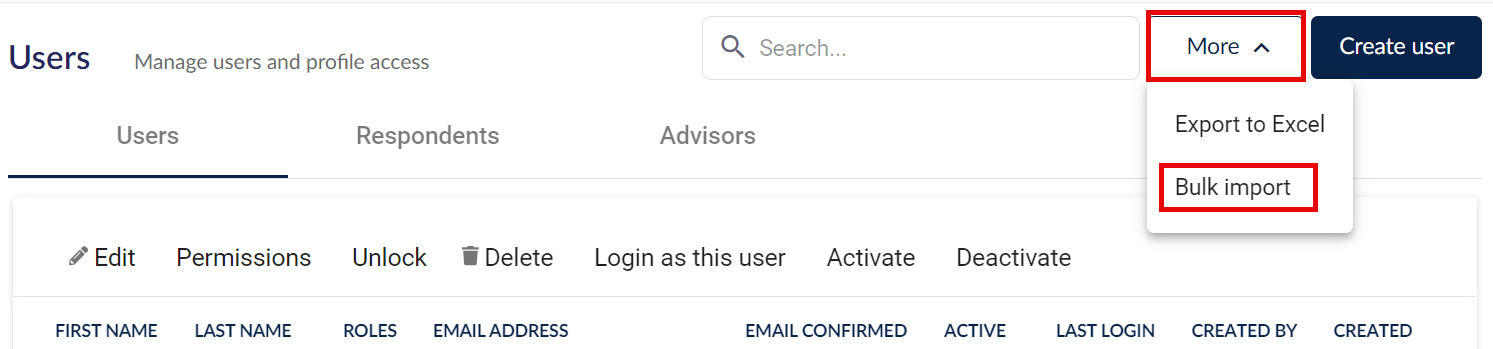
Select More and then click Bulk import. You will download and edit the template to add in the complete user profile for your users and then import that file into your environment.
Click on Download Template.
The Import Users Template you downloaded contains column headers that correspond to the required user fields. Complete each column with the appropriate information as outlined below.
Field Descriptions
Email Address
Enter the user’s email address.
First Name
Enter the user’s first name.
Last Name
Enter the user’s last name.
Roles
Enter the role(s) assigned to the user.
You can view available roles in your environment by navigating to Administration > Roles from the left-side navigation panel.
- Multiple roles may be assigned to a user.
- Separate multiple roles with a comma, as shown in the downloaded example template.
Groups
Enter the group(s) the user should be associated with.
Groups must already exist in the environment before importing users.
You can create or manage groups by navigating to Administration > Groups from the left-side navigation panel.
- Multiple groups may be assigned to a user.
- Separate multiple groups with a comma, as shown in the downloaded example template.
Active
Specify whether the user should be active immediately after import by entering Yes or No.
Note:
Users marked as Active = Yes will receive an activation email and gain immediate system access based on their assigned roles and groups.
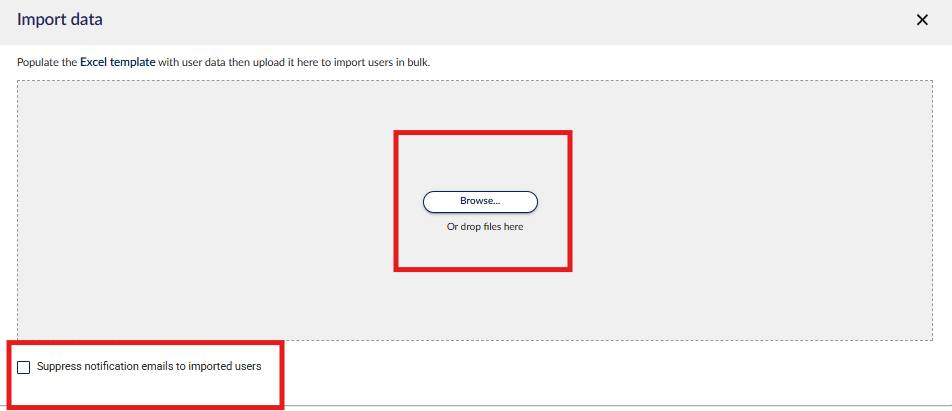
If the option Suppress notification emails to imported users is selected, activation emails will not be sent automatically.
Additionally, if:
- Active = No is specified for imported users, and
- Suppress notification emails to imported users is enabled; those users will not be able to access the system until they have been made active and an activation email is sent manually from the User Edit screen.

Once you have populated your user template file, save and close it.
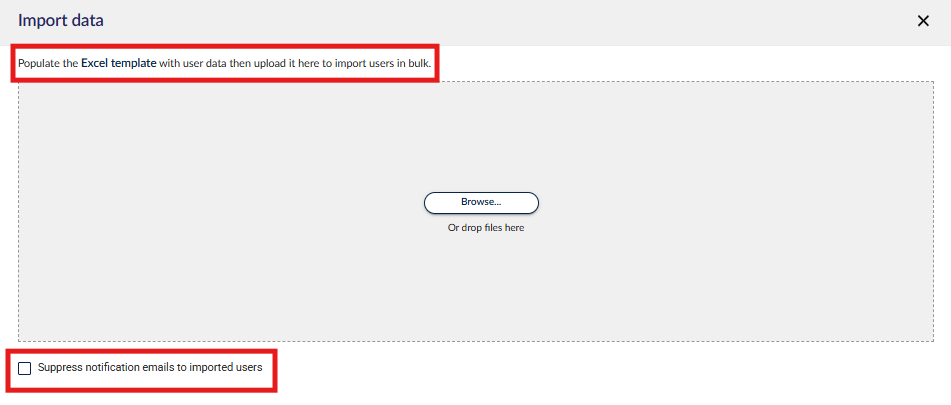
In the Administration/Users module select More and then click Bulk import.
Select the Browse button to navigate to and select your file or drag and drop it into the space provided below Browse.
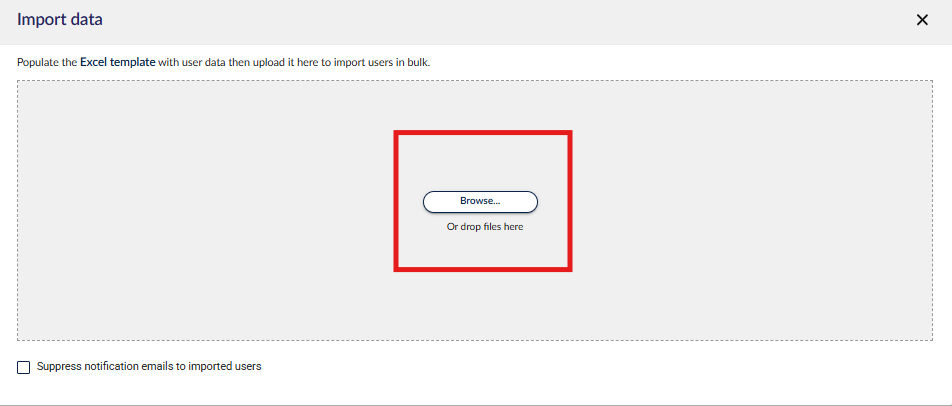
Once the file is ready to be uploaded, it will show the file name with the text 'Ready to upload.' Select Upload. Note: If you do not want users to receive an activation email at this stage, ensure that the Suppress notification emails to imported users option is enabled before completing the import.
The new User(s) will appear in Users List as Active/Inactive based on the import.
Learn more about 6clicks Administration functions, or Team Management.
Deactivating users
You can set users as 'inactive' in Administration > Users. Inactive users cannot login to the application.
When deactivating a user, you can reassign their items to another user.
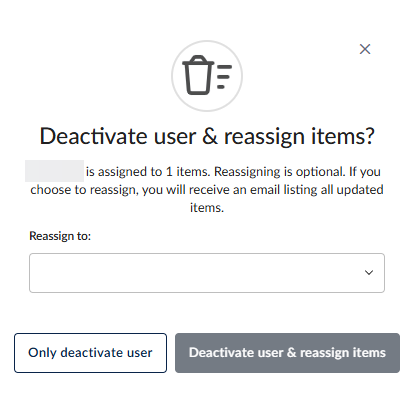
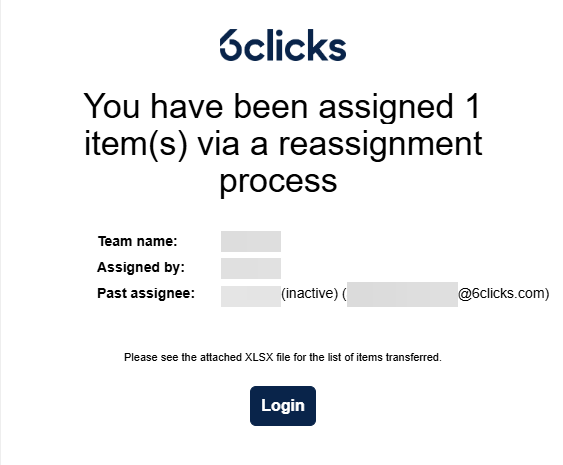
The user who receives the reassigned items will receive an email outlining the reassignment changes. Administrators will also receive an email.
An 'inactive' label is shown next to users that are inactive.
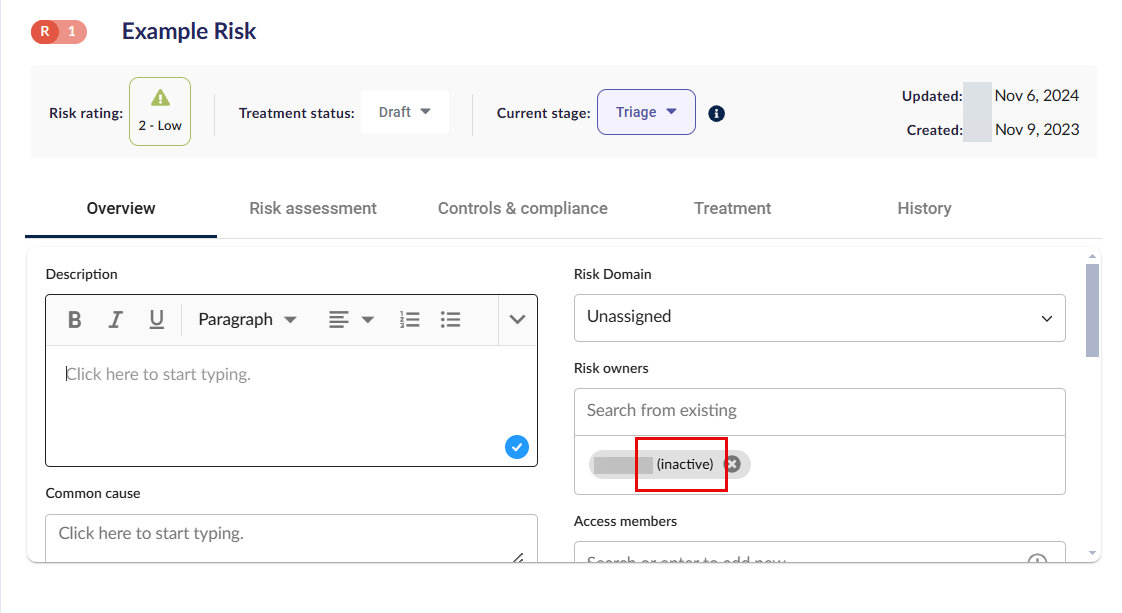
If a user is already assigned to a record, and they are made inactive, they will remain assigned to the record.
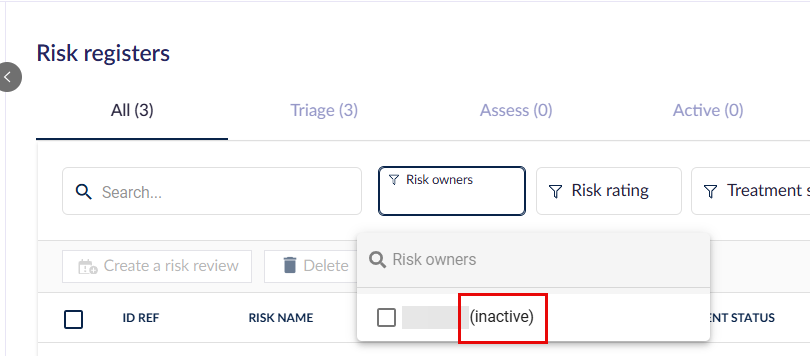
You can filter records based on inactive users.
Inactive users do not receive email notifications.
If the environment has SSO enabled, and a user is removed from the IdP group which allows them access to 6clicks, their 6clicks user will remain but the user will no longer be able to log in. Instead, the user will encounter the generic IdP error 'your administrator has not given you permission to access this application'.
If the environment has SCIM enabled, and a user is removed from the IdP group which unsyncs them from 6clicks, their 6clicks user is deactivated. Tasks assigned to the user will be automatically reassigned to the default reassignment user if configured.
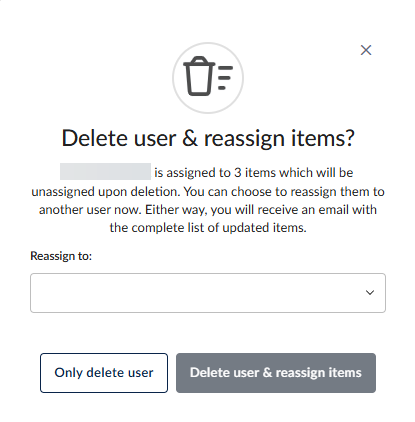
Deleting users & bulk reassigning tasks
When deleting a user from the platform, you have the option to reassign their tasks and review comments to another user. This ensures a smooth transition and prevents any disruption to ongoing work.
To set a default reassignment user in advance for any future reassignment, navigate to the Users window, click More and then select Settings. In the settings window, choose the user to whom the tasks should be reassigned and save your changes. This user will automatically be selected for future reassignments unless manually changed.

Alternatively, you can delete a user directly from the Users window and you will be prompted to reassign the tasks assigned dynamically. Select the user you want to remove, confirm by clicking Delete, and selecting Yes. You will then be prompted to choose a reassignment user. Once selected, click Delete user and reassign items to complete the process.
These actions are supported for both standard sign-ins and Identity Provider (IdP) sign-ins.
The user who receives the reassigned items will receive an email outlining the reassignment changes. Administrators will also receive an email.

For more information on managing users within 6clicks:
Learn how to manage user roles and permissions here.
Learn how to create and edit user groups to streamline managing access to records here.
Learn more about user management from the Hub & Spoke perspective here.