6clicks has released a feature that centralizes how customers can manage Risk and Risk Assessment fields. For existing customers who wish to use this new feature, follow the below steps.
This article does not include instructions on how to access and configure Risk Fields at the Hub-level. Refer to this article instead.
New customers need not follow these instructions as this capability will be set up by default.
Step 1 - Inform 6clicks Support that you wish to transfer to Hub-managed fields.
To do this, raise a ticket in the Support Portal. This ticket will then be used for all correspondence between you and 6clicks Support who will assist you through the transfer.
For details on how to do this, refer to this article.
6clicks will activate the standard Hub-managed fields in your environment.
The Hub-managed fields will now be enabled across all spoke environments. Doing this will also automatically relabel any spoke-managed fields with the same name.
Step 2 - Configure the required fields within the Hub.
Standard Risk and Risk Assessment fields will already appear within the Hub setting as disabled.
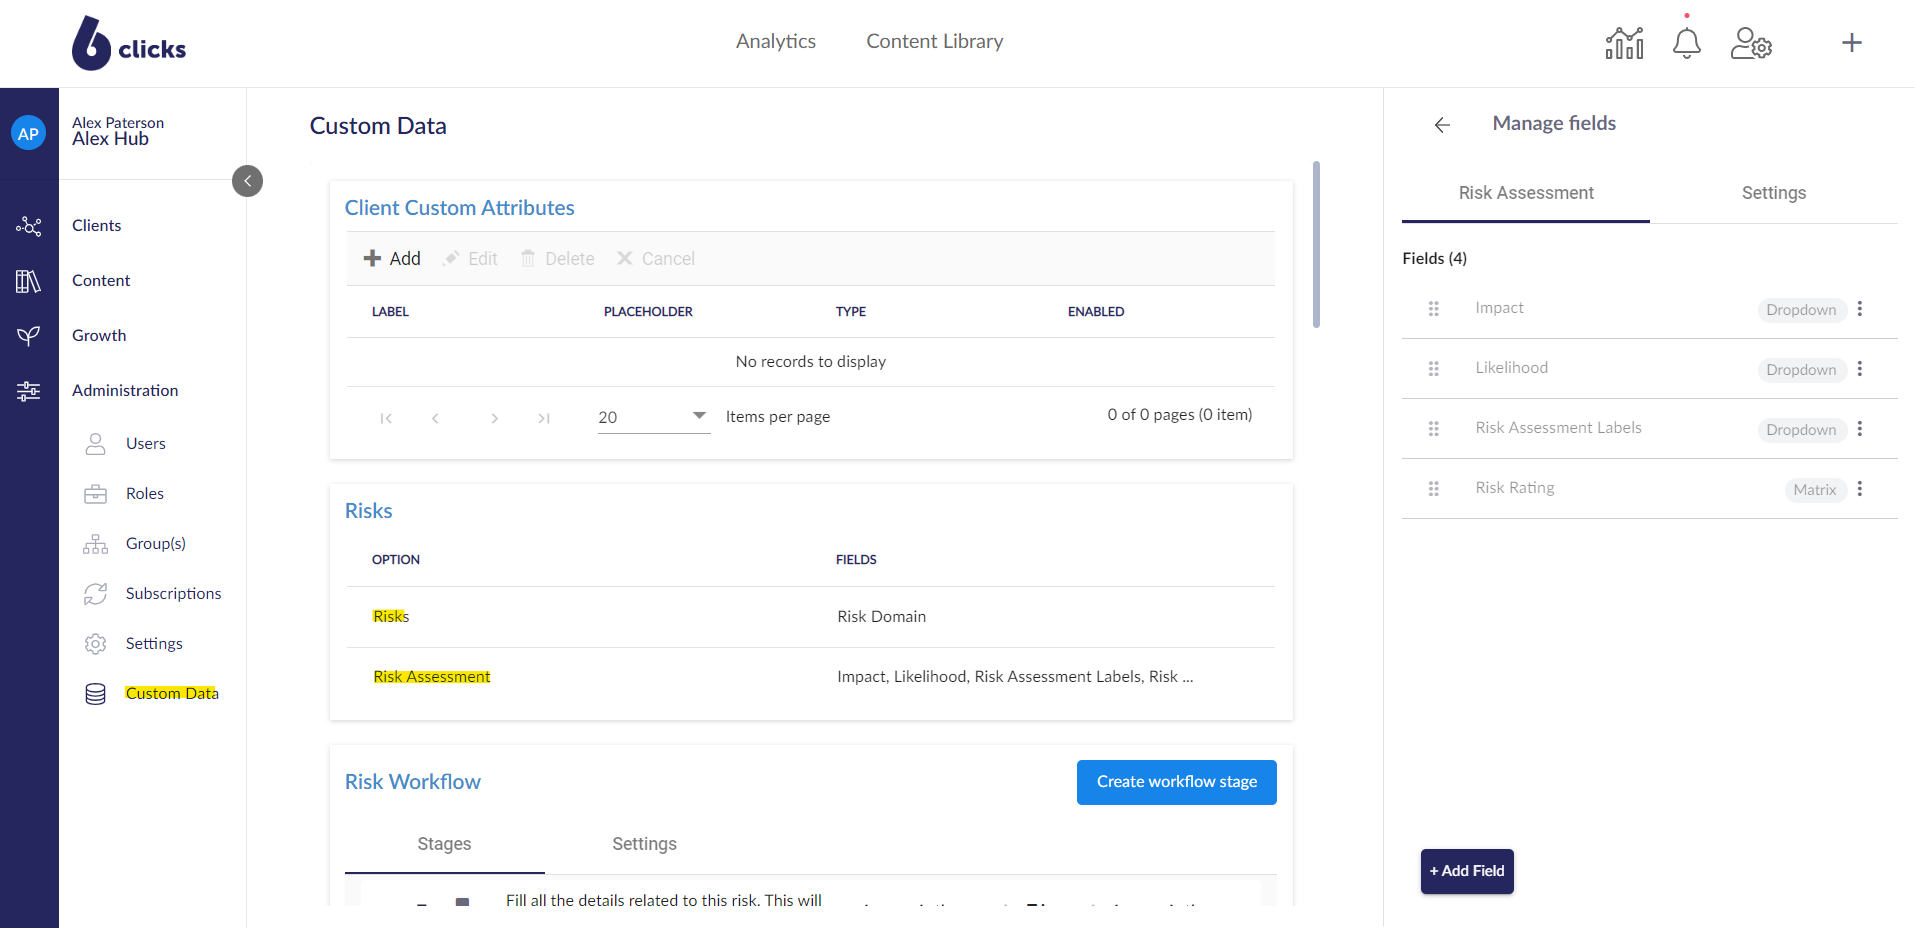
These should be configured to mirror the fields enabled within the spoke environments. This includes the field label and all options within the fields.
In addition to the above, any custom fields that exist within the Spoke environments and need to be transferred should also follow the above step. The key difference being that these must be created within the Hub as they will not appear by default.
You will want to label these to indicate that they are managed from the Hub (i.e. "[Field Name]_Hub") as this will help to differentiate these from similar spoke fields later on.
Not all custom fields need to be managed at the Hub level. 6clicks provides flexibility for some to be managed centrally at the Hub and others to be managed individually by the Spoke.
Learn how to create and configure risk fields and risk assessment fields.
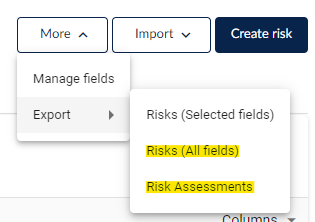
Step 3 - Export your risk registers.
For each spoke, export your risks and risk assessments. To do this, go to the Risk Register and click More > Export > Risks (All fields) and Risk Assessments.
The exports will include columns for both the original spoke-managed fields and the new hub-managed fields.
Step 4 - Transfer data to Hub-managed fields in the export template.
For each spoke's exports, copy the contents of the existing spoke-managed columns into the new hub-managed ones in Excel. You can then delete the existing spoke-managed columns when done.
Step 5 - Re-import the risk exports.
Now that the export templates are ready, these can be used as import templates to update all existing records to use the new Hub-managed fields. This will need to be done for each Spoke.
The below articles cover how to bulk update all risks and risk assessments via Excel import.
Each of the above articles includes instructions on how to update existing records via import.
Once you have completed the import, confirm that data has been re-imported correctly.
Step 6 - Disable/Remove spoke-managed fields.
Now that the data has successfully been moved to the new, Hub-managed fields, you are free to disable or delete the old Spoke-managed fields for each Spoke.
Doing this will ensure that users will not accidentally enter data into these moving forward and will instead use the new ones.