Responding to an assessment using Excel
Learn how to respond to a Question Based Assessment (QBA) using Excel import
This article only describes the Excel import/export functionality for responding to QBAs.
For other information on responding to QBAs, refer to Responding to an Assessment.
Table of contents
Creating an assessment response template
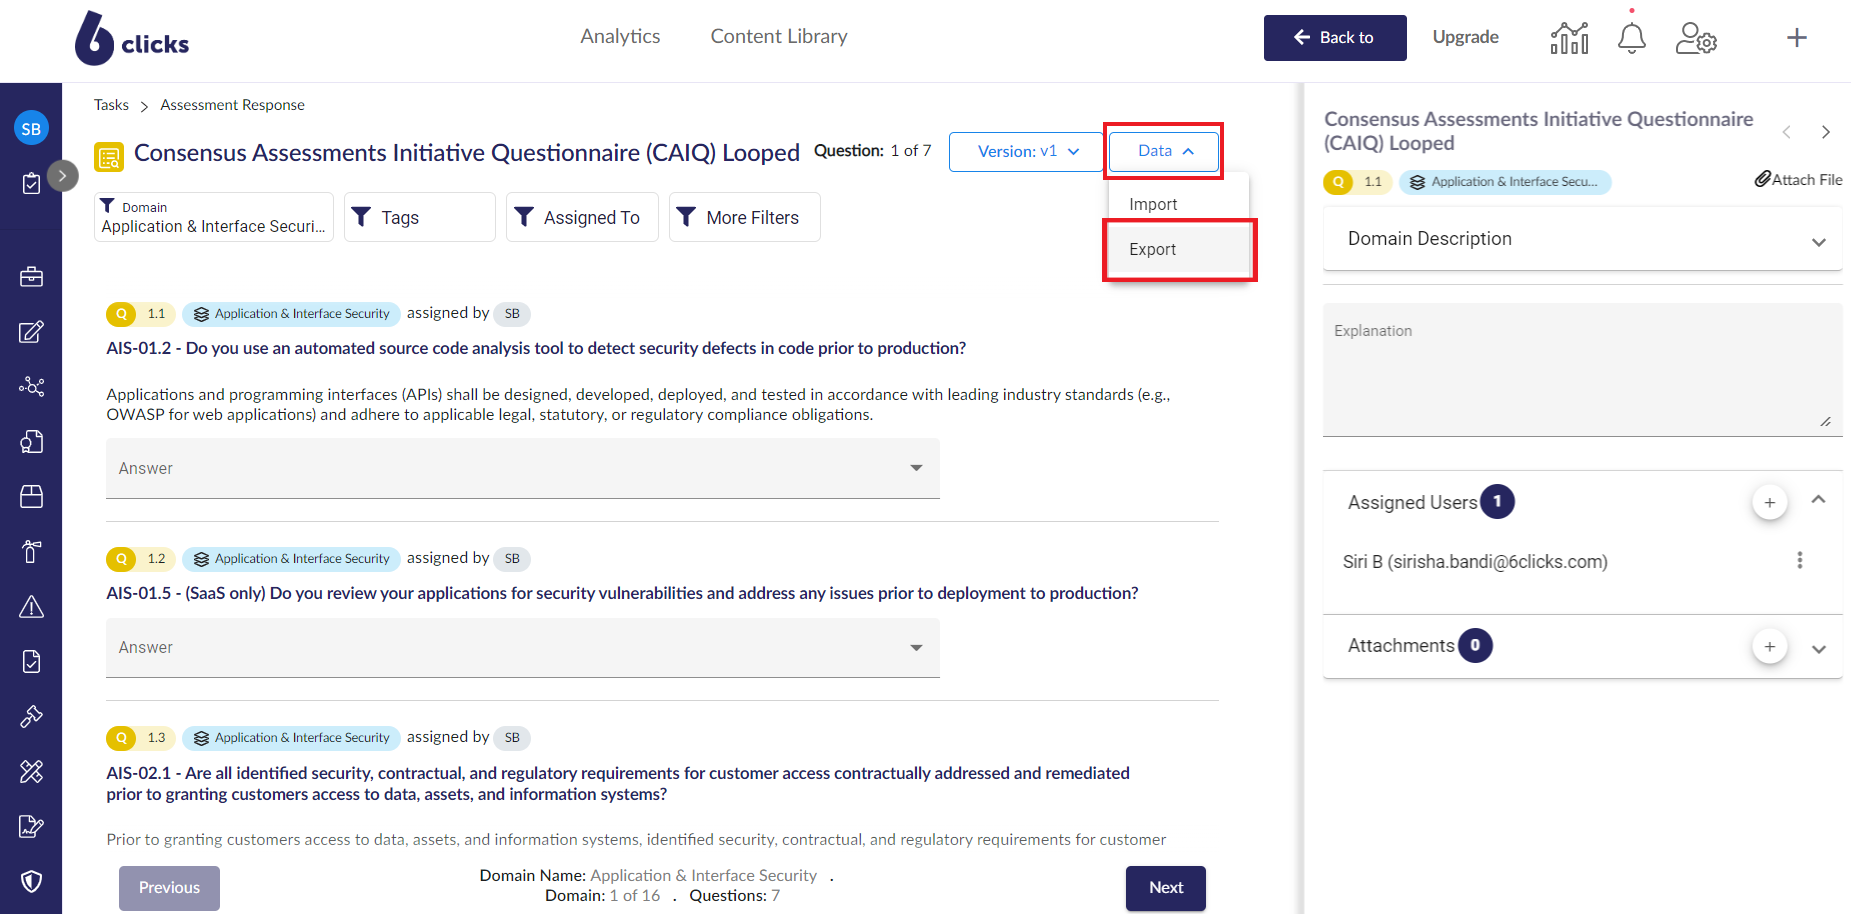
To create a response template, click Data then Export.
This option is available when responding to a Question Based Assessment (QBA).
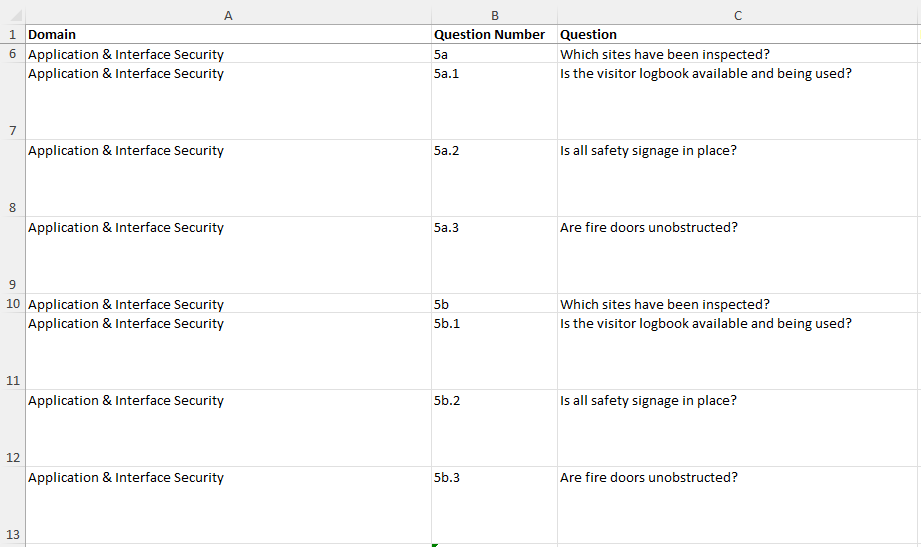
This will generate a tailored template for your response in the below format.
It will include the following populated columns:
- Domain - the domain/section the question belongs to
- Question number - the ID of the question
- Question - the title of the question
- Description - further details of the question
It will also include the following unpopulated columns, which you can fill in:
- Response - captures your response to that question
- Response Explanation - add any additional details or contexts about your response here
Data in the Response column must align with options given in the assessment.
To provide multiple answers for a checkboxes question, provide each answer on a new row.
Handling looped questions
See Assessment Questions Overview for more information on the different assessment question types.
Looped Questions have a dynamic number of responses available and require some manipulation of the response template.
The template will generate with a single response available for the question group.
The 'Question Number' column shows the question group with an alphabetical suffix. Each looped question within this group includes an additional numeric suffix to show its order in the question group.
If you have multiple responses, copy all questions in the group and insert them below (repeat as necessary); e.g. if you have 2 sets of answers, you would have a group of responses starting with 5a and another group of responses starting with 5b.
Finally, edit the alphabetical suffix in the 'Question Number' column for each subsequent loop to reflect its order.
The response template is now ready for import.
Populating the response
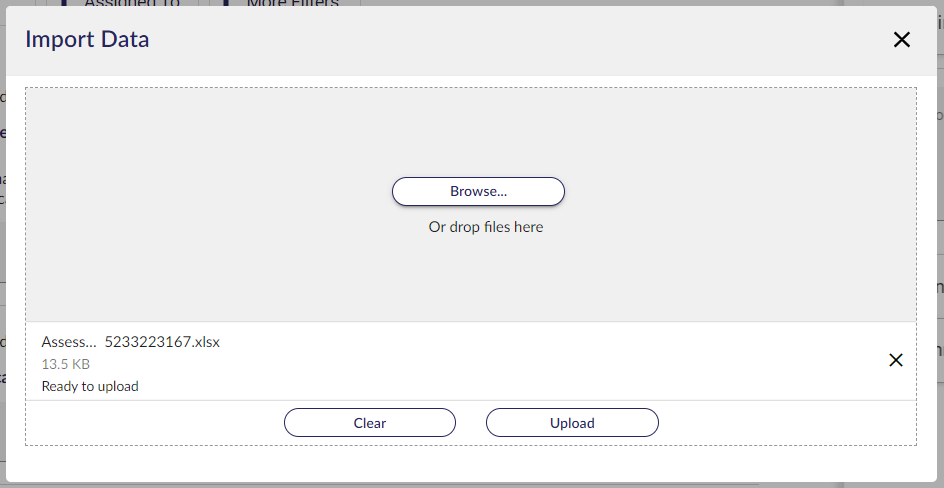
Click Data > Import and drag and drop the response file or browse for it in the file directory.
Click Upload to import the response. The dialogue box will close, and the response data will be loaded into the assessment.
From here, the assessment response can be submitted as detailed in Responding to an Assessment.


