Creating the form
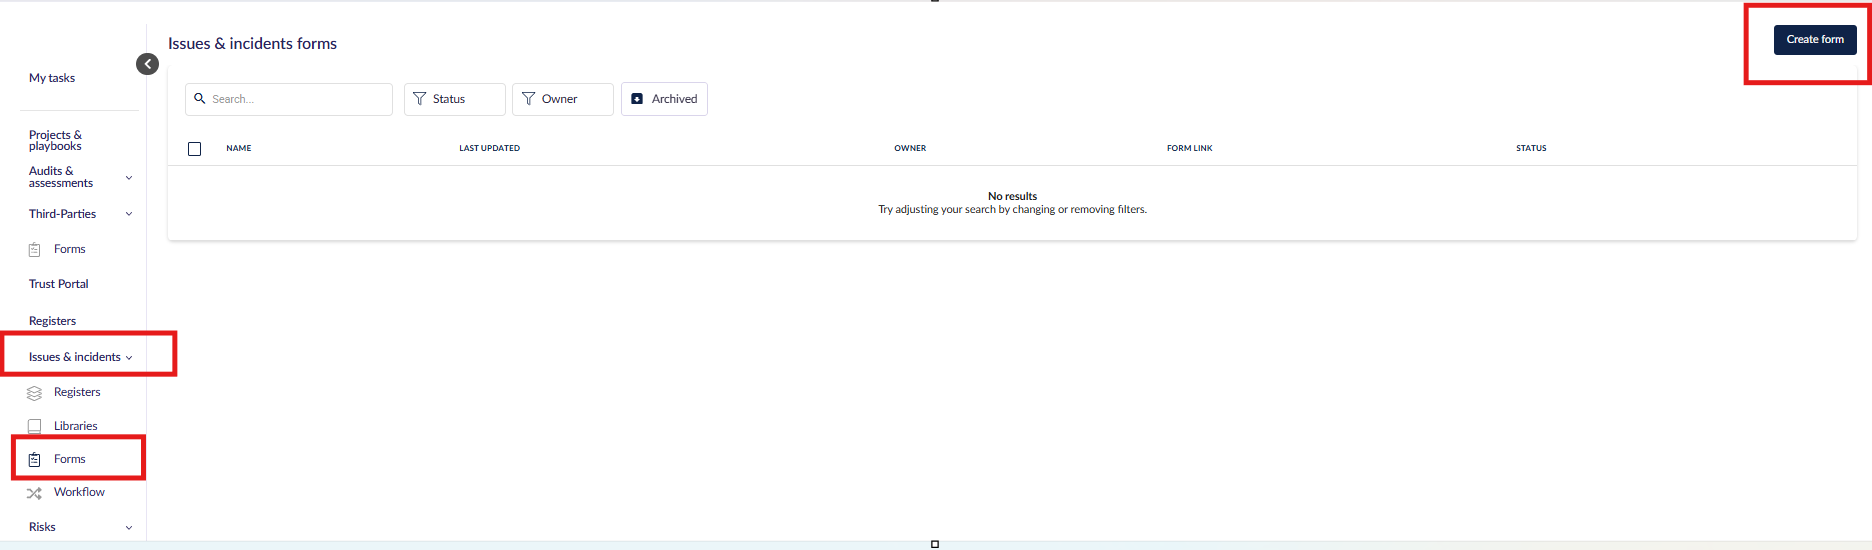
Go to Issues & Incidents > Forms and click Create form at the top right of the page.
Set up the issue form by filling in the details below.
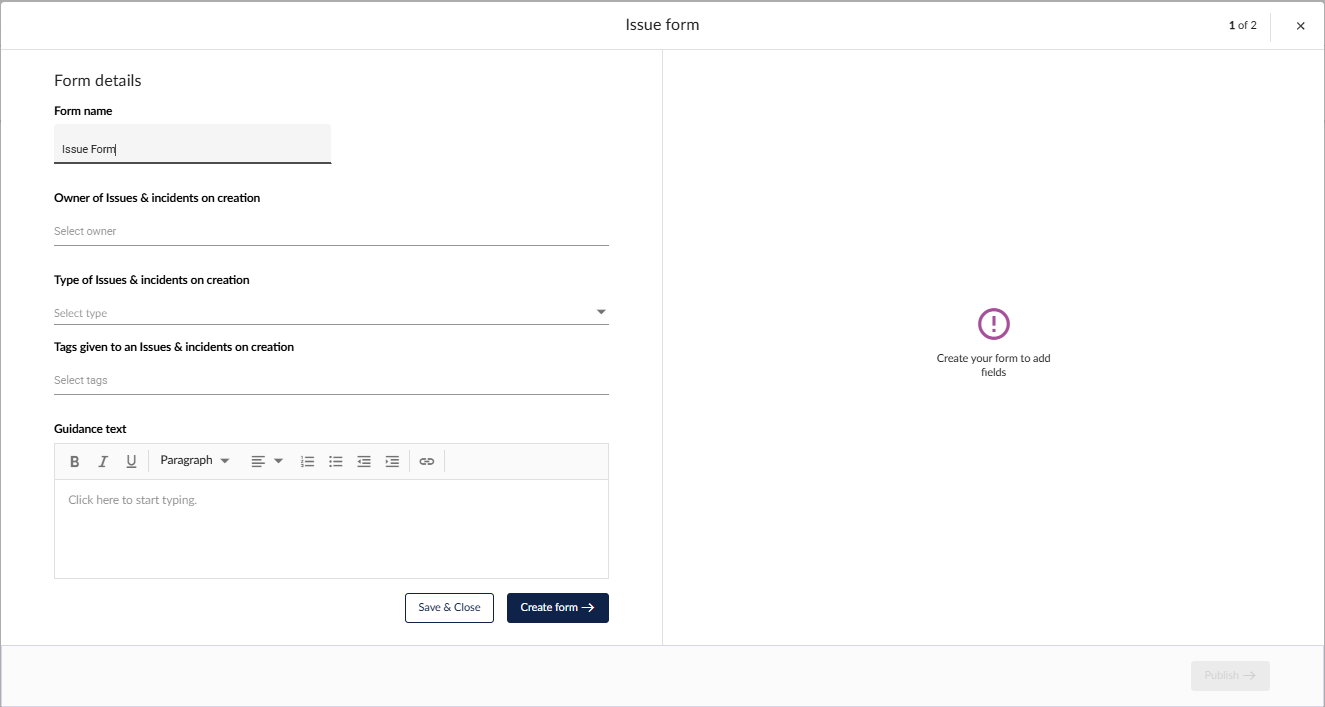
- Form name
- Owner of issue or incident on creation - select the owner of this issue/incident will have in the Registers by default. The user(s) added to this field will also be added to the access members list of the issue when the form is submitted and the issue is created in the Registers.
Head here to learn about the differences between owners and access members.
- Type of issue or incident on creation - select a type that this issue/incident will have in the Registers by default.
- Tags given to an issue or incident on creation - tags can be used to categorize issues/incidents; learn more about tag management here. If you are already using tags elsewhere, they will show up as a dropdown list here for you to add. If you have the correct permissions, you can create a new tag by typing in the new tag and pressing Enter.
The person filling out this form cannot create new tags, but they can choose one or more tags from the dropdown list that you can see here, and/or any new tags you add. - Guidance text - used to guide your non-6clicks users on how to use the form.
Click Create form to proceed.
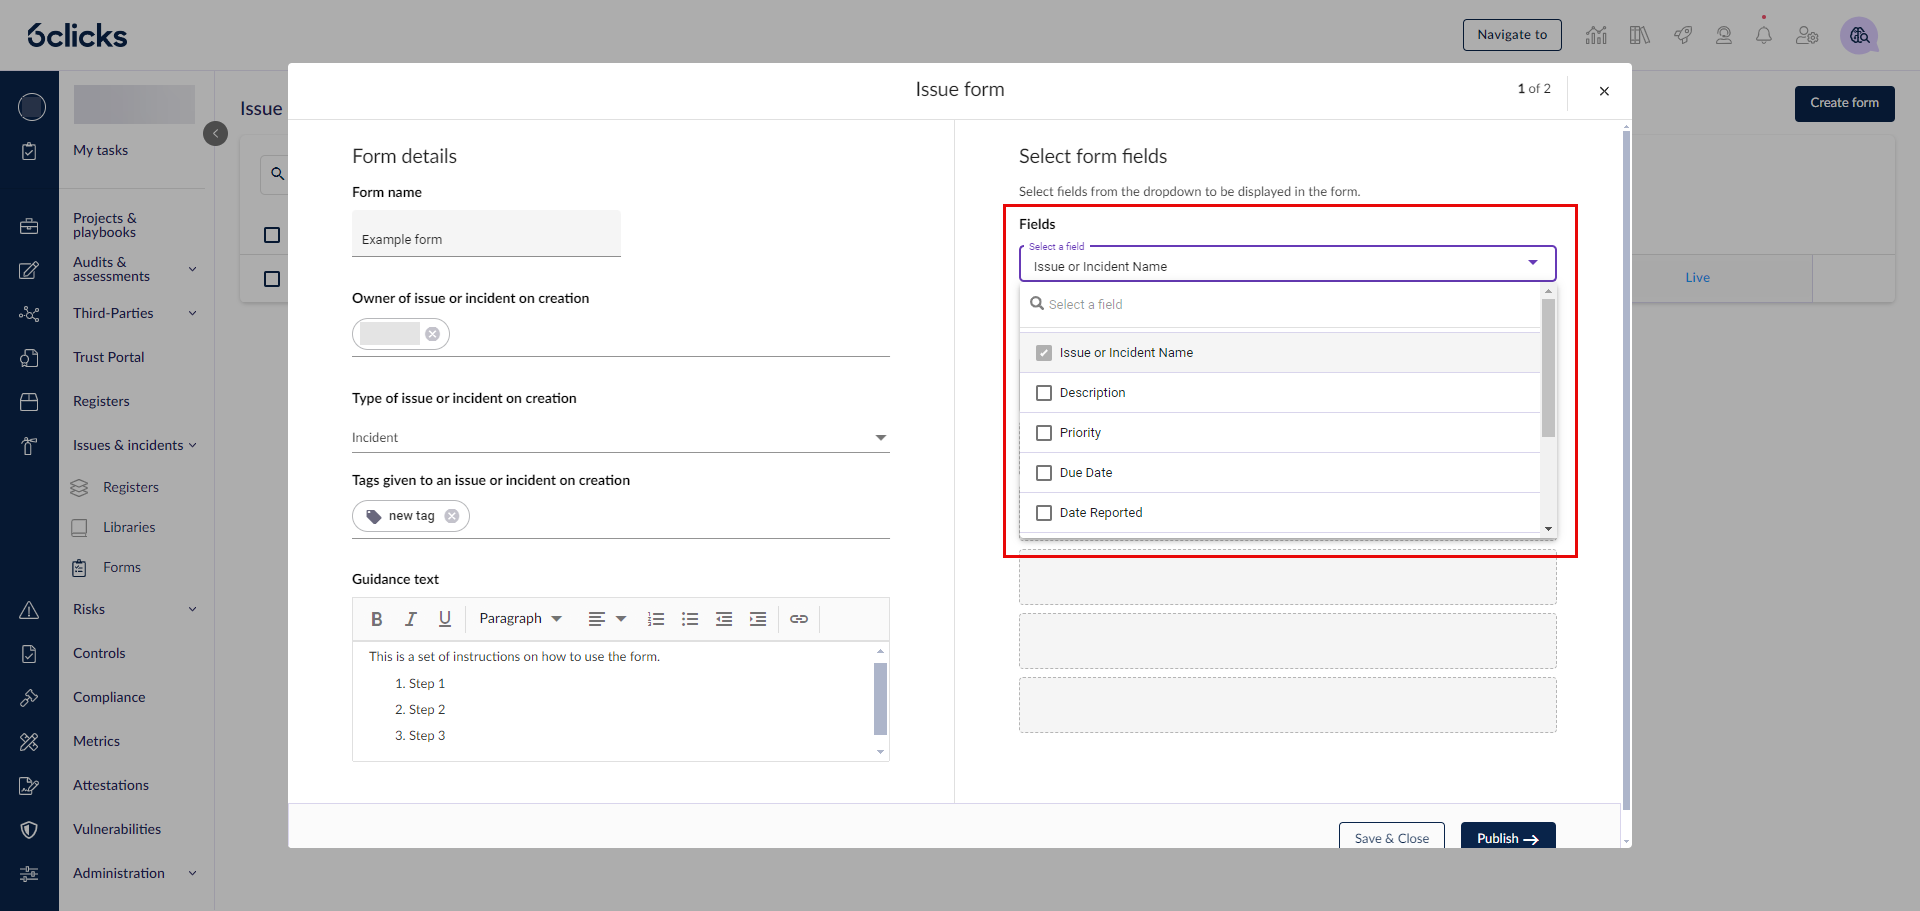
Selecting fields
Select any additional fields you want to be filled out as part of the form.
Use the Select a field dropdown list to add/remove fields by ticking/unticking the checkbox next to them. If you have any custom issue fields, they will also be available in this list.
You can make field details mandatory by checking Mandatory.
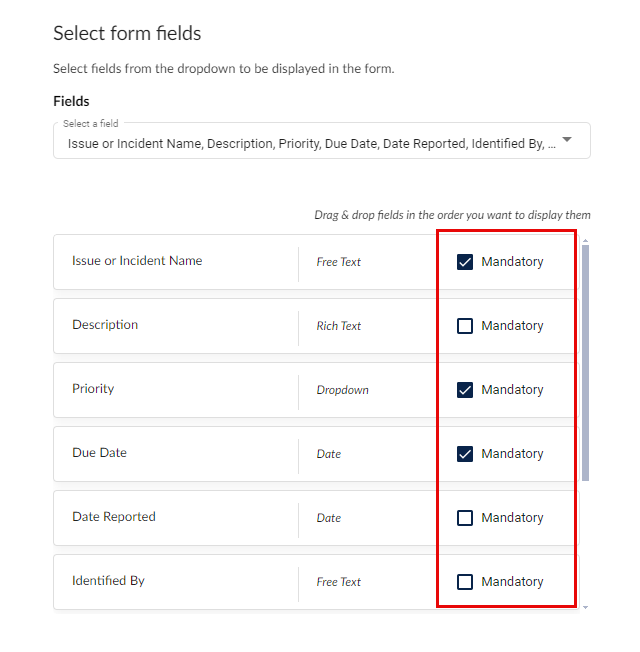
Click Publish when you are done, and you will see the unique link for this form.
You can copy, open or share the link via email. Ensure the issue form is live for others to be able to use it. Click Save & Close.
Please do not share this URL outside your organization or with anyone you do not wish to submit issues.

Using the form
The live form will now appear in the Issue & Incident Forms list. From this view, you can use the Copy icon to copy the form’s URL, allowing you to paste it into a new browser tab or share the link internally. You can also open the form directly in a new tab by selecting Open.
Additionally, you can update the form’s Status by clicking on its current status. This allows you to change the form from Active to Inactive, or vice versa.

When the form is inactive, people will see this screen if they go to the URL.

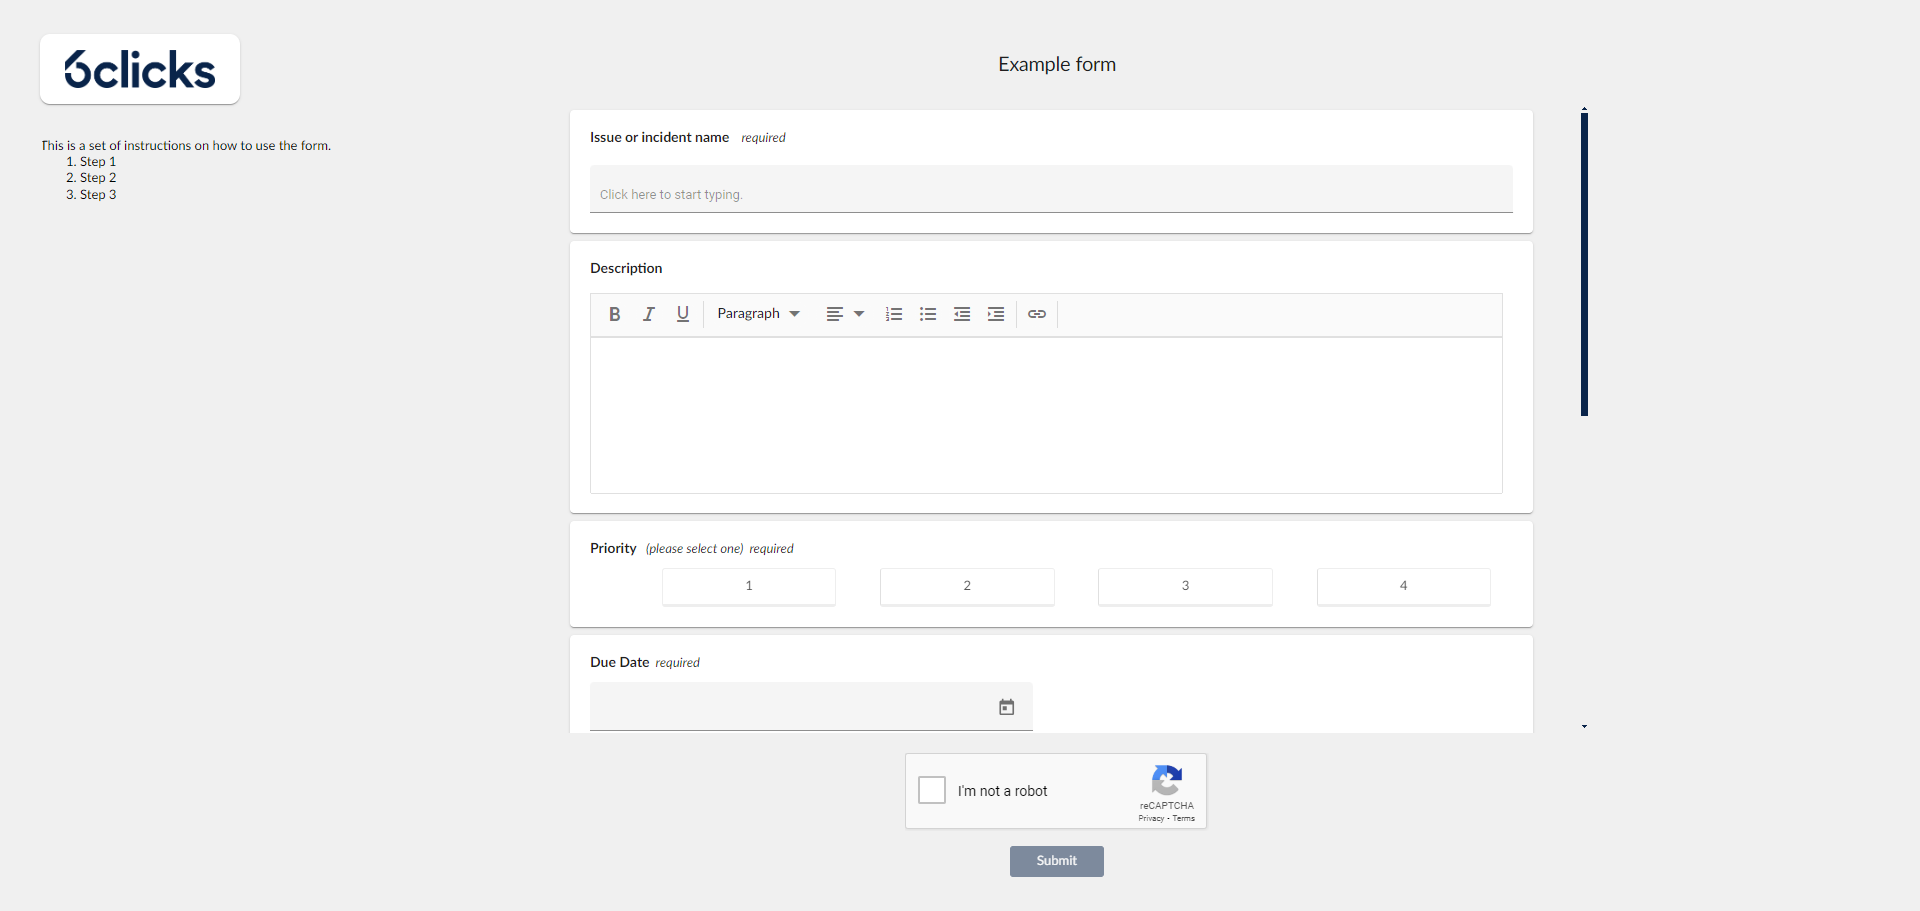
When the form is live, anyone can fill it out if they go to the URL. The guidance text will be shown on the left.
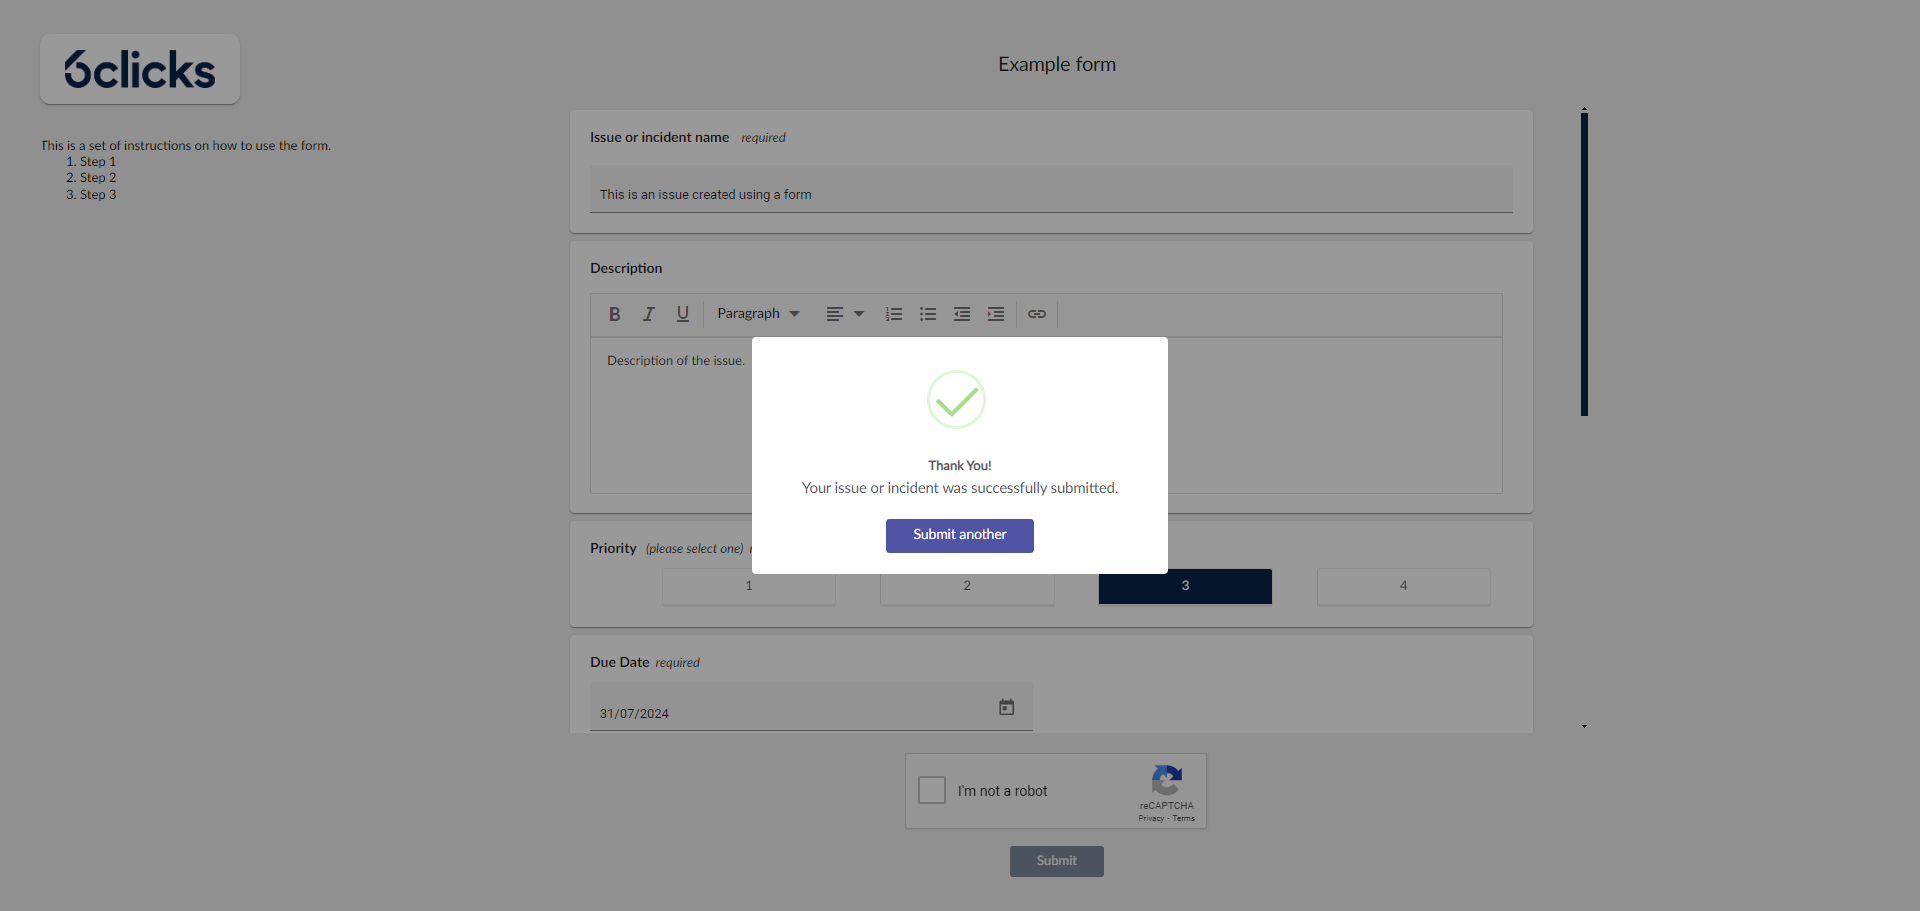
Once the person submits the form, they will see a confirmation screen.
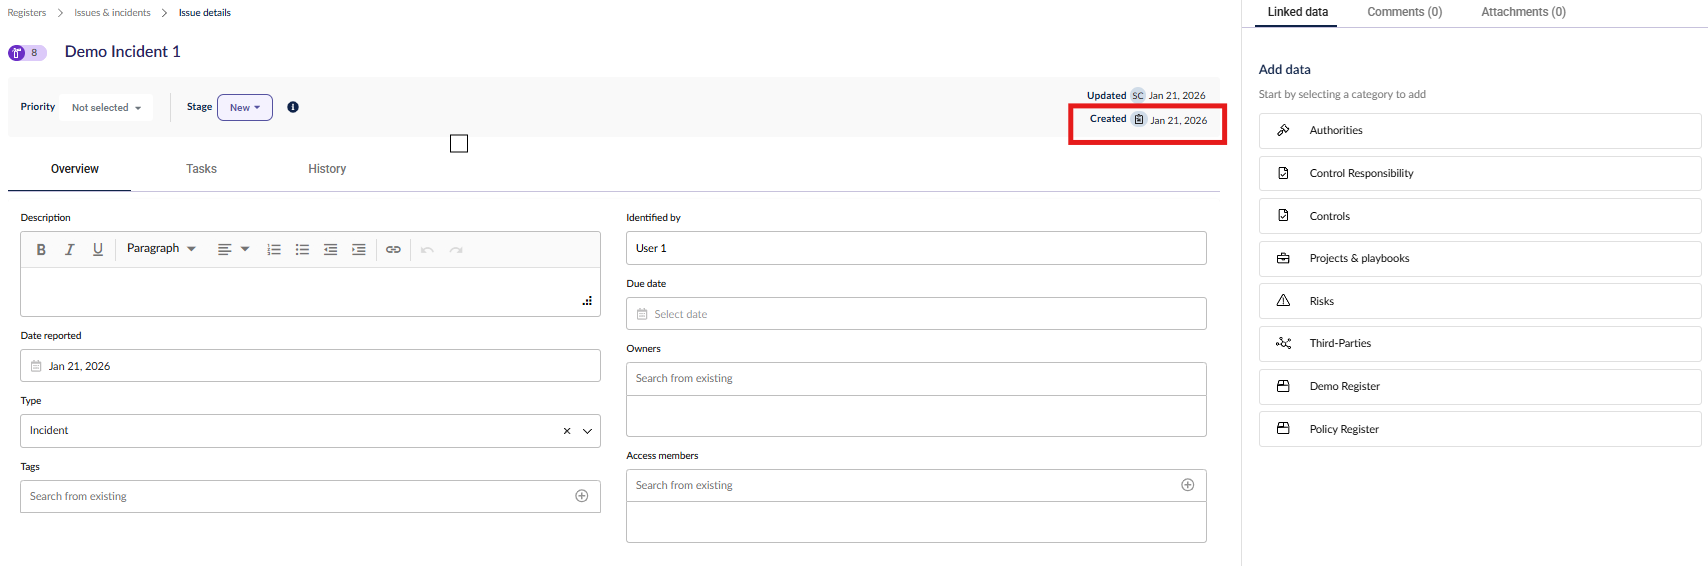
The issue/incident will show up in the Registers in 6clicks.

You can edit any details entered through an issue form, provided you have the appropriate view and edit permissions. Issues and incidents created via form submission are identifiable in the Priority Banner by a form icon displayed alongside the created date, indicating that the item originated from a form.
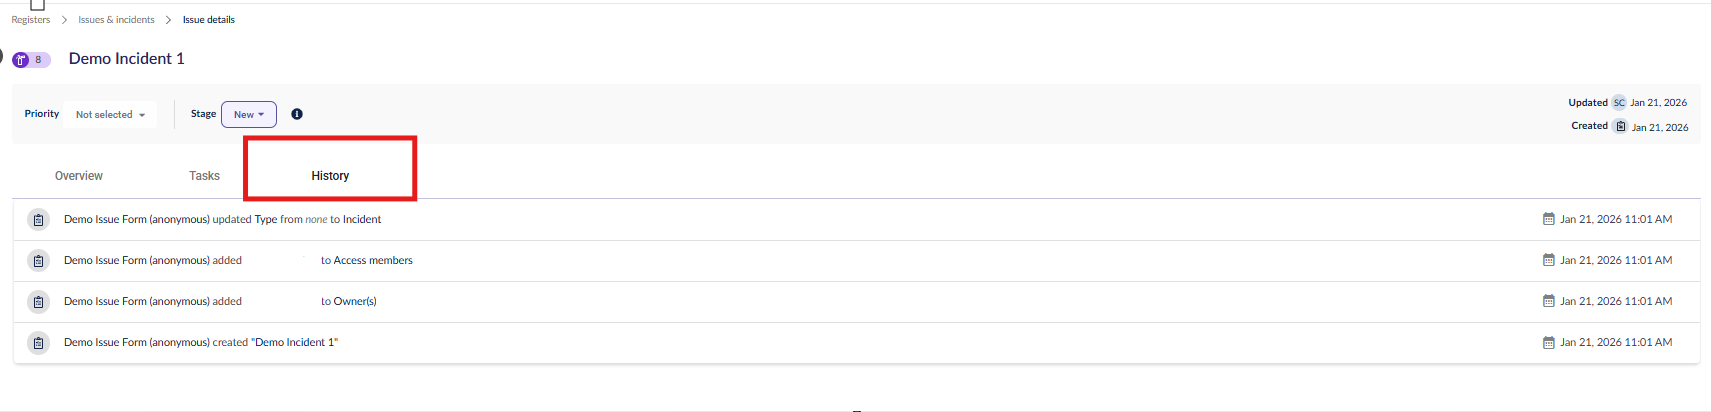
Additionally, you can view the full history of the item in the History tab, which records relevant changes and activity over time.
Issues created by the form are under the Triage workflow stage by default.
To learn more about issues, head here.