
Prerequisites
Before you can create a Requirement-Based Assessment (RBA) using a custom register, you must first enable the Requirement-Based Assessment feature for each register you want to use.
1. Navigate to Registers
2. Select the Settings icon
3. Select the Manage Feature (pencil) icon
4. Enable the Requirement-Based Assessment (RBA) toggle.
5. Select Save
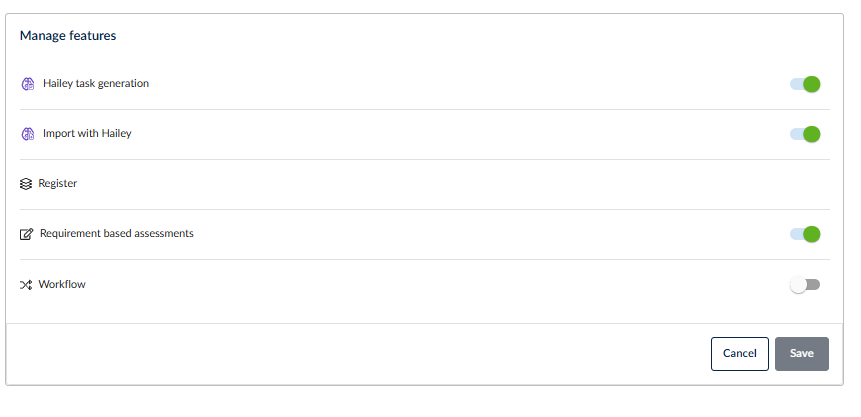
Note:
1. This must be completed for every register that you want to use as a data source or for Requirement-Based Assessments.
2. Users will need to have the permission Create requirement-based assessments enabled within their permissions for each register they would like to create an assessment.
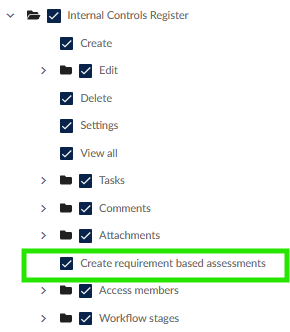
Creating a Requirement-Based Assessment
1. Navigate to the Audits and Assessments module.
2. Select Create New Assessment
3. Choose Requirement-Based Assessment
4. Select Start from Scratch
5. Enter an Assessment Name
6. Under Data Source, select Register, then choose the register you want to assess.
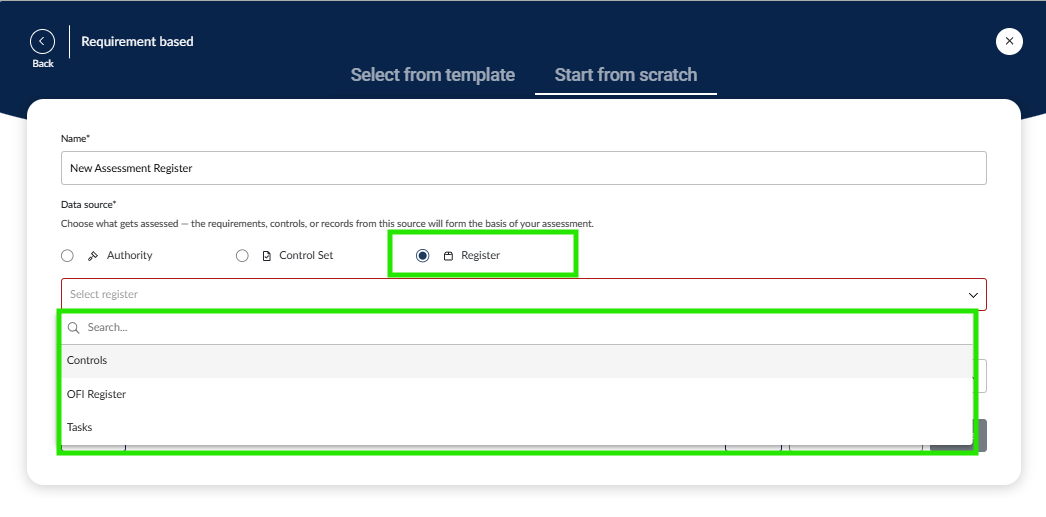
Note: Only registers with the Requirement-Based Assessment (RBA) feature enabled will be available for selection.
7. Review the Items to be Added count. This number reflects the total number of items currently contained within the selected register.
8. Select the Respondent.
9. Configure the Product tab as required.
Adding linked data
Once the assessment has been generated, you can select each assessment item individually and add the relevant linked data.
Linked data can also be added from the Overview page of the assessment. Please read here for more information on linked data.
Note:
1. Only one third party can be linked to any one assessment, and it is not editable when it takes a response of an assessment as a default third party.
2. The register on which the assessment is created does not exist in the assessment-linked data, as the assessment will automatically be linked to the custom register.
Adding Fields and Rules
Custom fields and rules can be added to tailor the assessment experience.
In this example, the following fields and rules have been implemented:
Field 1: Implemented
Answer options: Yes, No, Partially
Field 2: Implementation Notes
Answer options: Field Type: Long Text
Example Rule
Condition: When the following condition is met: Implemented is Yes or Partially
Action: Show Implementation Notes
Result
When a user selects Yes or Partially for the Implementation field, the Implementation Notes field is automatically displayed, allowing the user to provide additional details.
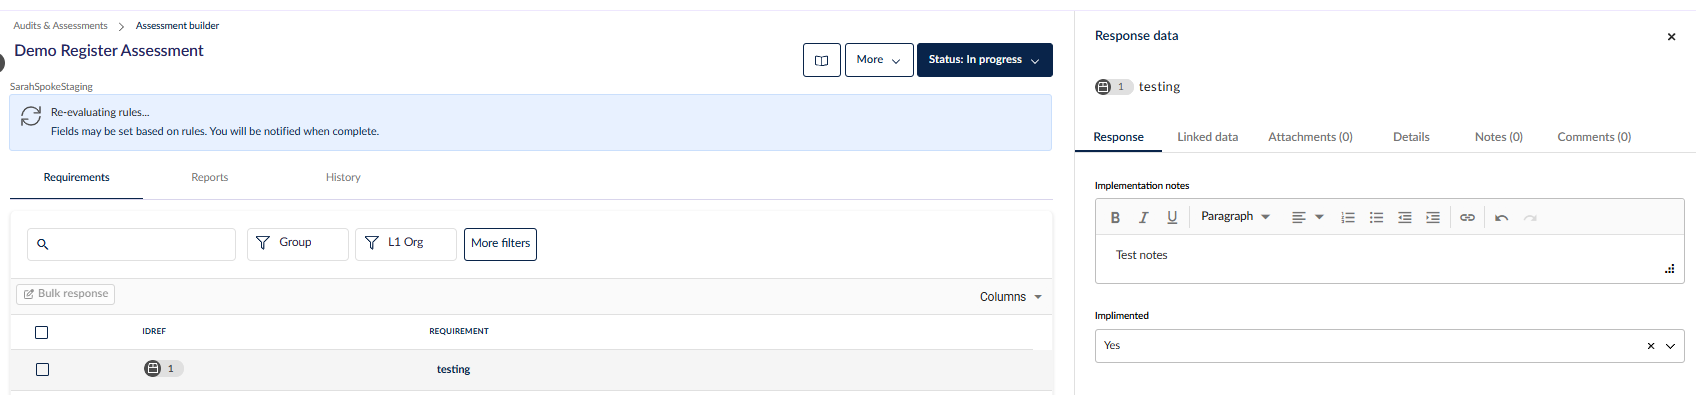
For detailed instructions on creating fields and rules, refer to the relevant Knowledge Base articles here.
Requirement-Based Assessment rules
Assessment filters section
When the assessment is in Draft status, the More Filters tab in the assessment builder view will allow you to filter and view register items based on the register custom fields.
When In Progress status, register custom fields and assessment fields allow the user to view and filter based on the selected requirements.
Overview
The assessment overview provides key information, including the assessment name, description, and scope. It also displays the due date, assessment owner, access members, and associated tags.
Details tab
When in response mode (In Progress), the Details tab will display all linked data of the selected register item.