Table of contents
- Responding to fields
- Notes & guidance
- Comments
- Attachments
- Control responsibilities
- Risks and issues
- Filtering
- Submitting the assessment
- Reopening a completed RBA
Responding to fields
To begin adding responses, access the assessment through the Audits and Assessments module. After opening the assessment, change the assessment status from Draft to In Progress.
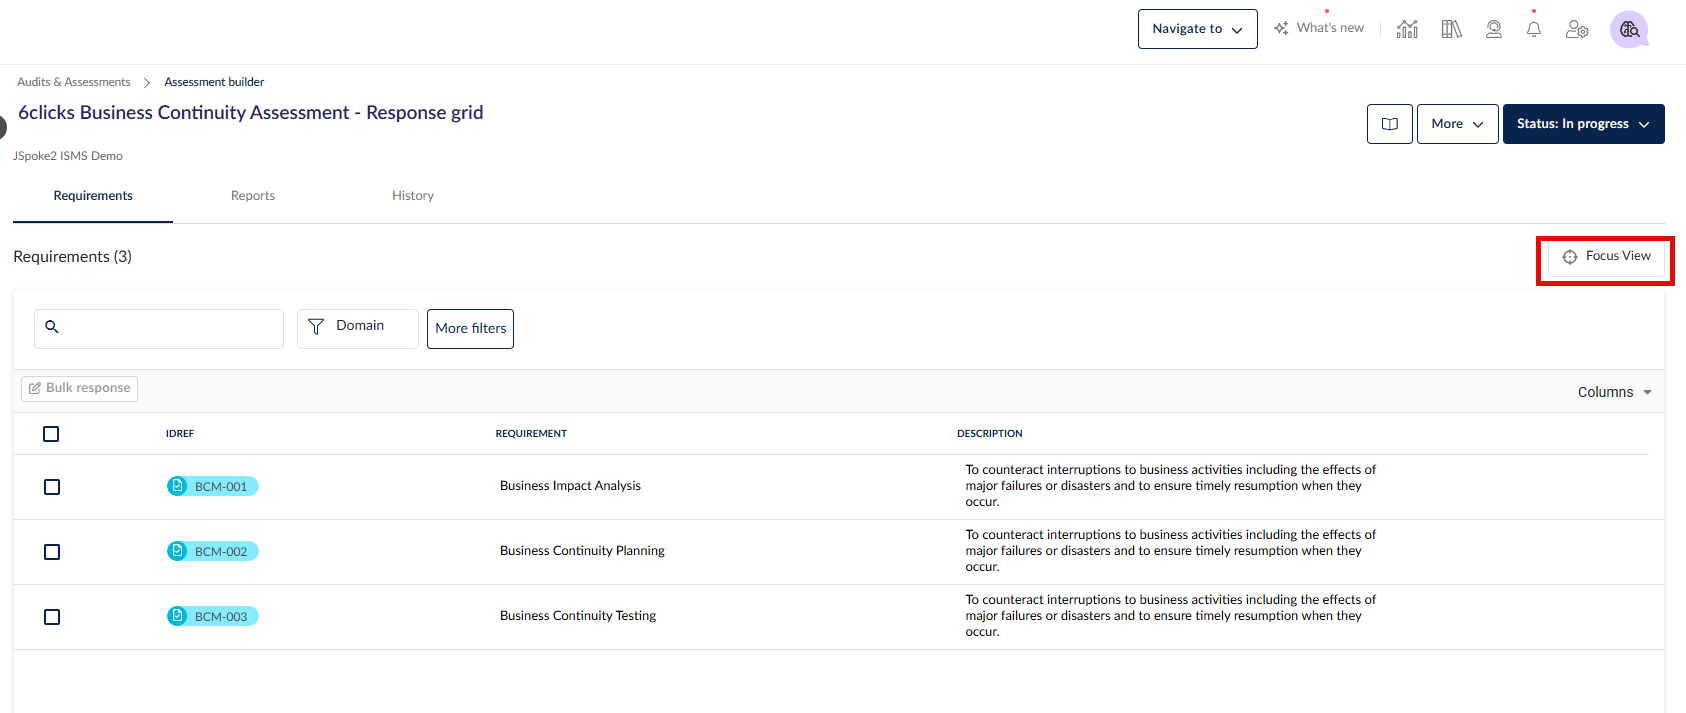
You can respond to the assessment either by clicking on the relevant requirement or by choosing to respond to the assessment using the Focus View, which is an alternative response mode for Requirement-Based Assessments (RBA) that presents one requirement at a time in a distraction-free, split-pane layout designed for concentrated work on individual responses.
If you choose to respond to the assessment by answering each requirement in turn, select the Focus View toggle:
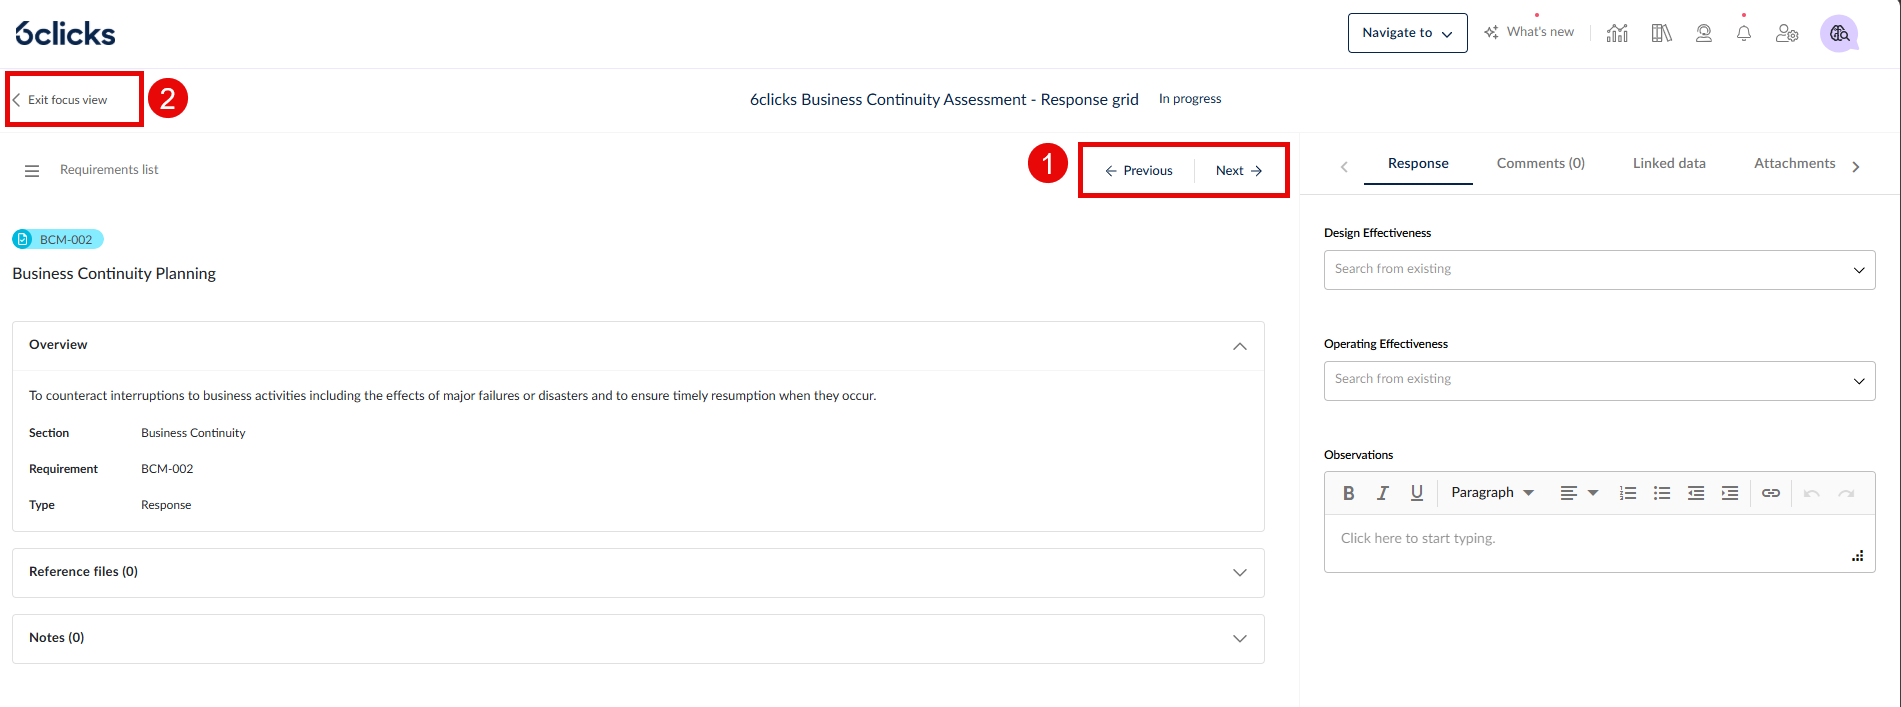
From here, you can 1) navigate forward and backward through the assessment with the next and previous buttons and 2) exit focus view to return to the full list of requirements:
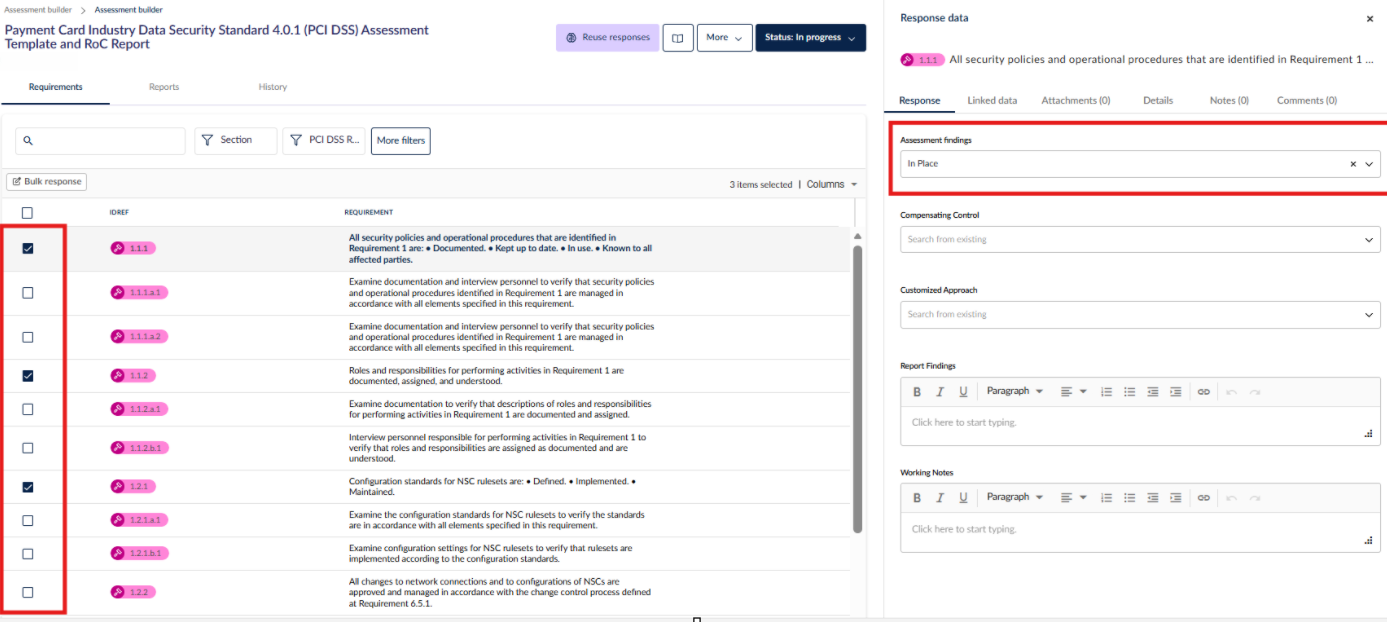
If you choose to respond to the assessment by selecting a relevant requirement in the main view, a side panel will appear, allowing you to enter the necessary data. If you are responding to the assessment and are working on a particular requirement, you can switch to focus view and you will see the full page view of that particular requirement.

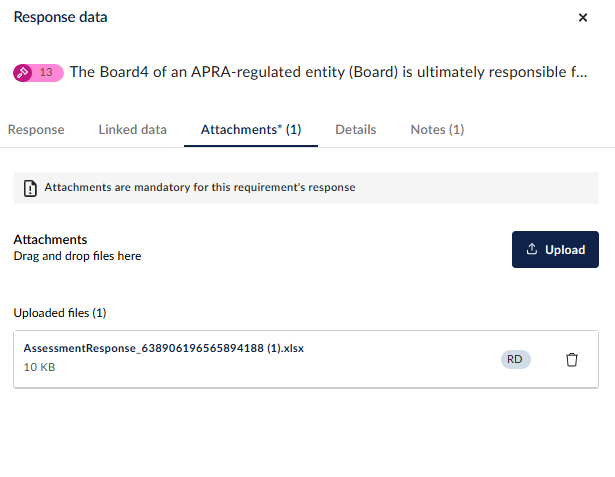
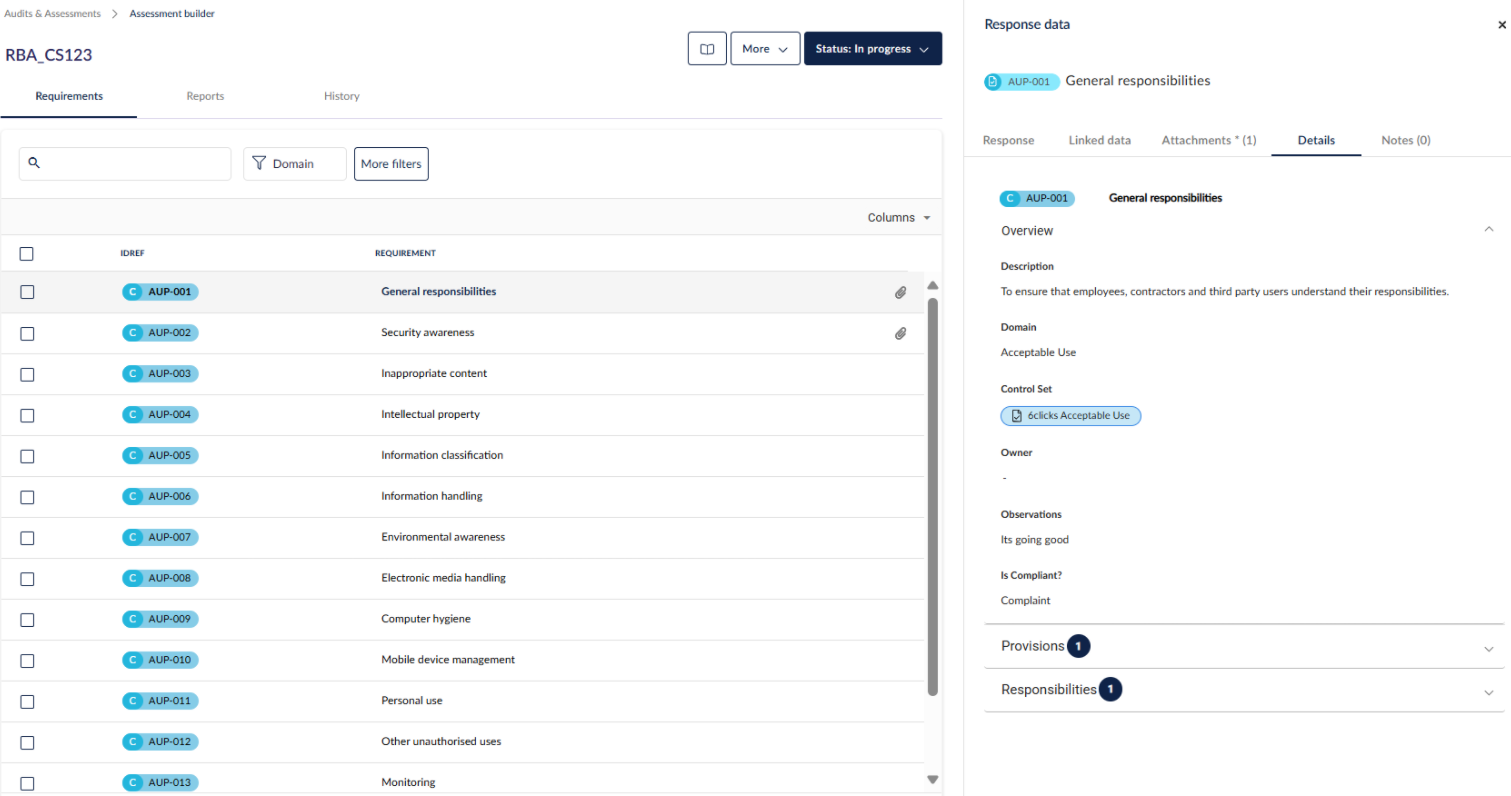
When responding to an RBA, either the focus view or the side panel view provides all the fields you need to complete the assessment. Start by entering your answers into the Response fields. You can link relevant risks, assets, issues, and incidents through the Linked Data field, ensuring that all related information is connected. If you need to include supporting documents, use the Attachments field to upload, drag, or drop files directly into the assessment. The Details field offers a comprehensive overview of the requirement and displays any linked controls, helping you understand the context. Any notes added by the assessment publisher can be viewed in the Notes field.
Note: If a requirement specifies that uploading a document is mandatory, an error will appear when moving the assessment status from In Progress to Completed if the document has not been added. The error will indicate the missing upload along with the requirement reference that needs to be addressed.
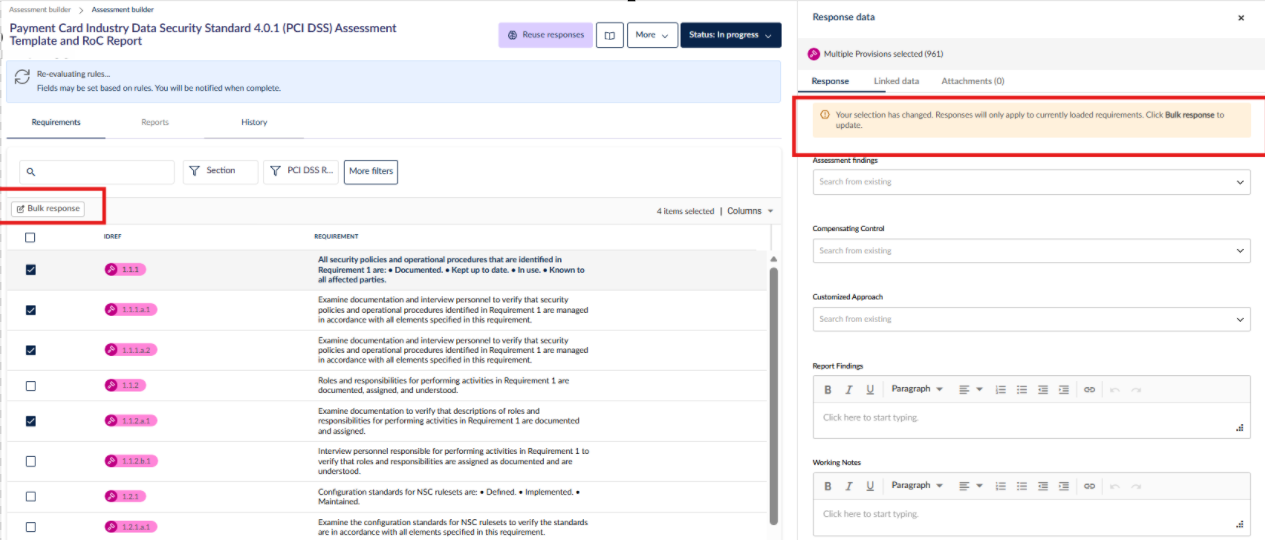
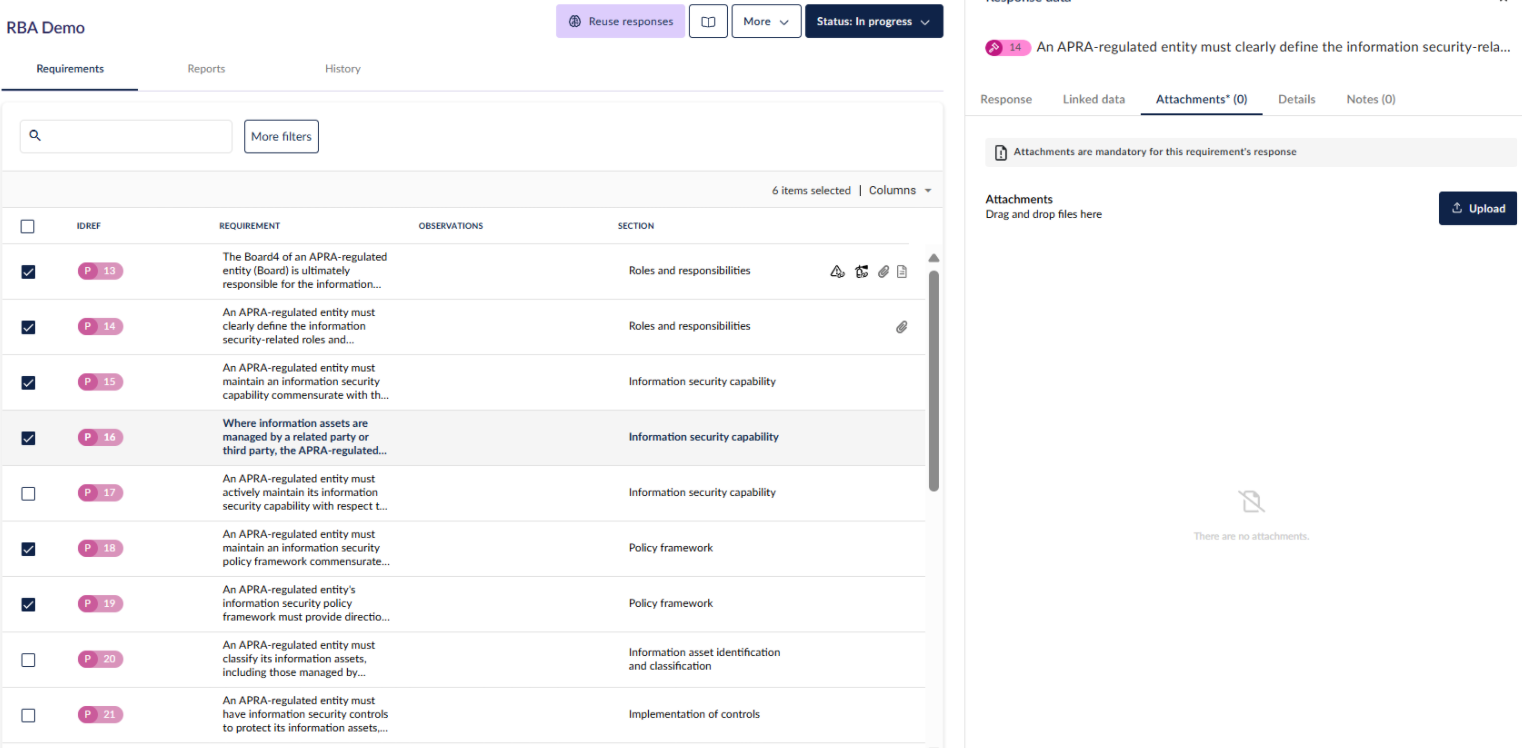
You can also bulk enter responses by bulk selecting requirements and then choosing the responses to apply to all selected requirements.
If you change your requirement selection while the Bulk Response panel is open, an orange banner will appear.
Banner message:
Your selection has changed. Responses will only apply to the currently loaded requirements. Click Bulk Response to update.
Quick notes:
-
The panel does not automatically refresh when selections change.
-
Any auto-saved responses apply only to the requirements originally loaded in the panel.
-
Click Bulk Response again to refresh the panel and load the updated selection.
Notes
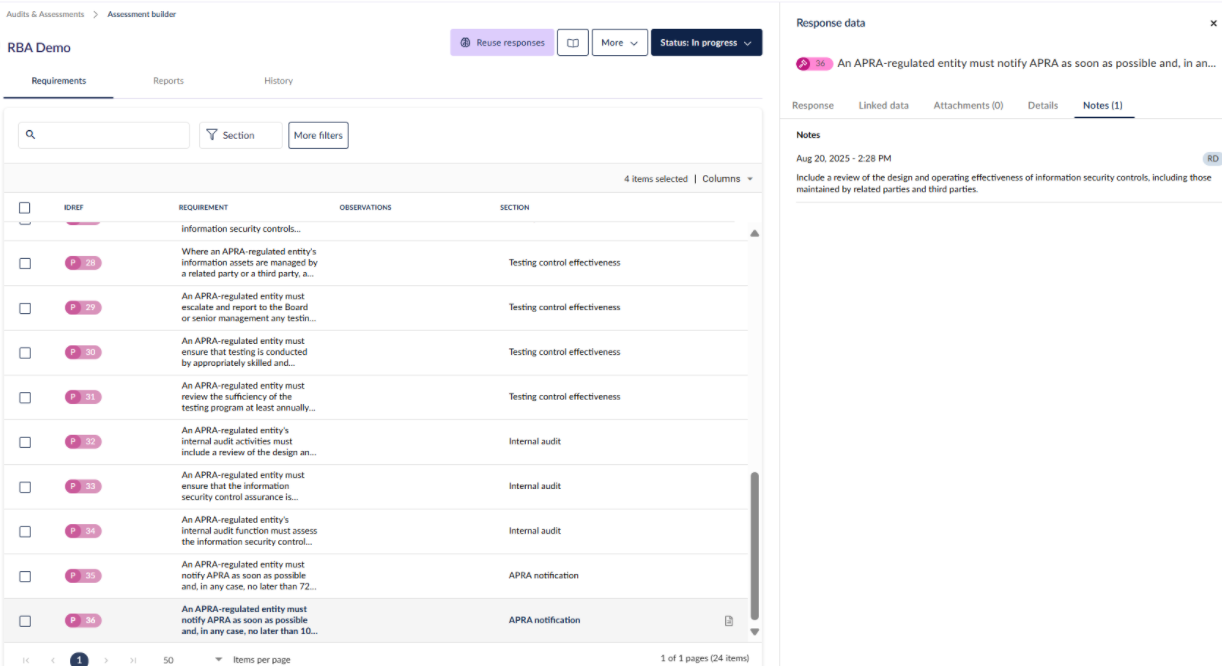
If a requirement has notes linked to it, the notes icon will be displayed in the requirements table. You can view notes and guidance for a requirement by selecting the Notes tab in the side panel.
Comments
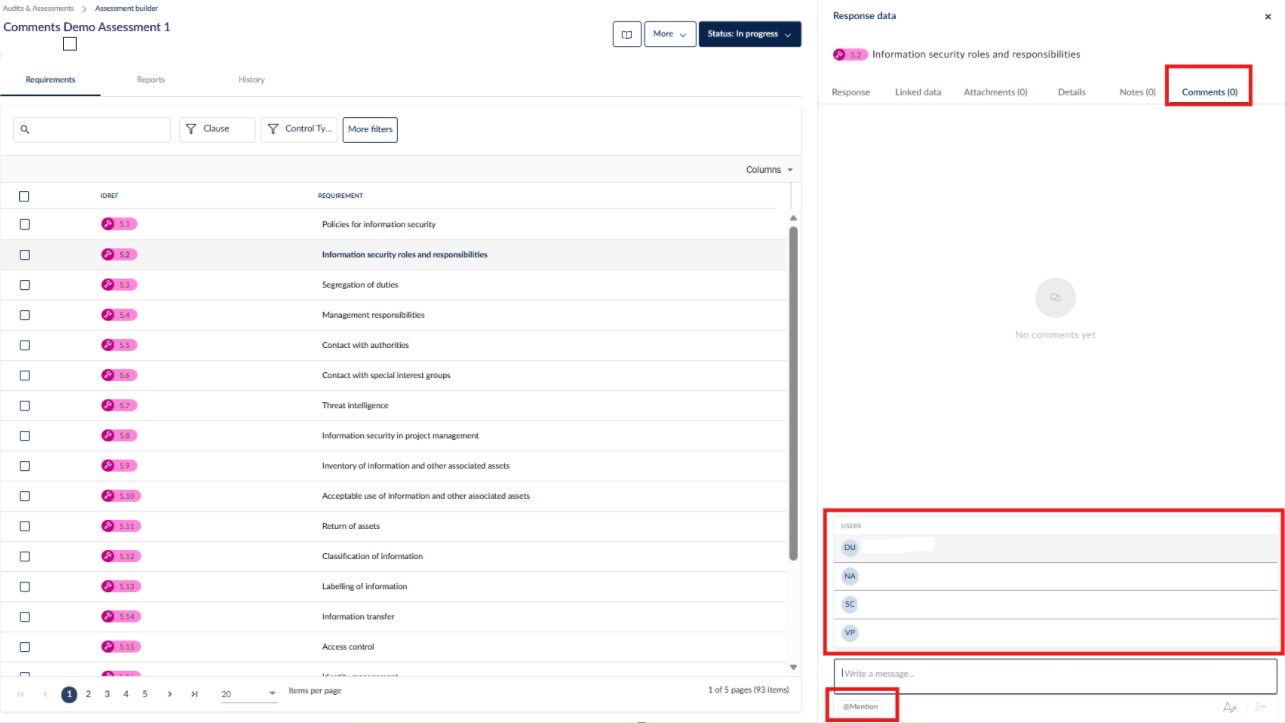
The Comments tab allows users to add comments against a specific requirement to provide feedback, ask questions, or share additional context during the assessment process.
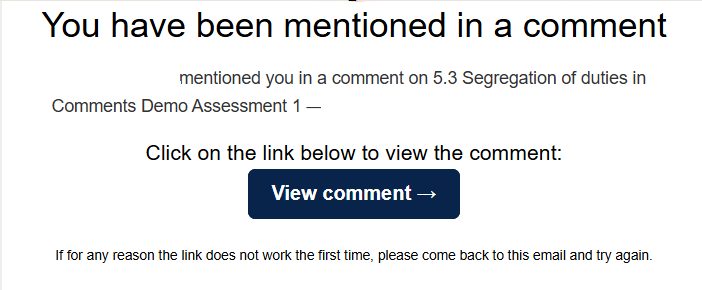
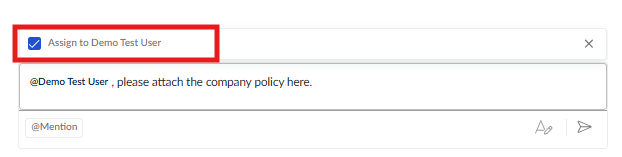
Users can notify other users or groups by tagging them with the @ symbol. When typing @, a list of users and groups with access to the assessment is displayed for selection. Tagged users are highlighted within the comment and receive both an in-app and email notification. Notifications include the assessment name, reference ID, requirement name, and a direct link to navigate to the relevant requirement.
Comments assigned to a user in a Requirement-Based Assessment (RBA) will appear in the user’s My Tasks view.
Key behaviour:
- Only comments specifically assigned to the user are displayed in My Tasks.
- Each task displays the relevant assessment name and a snippet of the assigned comment.
- Clicking the assessment name takes the user to the assessment response or results page.
- Clicking the comment snippet takes the user directly to the relevant requirement or provision in an RBA.
- When navigating through the comment snippet, the relevant requirement is opened with the Comments tab selected.
- Tasks are updated when a comment is assigned, read, resolved, or reopened.
- Only comments from assessments that the user has permission to access are displayed.

Users can also assign comments to another user to make them accountable for an action. Comments can be assigned during comment creation or editing, and the assigned user is clearly displayed within the comment. Assigned users receive notifications when a comment is assigned to them. Assignments can be updated or removed at any time, and if a comment is reassigned, both the previous assignee and the new assignee are notified.
The Comments tab is available within each requirement while an assessment is in progress or completed.
Authorized users can add, edit, or delete their own comments at any time. Each comment displays the author, timestamp, and comment content, and all comments are persisted and visible to users with access to the assessment. Audit logs are also maintained, with timestamps recorded whenever a comment is added, edited, or deleted.
Comments can be marked as Resolved to help track completed discussions. Only comments that have been assigned to a user can be marked as resolved or unresolved. Resolved comments are visually differentiated from unresolved comments, and the Resolve and Unresolve actions are visible to all users with access to the assessment. If additional discussion is required on a resolved comment, users can reopen the comment before adding further updates, as each requirement supports a single comment thread.
Respondents can retain entered text while navigating within an assessment to prevent losing progress during completion.
Any entered text is retained when:
- Switching between requirements
- Navigating between tabs within the assessment
- Switching browser tabs within the same session
NOTE: If a user navigates outside of the assessment, such as returning to the dashboard or opening another module, any unsaved text will be cleared.
Attachments
If a requirement has attachments linked to it, the attachments icon will be displayed in the requirements table. These attachments may have been uploaded to the requirements when the assessment was being made.
Attachments added when the assessment was created can be previewed and/or downloaded, depending upon the file type. Please see this reference for supported file and file preview types.
You can preview or download attachments from the Attachments section in the side panel.
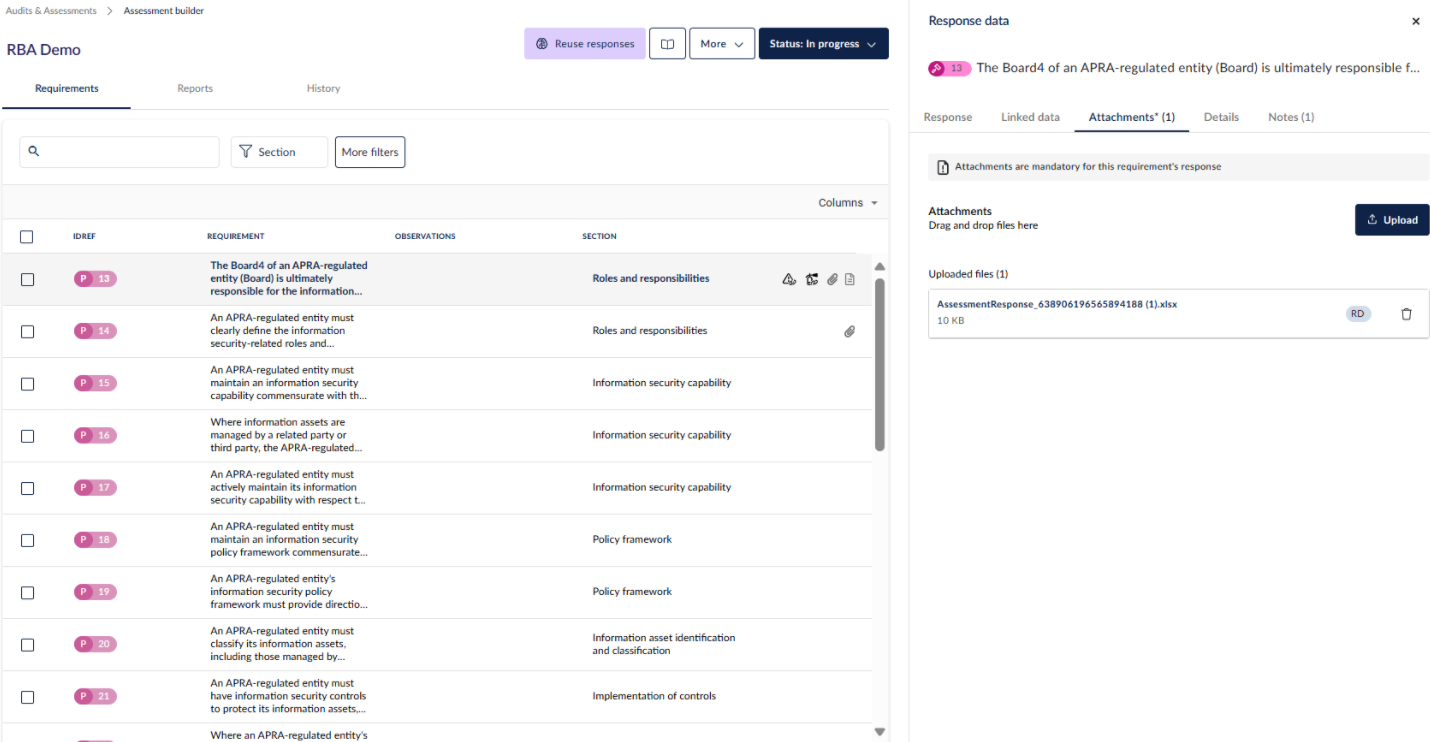
Attachments can also be added to requirements when completing the assessment by clicking the upload option or by using the drag and drop functionality in the Attachments tab.
You can also bulk add attachments by selecting requirements and adding attachments.
Control responsibilities
If a requirement is linked to a control and its responsibility, you can see the responsibility and its tasks from within the assessment. To learn more, head here.
Risks and issues
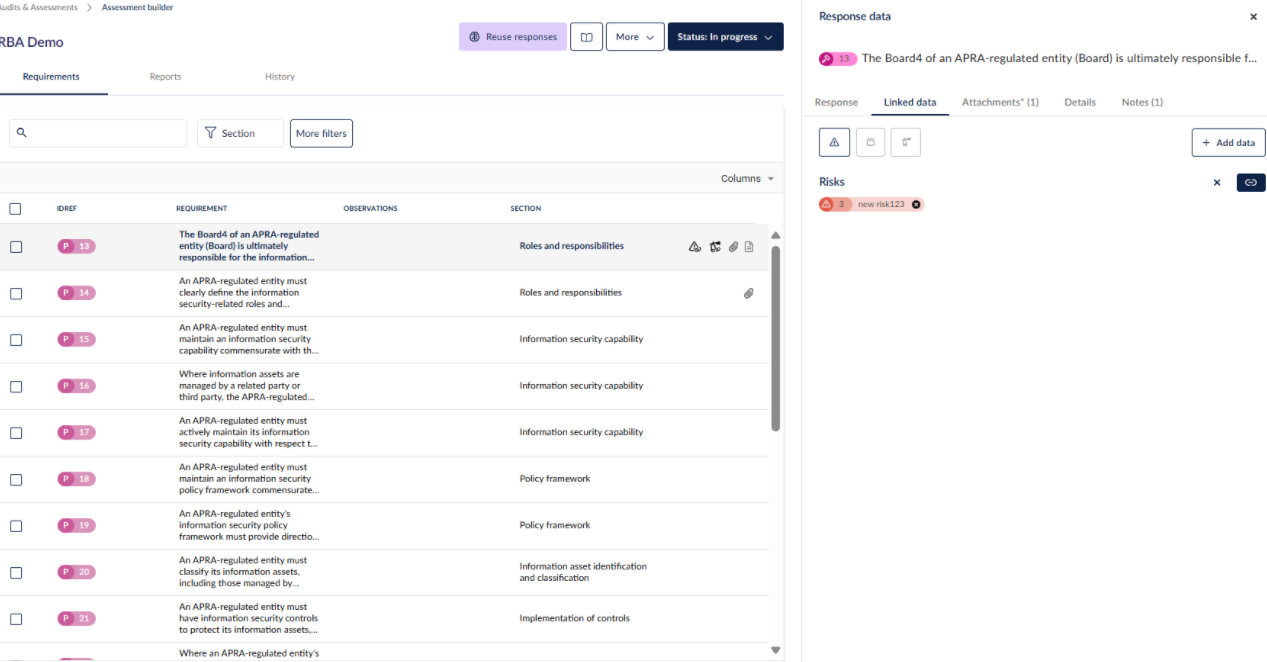
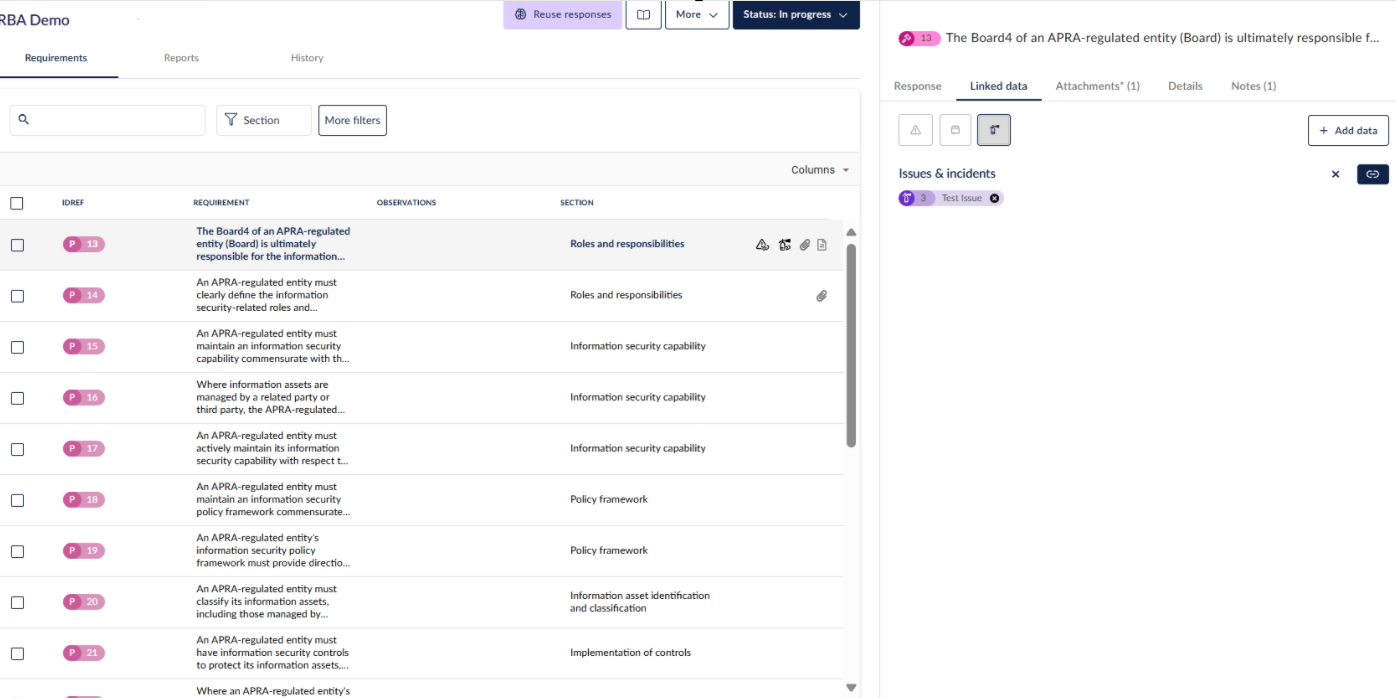
You can also add risks, risk treatment plans, issues, and issue actions to requirements while responding.
To learn how to add risks and risk treatment plans, head here.
To learn how to add issues and issue actions, head here.
You may find recommended risks and issues while responding; this is done via automations and streamlines the response process. Hailey can also help with suggesting risks and issues from your register, or coming up with new risks and issues.
You can also bulk add risks, risk treatment plans, issues, and issue actions by bulk selecting requirements and adding performing these actions.
Filtering
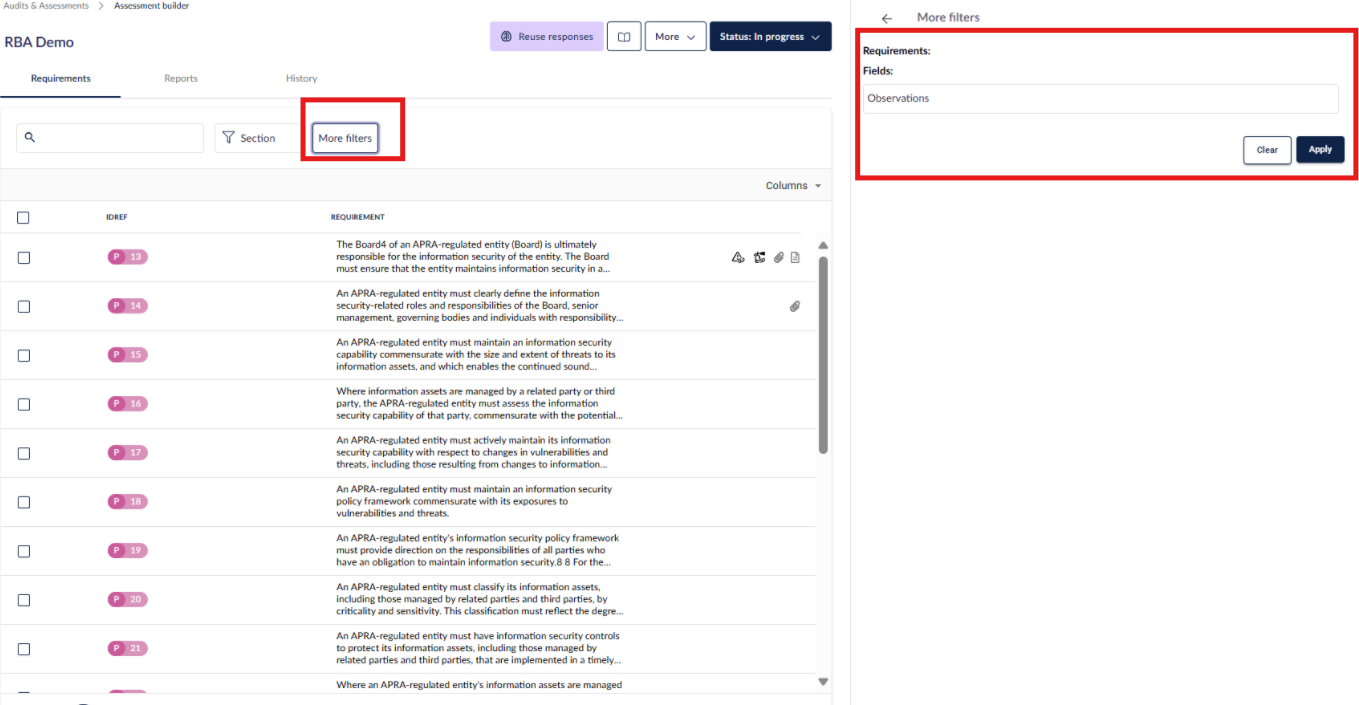
You can use the filters to filter by requirement details as well as your responses.
Click on More filters to view all the fields that are part of the authority document.
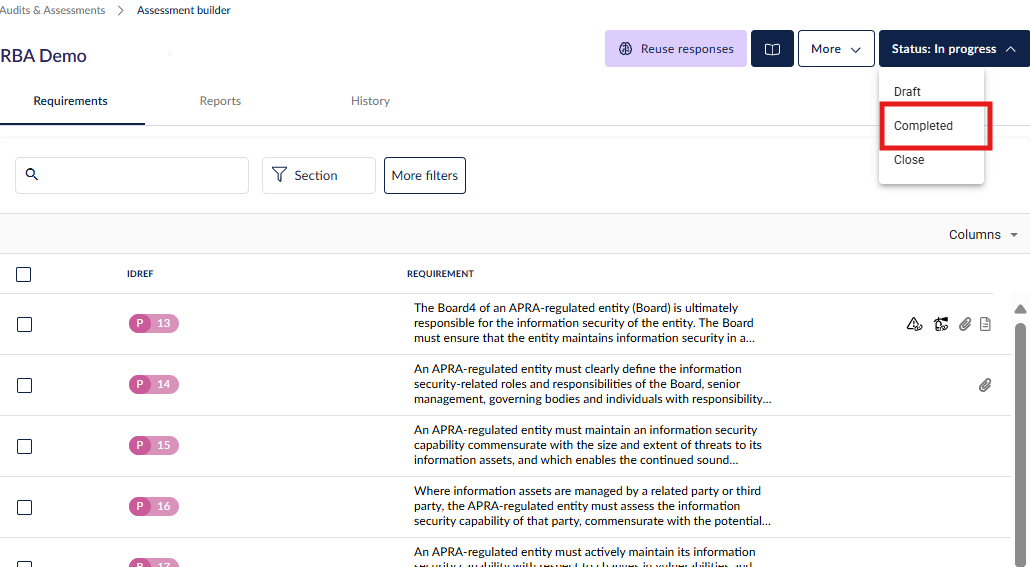
Completing the assessment
Once all required responses and supporting documents have been provided, the assessment can be finalized by updating its status from In Progress to Completed. This confirms that the assessment has been fully addressed and is ready for review.
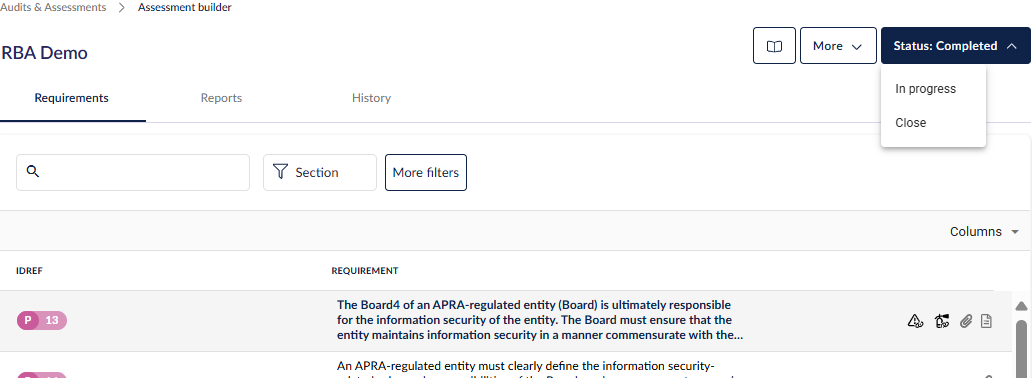
Reopening a completed RBA
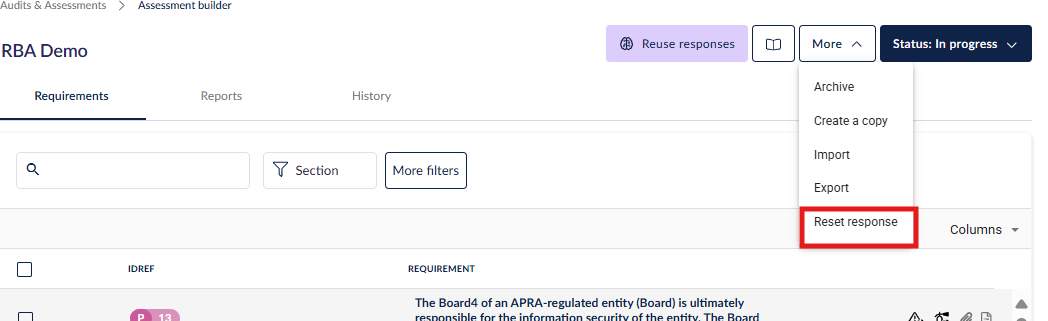
After an RBA assessment has been marked as Completed, it can still be reopened if a response needs to be updated. To make changes, navigate back to the assessment and change its status to In Progress. This will allow you to edit the necessary responses or add any missing information. Once the adjustments have been made, return the assessment status to Completed to finalize the updates.
If you need to remove all previous responses and begin again, navigate to More and select Reset Responses. This action will clear all existing data and allow you to reset the assessment from the beginning.