To create a new 6Clicks application (type: SPA OpenID Connect) in Okta, you will need administrative permissions. The steps are as follows:
1. Retrieve 6clicks SSO settings
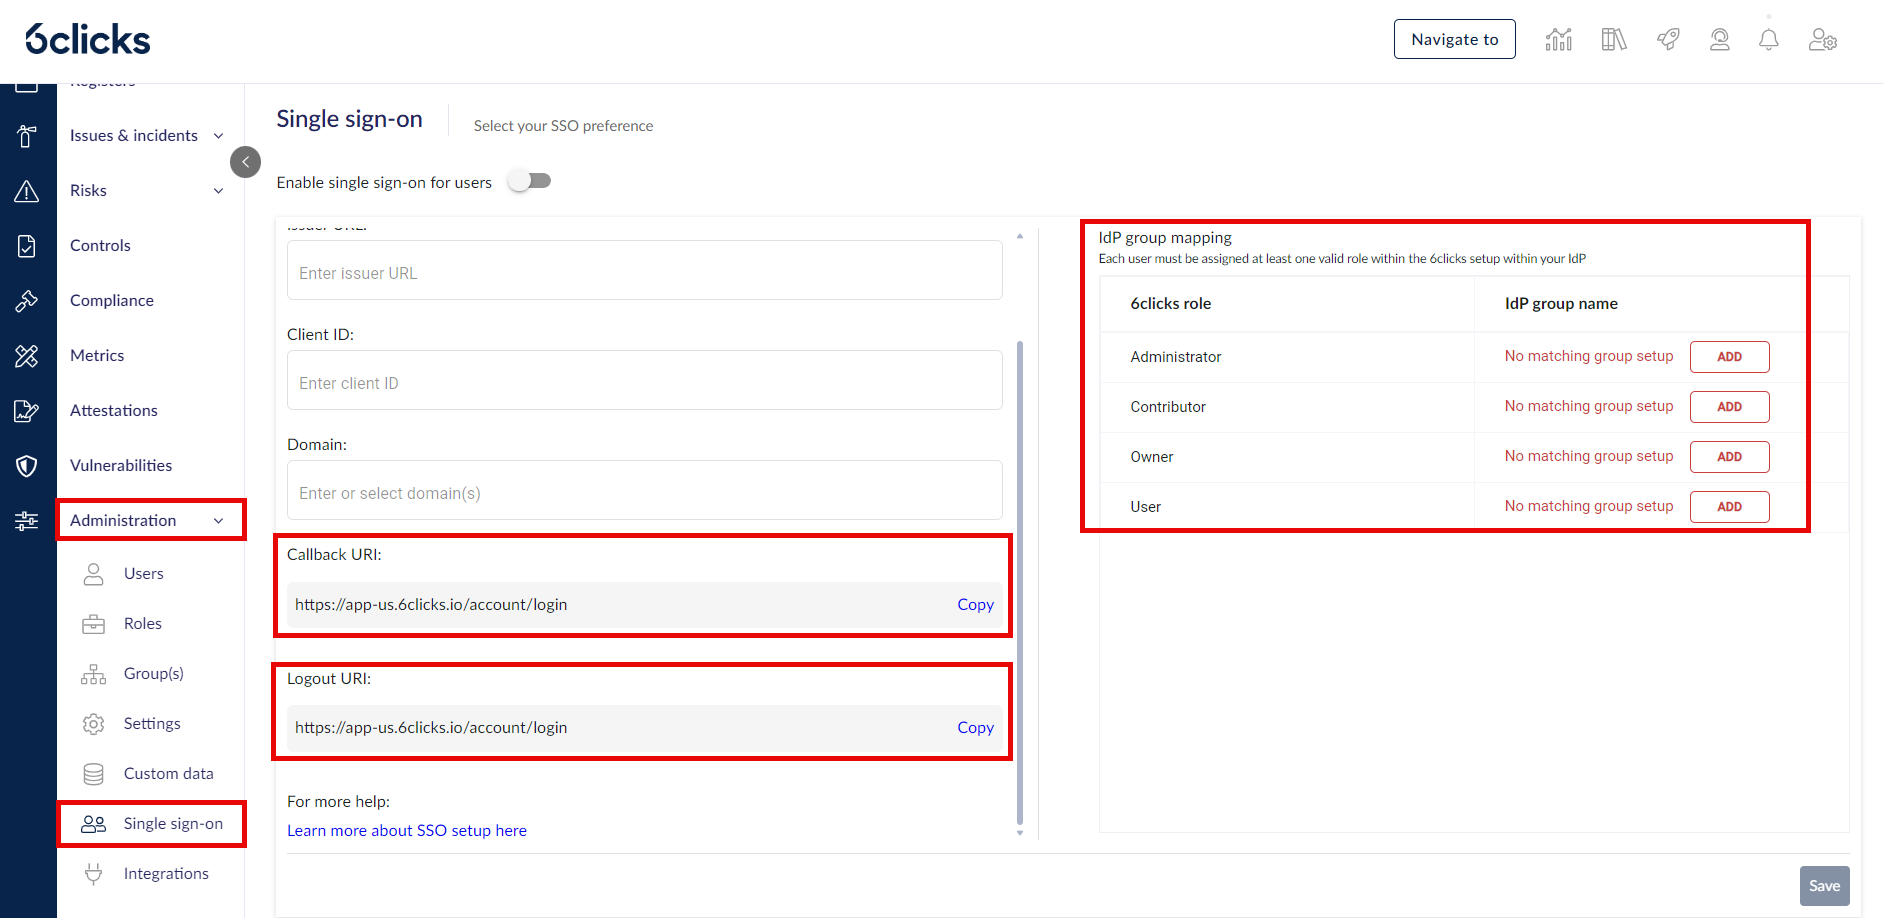
Sign in to 6clicks with a user account that has permission to administer single sign-on.
Navigate to Administration → Single Sign-On. Note the Information within the Callback URIs, Logout URI, and Roles fields.
Create or take note of the 6clicks roles you will be using in your single sign-on environment. You will create corresponding groups in Okta to map to these roles. You can learn more about user roles and permissions here.
2. Okta: Create Groups
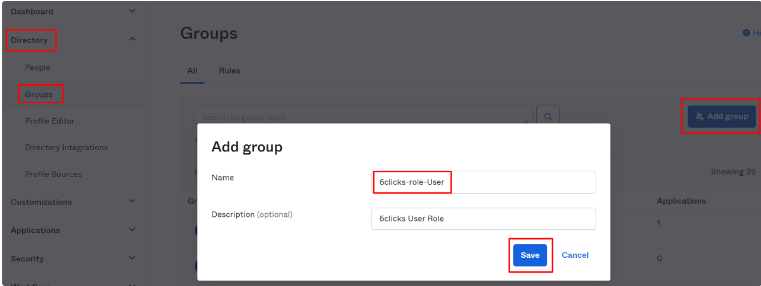
Each user in Okta using 6clicks must be in a group that matches at least one valid 6clicks role. In the Okta administration console, navigate to Directory → Groups → Add group. Create the Okta group name to correspond to the role name in 6clicks in the format "6clicks-role-<role name>".
For example, for the Administrator, Users, and CustomRole1 roles in 6clicks, the Okta group names would be:
-
6clicks-role-Administrator
-
6clicks-role-Users
-
6clicks-role-CustomRole1
3. Okta: Create the Application
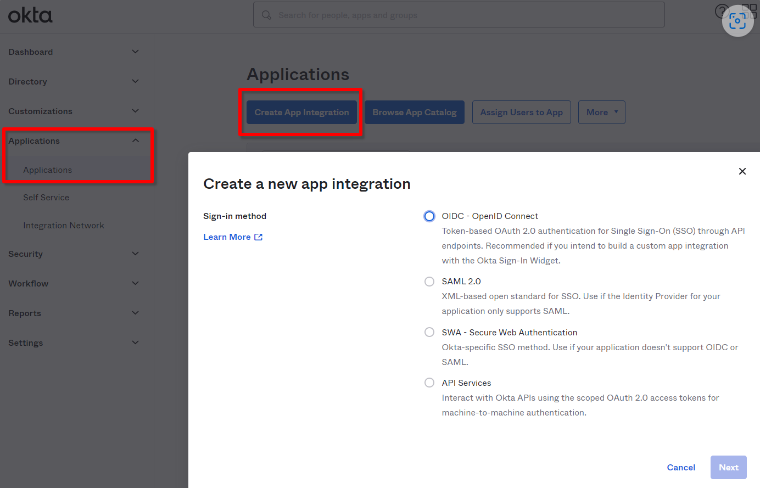
Select Applications → Applications. Click on the "Create App Integration" button.
-
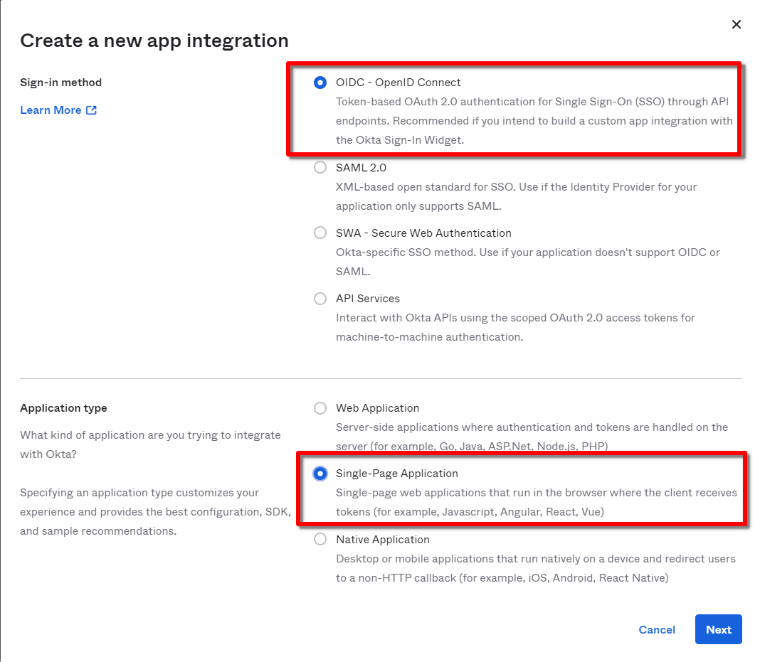
Select OIDC - OpenID Connect
-
Select Single-Page App (SPA) as the platform type
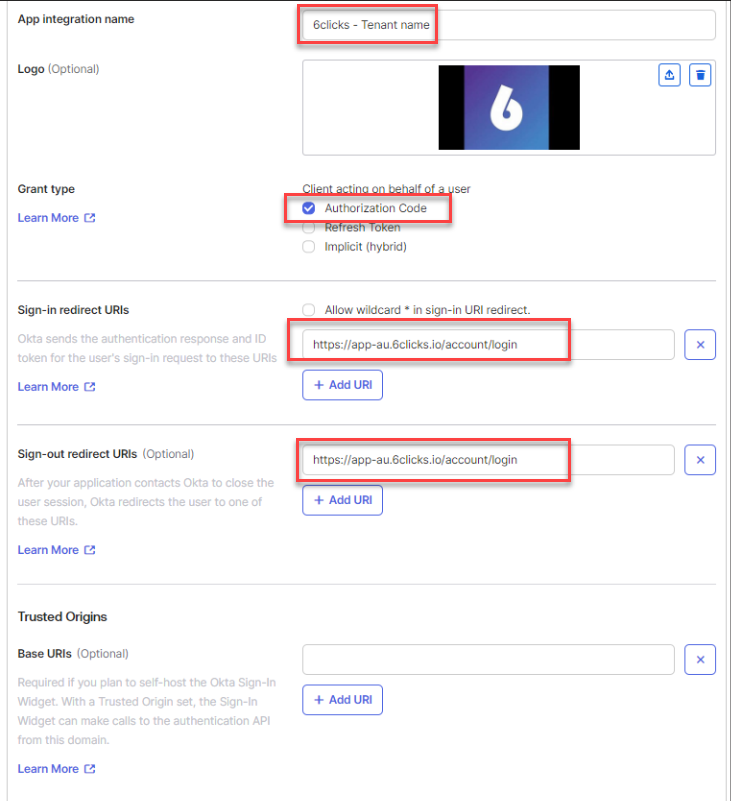
4. Okta: Configure the Application
-
App integration name: Provide a name for the application, such as "6Clicks - Tenant Name"
-
Logo: You can download the 6clicks logo from our Media Kit
-
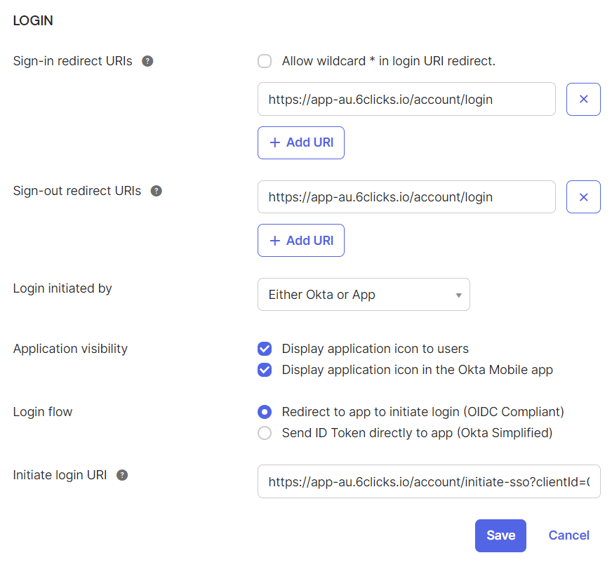
Sign-in redirect URIs: https://{6clicks host name}/account/login (e.g. https://app-au.6clicks.io/account/login)
-
Sign-out redirect URIs: https://{6clicks host name}/account/login (e.g. https://app-au.6clicks.io/account/login)
-
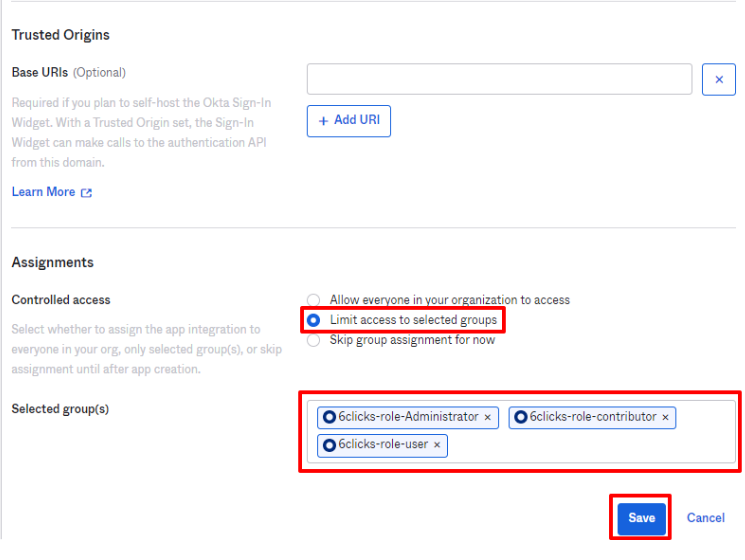
Assignments: <add in the groups created in the previous step>
(Note: The sign-in and sign-out URIs required for the Okta configuration can be obtained from the 6clicks SSO settings noted earlier)
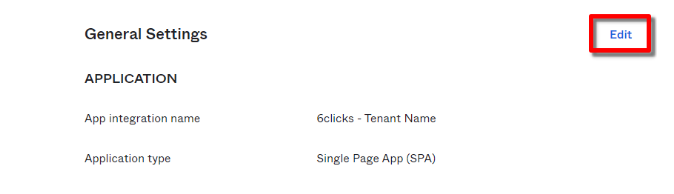
5. Enable Login from Okta Dashboard
-
In the application General Settings select 'Edit'
-
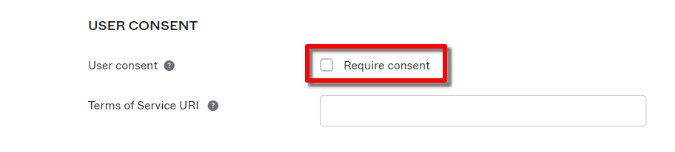
Uncheck Require consent
-
Login initiated by: Either Okta or App
-
Application visibility: tick both boxes as required
-
Login flow: Redirect to app to initiate login (OIDC Compliant)
- Initiate login URI: https://{6clicks host name}/account/initiate-sso?clientId={client Id of Okta application} (e.g. https://app-au.6clicks.io/account/initiate-sso?clientId=0o12vabsj123)
-
Save
Note the Client ID
The Client ID of your new Okta application will be required to finish the 6clicks setup, so please note it and save it for future reference
6. Configure Okta authorization server
Okta has two different authorization servers, the Custom Authorization servers (which includes the ‘default’ custom server) and the Okta Organization Auth Server (commonly called the "org authorization server"). Below are the instructions for both types of auth servers.
Using a custom Okta authorization server
Custom Server Issuer URI
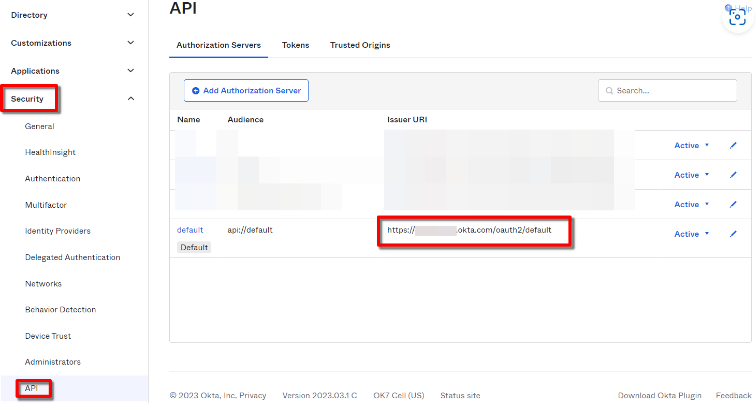
The issuer URI is shown for all the custom authorization servers within the Okta Admin Console under Security → API → Authorization servers. Copy the relevant Issuer URI.
Edit the custom authorization server you wish to use. We will be setting up a custom claim and a custom access policy and using the existing OpenID spec. ‘profile’ scope. Our example will use the default custom server, but you can use any custom server your organization is already using or you can add a new one for this purpose.
Add Custom Claim
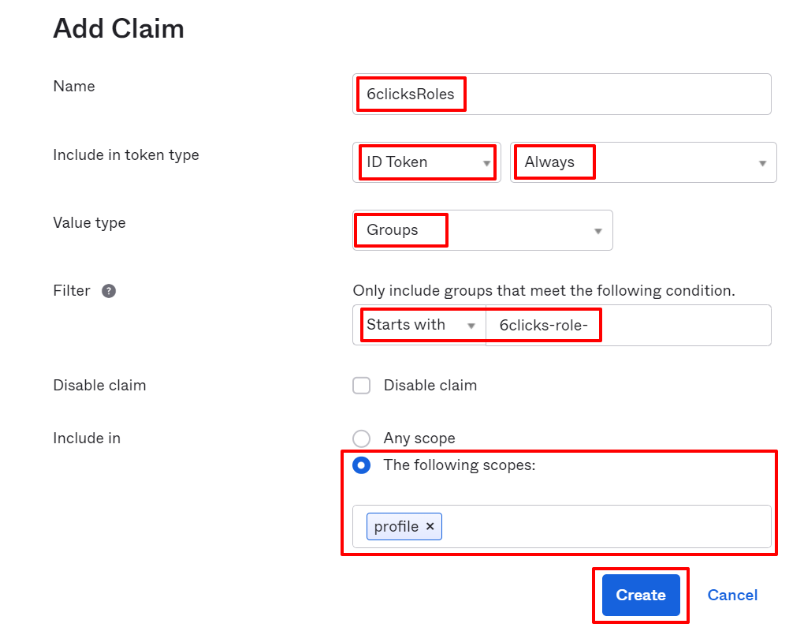
In the Claims tab, click Add Claim
-
Name: 6clicksRoles (it has to be this name).
-
Include in token type: ID Token Always.
-
Value type: Groups
-
Filter: Starts with 6clicks-role-
-
Include in: The following scopes: profile.
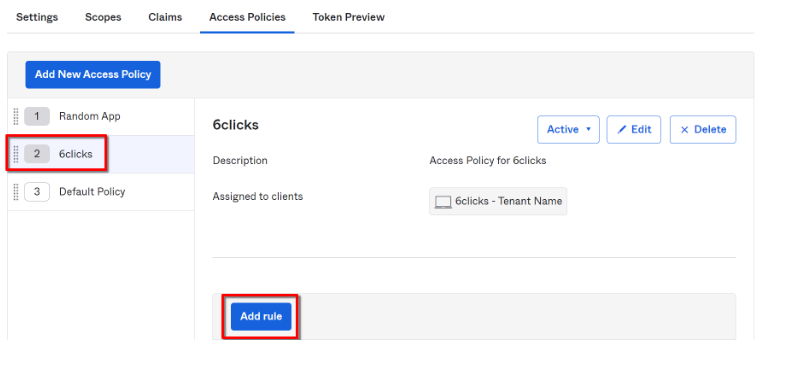
Create Custom Access Policy
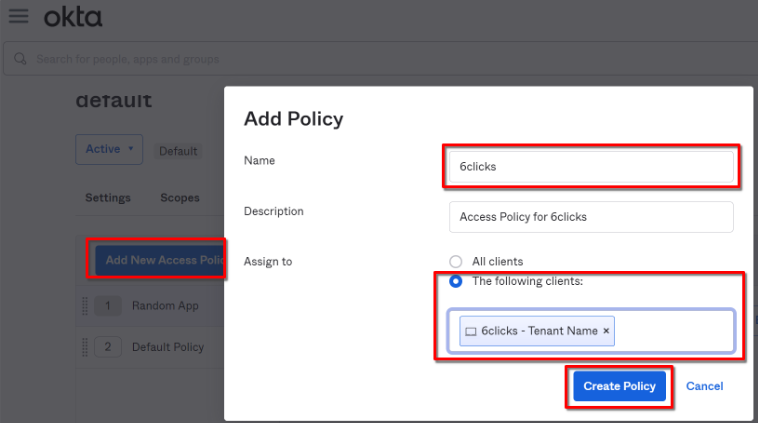
Head to the Access Policies tab and choose ‘Add New Access Policy’. Name the policy and assign it to your 6clicks application.
Create Access Policy Rule
You will need to add at least one rule. Select your policy and click the ‘Add rule’ button.
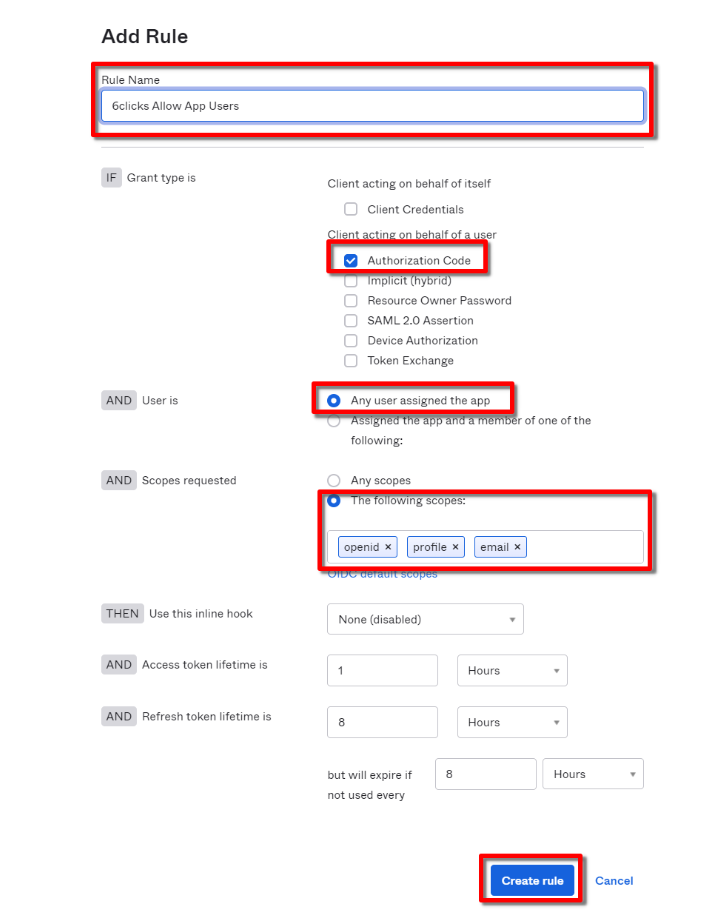
The rule should be created with the following attributes:
-
Rule name: Free format
-
If Grant type is: Authorization Code
-
And User is: Any user assigned to the app
-
And Scopes requested: The following scopes: openid, profile, email
We recommend disabling the default Okta policy. The access token and refresh token lifetimes can be configured to align with your risk tolerance.
Test your Token
You can now test that the roles attribute, with a 6clicksAuthRoles group, is added to an ID Token for this application. Please ensure that the setup above is finished and you have at least one user assigned to a valid 6clicks group within Okta.
Click on the Token Preview tab
-
OAuth/OIDC client is your 6clicks application
-
Grant type: Authorization code
-
The user must be assigned to a valid group, which needs to be assigned to the application (see above)
-
Scopes: open, profile, email
You should see a roles attribute in the id_token with the corresponding groups when you click on Preview Token

Using an Okta Organization Server (org server)
Okta Org Server Issuer URI
The Issuer URI for the Okta org auth server is: https://{yourOktaDomain}. You will need this to finish the 6clicks setup, so please note it and save it for future reference.
Configure the Org Server Group Claim
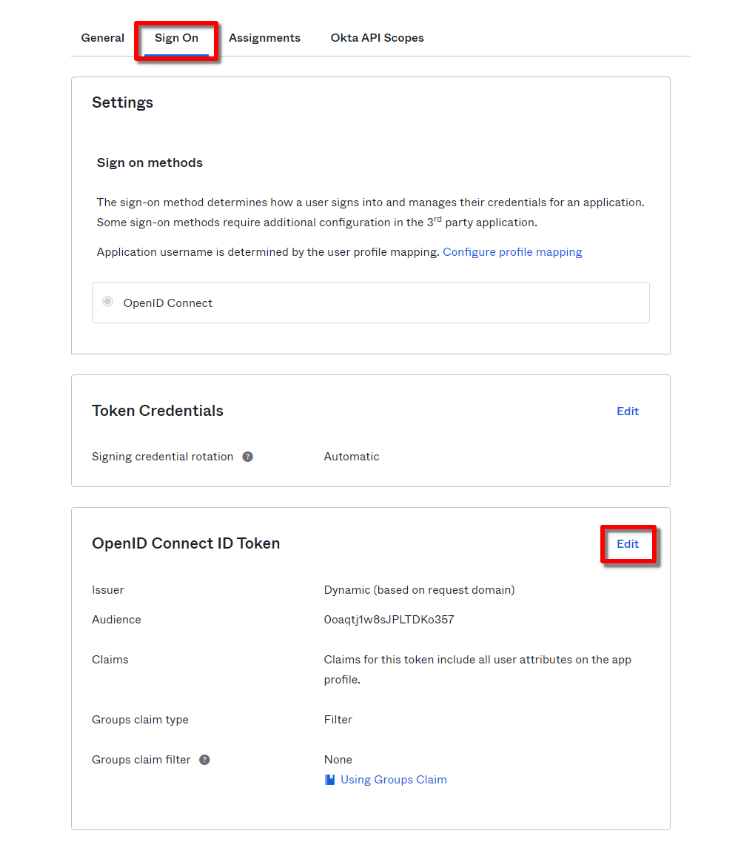
In the application Sign On tab, click ‘edit’ in the OpenID Connect ID Token section.
-
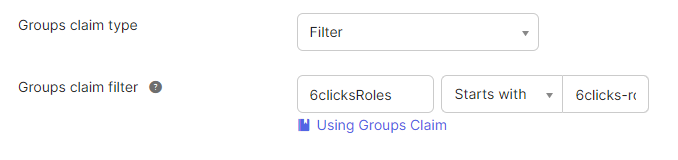
Keep the group claim type as Filter and make the filter: 6clicksRoles ‘starts with’ 6clicks-role-
When a user logs into the "6Clicks - Tenant Name" application, the group claims will be included in the ID token, with the group names being the role names.
7. Finish 6clicks Setup
You should now have an Okta Client (application) ID and an Issuer URI. Armed with this information head back to 6clicks to finish the 6clicks SSO setup.