Configuring issue workflow stages
Learn how to configure issue workflow in the Spoke
This article discusses issue workflow stages in detail and provides instructions on how to configure them.
If you have a Hub and prefer centralized issue workflow management in the Hub instead, head here to learn more.
Table of contents:
Getting started
Issue workflow stages allow your organization to effectively address issues by defining different stages, and moving issues between them as applicable at different stages of the issue's lifecycle.
To get started, head to Issues & incidents > Workflow.
(If you are in the Hub, stay in Administration > Custom data.)
If you don't see Workflow under Issues & incidents in the Spoke even though the Hub setting is Enabled, you may be missing the permissions grouped under Issue workflow stages.
The 4 default issue workflow stages are:
- New
- Triage
- In Progress
- Completed
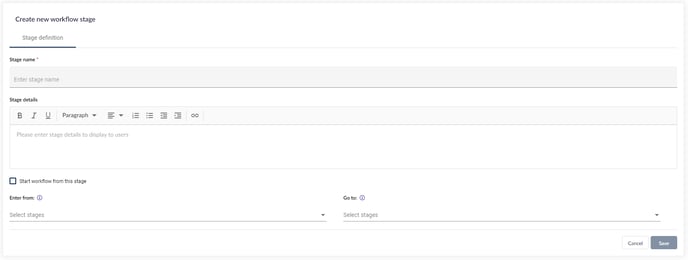
Click on Create new workflow stage to get started.
Stage definition
Define the below details in the Stage definition tab.

- Stage name
- Stage details
- Start workflow from this stage - tick this if this is the first stage in your workflow
- Enter from - if this is not the first stage, select stage(s) that can lead to this stage
- Go to - if this is not the last stage, select stage(s) that this stage leads to
Click Save when you are done.
Connecting and organizing stages
Add as many stages as your organization deems necessary.
Click the arrow next to a stage's name to show or hide its description, the pencil to edit it, and the red bin to delete it. Reorder stages by holding the 6 dots to the left and dragging them.
To learn more about issues in general, head here.

