Spoke groups
Organize your spokes using spoke groups
Table of contents:
Add spokes / clients to groups
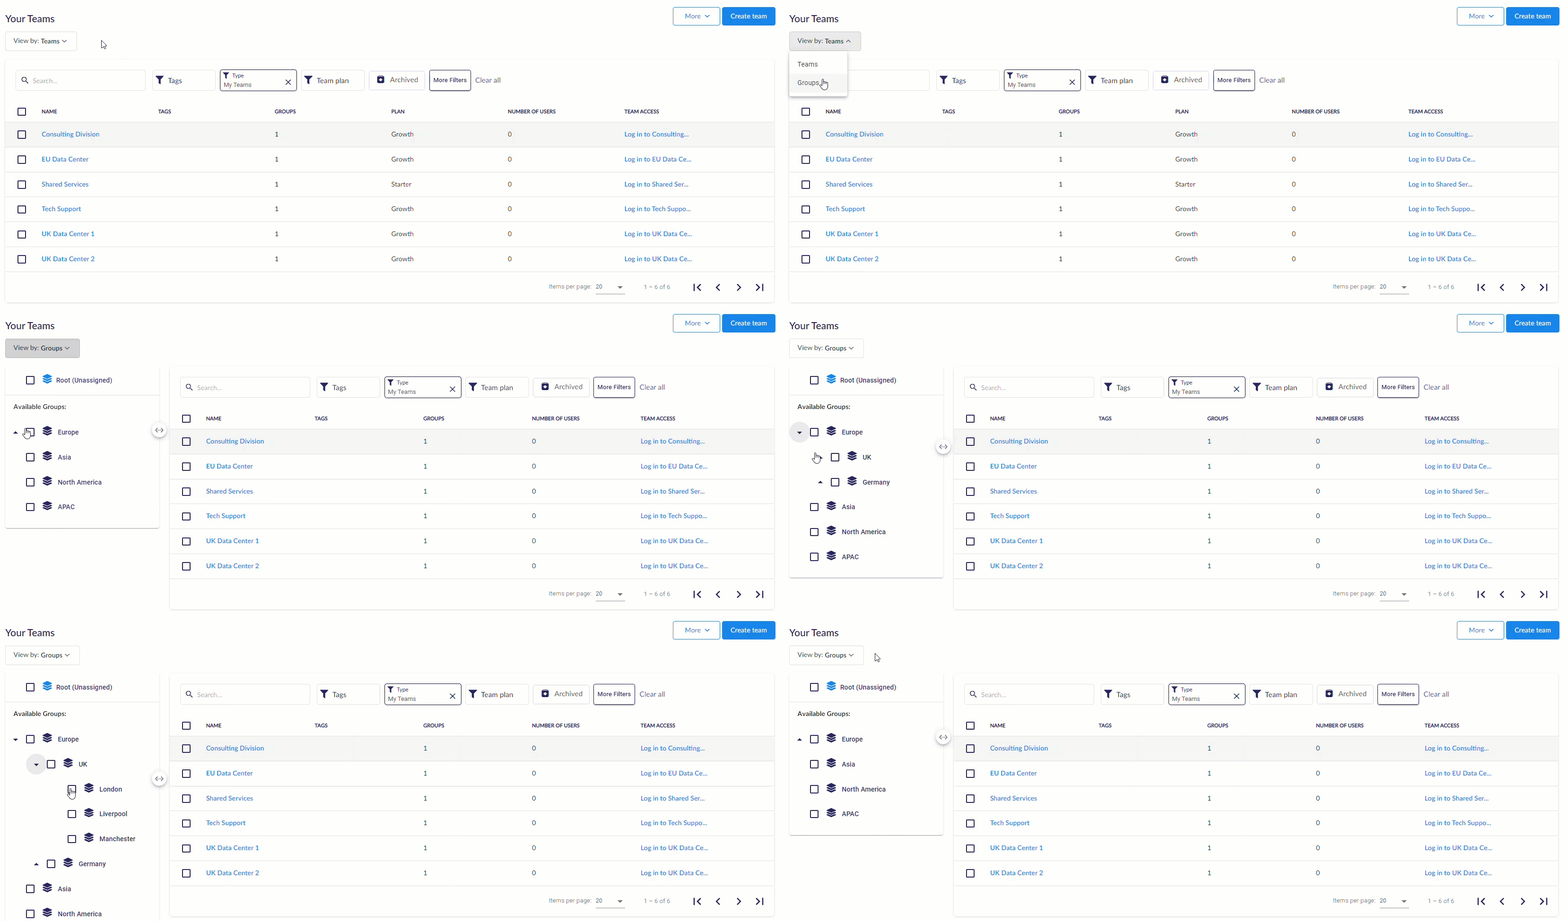
Spoke groups allow you to organize spokes/clients into groups. Groups can be set up to have parent-child relationships, giving you the flexibility to create your organizational structure or better organize clients.
Creating new groups
To create a spoke group, first, log into your Hub team and click More > Group management.
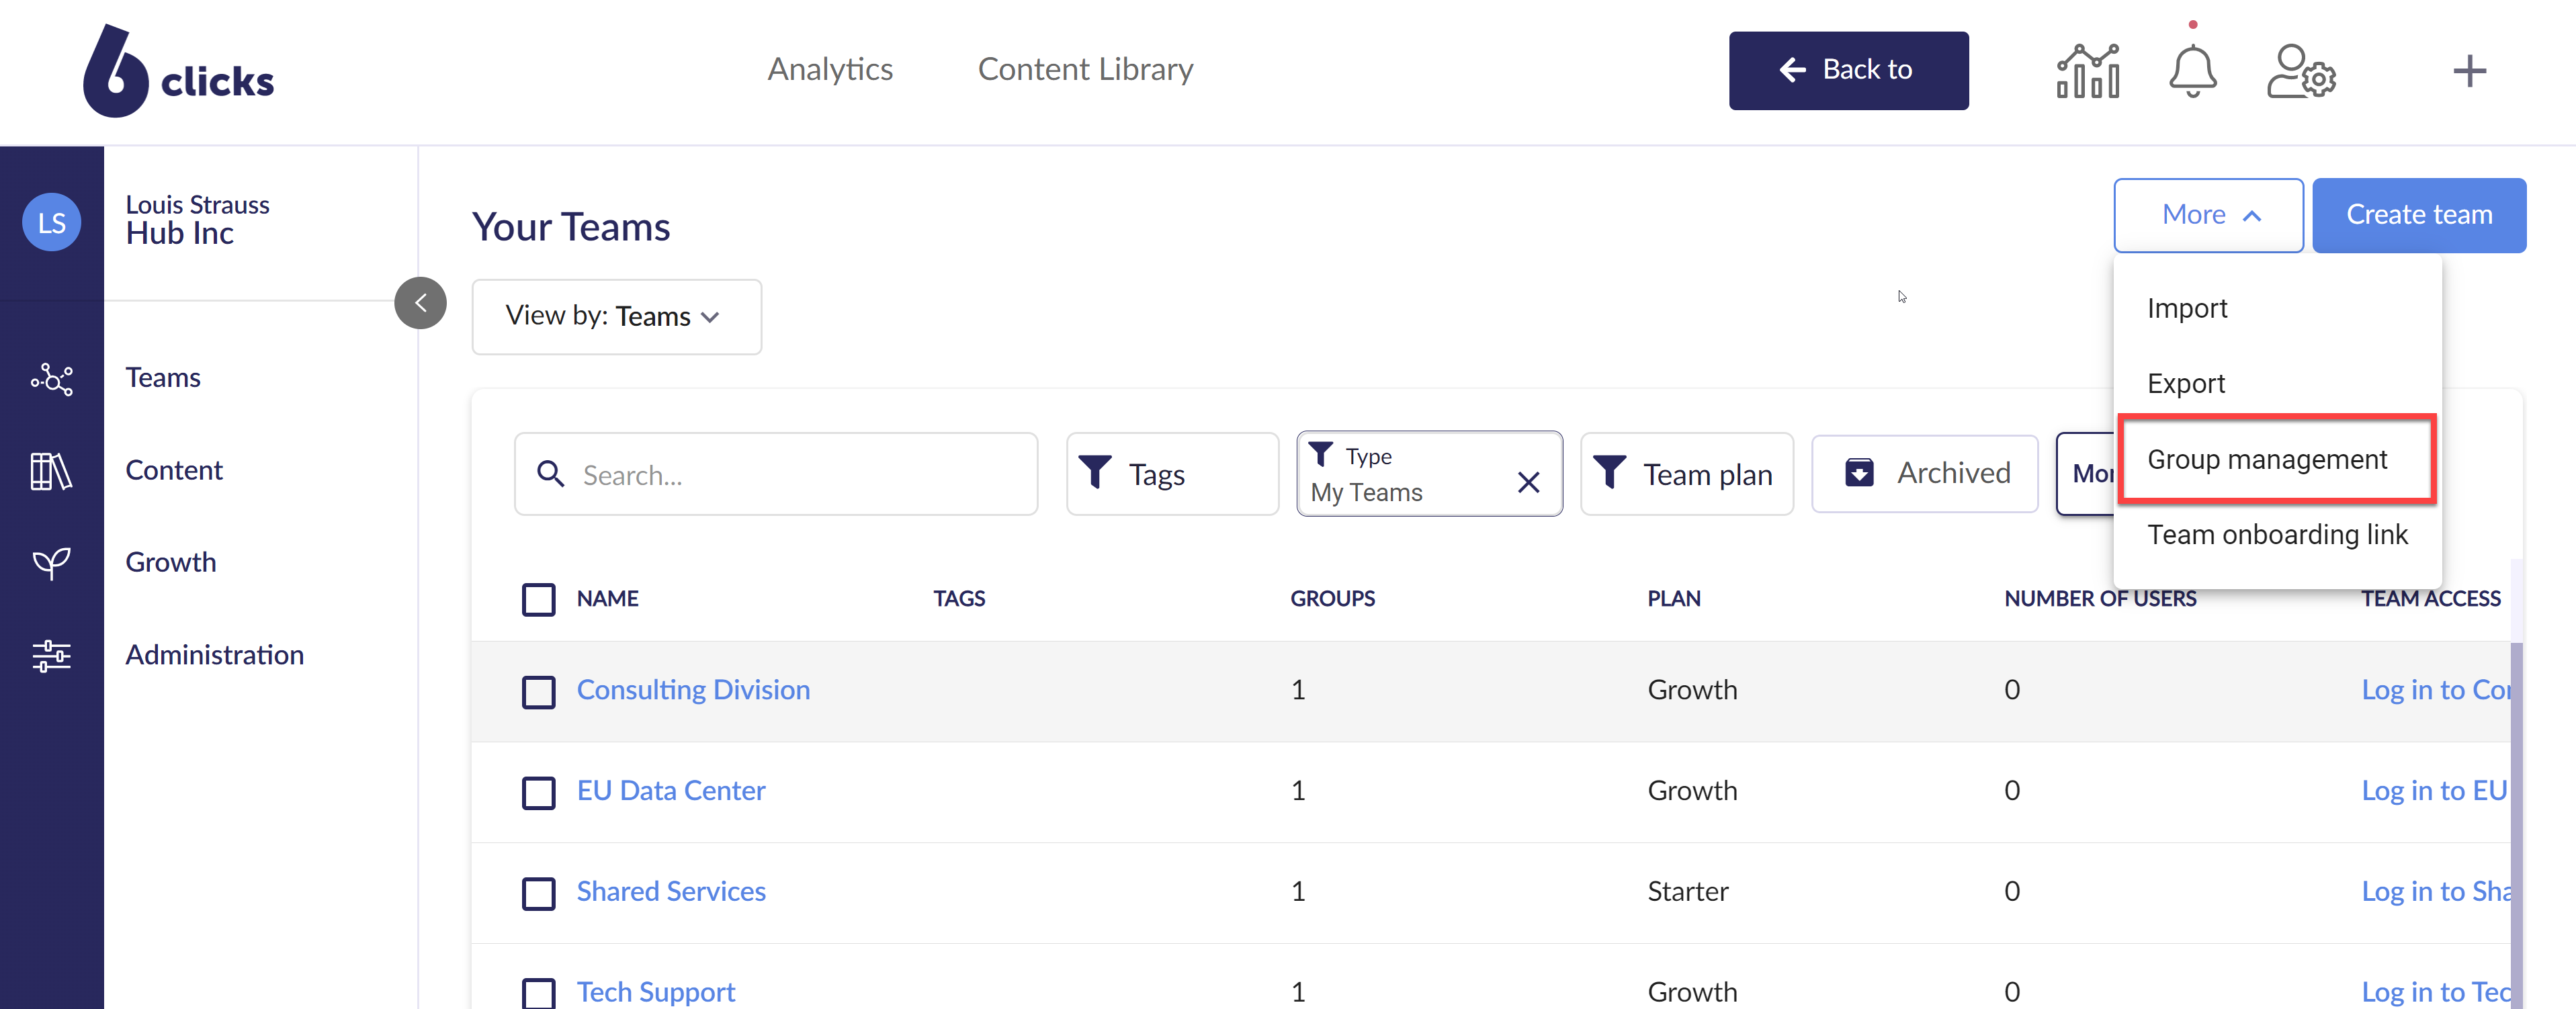
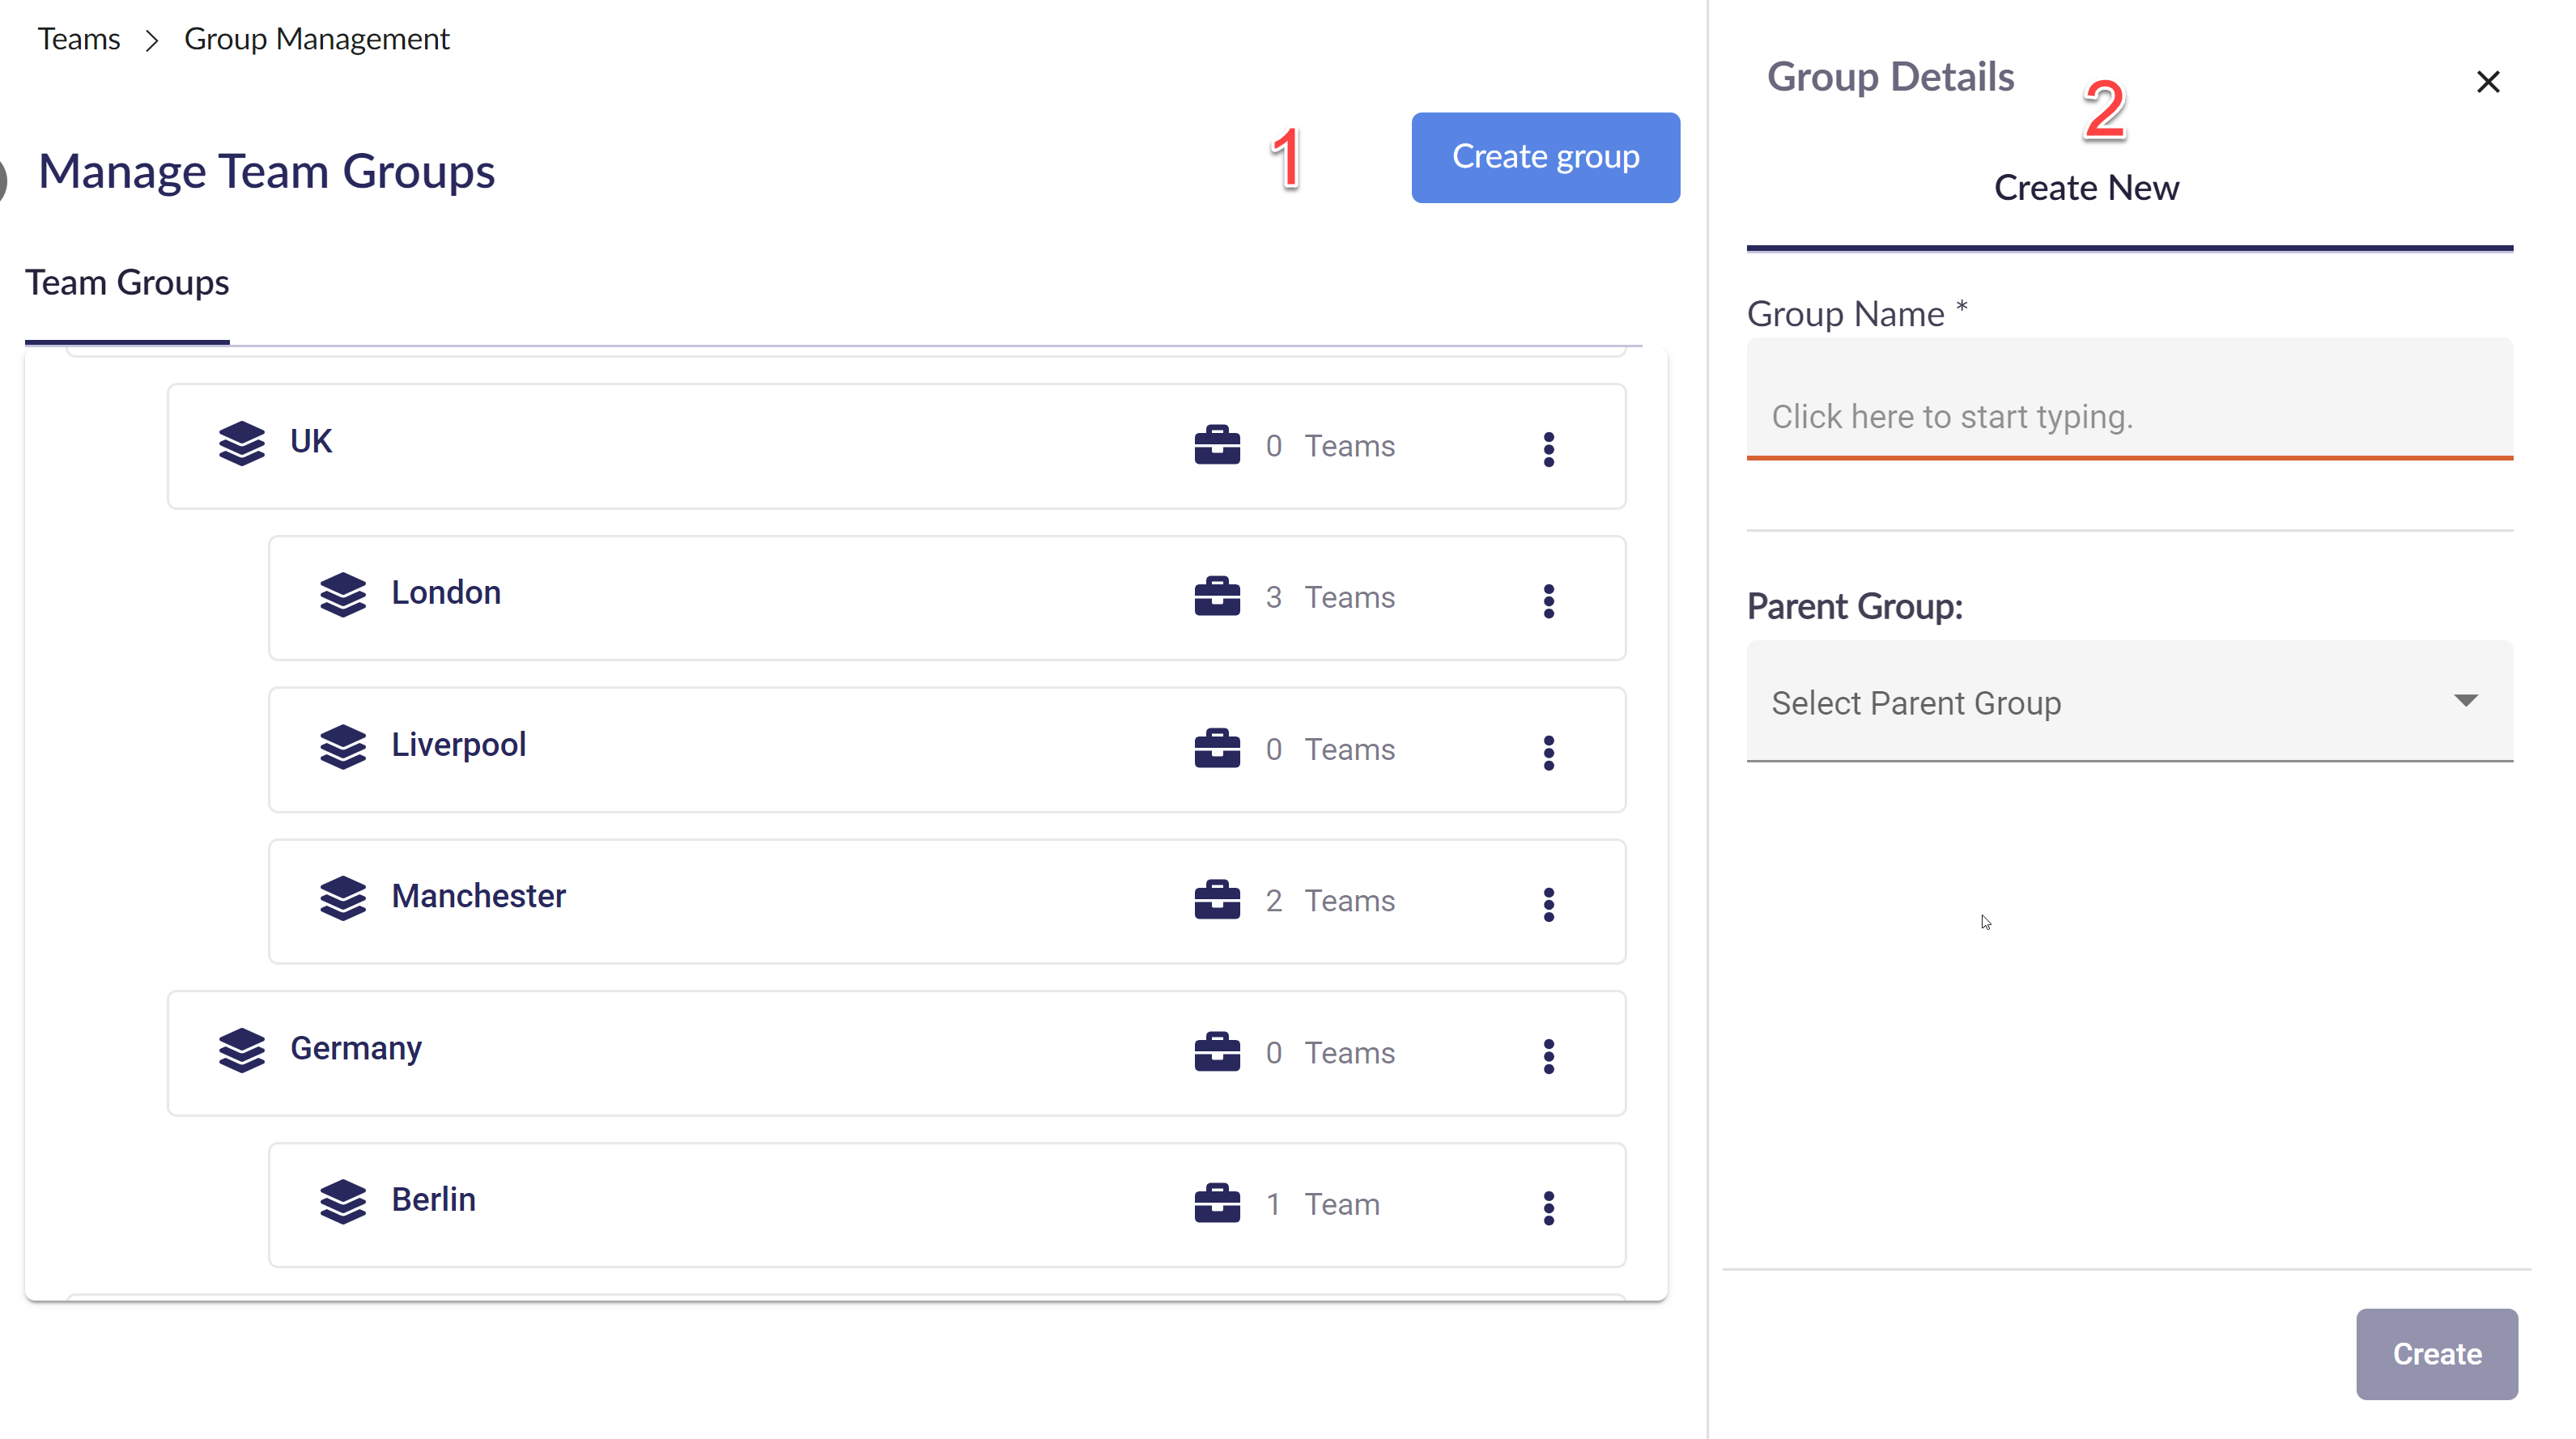
You will be navigated to the Manage Groups page. To create a group, click Create group on the top right (1), and the Group Details side panel menu (2) will appear.
In the side panel, type in the Group's Name (1), and select if the group will have a Parent Group (2). If the Parent Group field is left blank, then the Group you create will be a first-level group. Click Create (3) to create the group.
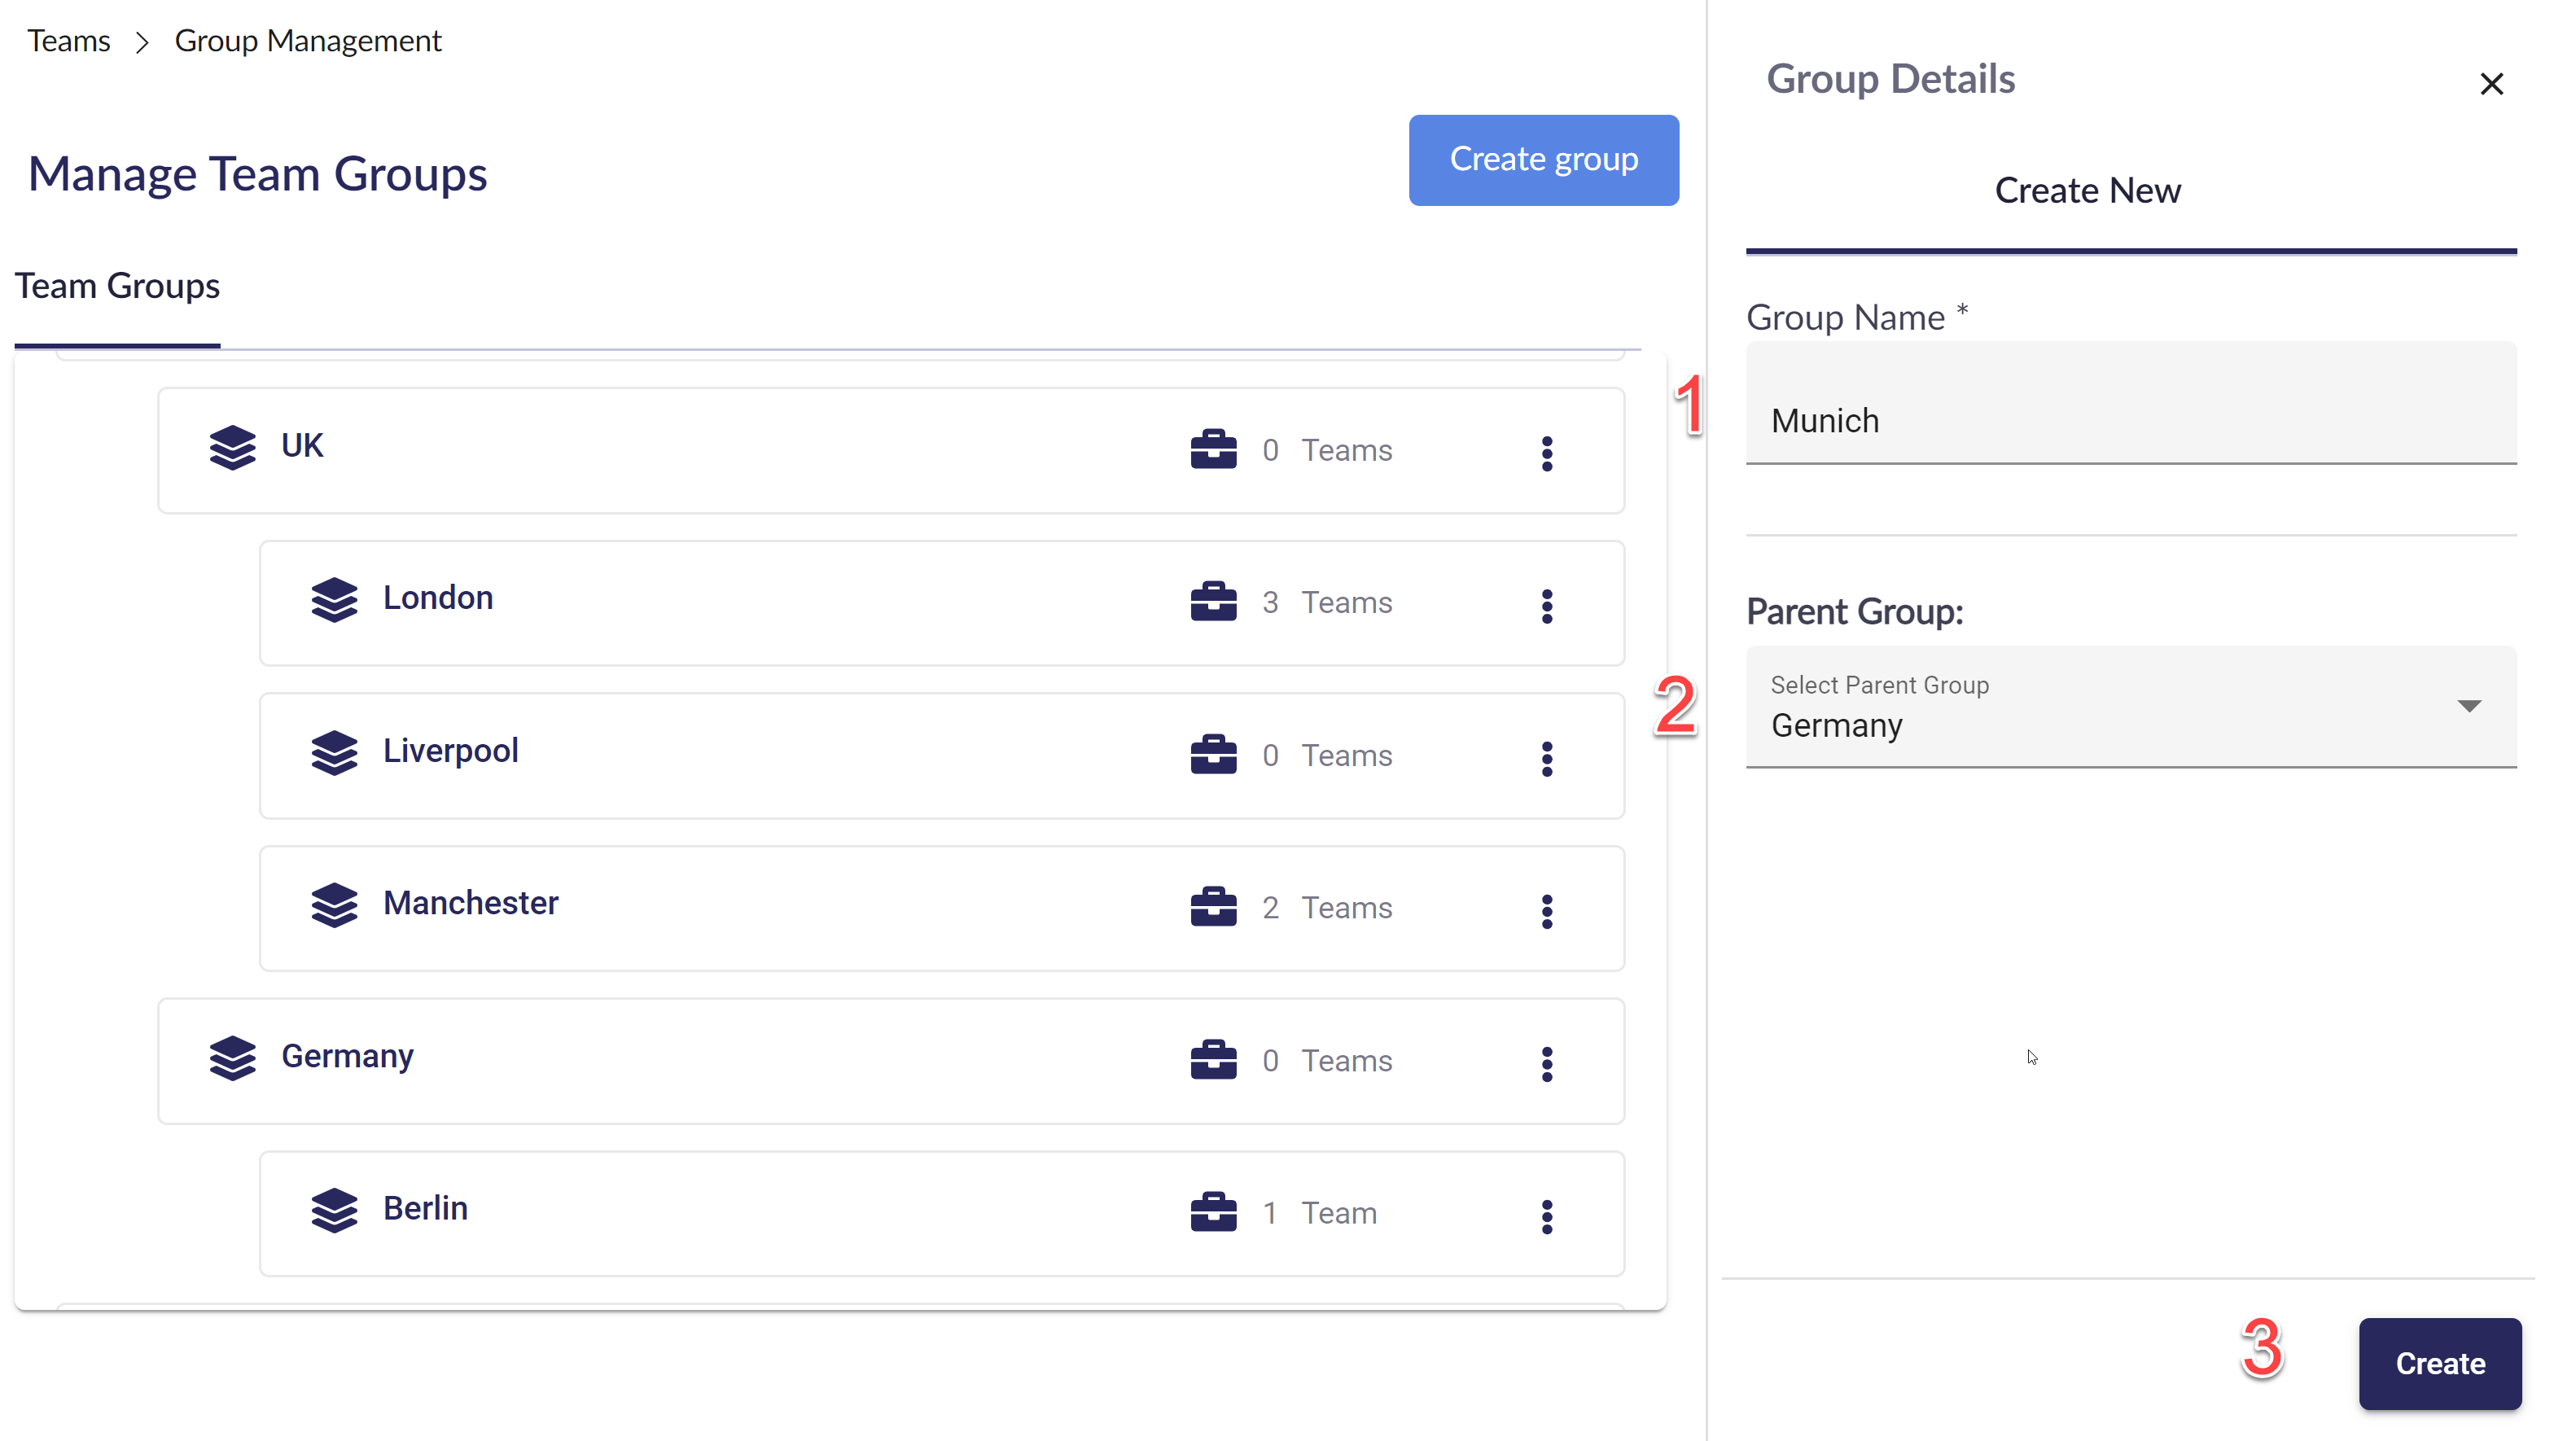
In this example, the group Munich was created with Germany as its parent group.
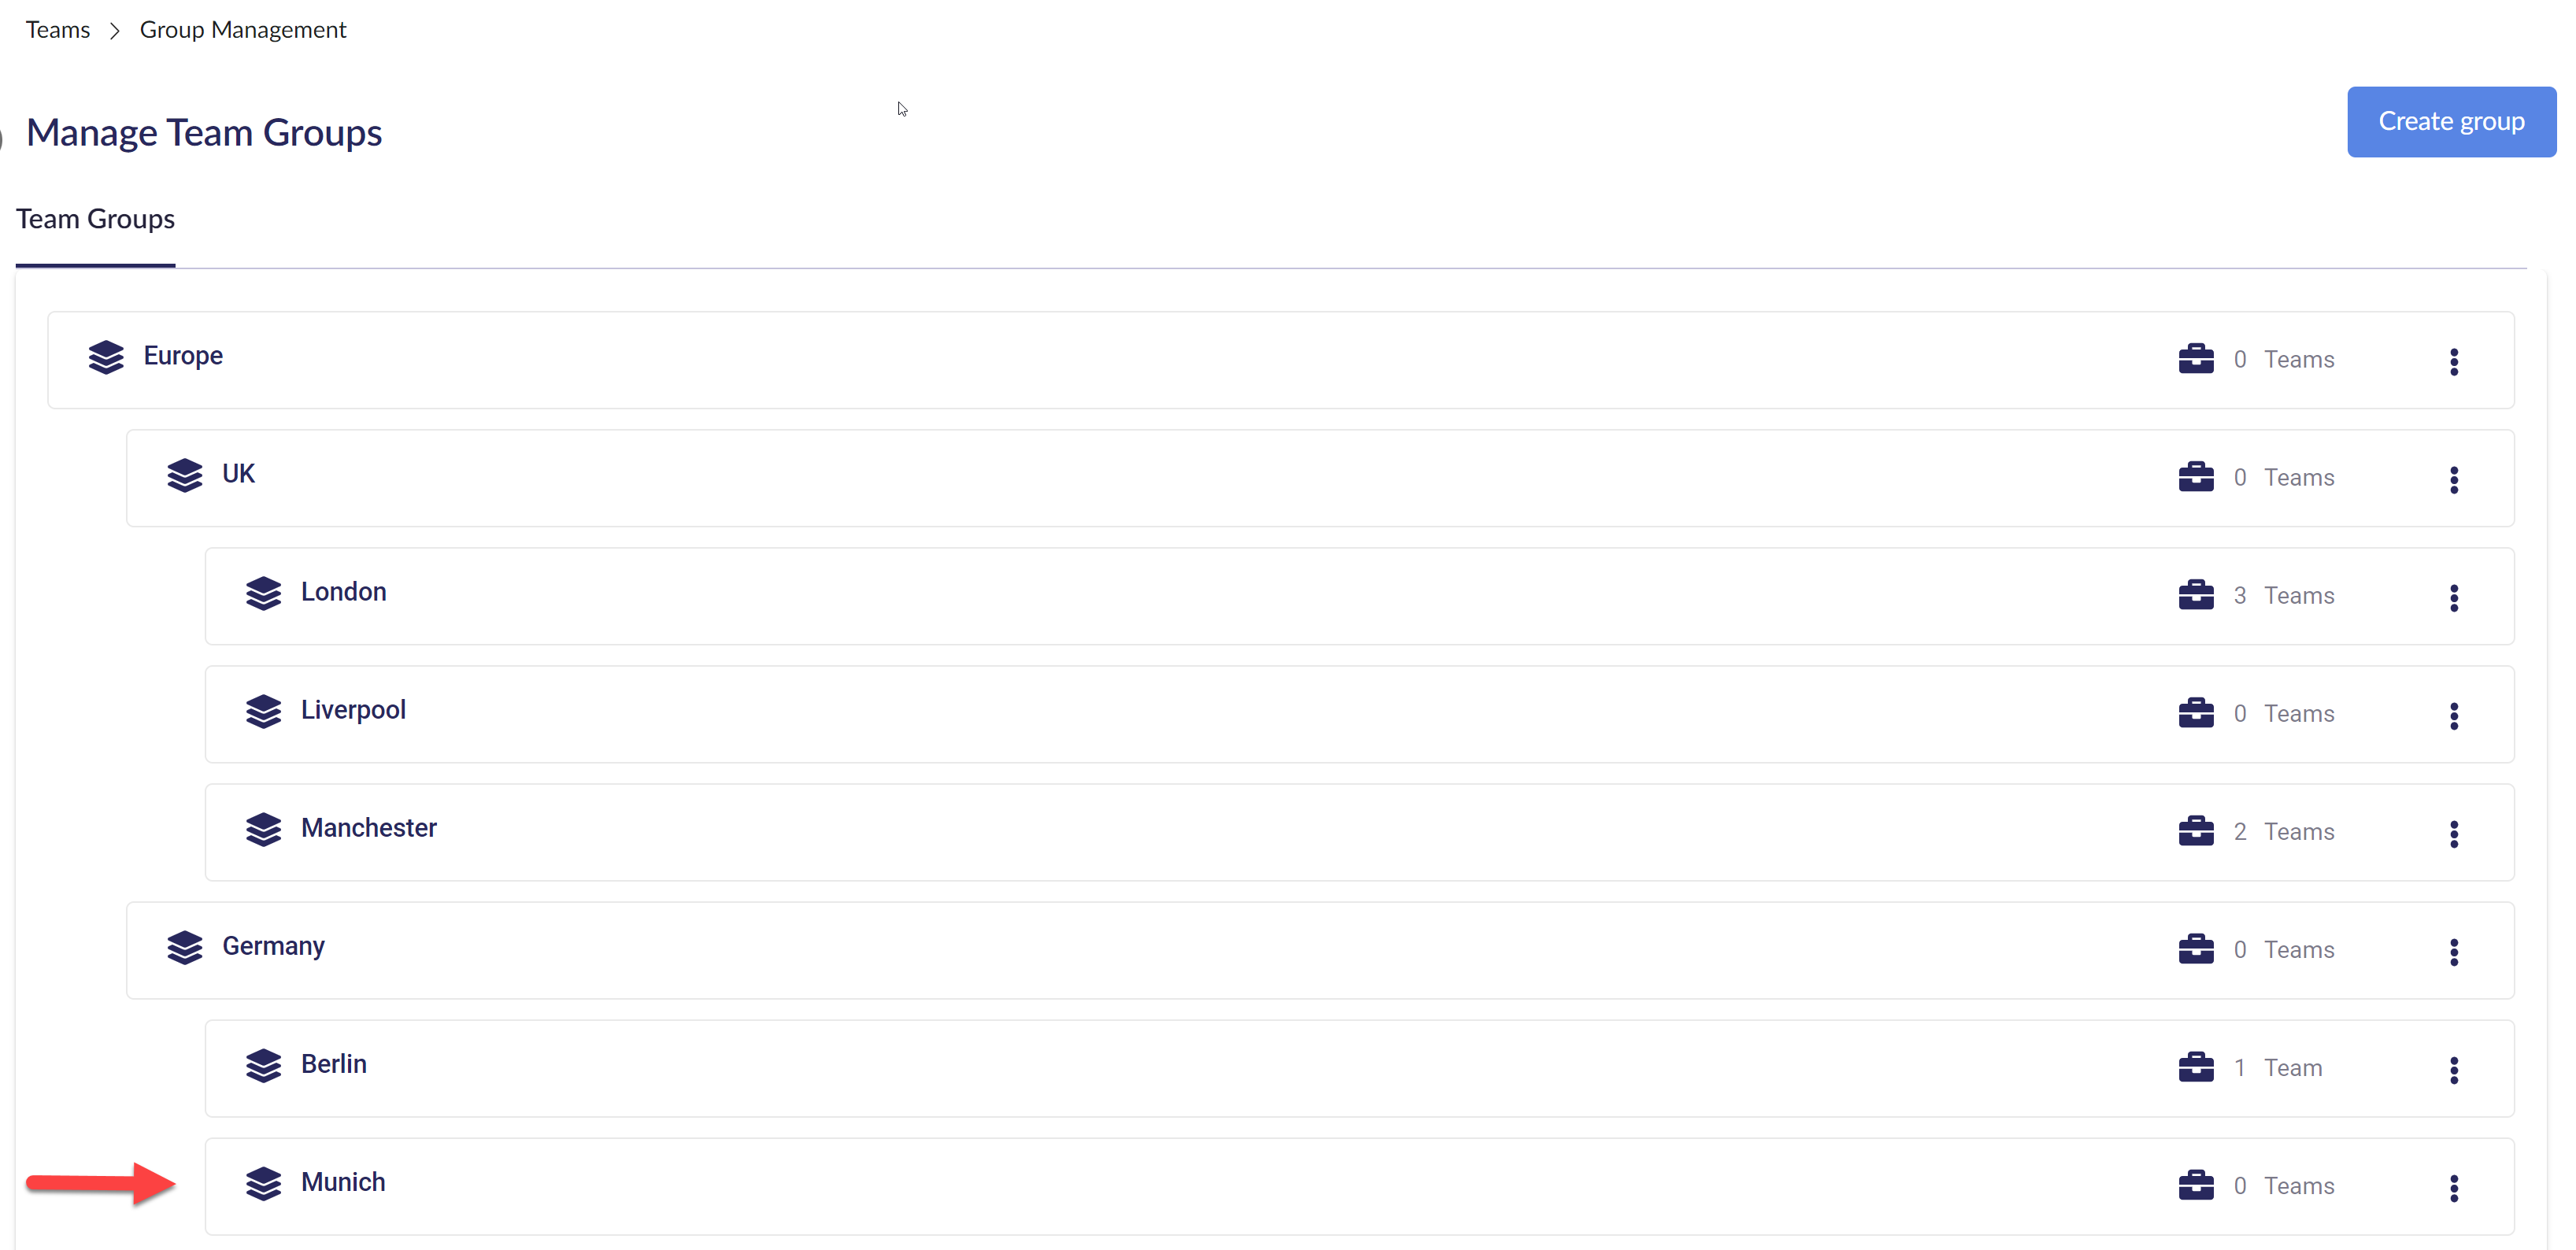
Editing and deleting groups
To edit or delete a group, simply click on the group to show the Group Details side panel menu. From here, you can update the Group Name (1) and Parent Group (2) and confirm the changes by clicking Save (3). Or you can delete the group by clicking Delete Group (4).
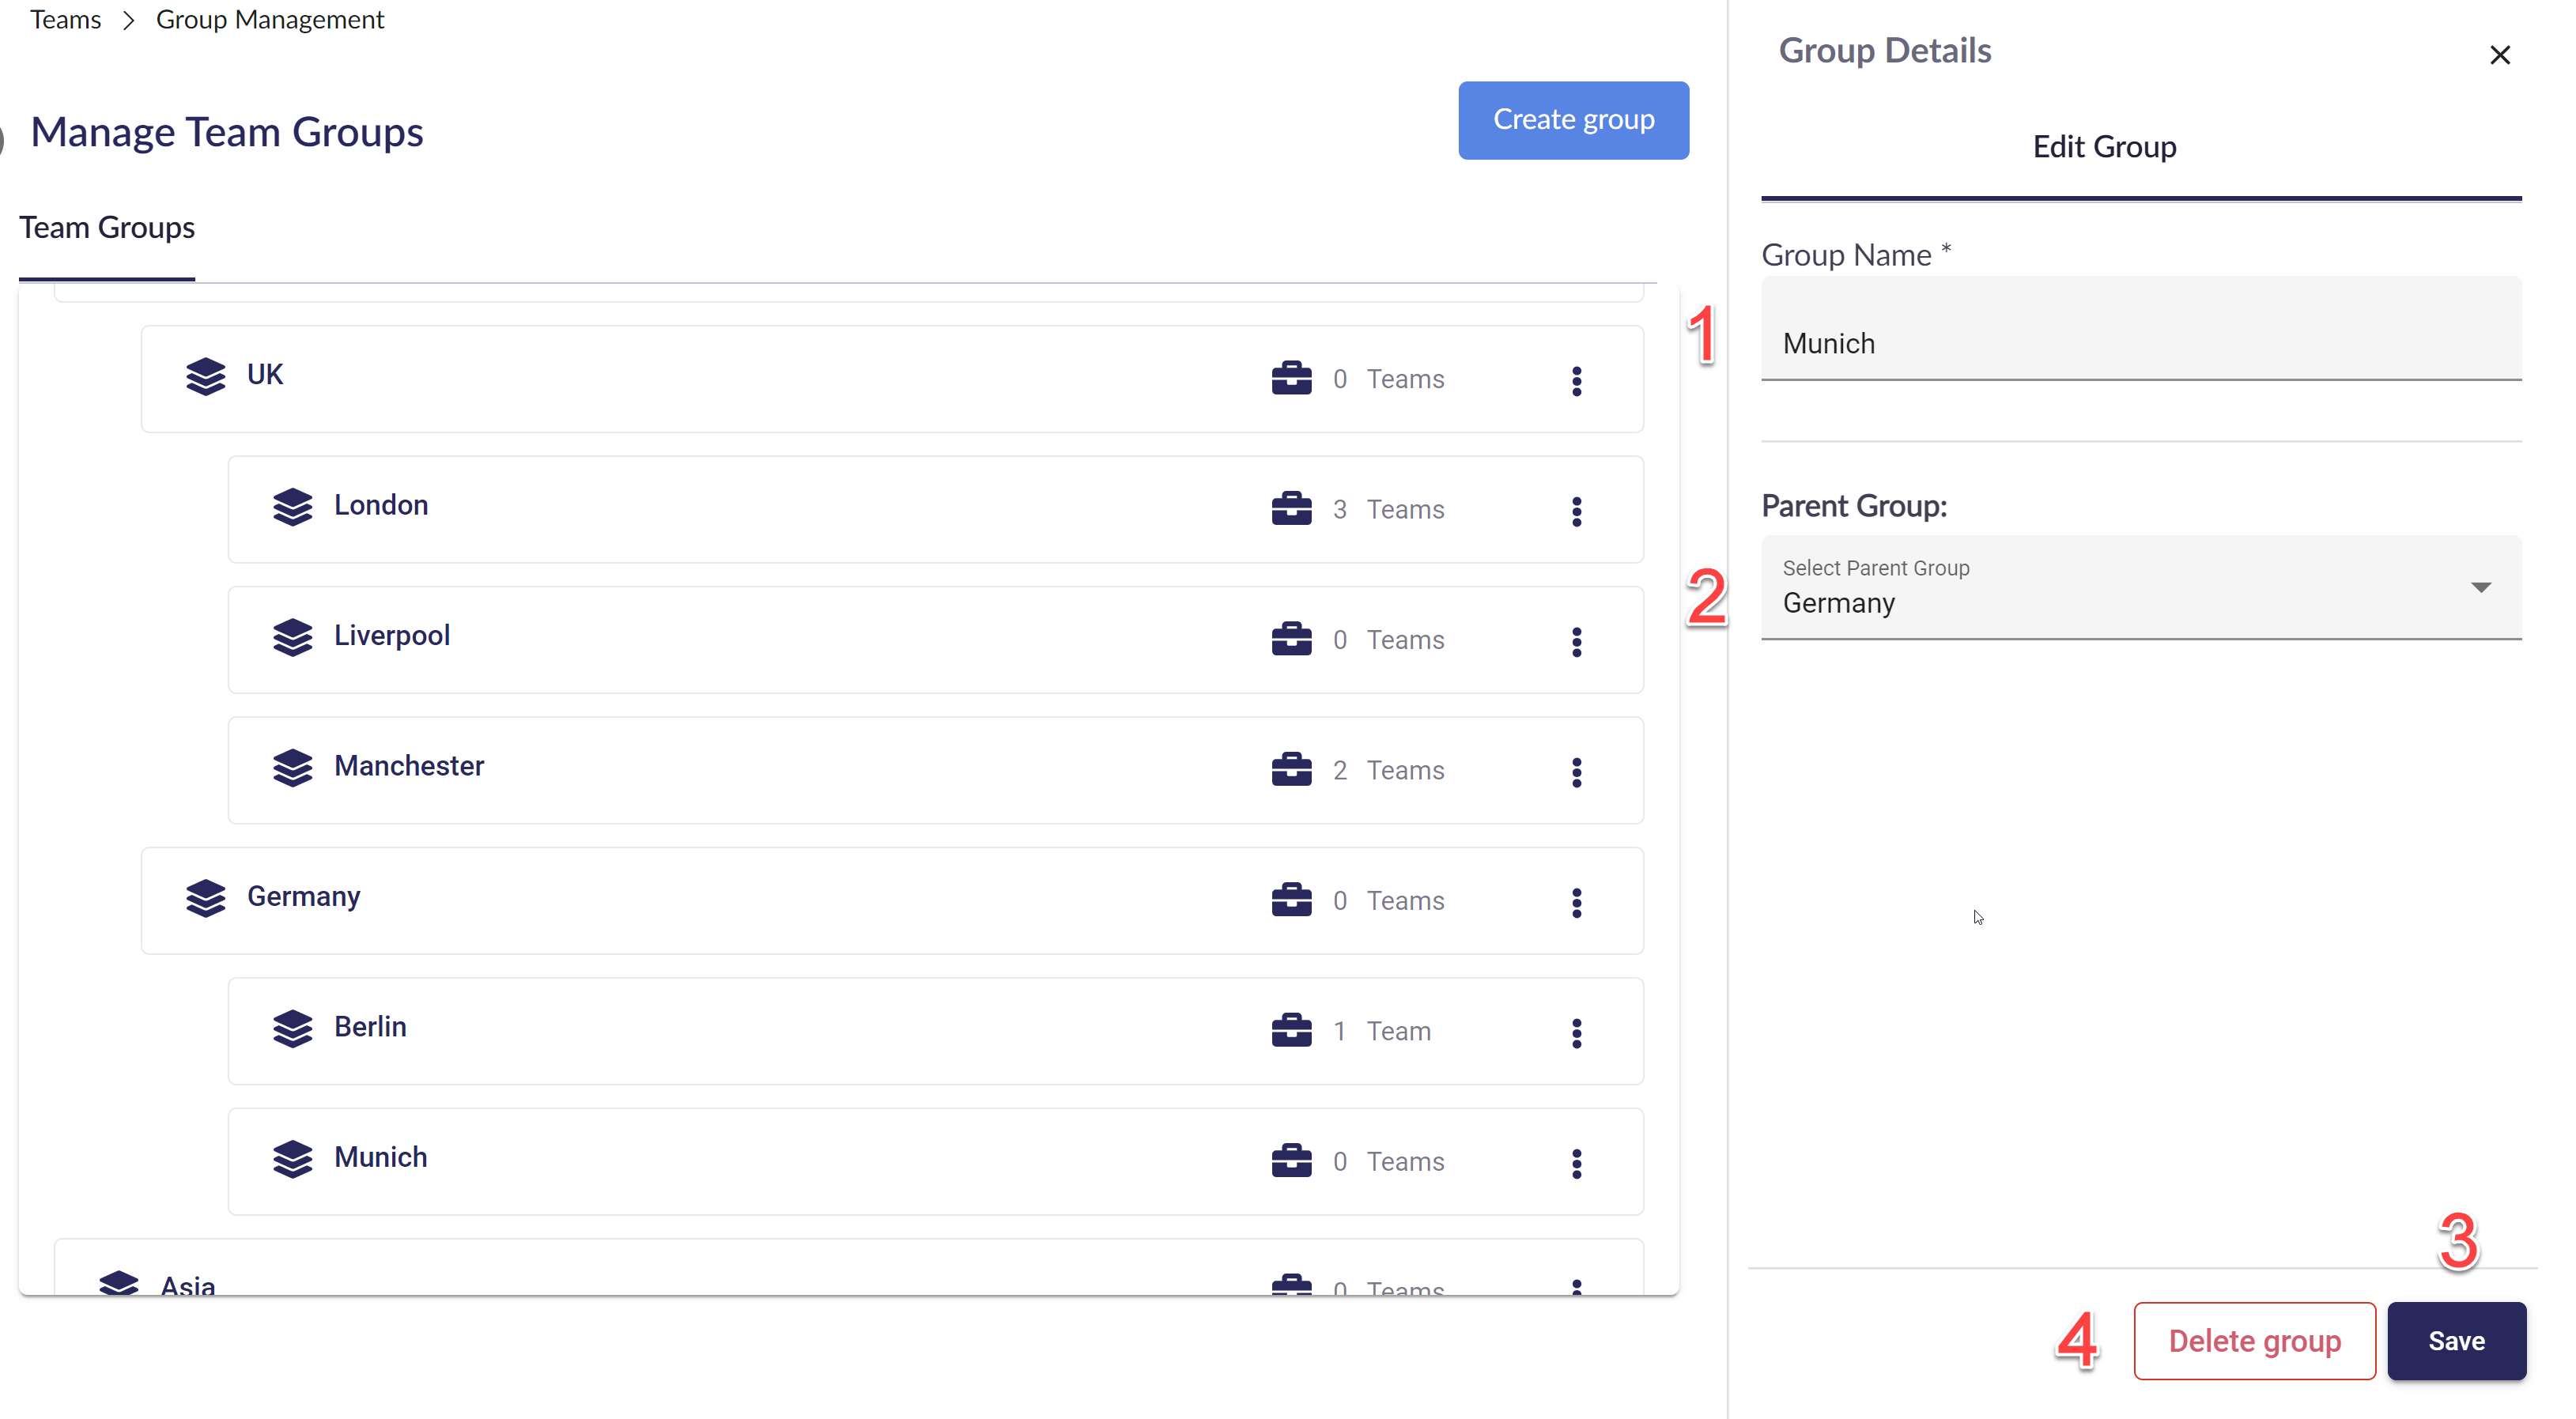
If you change a group's parent, all child groups will move with it.
Add spokes / clients to groups
First, navigate to the home screen, where you can see your list of spokes/clients.
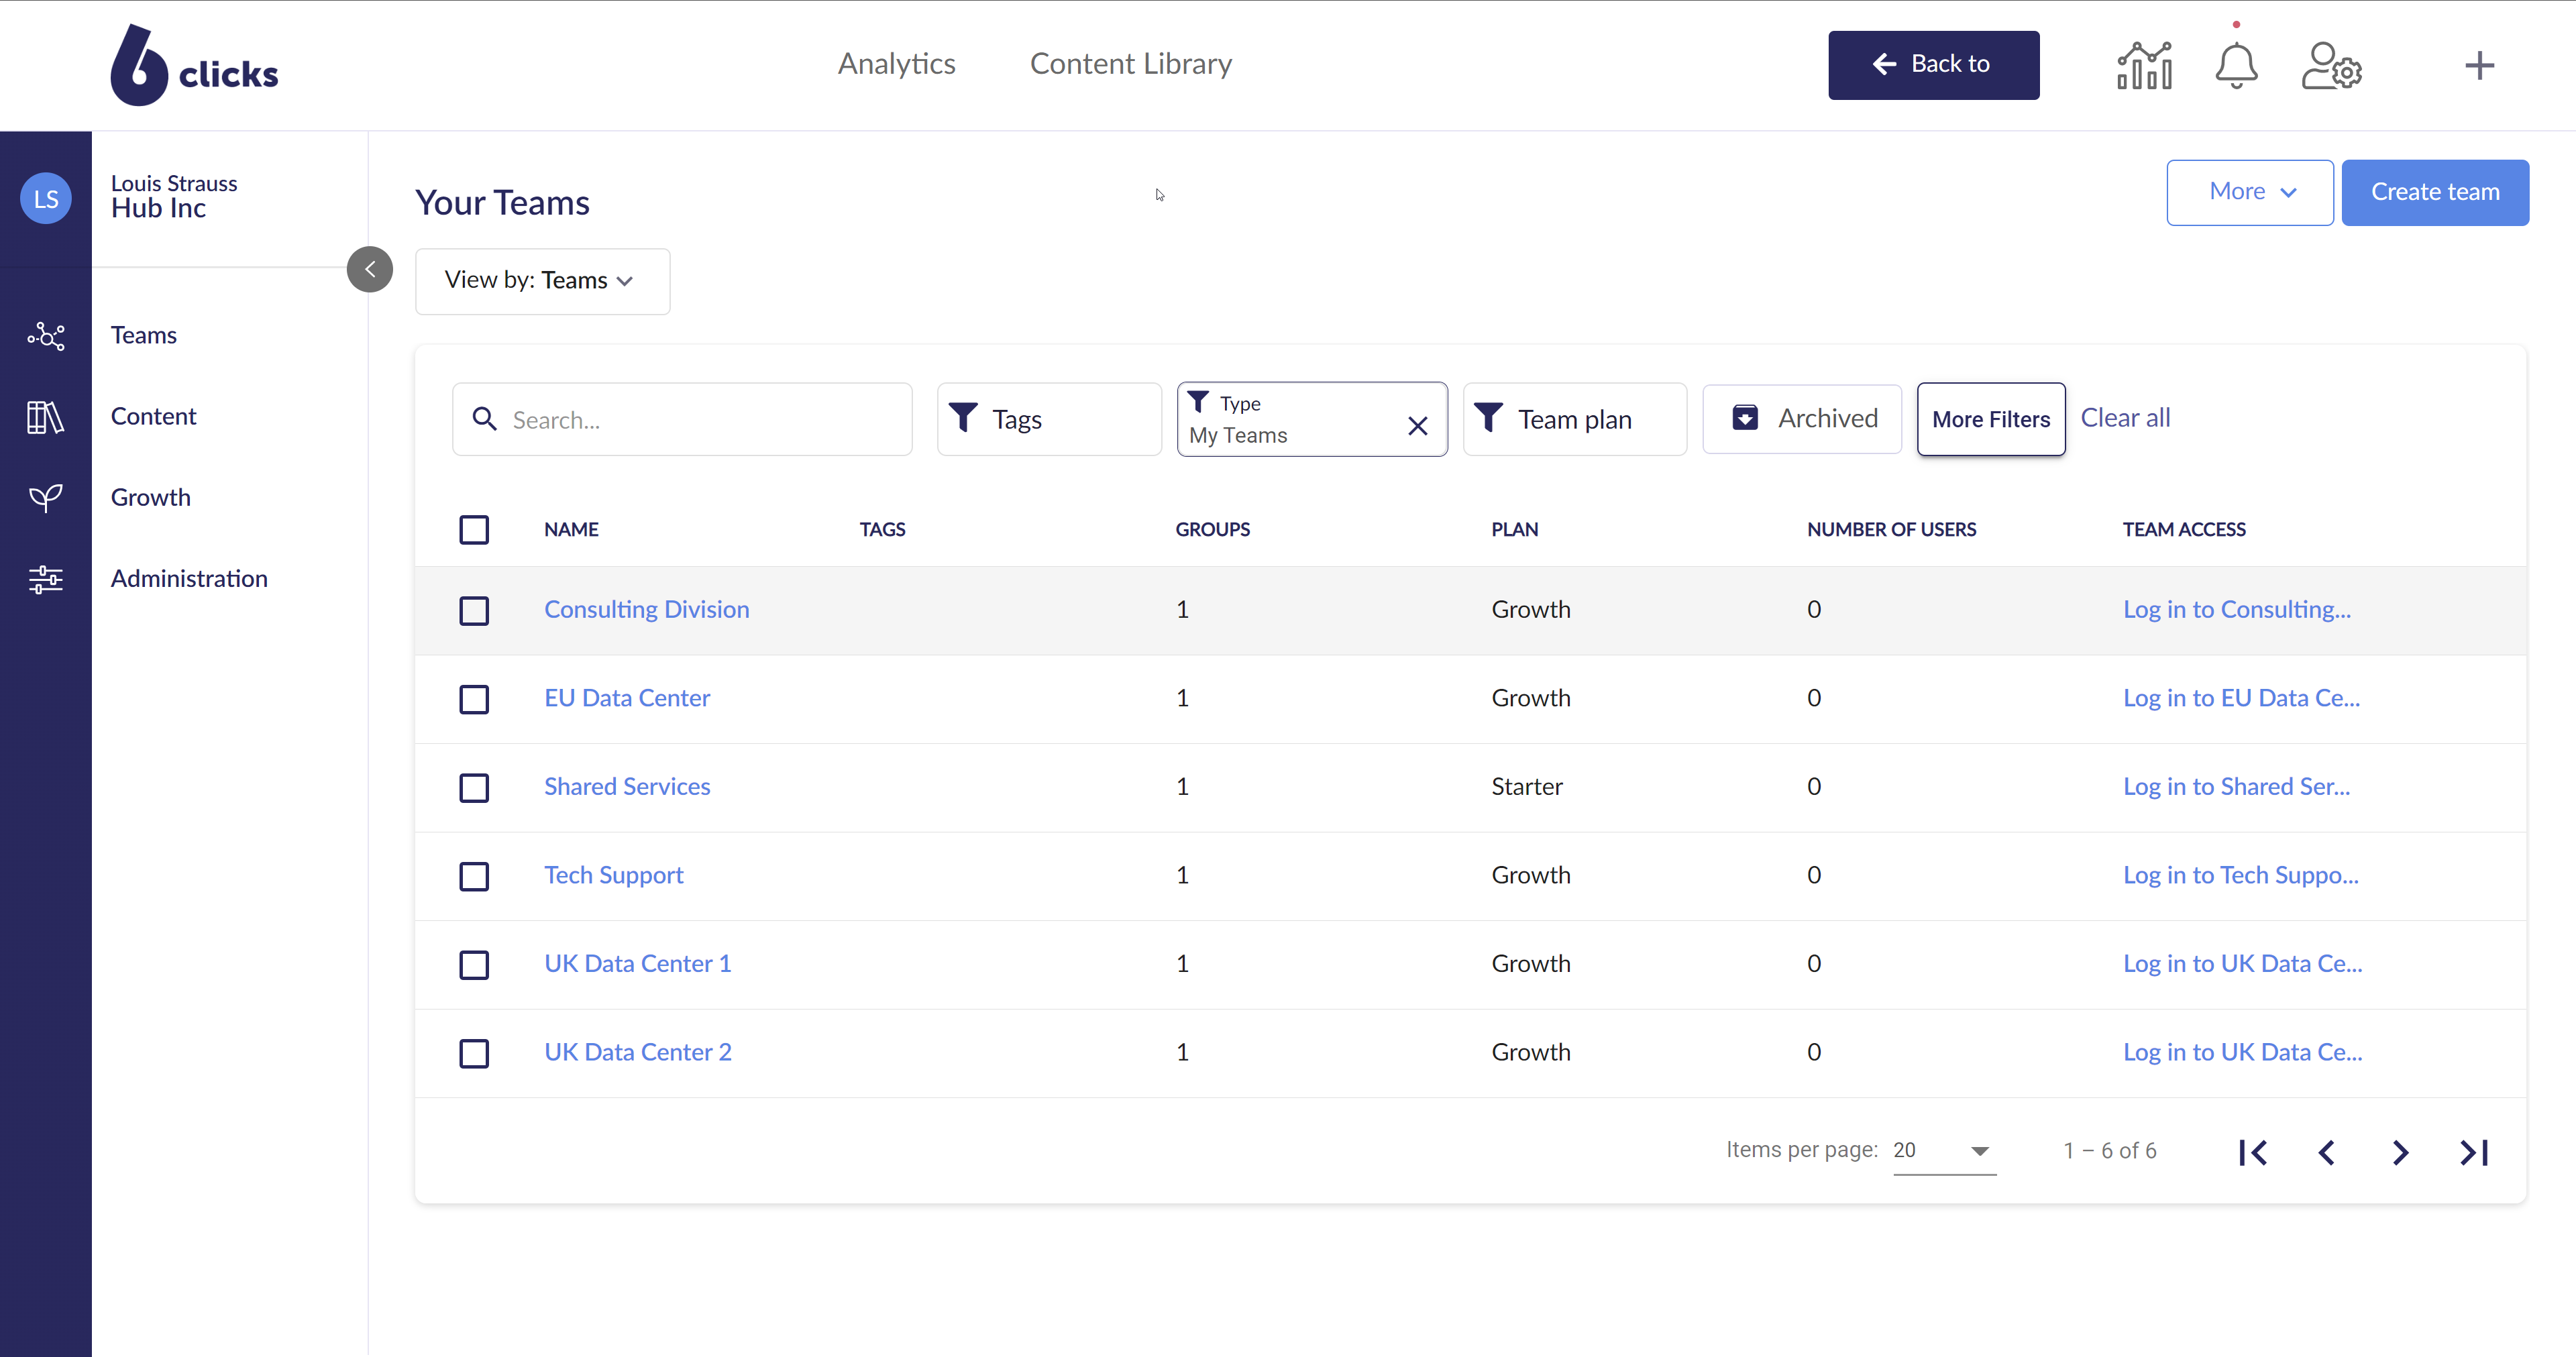
From the home screen, you can select one or more spokes/clients (1), then click the Edit (2) button and the Edit Teams side panel menu will appear.
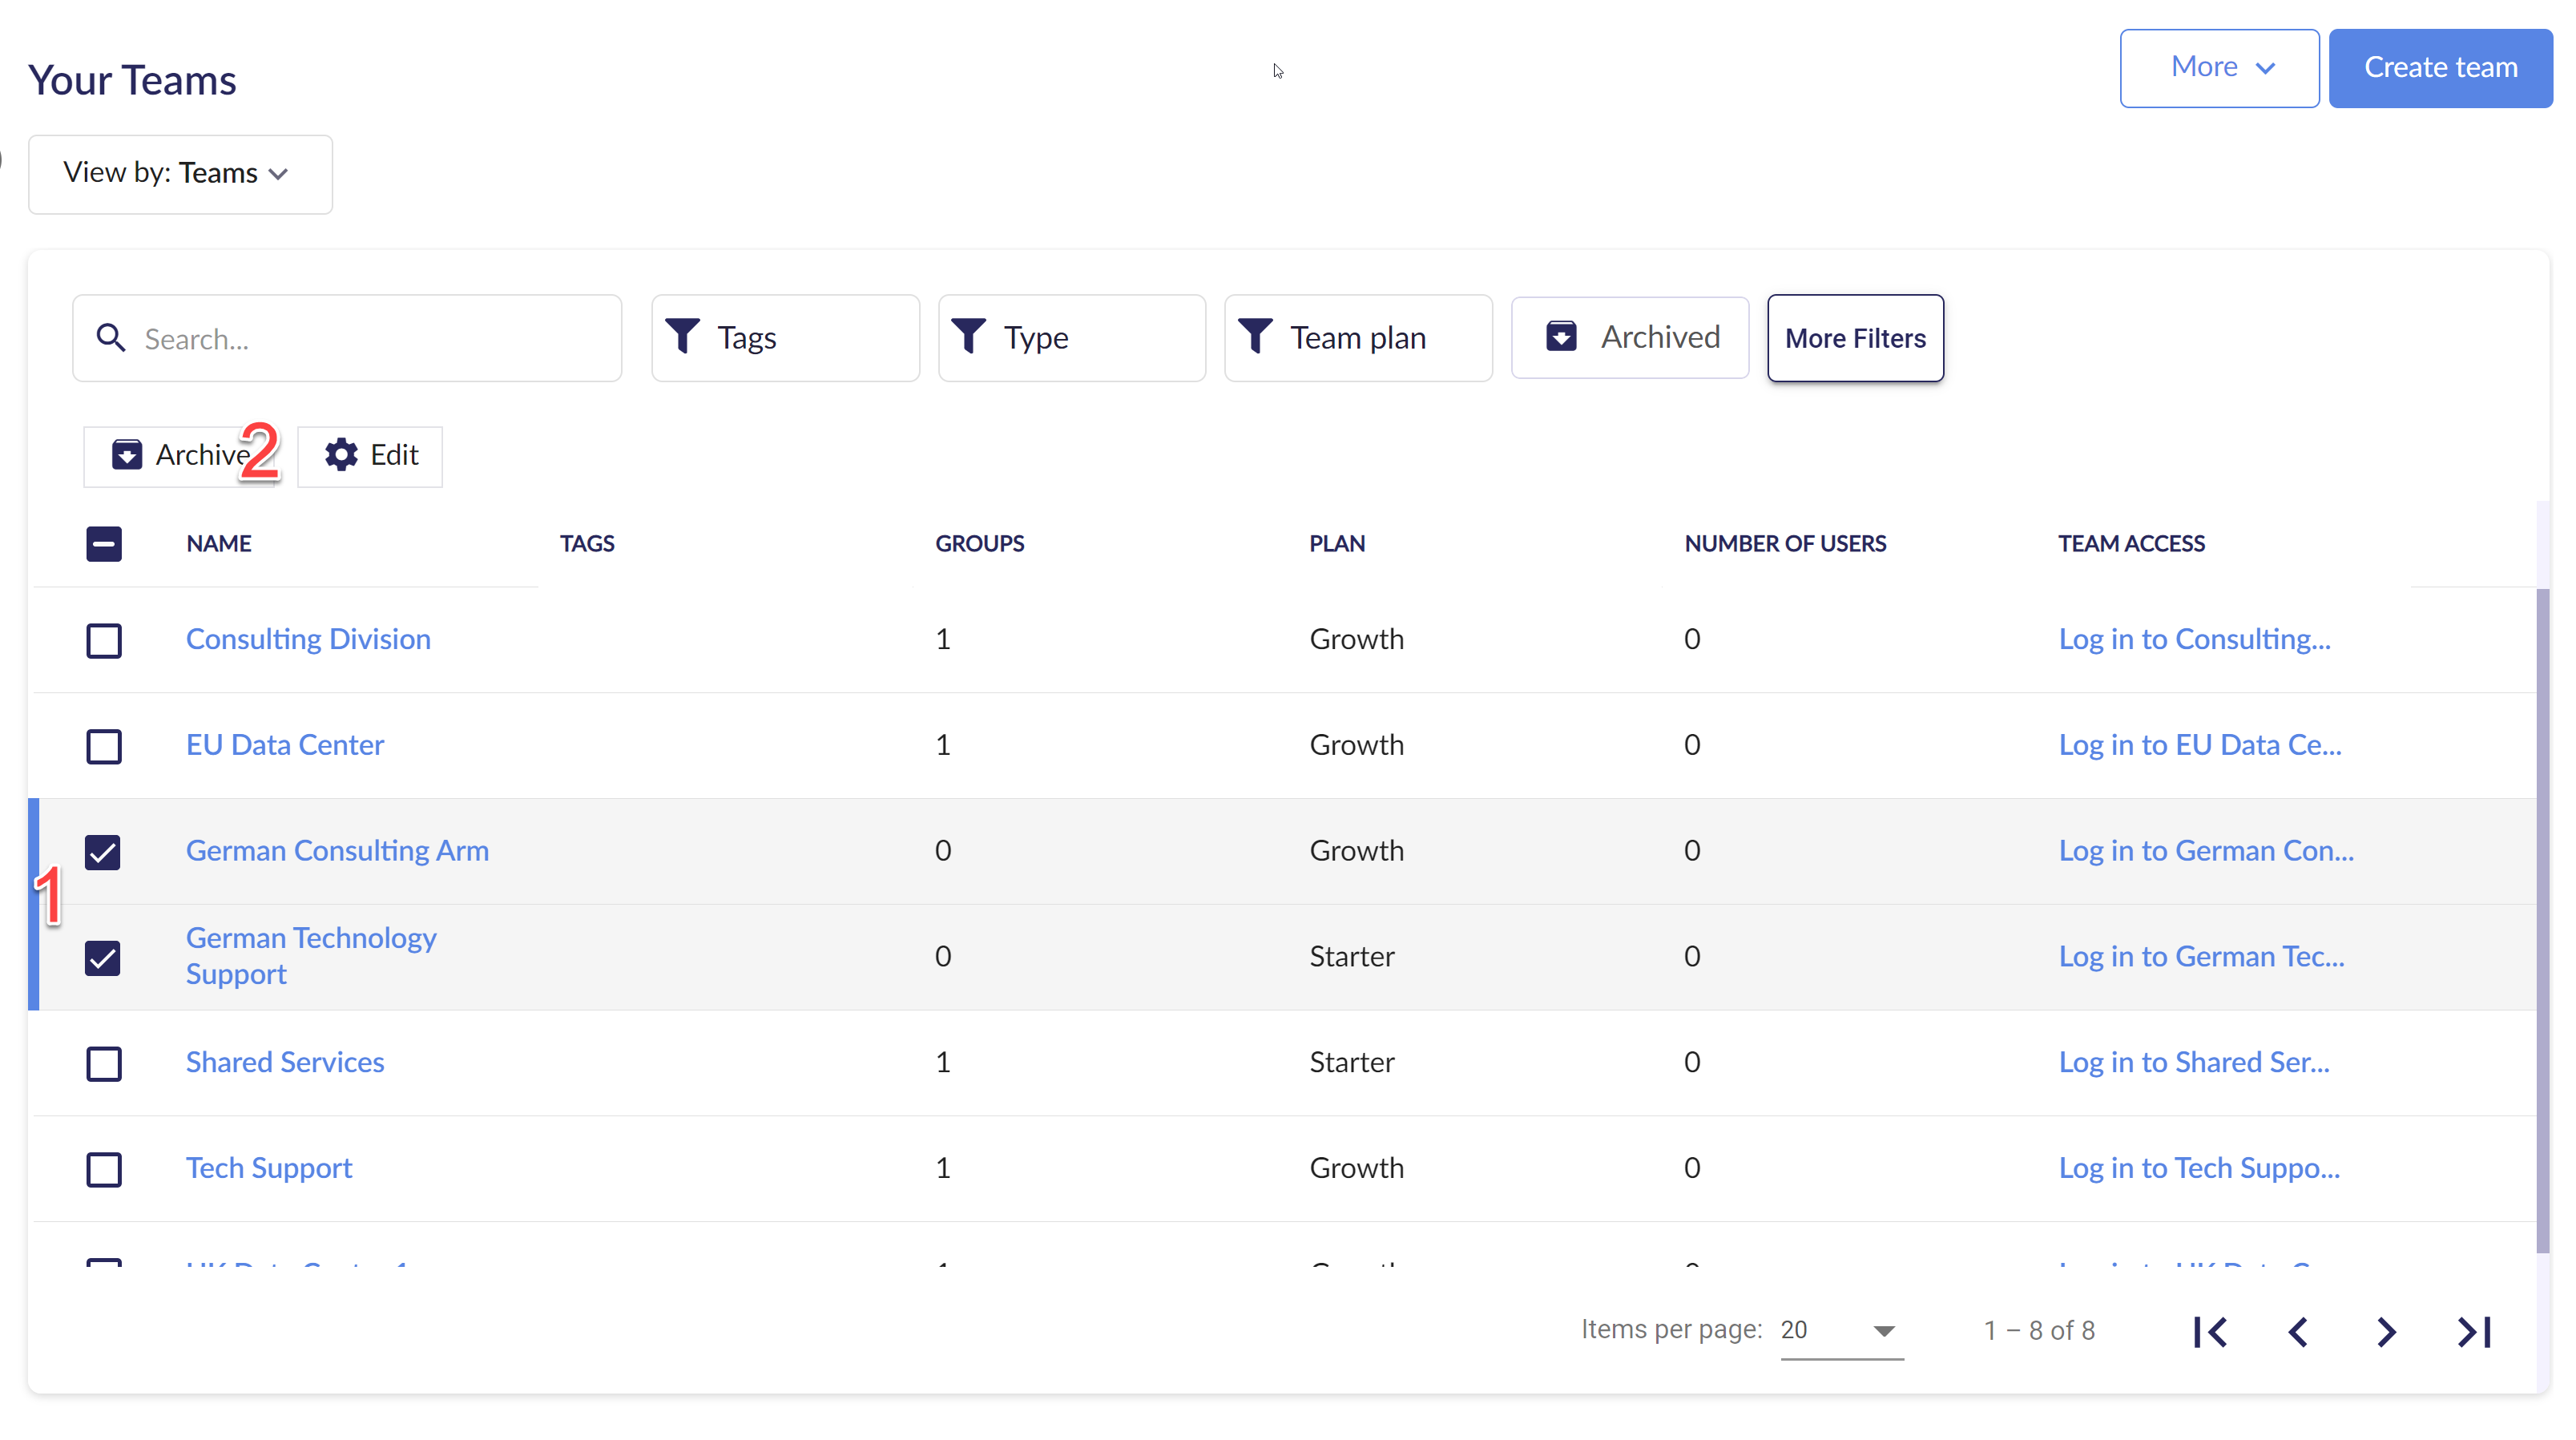
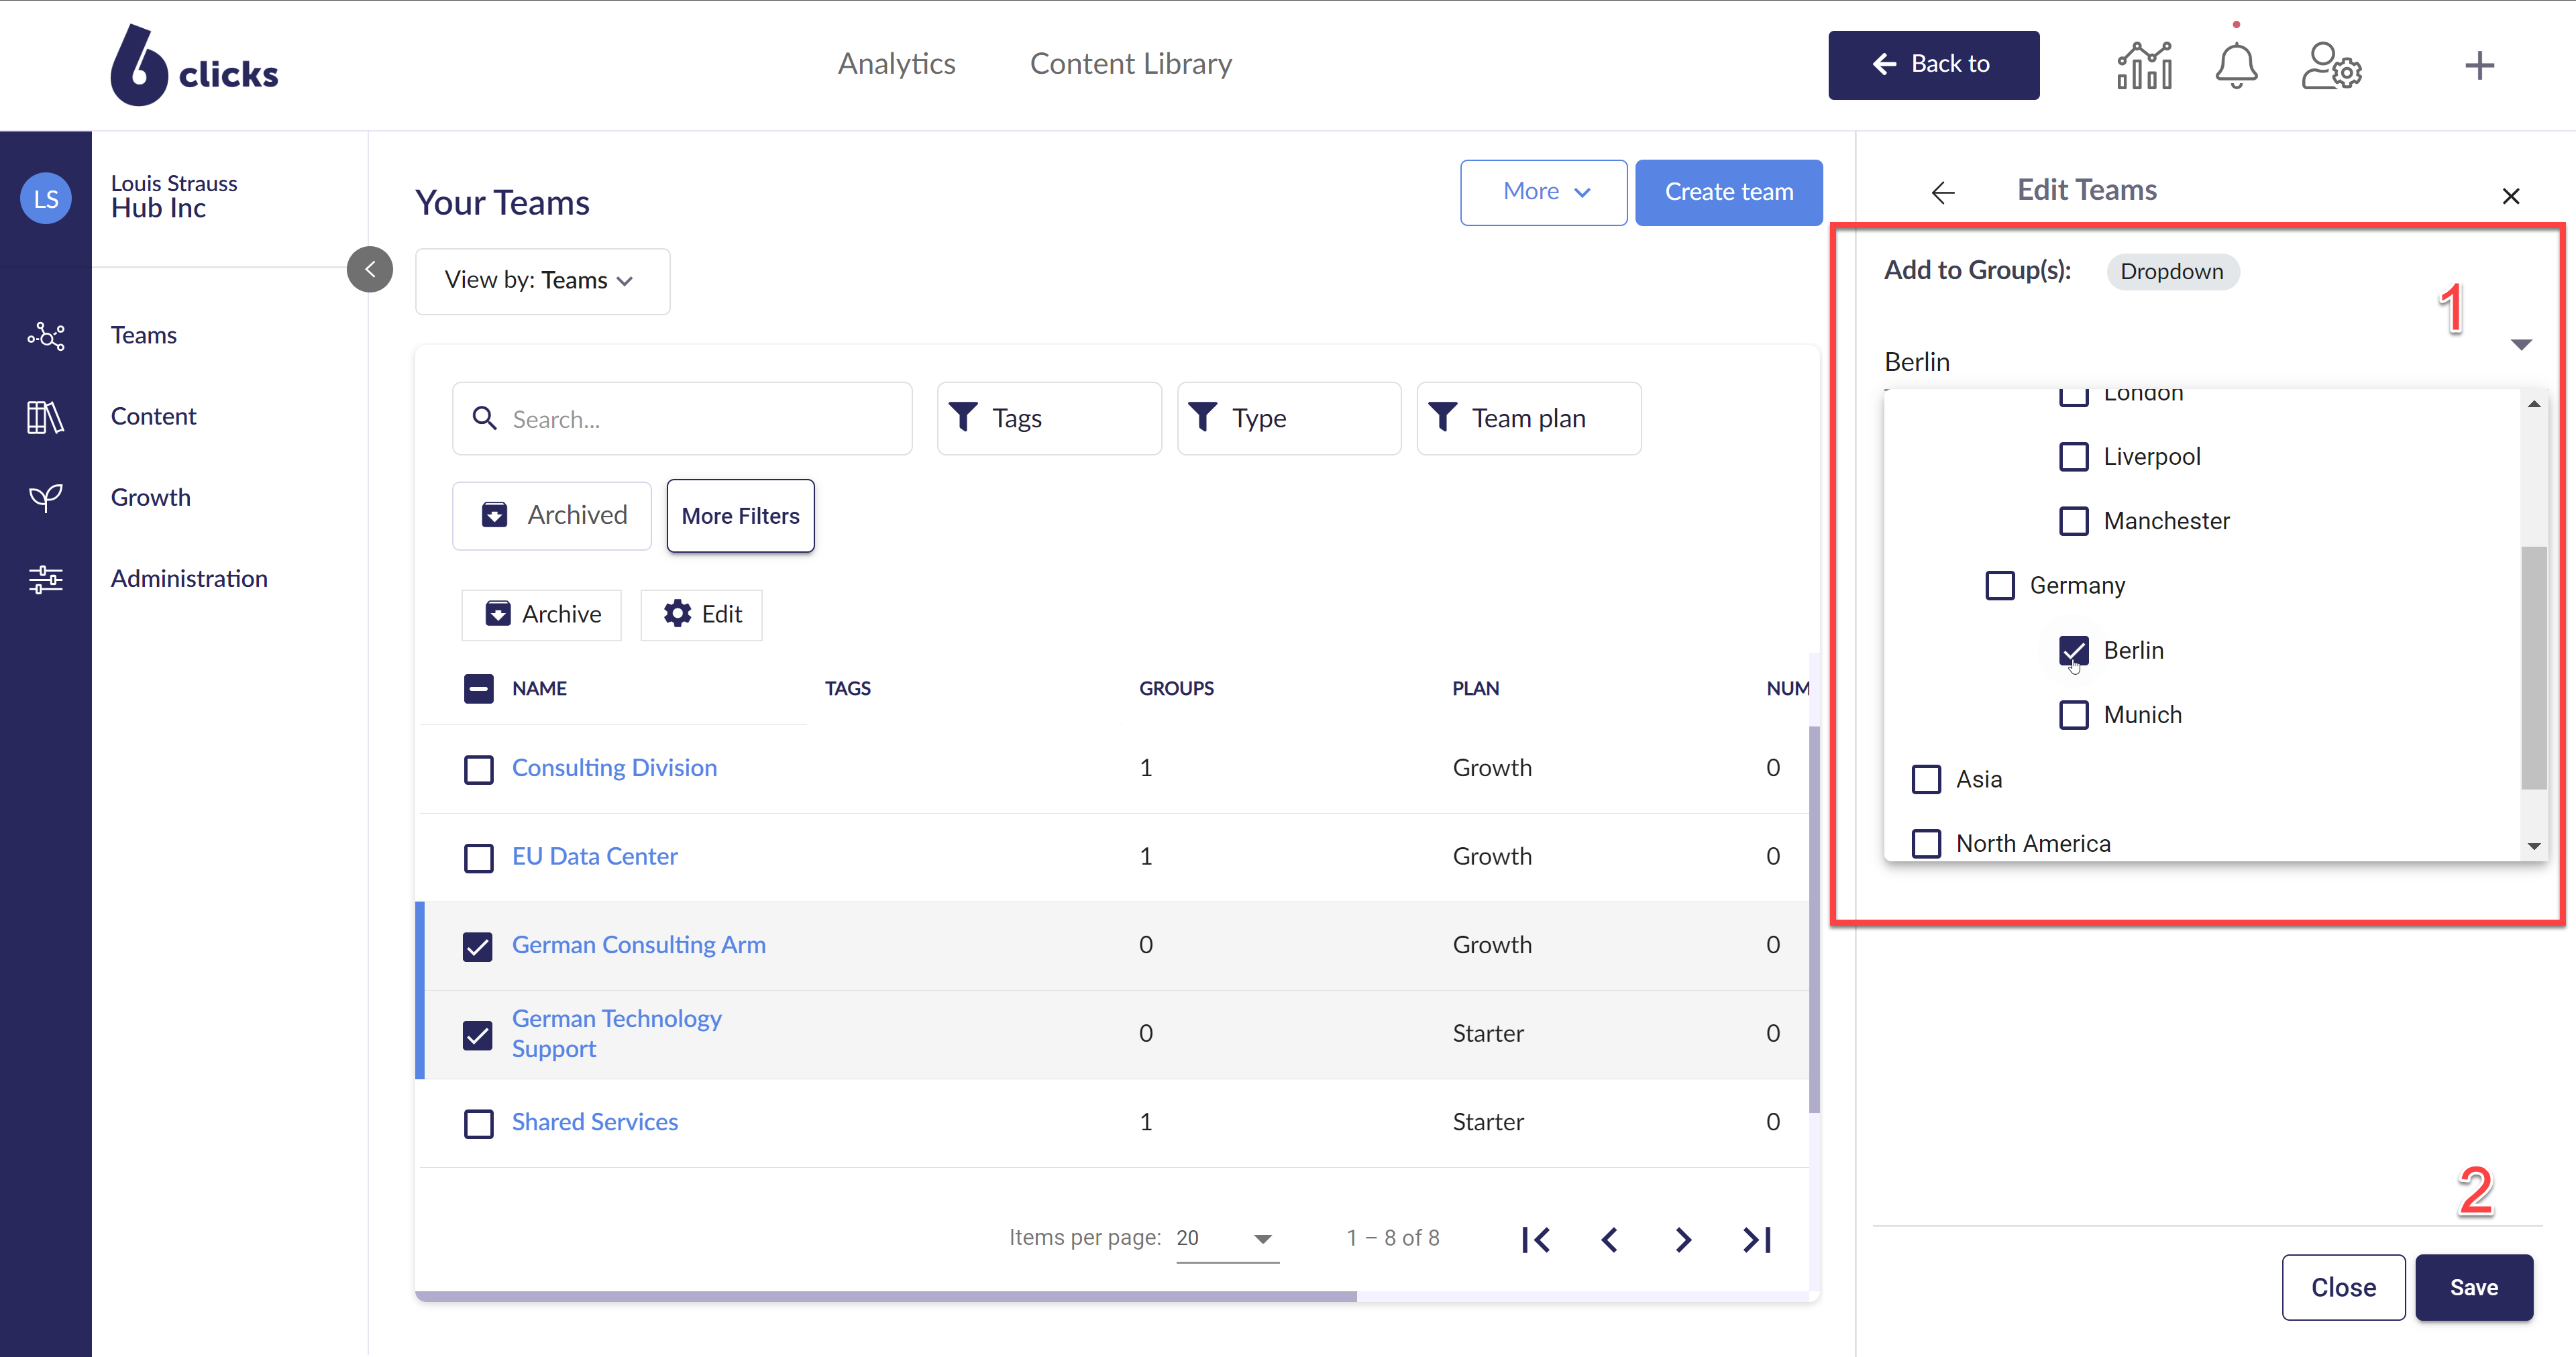
From the Edit Teams side panel menu, you can select the parent group or groups to add the spokes/clients to (1) and then click Save (2) to confirm the selection.
Viewing groups
To view the spoke/client table by groups, select Groups from the View by dropdown.

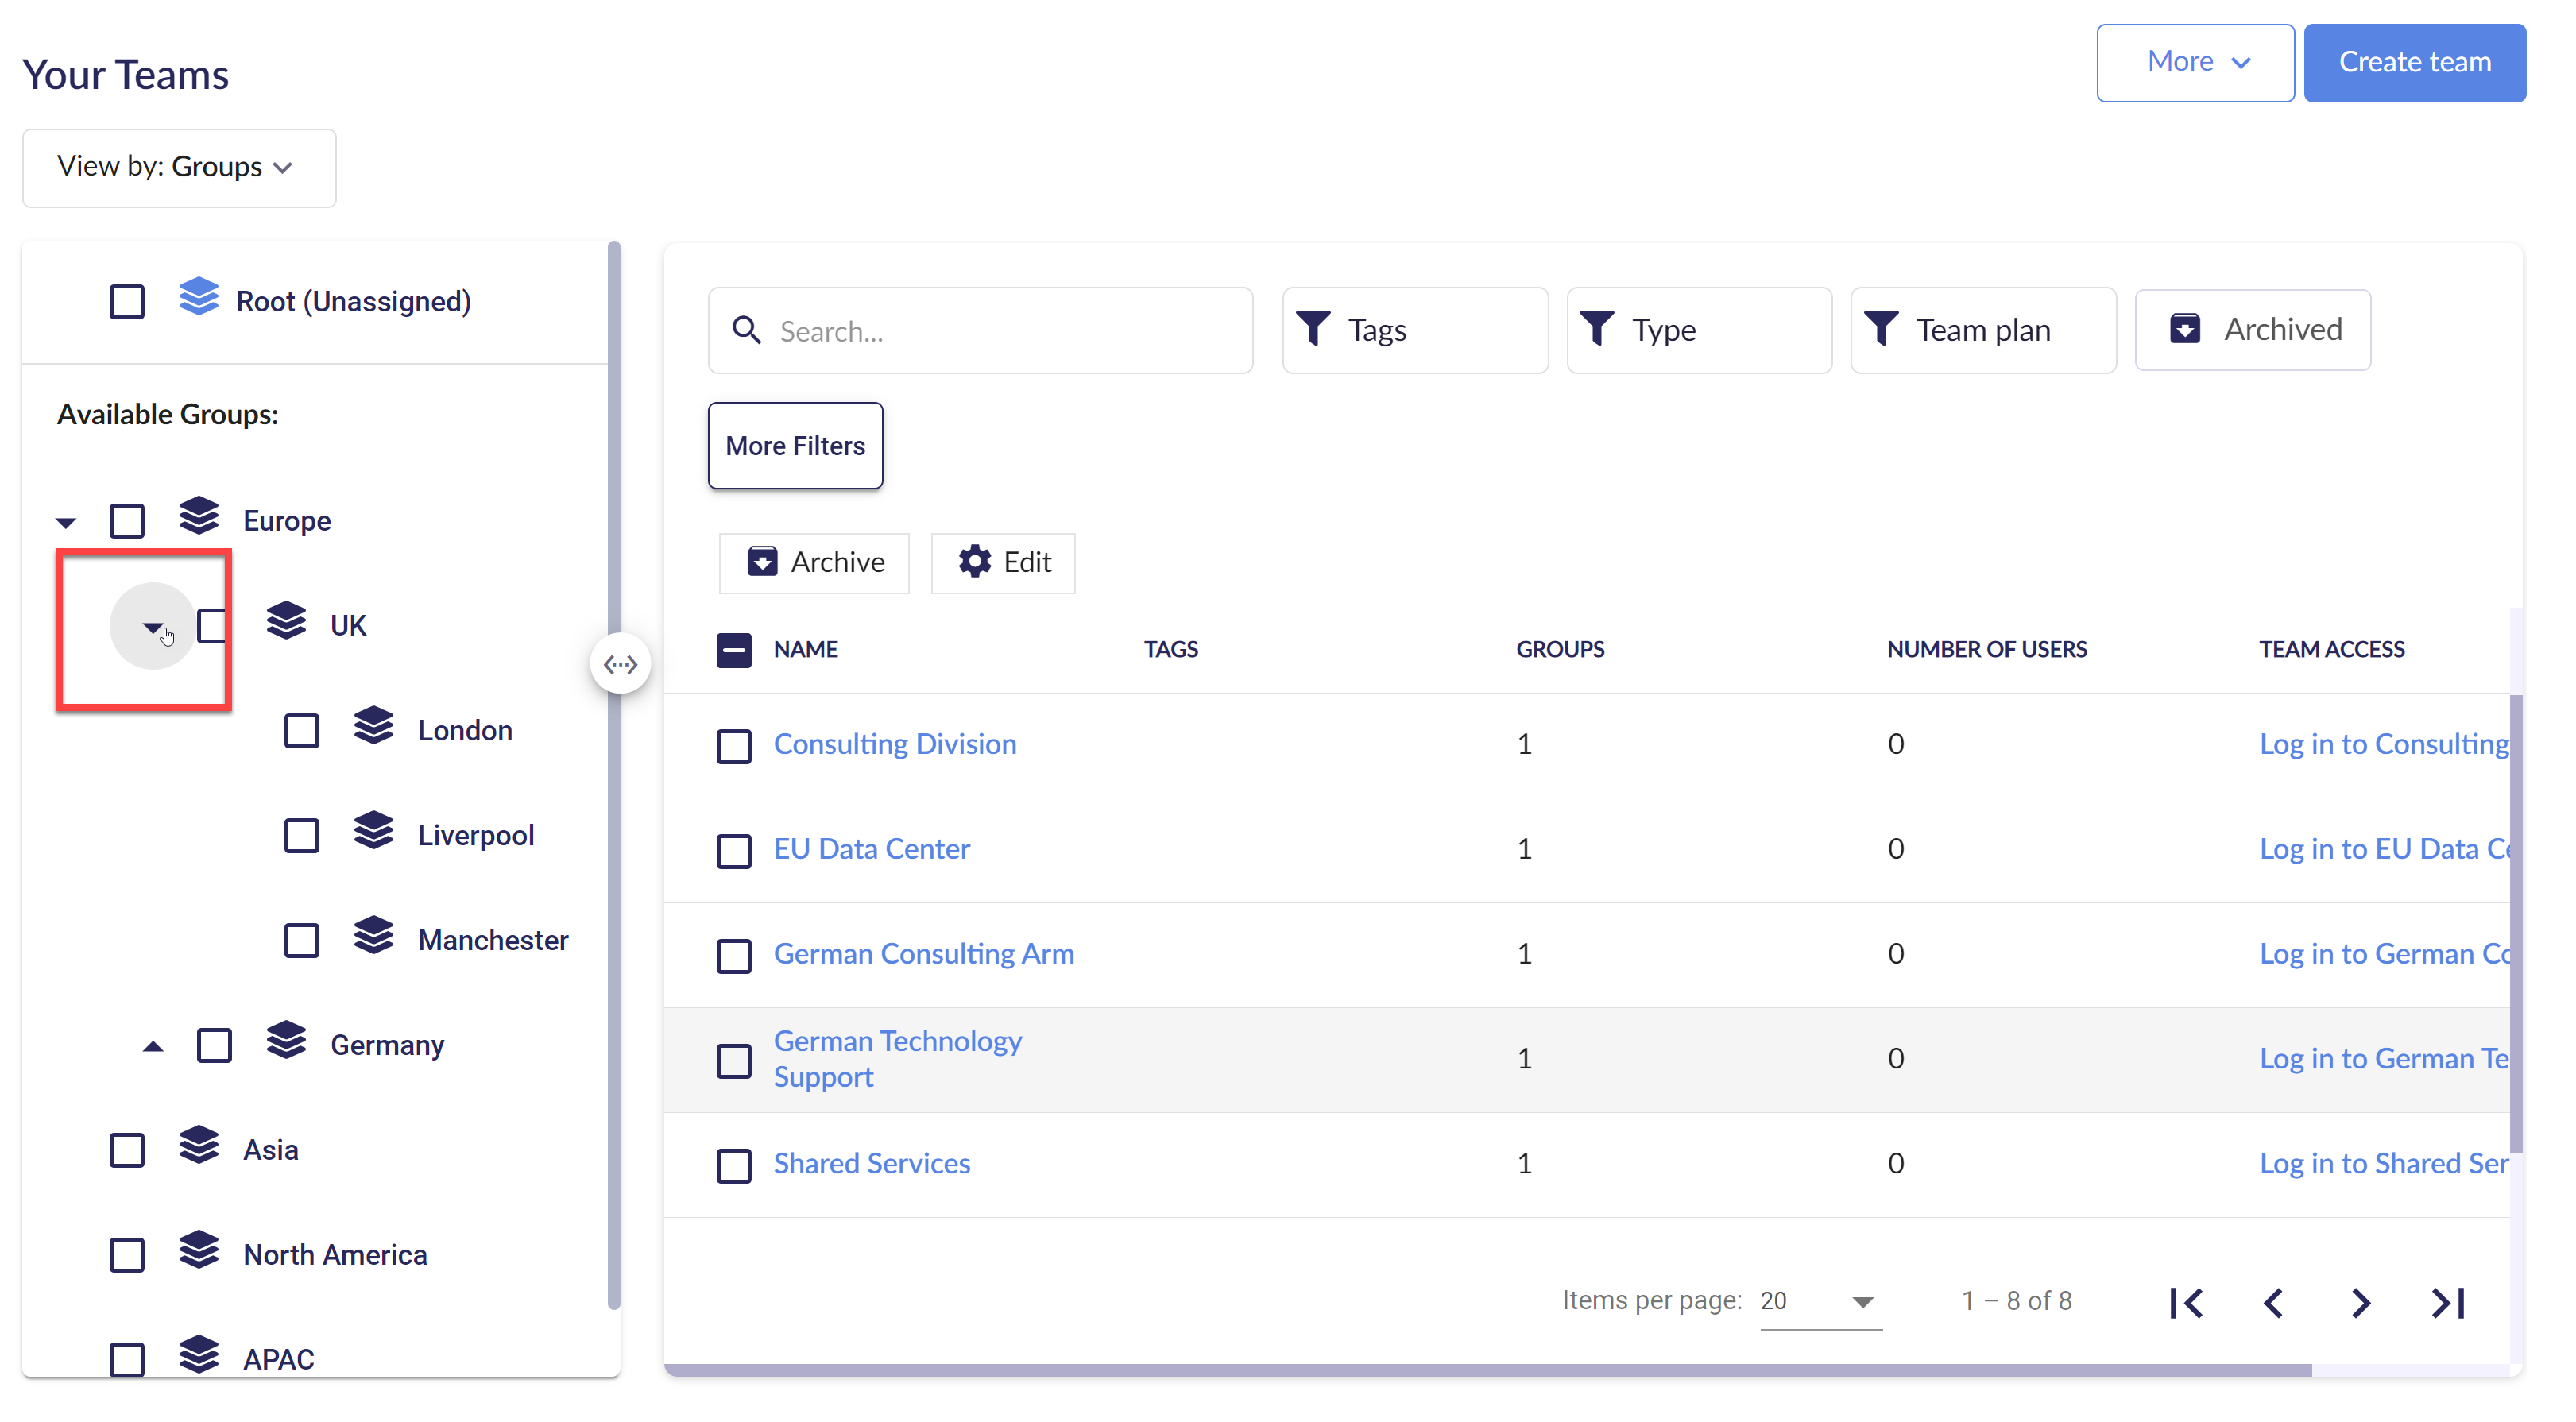
Once you click on Groups, the groups will appear on the left-hand side. You can view child groups by clicking on the arrow next to parent groups.
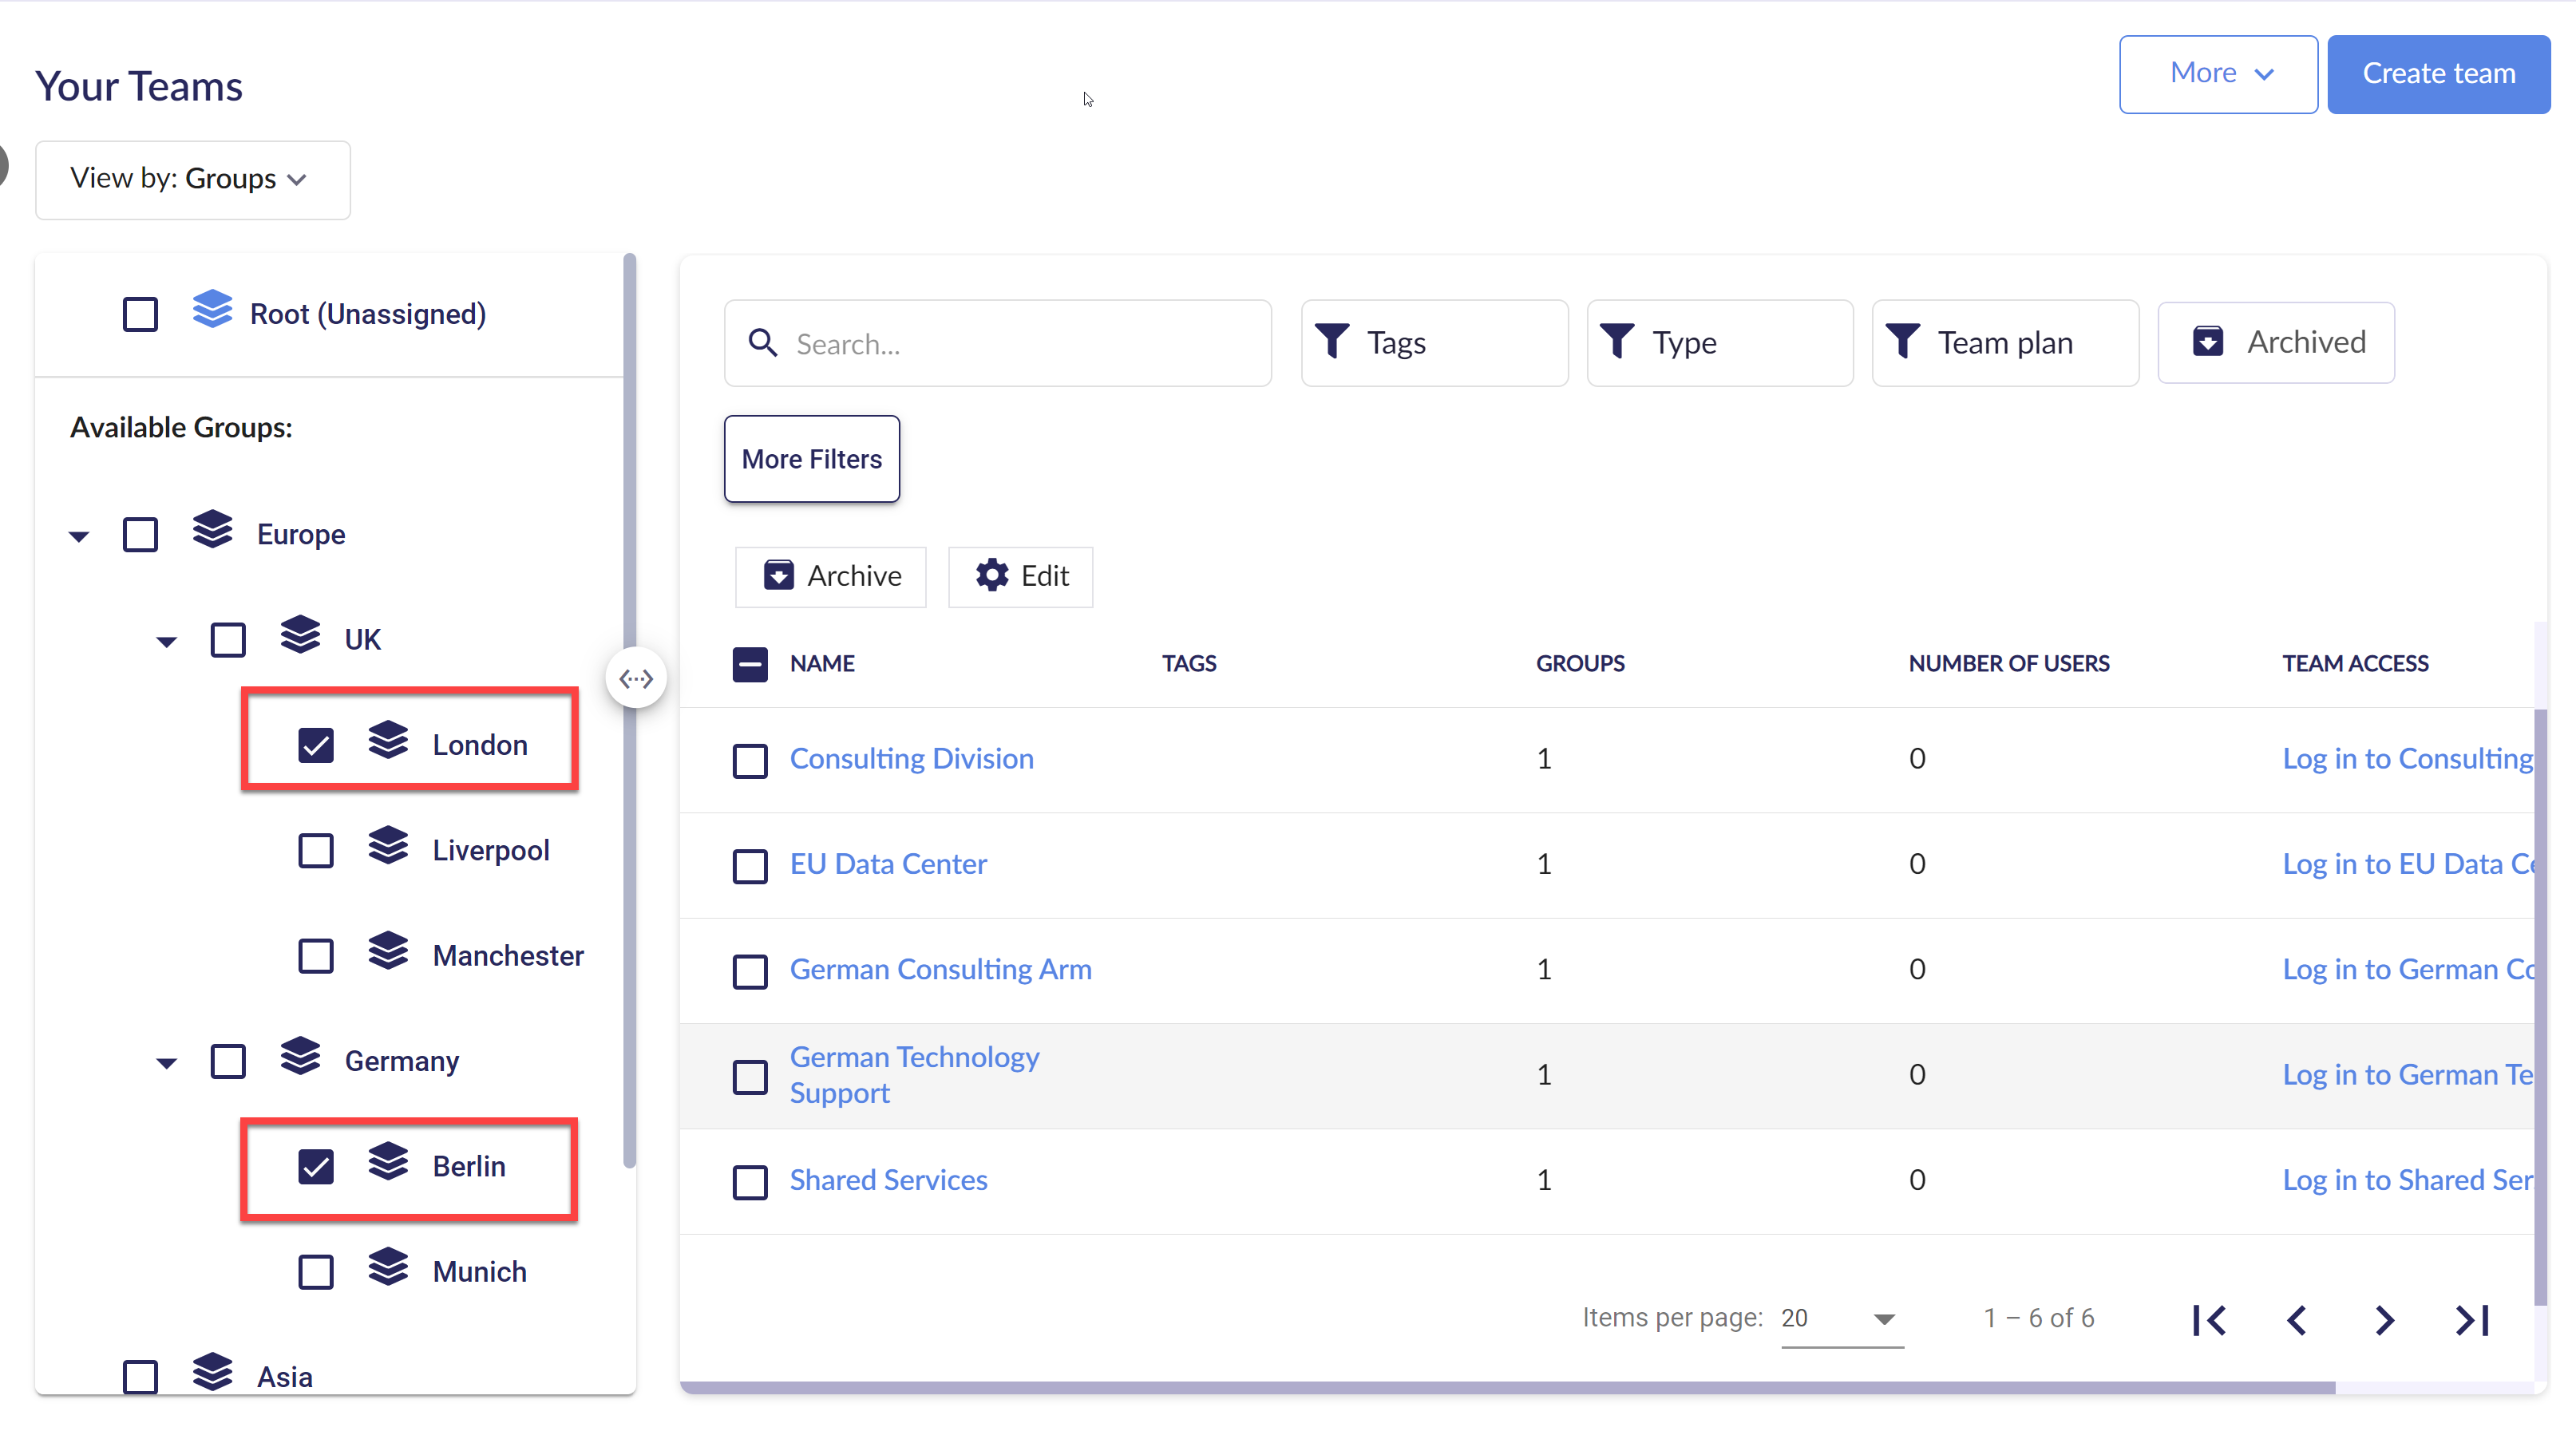
Select one or more groups to view the spokes/clients in the groups. You can select as many groups as you want at once.
Importing / Exporting Groups
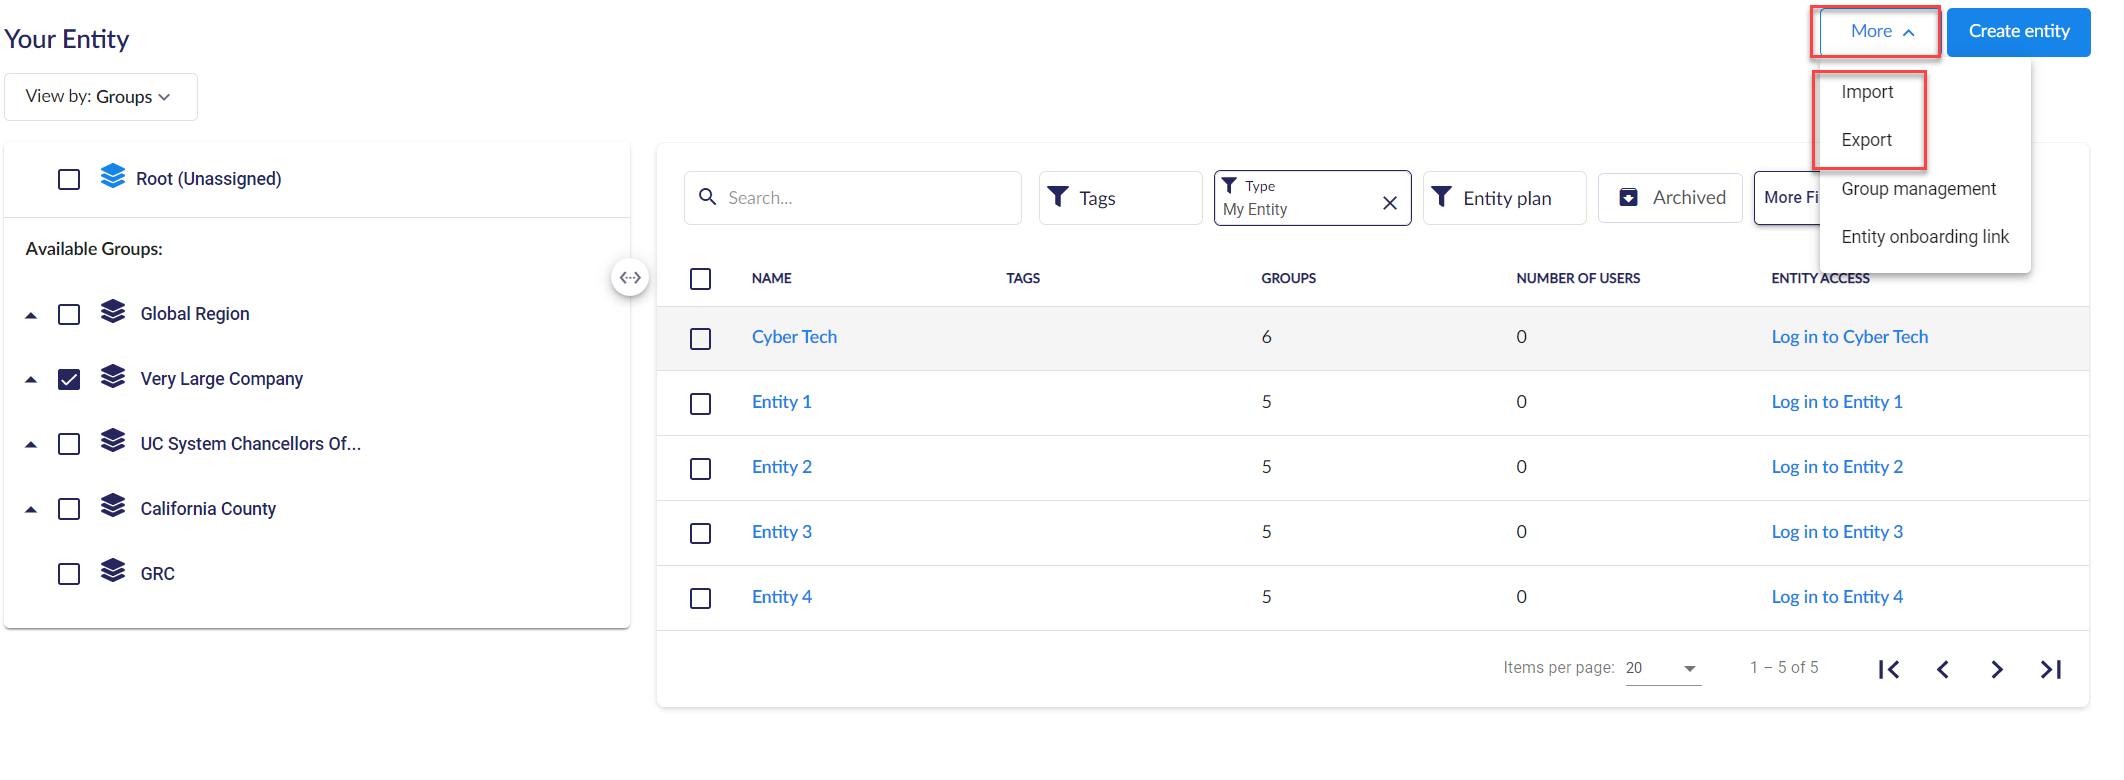
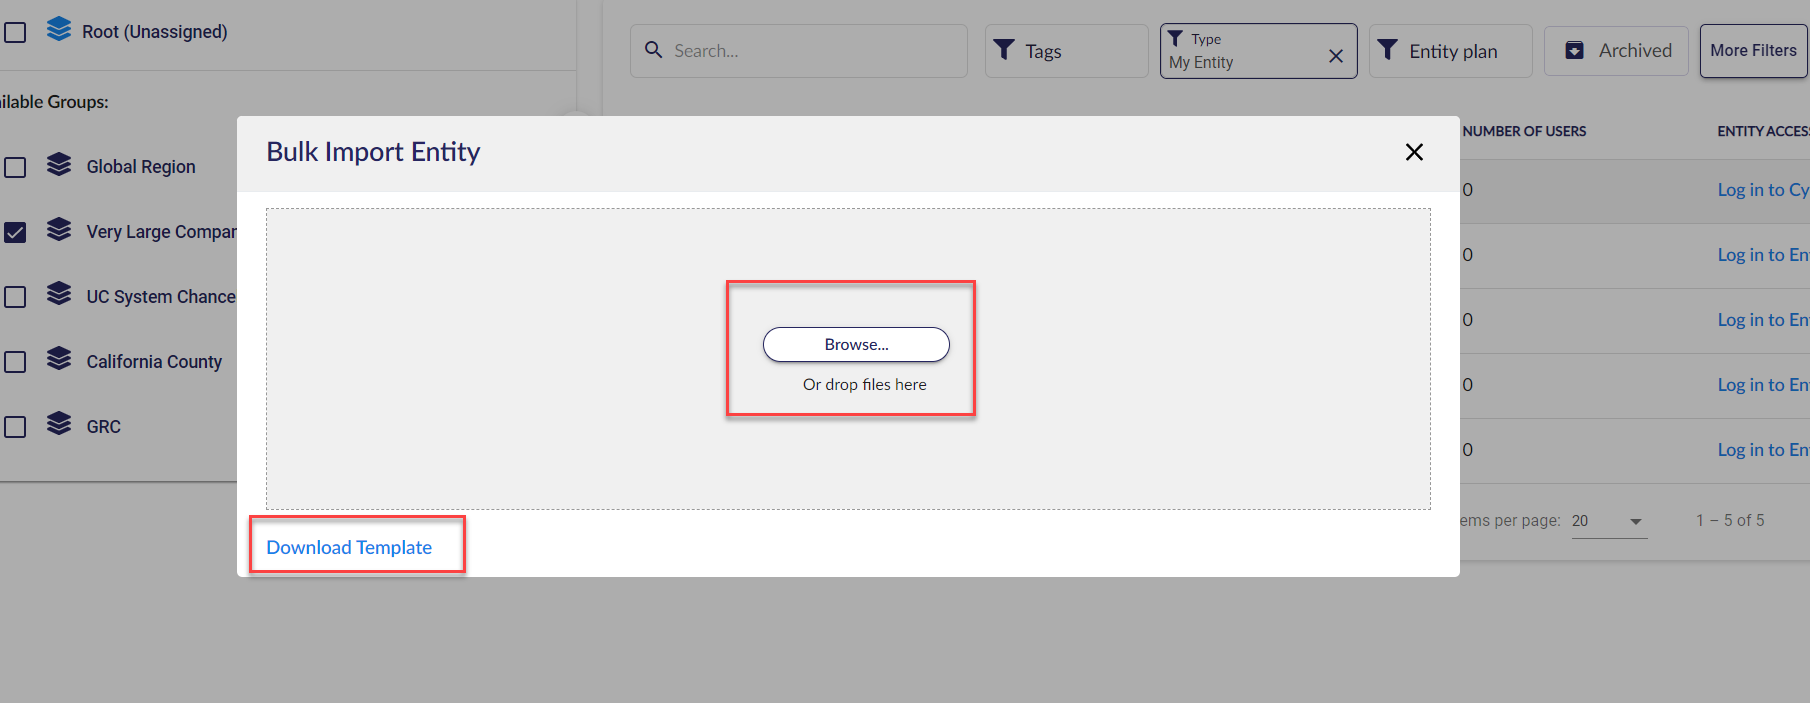
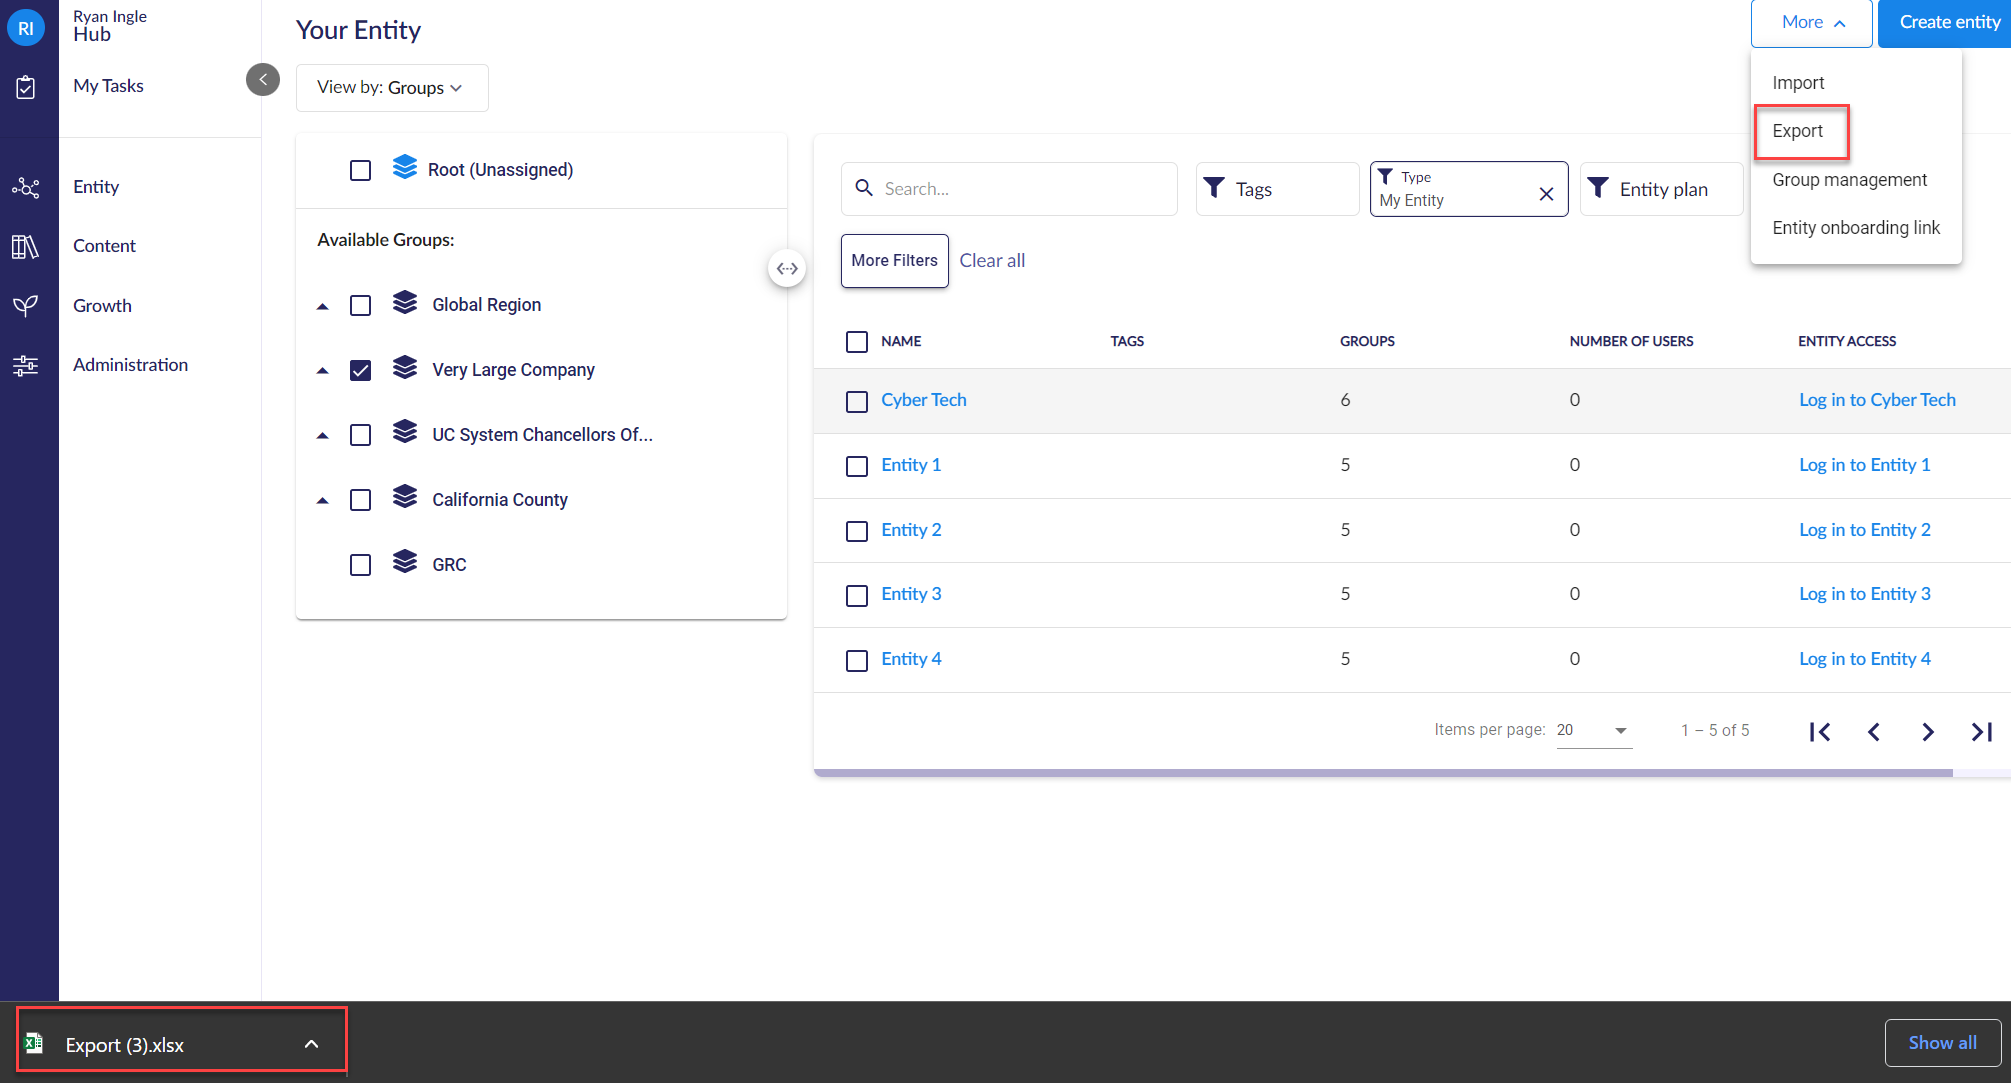
To Import and Export groups see the 'More' dropdown on the top right.
To Import see the 'Download Template' to format content. Once this is properly formatted you can bulk import entity data by selecting the the file or dragging and dropping it over.
To Export, select the Export button from the 'More' dropdown on the top right. After that is selected you will see an excel doc download with the selected Entity data.
To learn how to create spokes/clients, head here.