Issue & incident libraries allow for a bank of issue and incident templates to be pre-prepared for use in 6clicks. These are not live records and do not appear on the register.
Libraries provide a way for organizations to define issue and incident templates and then push these to the register if and when they occur.
You can create these libraries at either the Hub level or the Spoke level.
Table of contents:
- Creating an issue/incident library
- Adding a new issue/incident to a library
- Importing issues & incidents
- Adding an existing issue/incident to another library
- Adding issue actions
- Using published issue & incident libraries
- Pushing issues to the issue registers
- Showing Hub level issue libraries at the Spoke level
Creating an issue/incident library
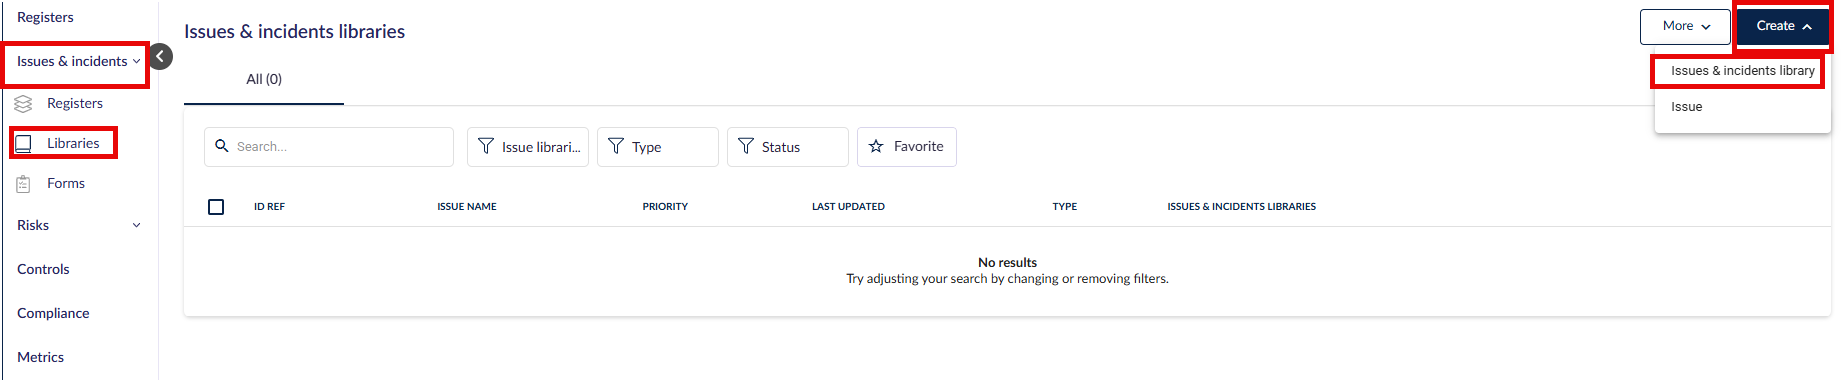
Go to Issues & Incidents > Libraries. Click Create and choose Issue or incident library to create a new issue or incident library.
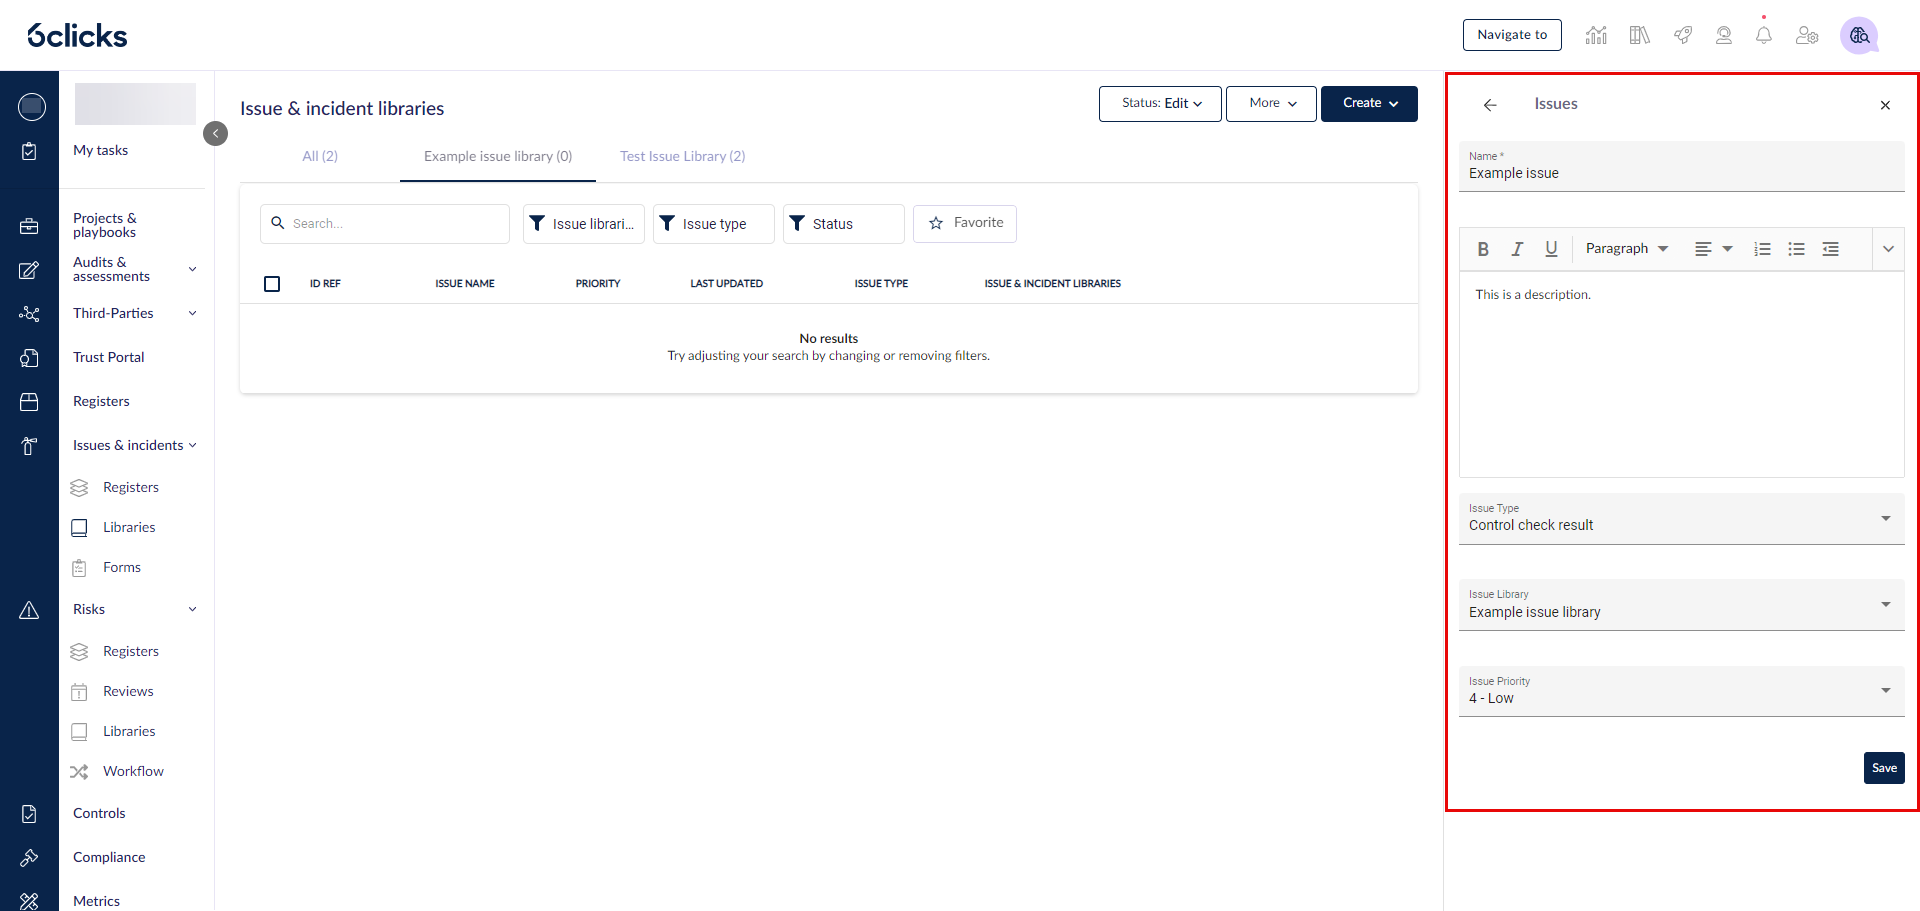
Enter the name and description of your new issue/incident library in the side panel and click on Save. Your new library will now be visible as a tab in your incident library module.
Adding a new issue/incident to a library
To create a new issue/incident, click Create and choose Issue.

You can then fill in or select values for the following fields.
- Name
- Description
- Type
- Library
- Priority
Once done, click Save.
Upon creating the issue/incident, it will appear at the top of the All tab.
It will also be in the library that you selected.
Importing issues & incidents
To bulk import issues/incidents, click More > Import issues.

Click Download Template.

Using the template provided, add your issues/incidents and fill in their details.
- Name
- Description
- IssueType: use one of the existing options:
- Assessment result
- Control check result
- Feedback or improvement
- Incident
- Management review item
- Near-miss
- Penetration test result
- Policy non-compliance
- Vulnerable or weakness
- Priority: use one of the existing options.
- Immediate
- High
- Medium
- Low
- Issue Library: Add the name of the issue/incident library you want to add the issue/incident to. If you enter the name of a library that does not yet exist, the library will be created at import.
Upload the completed spreadsheet from where you downloaded the template, in More > Import issues.
Adding an existing issue/incident to another library
You can also add issues/incidents from one library to another.
Choose the issue/incident you want to add to another library and select Add to existing library at the top of the table.
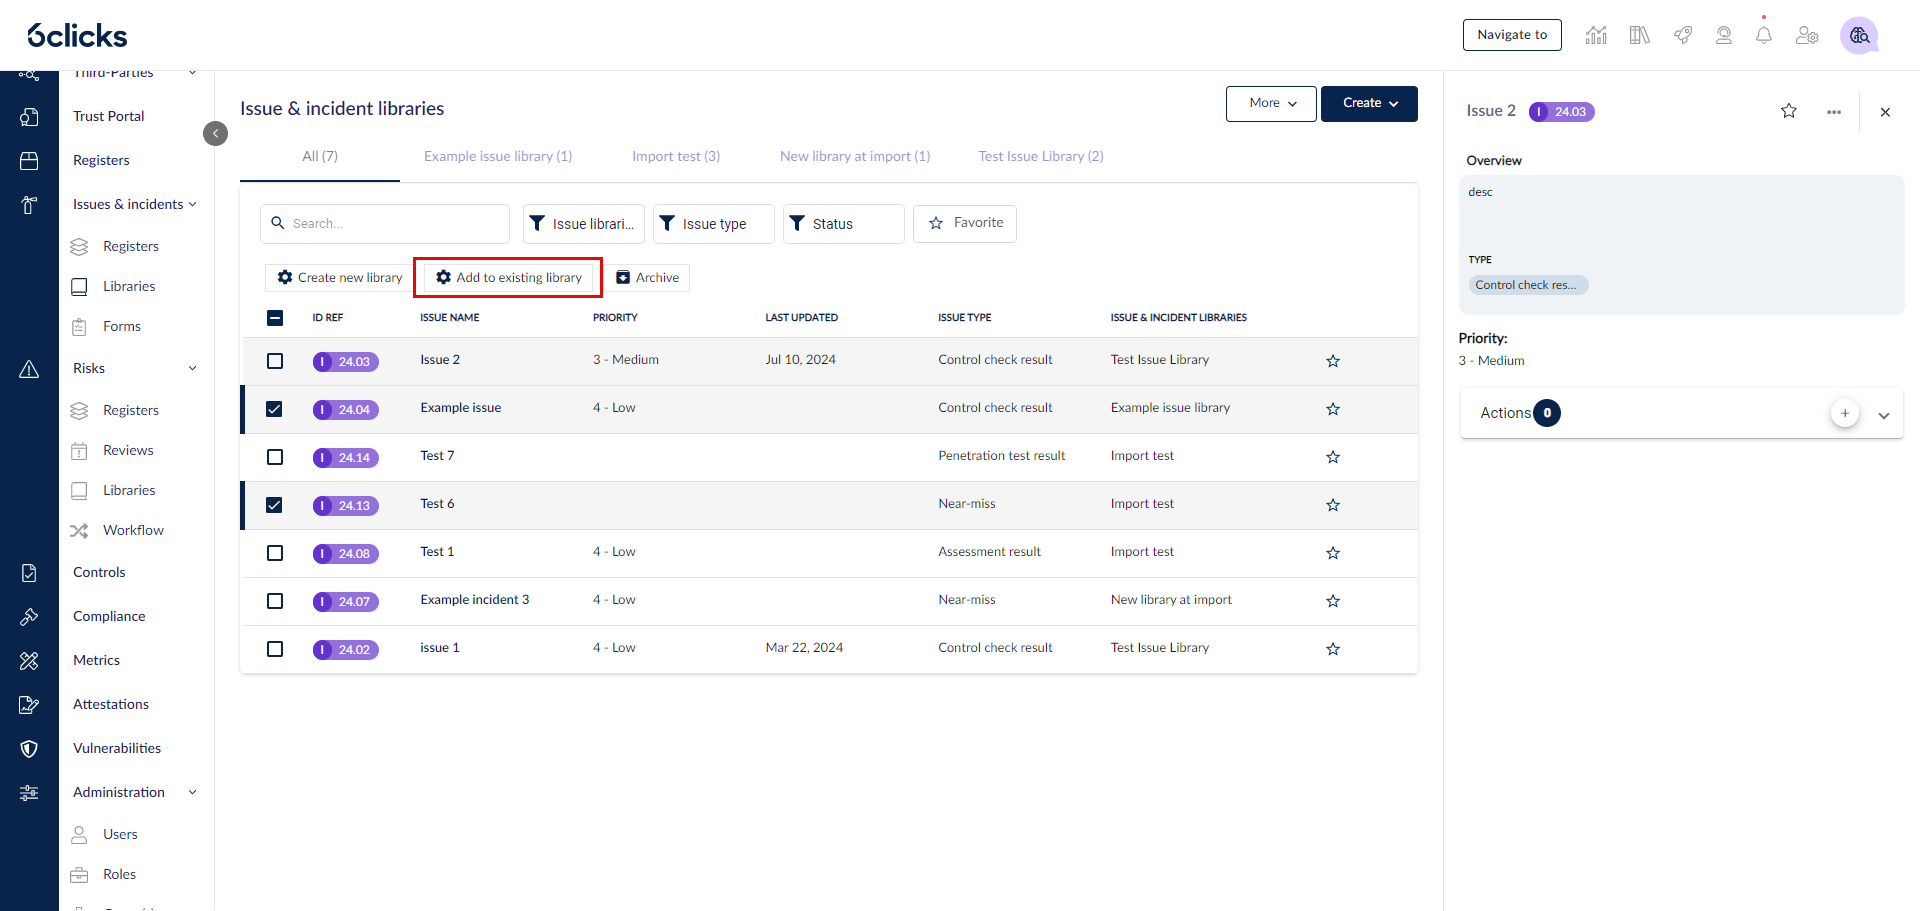
Select an issue/incident library from the drop-down list, then click Add Issue. You can then find the issues/incidents also in your destination library.
You can also add one issue/incident to an existing library by clicking on the 3 dots to the right of the issue/incident.

Adding issue tasks
Issue tasks in the libraries are abstract, i.e. they set out general tasks that will be assigned with due dates to users once active in the issue registers.
You can only create issue tasks after you create the issues to which they will be linked. This means that if you are importing both issues and issue tasks, you will use two different Excel spreadsheets and import them in that order.
Manually adding an issue task
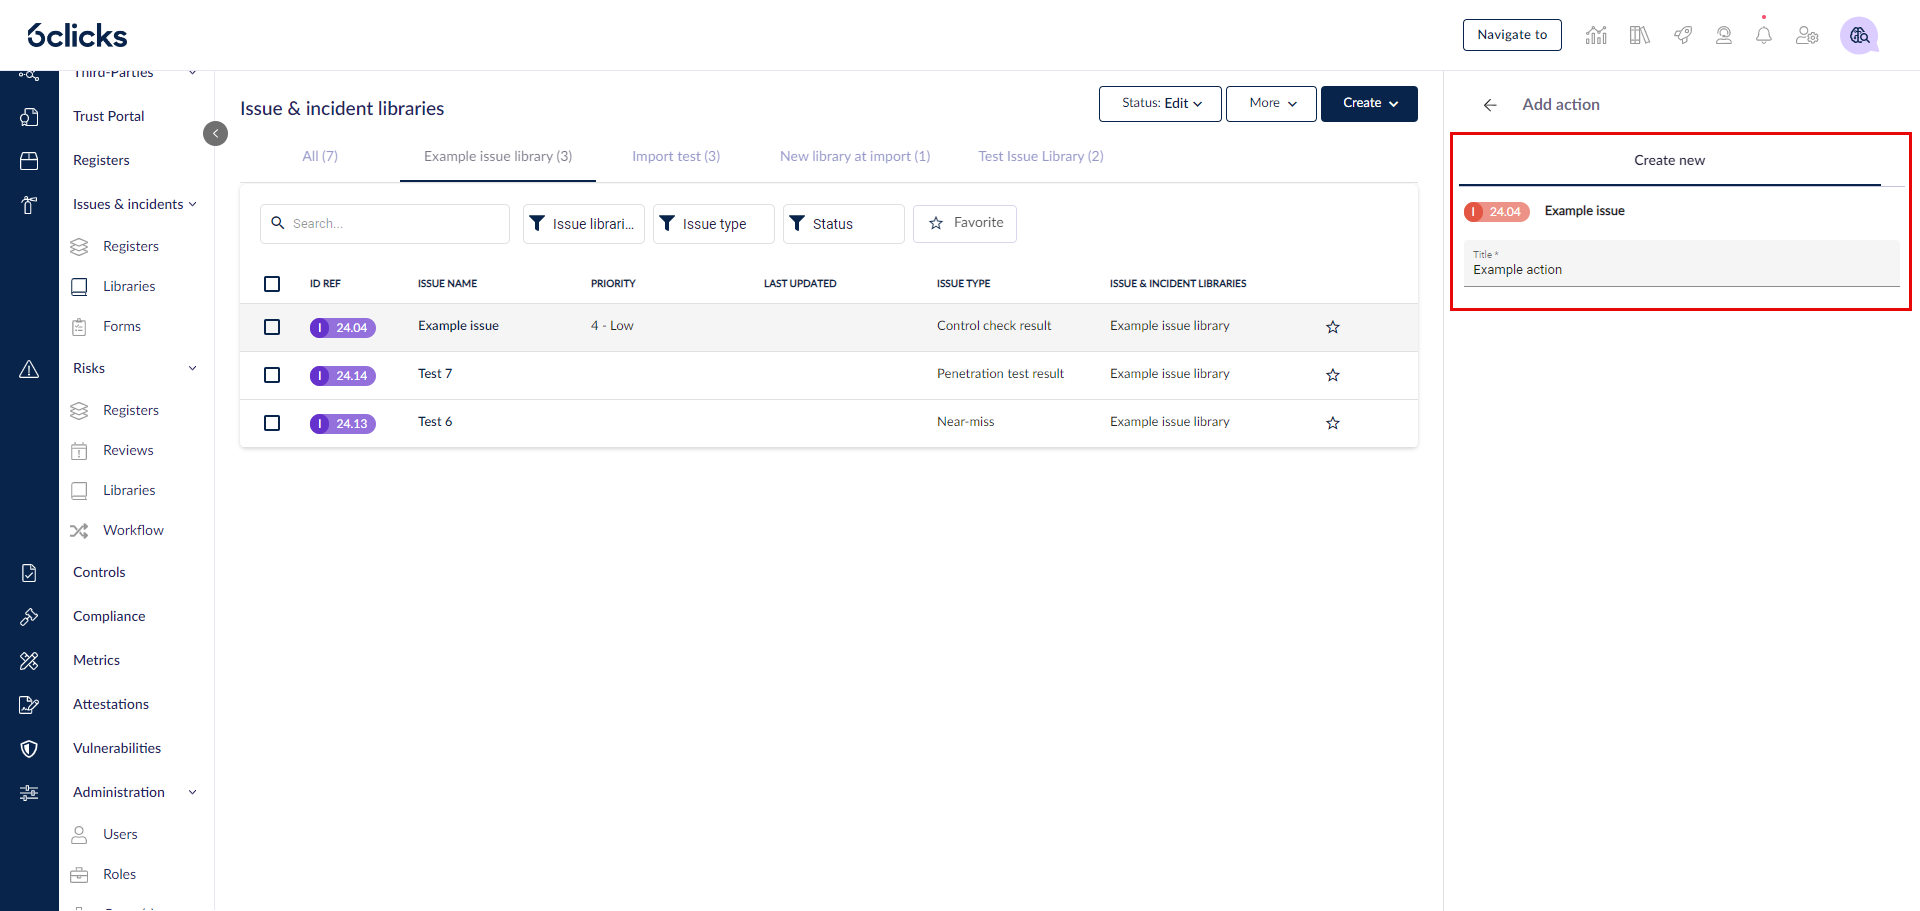
Select the issue to which you wish to add a task. Click the + next to Tasks in the side panel.
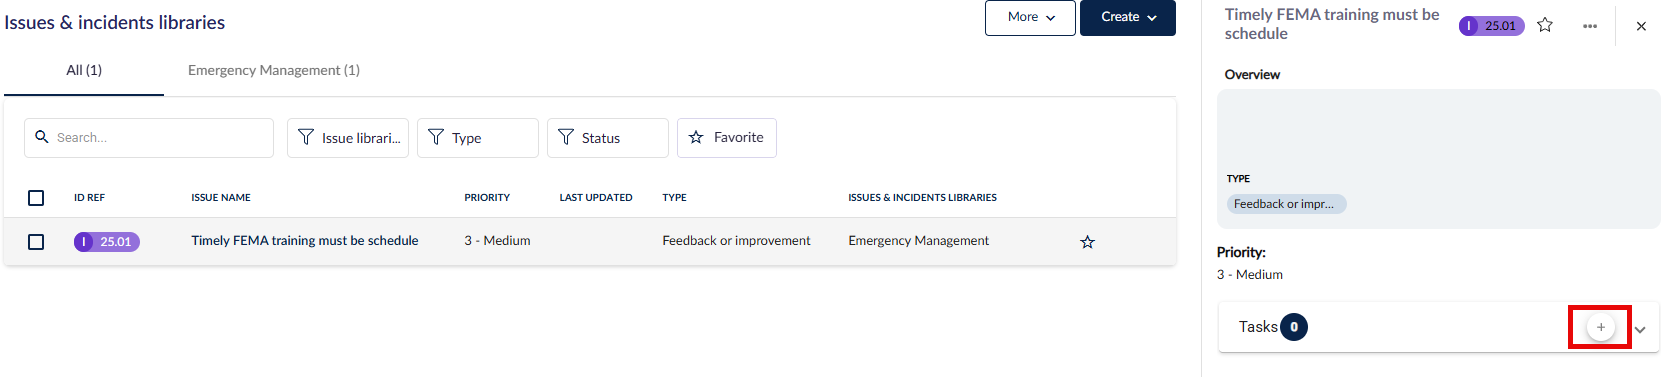
Create a new issue task by filling in the Title field and hitting Enter on your keyboard.
This will create the task and give you the option to fill in the Description.

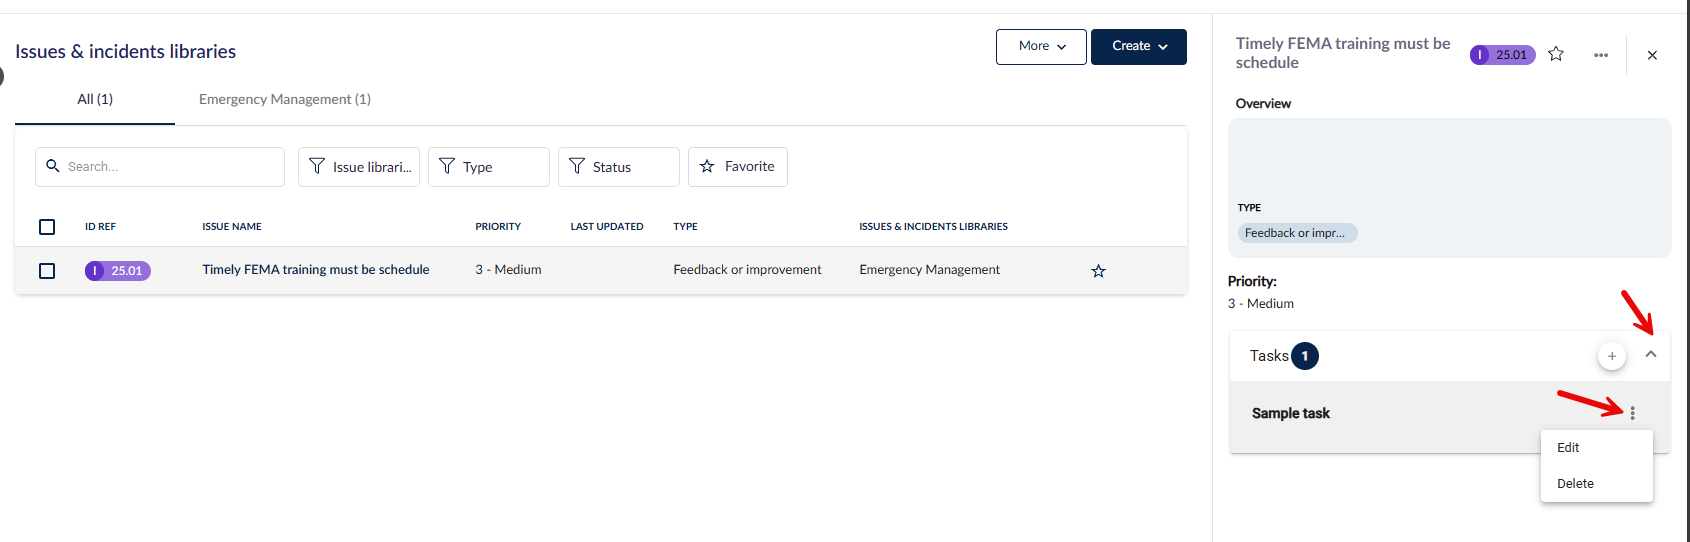
Back out into the issue detail side panel by clicking on the issue again or the back arrow at the top of the side panel, and expand the Tasks section to see tasks linked to the issue.
Click on the 3 dots to the right of a task to edit or delete it.
Importing issue tasks via Excel
In your Issues & incidents libraries, click on More > Import tasks.

Click on Download Template.

Fill in the spreadsheet accordingly.
- IssueLibrary: the library to which your issue belongs
- IssueName: the name of your issue; this is used to link the task to the issue
- Name: the name of the issue task
- Description: a description of the issue task
Upload your completed template and your tasks will populate under the associated issues.
Using published issue & incident libraries
Once an issue/incident library is published, you can then:
- Push issues to the issue registers to put them in action
- Populate the issue registers via automation in Question Based Assessments
- Populate the issue registers via automation in Requirement Based Assessments
Pushing issues & incidents to the register
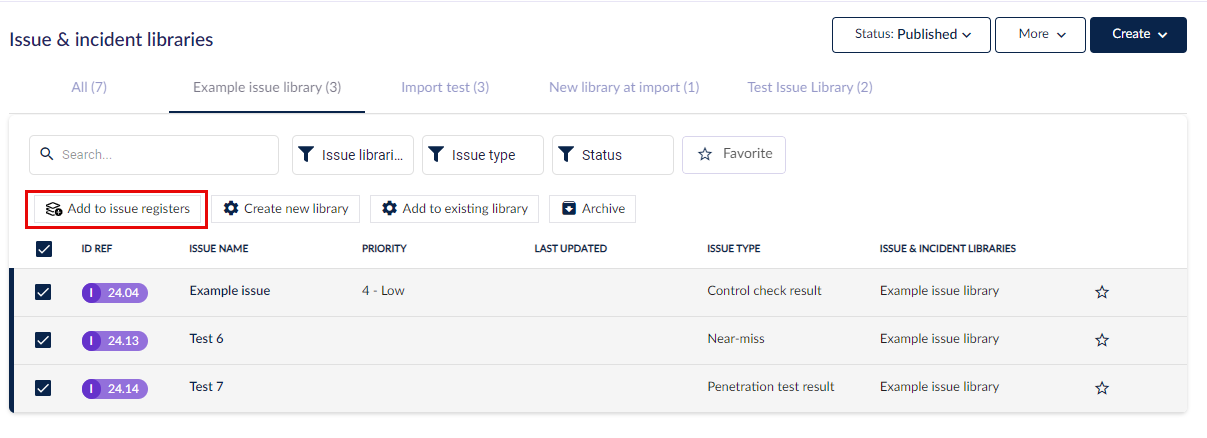
Select the issues/incidents you wish to push to the register, then click Add to issue registers.
Add to issue registers does not appear in the All tab.
Select an issue from within a specific library that is published to proceed.
Click Yes when prompted.
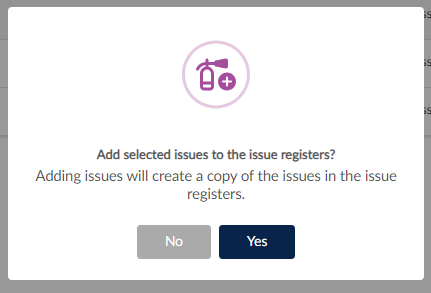
You will receive a notification in the bottom-left corner of the screen when successful.
![]()
An Added to issue registers icon will appear next to applicable issues.
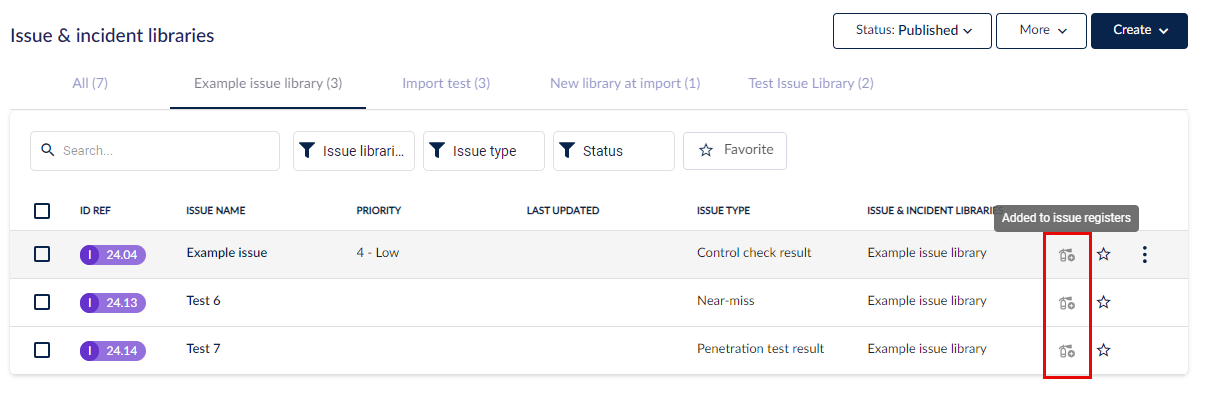
The Issue registers now contain the pushed issue and its actions, if any.
Showing Hub level issue libraries at the Spoke level
You can choose to show or hide your Hub's issue libraries at the Spoke level.
If hidden, the libraries will not be shown in spokes, with no impact on assessment recommendation flows.
In your Hub, go to Administration > Settings and then the General tab.
Scroll down to find Show libraries in Spokes.
Use the checkboxes to show or hide your Hub libraries in your Spoke(s).
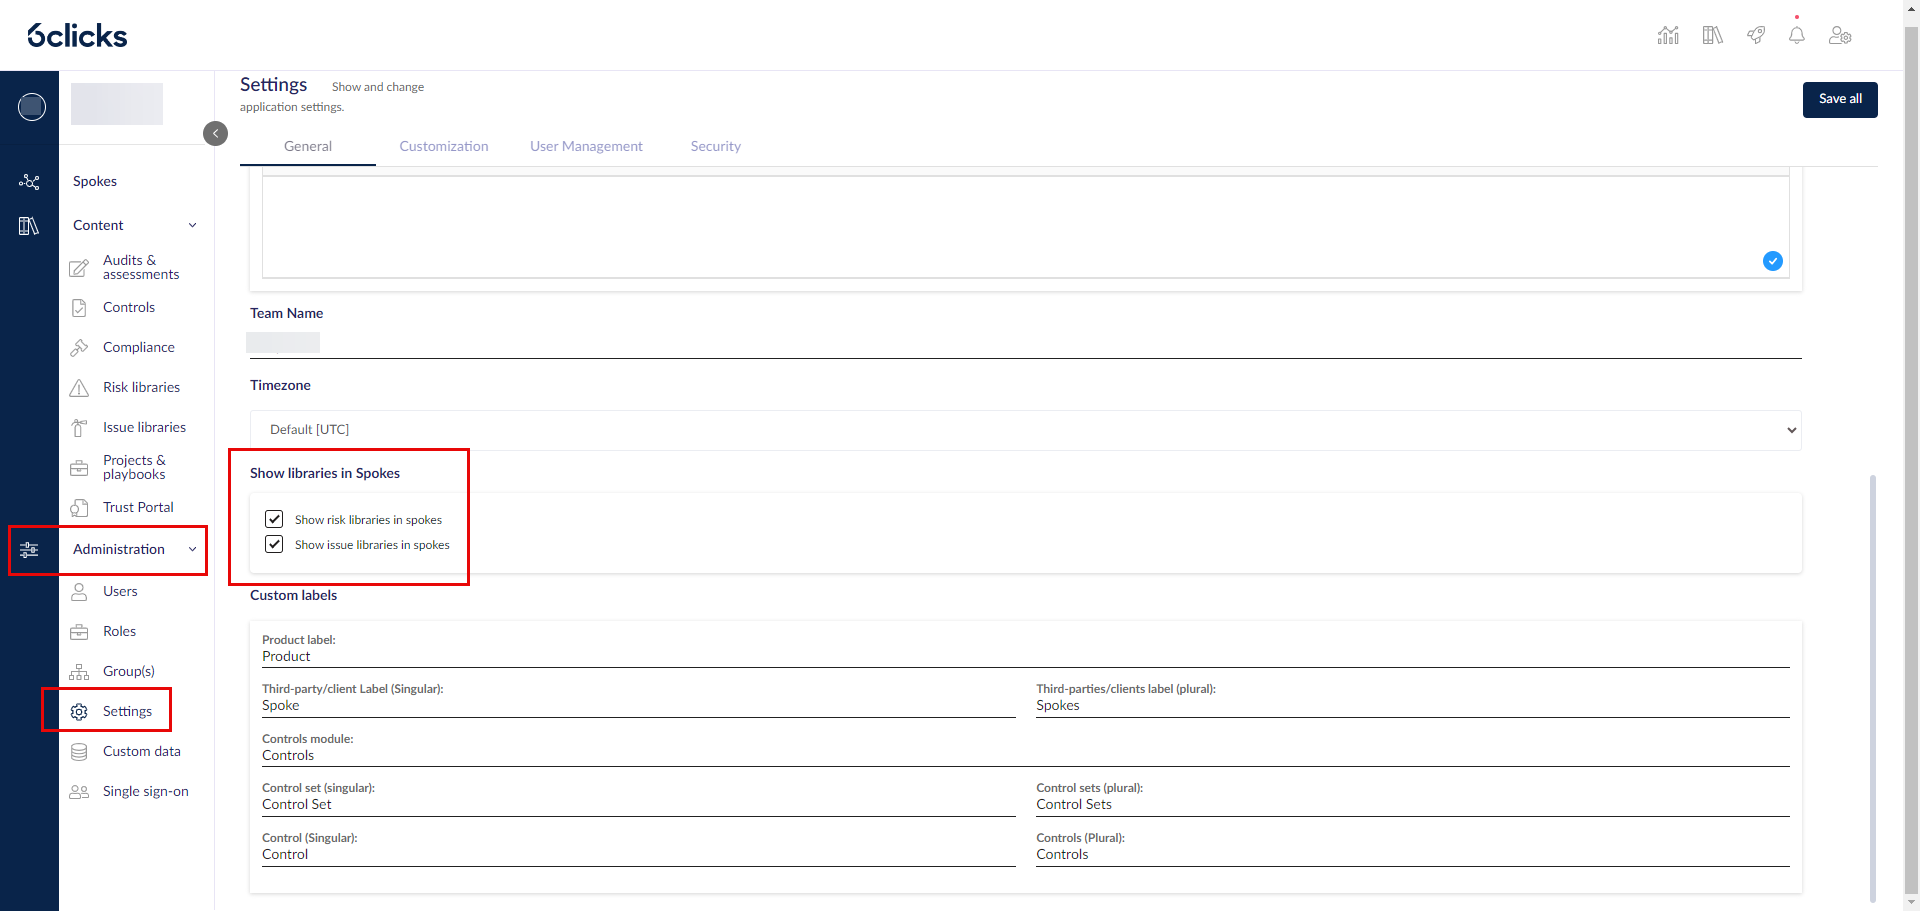
When turning these off at the Hub level, you are only turning off the issue libraries created at the Hub level.
Any issue libraries created and published by the Spokes themselves will not be impacted.