Using onboarding forms is an automated, easy-to-use, and quick way to onboard a new third-party/vendor in your 6clicks team. The forms can be shared with your organization and clients to introduce one or more vendors to your 6clicks platform.
Forms will also automatically define the pre-qualification or initial assessment, allowing you and your organization to better manage and control the vendor's risk and compliance lifecycle. You can achieve this by setting up the form in a way that not only creates a vendor in 6clicks when submitted, but also generates and sends a Question-Based Assessment to the respondents who can be individuals within your organization or the vendor itself. This allows you to make sure all the vendors are going through the qualification phase automatically.
The onboarding form is also used to shape the onboarded vendor in a way that suits your organization's needs. By setting up default field settings and values, all onboarded vendors can have the important fields and data right from the beginning.
Form capabilities at a high level:
- Allows you to create an onboarding form to be shared with whomever has the responsibility to introduce or add vendors to your 6clicks ecosystem
- Allows you to set default values and data, including custom data and standard vendor fields, for all the vendors onboarded via the form you are creating
- Allows you to automatically create and publish a pre-qualification Audits and Assessment (Question-Based Assessment) to be sent to the vendor or assessor when the vendors are onboarded using the form
- Allows you to notify your team members when every vendor is onboarded as well as when they complete the pre-qualification assessment
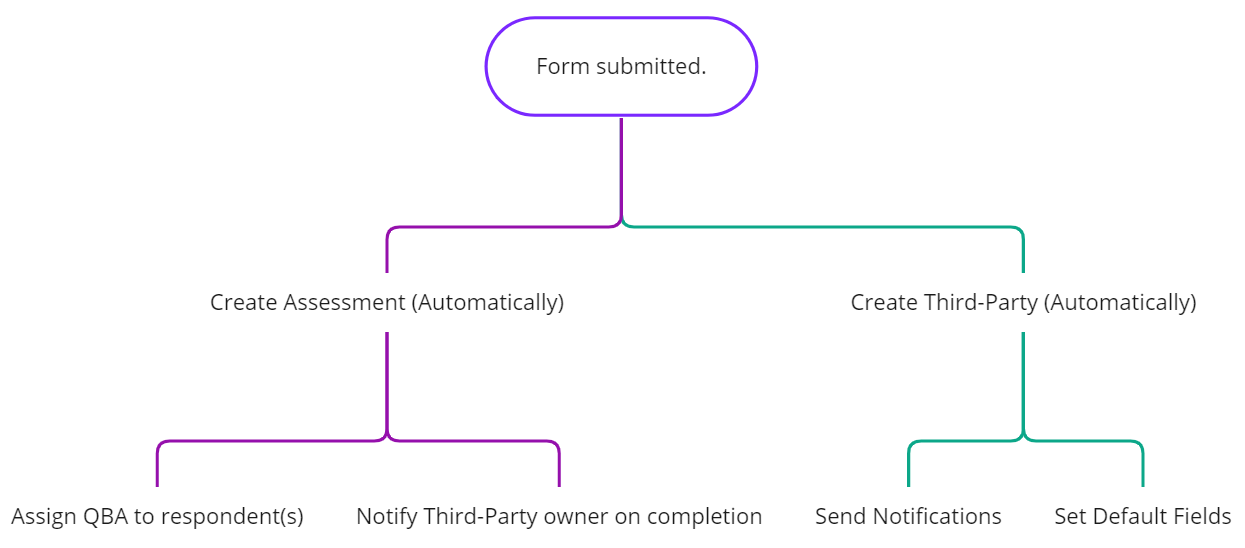
Table of contents:
1. Create the form (Form details)
Note: This functionality requires specific permission. Your system administrator can add "ThirdPartyOnboardingForm" to your permissions if you are tasked with managing vendor onboarding forms.

Create the form: Creating an onboarding form is done in your client/team account by clicking on the Third-Parties menu on the left. The onboarding forms page is then accessible by clicking on the Forms sub-menu below:

This page displays all the existing forms created under your team/accounts.
You may filter the forms by Status and Owner. You can also select the Archive filter to view forms that have been archived.
Select Create onboarding form which will open the Onboarding Form Builder
Add Form fields
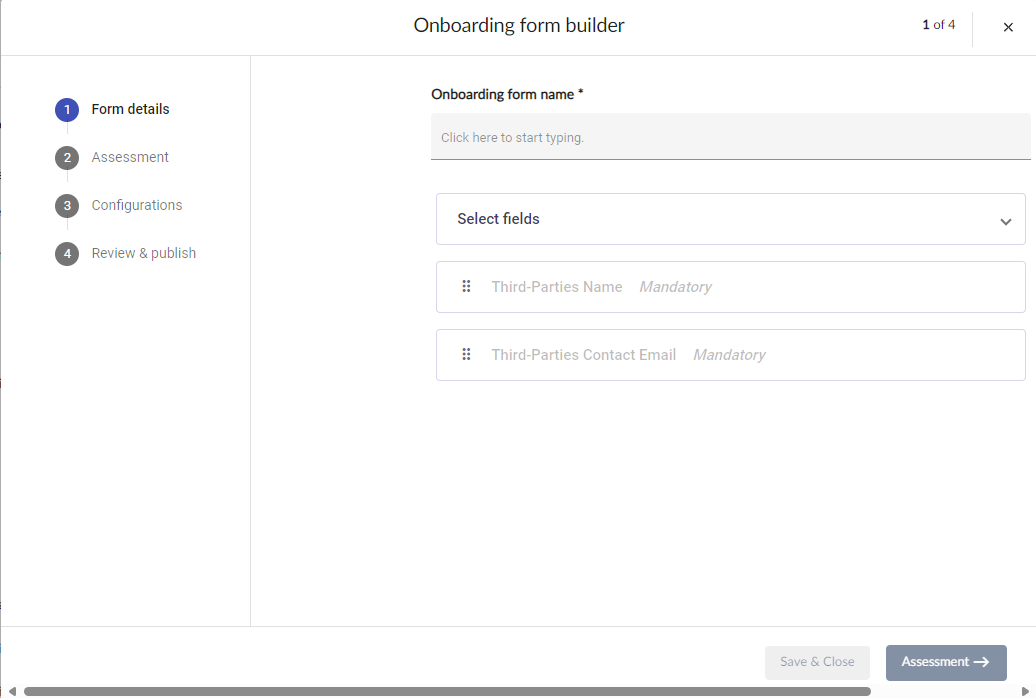
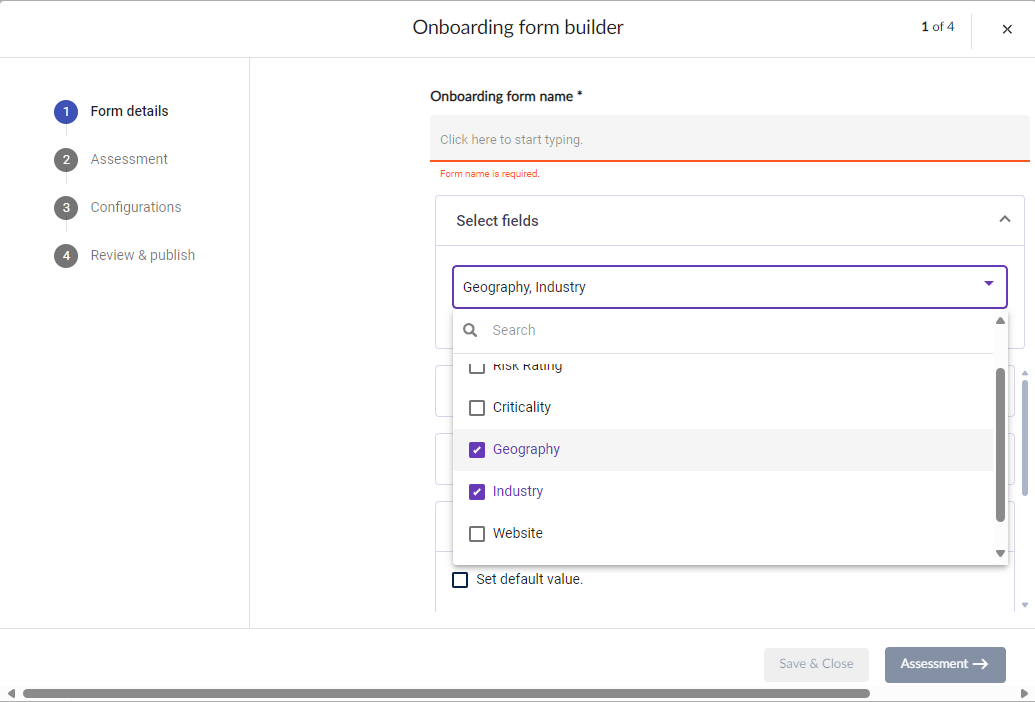
This initial form page allows you to define specific fields that help identify your vendors.
Here you can add/remove all the available fields to be displayed on the form when it is published. Fields can also have a mandatory checkbox for the questions the user must answer as well as the fields that are defined by you during the process.
- The field(s) you want the form user to answer
- The field(s) you want to make mandatory for the form user
- The field(s) you want to fill automatically when the form is submitted
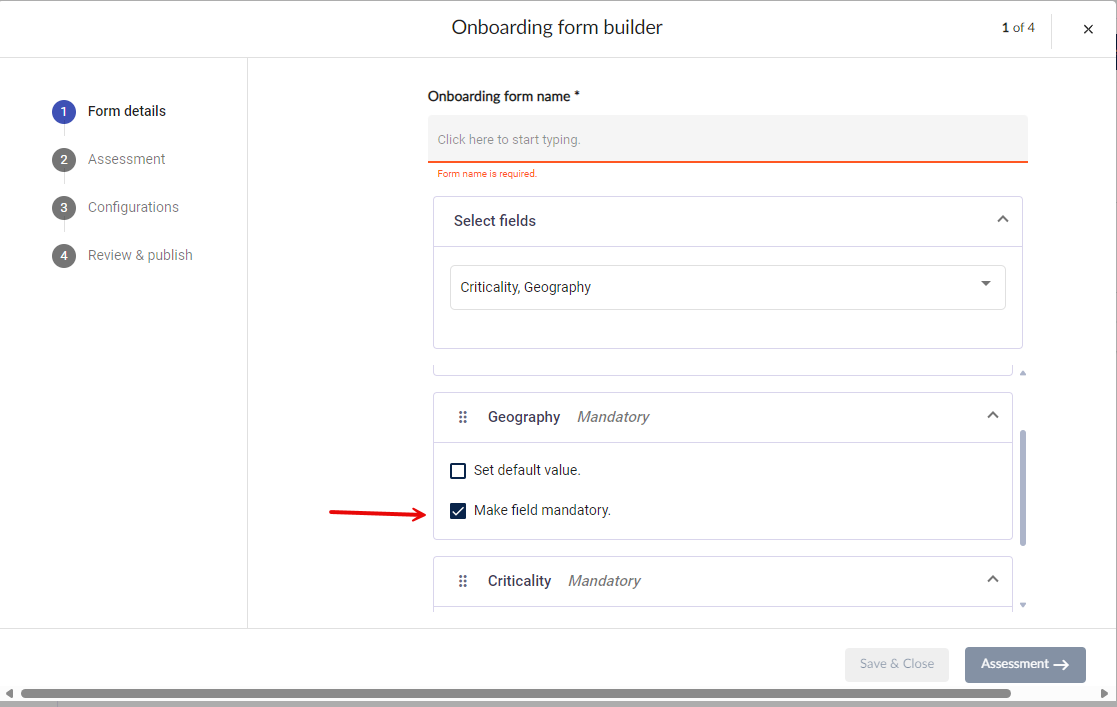
Define mandatory and default value fields
By default, the added fields are marked as mandatory, but you can deselect this by clicking on the applicable checkbox when the field setting dropdown is closed. You can also provide a default value for the field.
Marking a field as mandatory means the form user will have to provide the value to be able to submit the form.
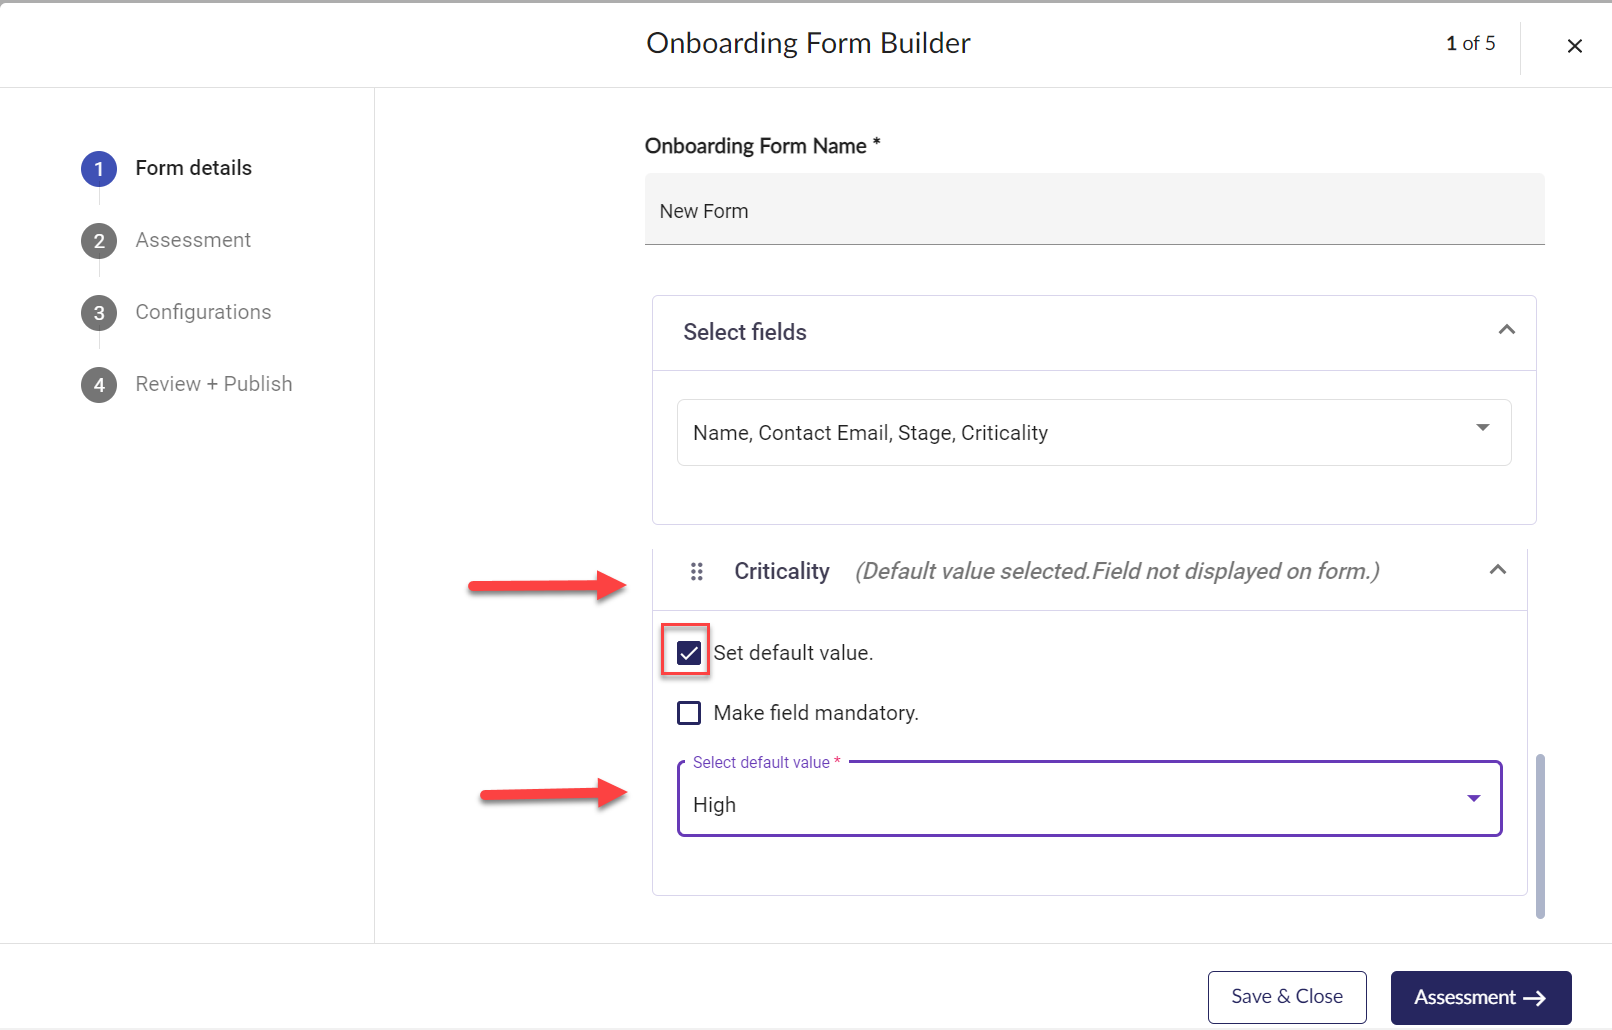
 Using provided value (Default value for the field):
This functionality allows the form builder to specify a value at the time of creating the form. If there is a default value for the field, the user of the form will not see the field on the form, but the value will get saved against the field when the form is submitted.
Once all the required, default, and optional fields are defined for the form, you can click Save & Close which allows you to stop at this step and return later to define the pre-qualification assessment automation for the form.
If you have the required assessment template created, click Assessment. The form will get saved and you can proceed with the next step.
The example below is a form that was created with the Critically set to "High" as a default value. All the Third Parties created from the form will have their Criticality set to "High" by default.
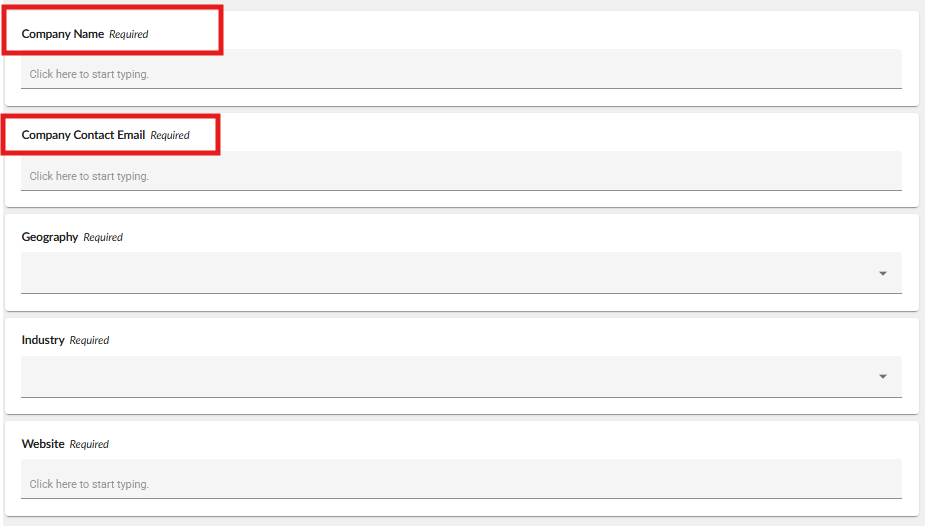
The following two fields are mandatory on all onboarding forms and cannot be removed from the forms.
- Third-Parties Name: The form user must provide a name for the vendor being onboarded. This name is the name that will be used to store and create the vendor in 6Clicks.
- Third-Parties Contact Email: This is an email address of a person responsible for communications with your vendor. Although this can be an internal person from your organization, we encourage this to be used as a place to store the actual vendor's contact person details. This field can later be used when the automated pre-qualification assessment is set up.
Optional customization of Third-party form labels
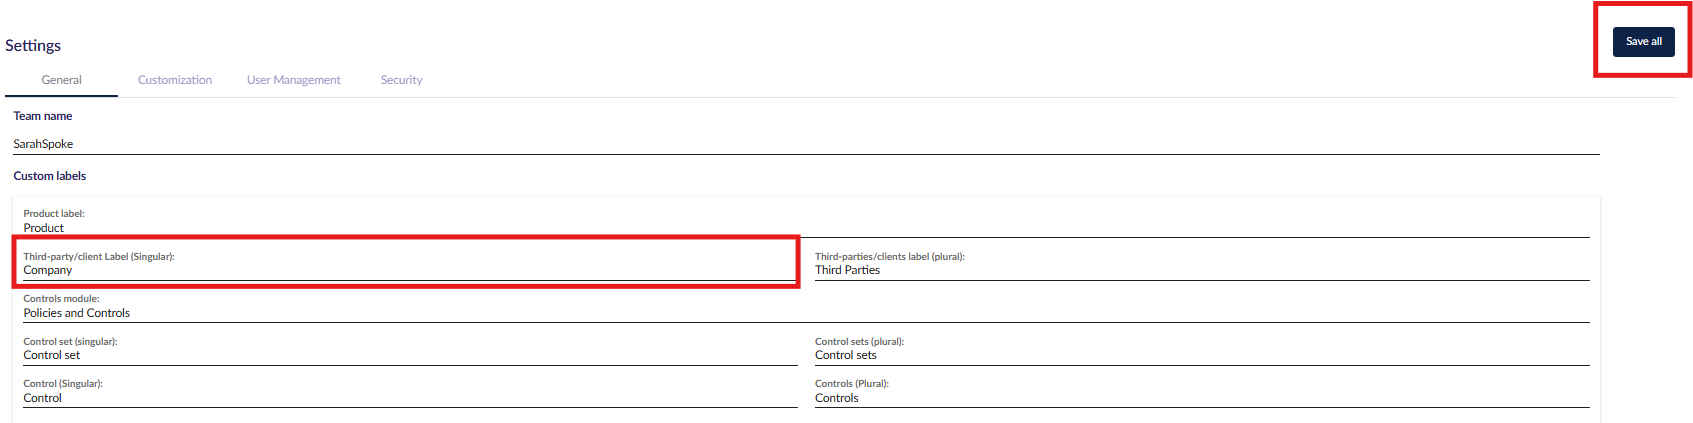
By default, third-party forms include mandatory fields labelled Third Party Name and Third Party Contact Email Address. If you prefer to customize these labels, for example, to reflect Company Name and Company Email or any other preferred terminology, you can do so through the settings menu.
To customize the third-party field labels, go to Settings, where the Custom labels section will be displayed. Locate the field titled Third-party/client Label (Singular). Enter your preferred label text, such as "Company," then click Save all to apply the changes.
2. Assign an assessment template to the form
Once all the required, default, and optional fields are defined for the final form, you can proceed to the next step to define the pre-qualification assessment automation for the form.
As noted earlier, "Save & Close" allows you to stop at this step and come back later to complete the form setup. When you click on the "Assessment" button, the form will get saved and is ready to take vendors on board.
Important Note: The Form Details step is the only mandatory step during the form creation process. The form can be used when this step is complete, and you can directly go to the last step bypassing all the other steps and making the form live. We will cover this in the next sections.
Assessment automation settings
Once the form is submitted by the user, the automatically created Third-Party will have the opportunity to immediately undergo a pre-qualification/initial assessment.
This allows the form builder and your organization to automate the onboarding process and make sure no vendor is added to your 6Clicks ecosystem without completing your required compliance check and initial control.
Pre-requisite: Create your pre-qualification/initial assessment template before creating a Third-Party form. The assessment template should be a Question Based Assessment, published and ready to be used. The form you are creating can be used to onboard multiple Third-Parties referencing this template.
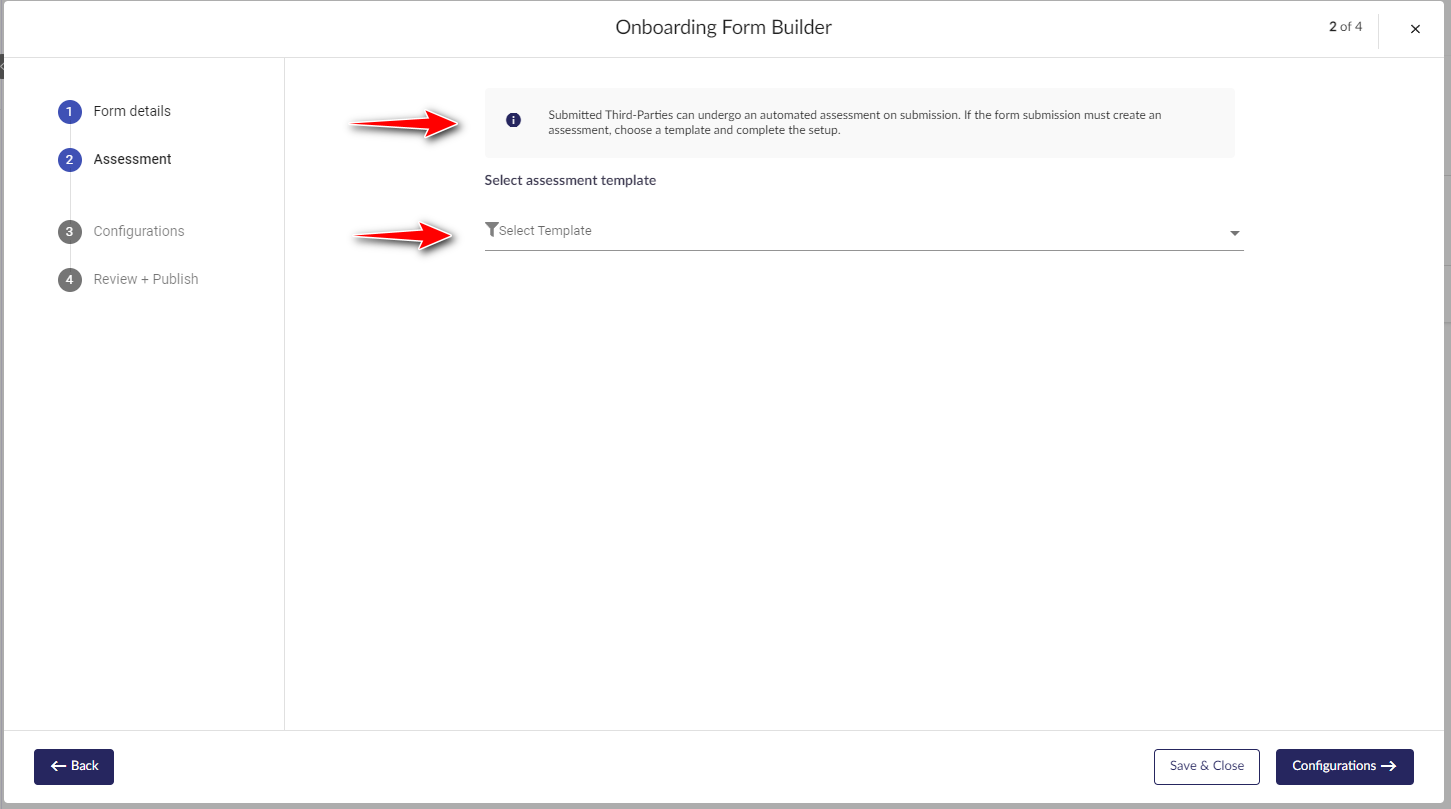
Once you configure the form details, the Assessments tab is accessible by clicking on Assessment.
Select assessment template: The explanation on this step describes how you can use it to select one of the available, published Question Based Assessment templates in your account. If you have not yet created the template, you can click on "Save & Close" to save the form as is and come back later to complete the steps.
Providing an assessment template here means each vendor who is introduced/onboarded using this form will receive a published assessment that they will be asked to submit, created from using this template.
Once the template is selected, you will see the following Assessment Respondent settings. This section allows you to define who should perform and complete the assessment for the vendor. The options are outlined below:
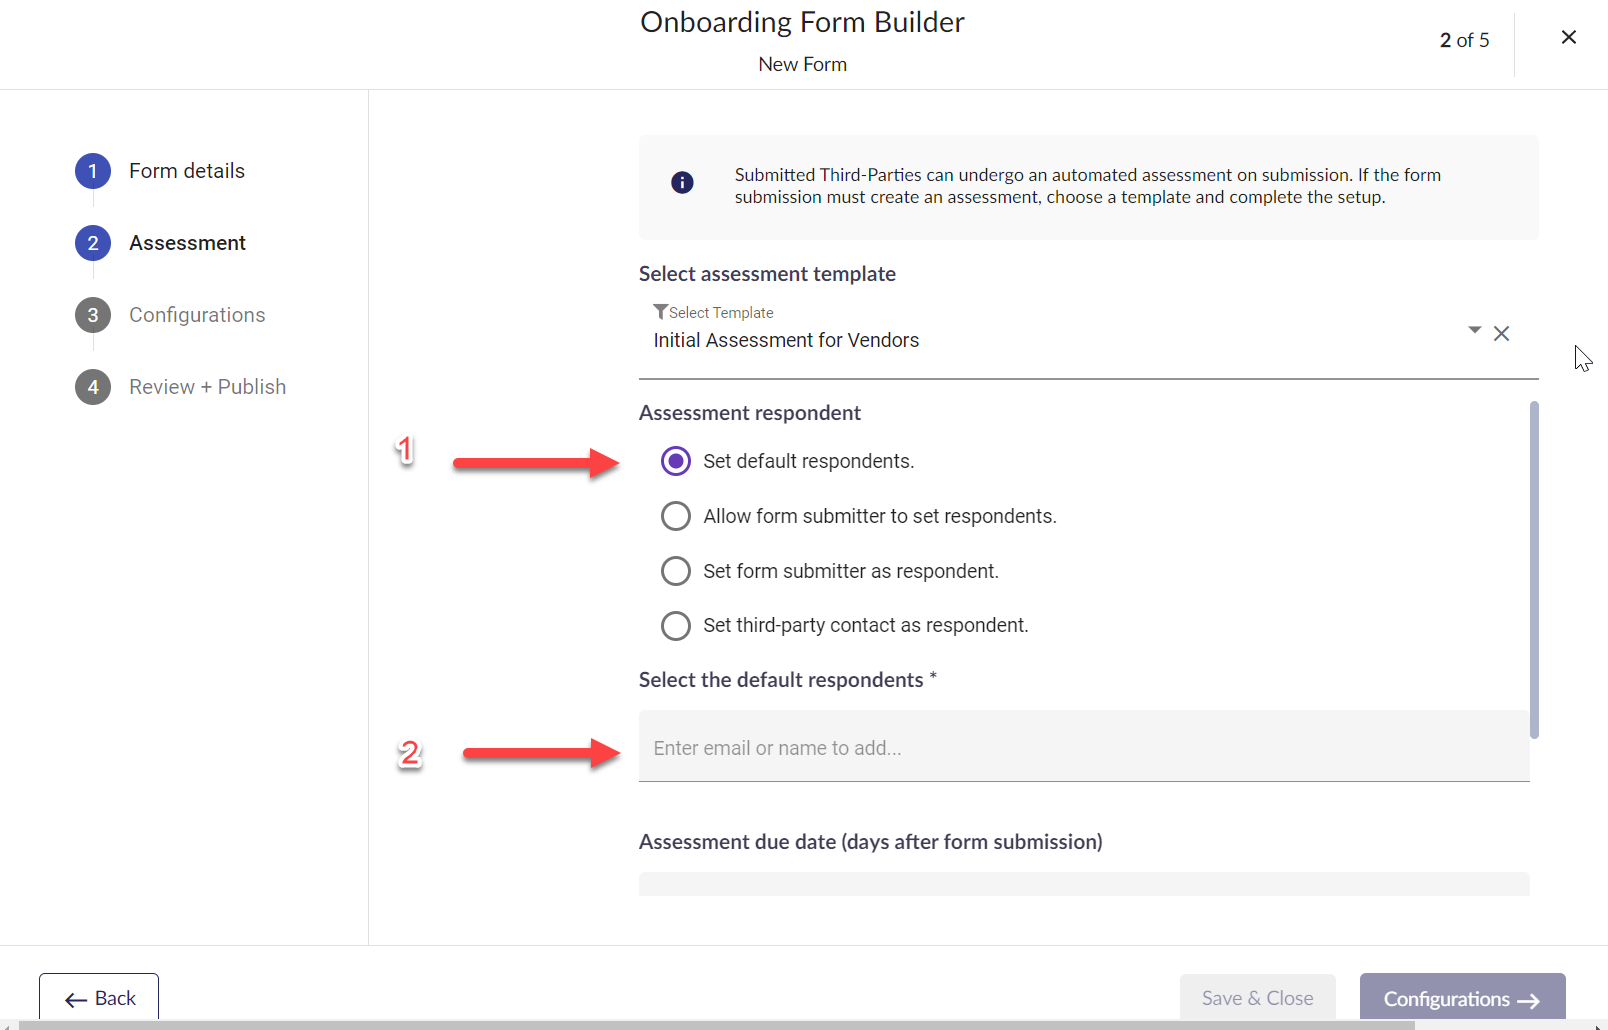
Allow form submitter to set respondent: Choosing this option means there will be a field in the final form that the form user needs to use to allocate/nominate the respondent for the assessment. Once this option is selected, the "Add assessment respondents" section on the image above will not be required, hence not displayed.
Set form submitter as respondent: Choosing this option will ask the form user to provide their email address. Once the form is submitted, they will be the one who receives the assessment and the individual added to the automated assessment as a respondent.
Set third-party contact as respondent: Choosing this option means the vendor's contact email that was initially provided on the form will be the respondent to complete the assessment. Remember, one of the mandatory fields on all the onboarding forms is the "Third-Party contact email" which will then be used as the assessment's respondent.
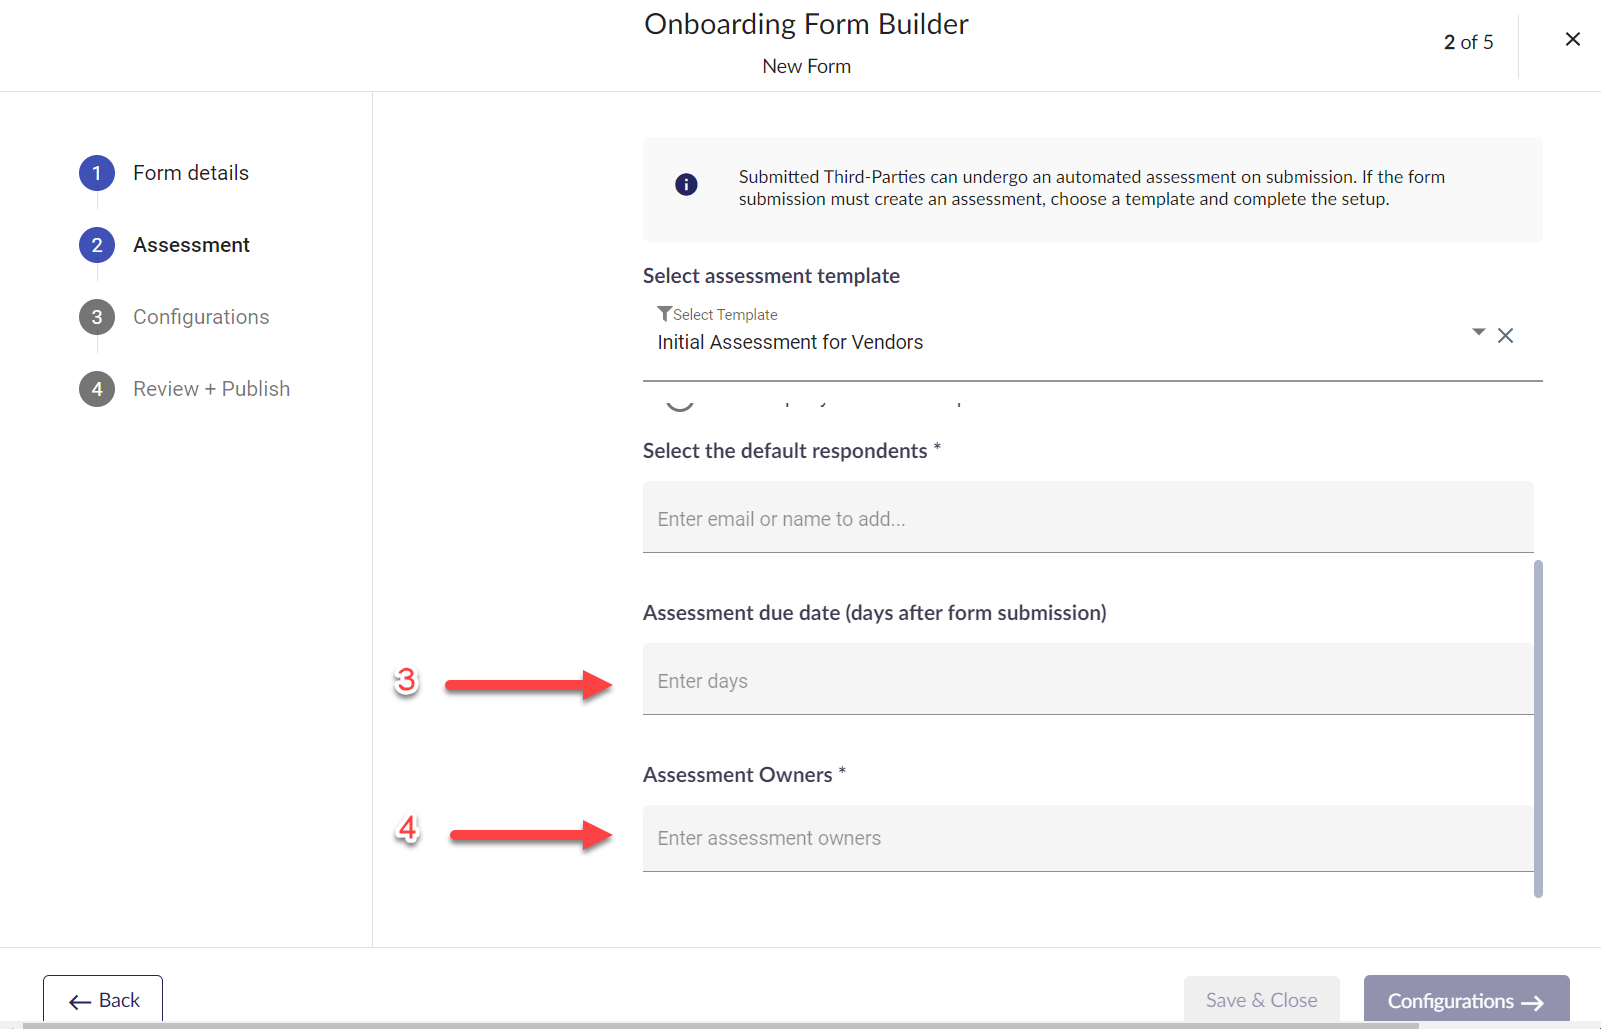
Assessment due date (days after submission): This field is the number (3) in the above image. The number of days added here as a numeric value will be used to calculate the actual assessment due date. As the date that the form was submitted is not known at this stage, the numbers provided here will be added to the submission date to calculate the due date.
Assessment Owner(s): The automatically created assessment needs to have at least one owner (4). The owner is the person who will be notified at every stage of the assessment. The owner in this field can be either an individual or a group in the 6clicks account.
"Save & Close" or moving on to Configurations: Once all the fields are properly filled and the assessment setting is complete, you can move ahead by clicking on the "Save & Close" button to save all the changes you have made or click on the "Configurations" button that saves the changes and moves to the next step.
3. Configurations
This step is used to set the notifications and other configurations that need to be added to the onboarding form. 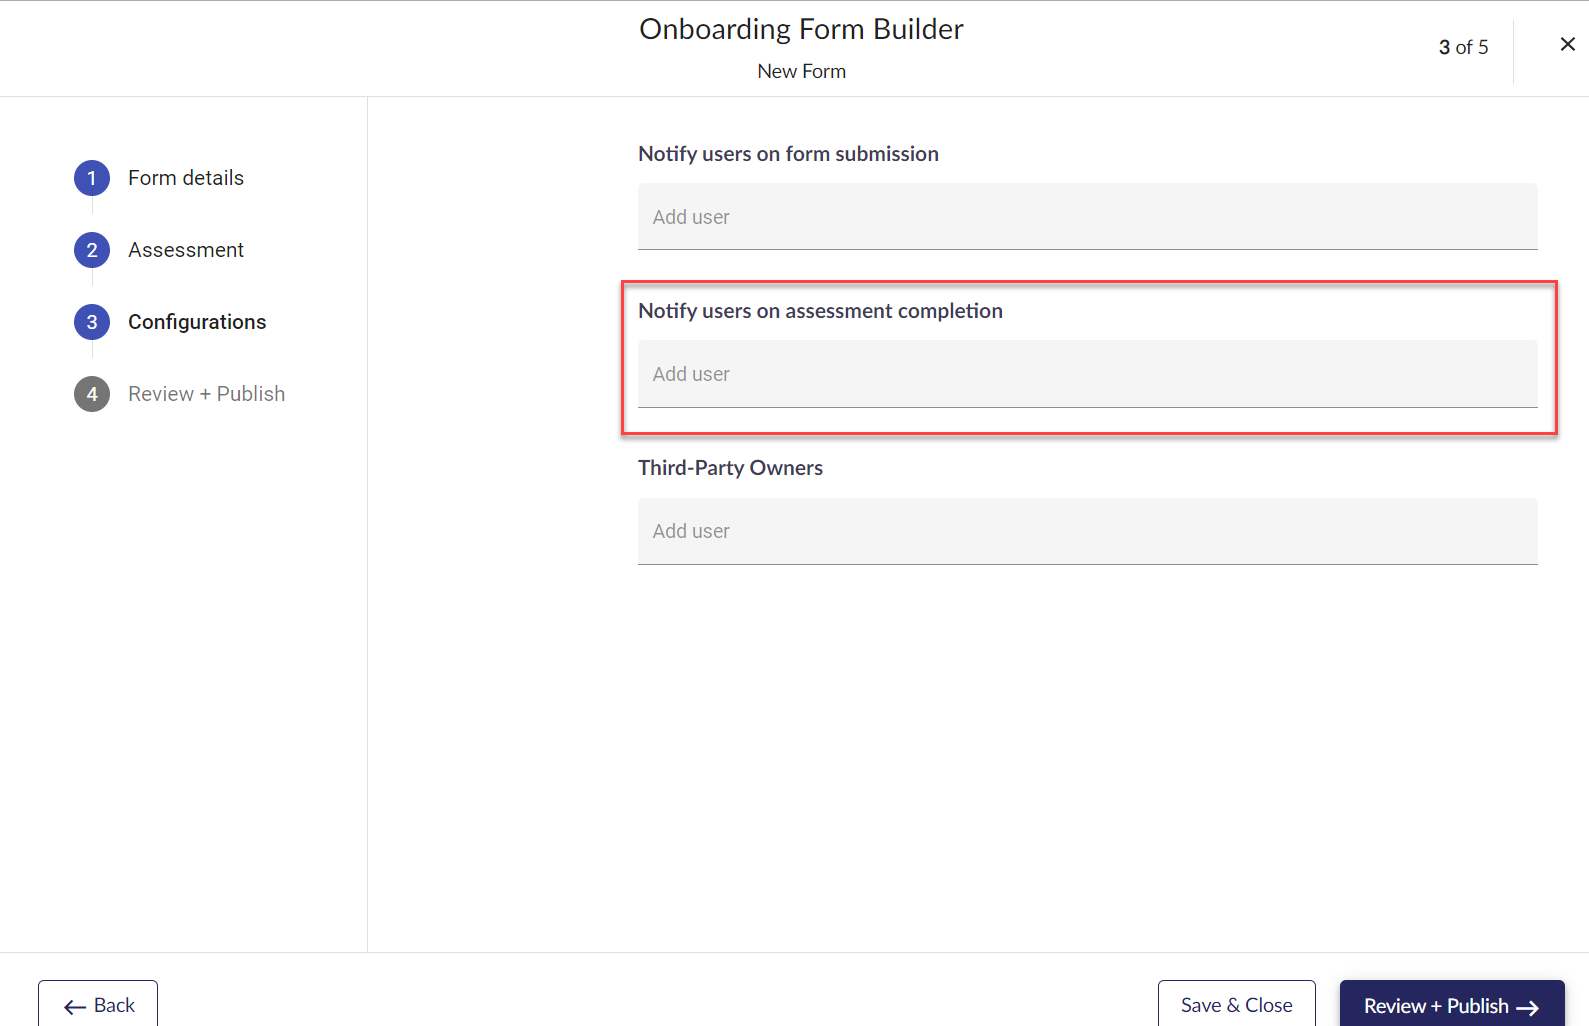
Notify users on form submission: This field allows you to add one or more users to get notified once the form is submitted and the vendor was created in the system. The notification will be in the form of an email and is sent once the form was successfully submitted.
Notify users on assessment completion: This field allows you to add one or more users who will be notified once the third-party respondent(s) has/have successfully submitted the automated assessment generated after the form is submitted. The notification is in a form of an email and will be sent once the 6clicks application receives the assessment result and the status of the assessment is set to complete.
Important Note: This field (marked with a red border above) is only available if there is an assessment template selected in the previous step. If no assessment is required for the vendors, then this field will be hidden.
Third-Party Owners: This field allows you to associate an existing 6clicks user to the vendors created by this form as the owner. The owner will be the go-to person in your organization who manages the vendors.
"Save & Close" moving to Review + Publish: Once all the fields are properly filled, you can move ahead by clicking on "Save & Close" to save all the changes you have made or by clicking on "Review + Publish" to save the changes and move to the next step.
4. Review + Publish
This is the last step in creating the form and you can either check the form by copying the provided public URL or toggle the "Make submission form live".
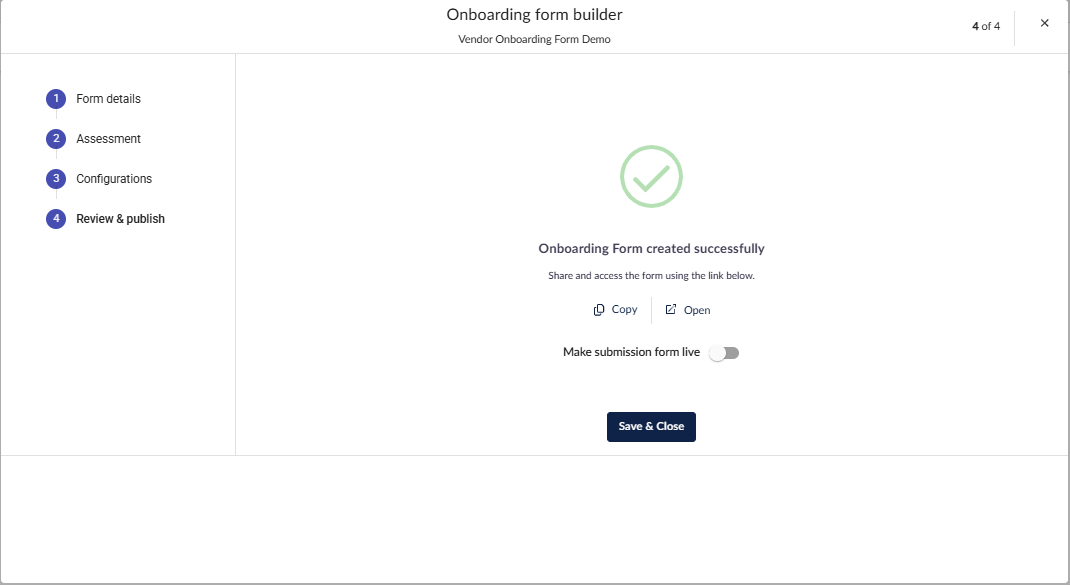
Important Note: The form is a public form and can be accessed by anyone who has the URL. This is the organization's responsibility to make sure the form does not get compromised/shared outside the organization.
5. Using the forms: Onboarding Forms list page
Once you click on the "Forms" menu under the "Third Parties" menu item on the left, the list of all existing forms will be displayed:
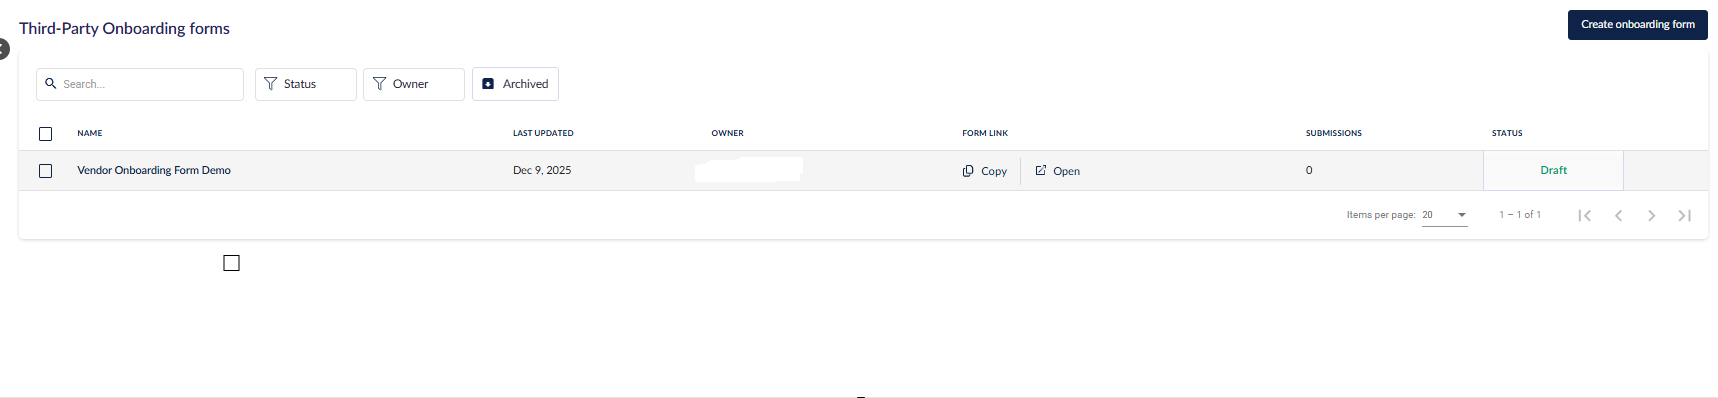 Here, you can copy the form URL or open the form as well as change the status of the forms between live and inactive by clicking on the status itself.
When a form is set to Live, you can send the associated URL to the vendor(s) you wish to onboard to have them complete the form and the associated assessment, if applicable.
Do not share this URL outside of your organization or with anyone you do not wish to onboard as a vendor.
Status: There are four statuses available for each form:
- Draft: This is when the form is just created and has never been set to Live. Once the status is changed to anything other than Draft, it cannot be set back to Draft. Forms in Draft status are not accessible by the users and if the user visits the URL, they will receive an error message.
- Live: This status shows the form is live and is accepting submissions.
- Inactive: The form can be set to inactive by editing the form and toggling the live checkbox to inactive (Review + Publish). This makes the form temporarily inactive, and the user will see an unavailable message when landing on the form's URL.
- Archived: A form can be archived. Achieved forms will not accept any submission and the user will see an unavailable form message.
- Vendor creation: With every submission, there will be a new vendor/Third-Party created in your account and will respect the default fields you have set up on the form. For example, if the form has a default of "High" for Risk Rating, all the vendors created using the form will have the Risk Rating set to "High" by default.
- Assessment Automation: With every submission and if the form has automation set up for assessments, the 6clicks automation engine will generate a Question Based assessment from the template specified and will assign it to the respondents provided at the time of form creation. The details such as the due date and owners will also be set automatically for the assessment, based on the form settings.
- Notifications: The system will send notifications for every form submission if it was set at the form creation time, as well as notifications to the users specified for when the assessment is submitted and completed.