Topics covered in this article:
- Overview
- Setting up the integration - Jira side
- Setting up the integration - 6clicks side
- Enabling/disabling the integration
- Using the integration to create or link Jira issues to Issue Actions
- How to disconnect Jira and the consequences of doing so
Overview
GRC team members can manage Incidents and Issues in 6clicks, but allocate actions to tech team members in Jira.
Tech team members can stay working in their core system to manage and complete tasks.
The Jira integration handles the connection between the two systems keeping the GRC team always updated without anyone needing to move between the systems manually to monitor the status and progress of actions.
This integration requires the following:
- Atlassian Developer account to set up the "app" authentication
- Appropriate admin permissions on Jira
- Feature enablement - please contact your Customer Success Manager, Solution Architect, or Support.
Setting up the integration – Jira side
- As a Jira admin, log into Atlassian Developer Console https://developer.atlassian.com/console/myapps/
- Under My apps > Create, select OAuth 2.0 integration.
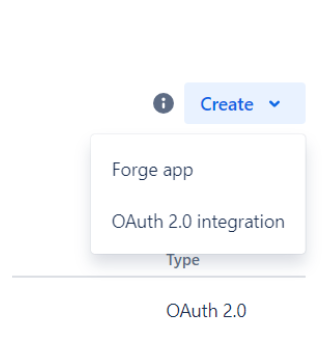
- Give the app a name – e.g. “6clicks integration”, and accept the terms and click on Create.
- Set the Permissions for the app, by navigating to Permissions and then clicking Add next to the Jira API
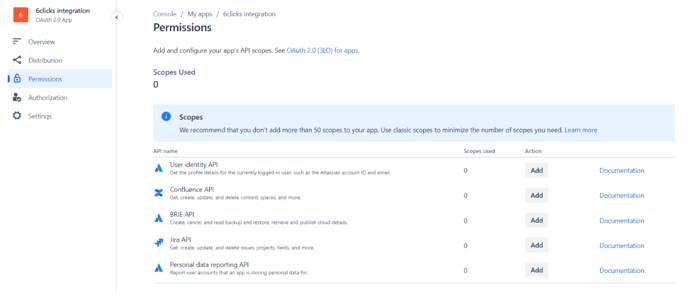
- The Add button will change to Configure, click it again
- Click Edit Scopes, and select the first 5 permissions:
- read:jira-work
- manage:jira-project
- manage:jira-configuration
- read:jira-user
- write:jira-work
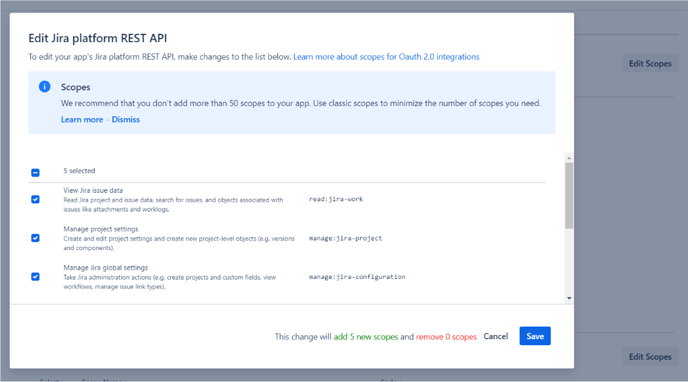
- Click Save
- Set the Authorization by navigating to the Authorization tab and clicking Add
- Enter the Callback URL which is constructed via combination of the 6clicks instance you use eg. https://app-au.6clicks.io AND appending /app/admin/integrations/jira on to it.
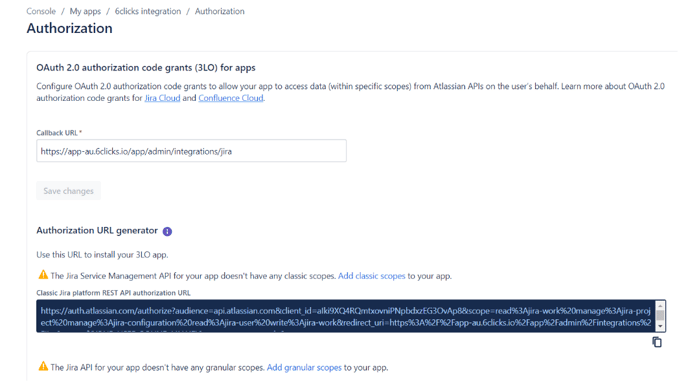
- Click Save Changes
- Take note of the Authorization URL that is now generated, this will be required for the 6clicks setup.
- Lastly, navigate to Settings
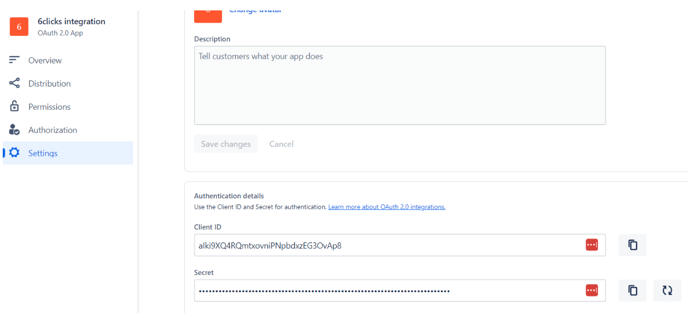
- Make note of the Client ID and Secret, these will be required for the 6clicks setup.
Setting up the integration – 6clicks side
If your organization utilizes the 6clicks Hub & Spoke architecture, Jira can be set up both at the spoke level and the hub level. Configure Jira at the spoke level if different spokes are connected to different Jira projects or need different configurations.
Note that the Jira integration is tied to the user account that creates the integration. To prevent the integration from stopping if a user leaves your organisation, consider using a dedicated, shared user account with administrator privileges for creating the integration.
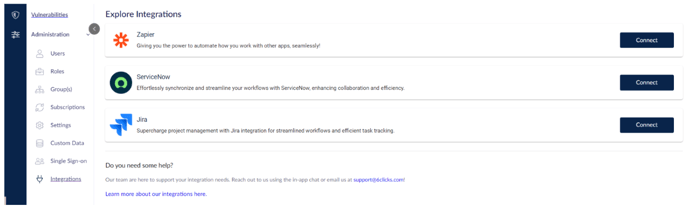
- Ideally, on the computer as you set up Jira, login as a 6clicks Administrator and navigate to Administration > Integrations > Jira then click Connect.
- For the Connect Jira step, you will need:
- Authorization URL – recorded from previous section
- Client ID – recorded from previous section
- Client Secret – recorded from previous section
- Base URL – this is the URL for your Jira instance, eg. https://company.atlassian.net
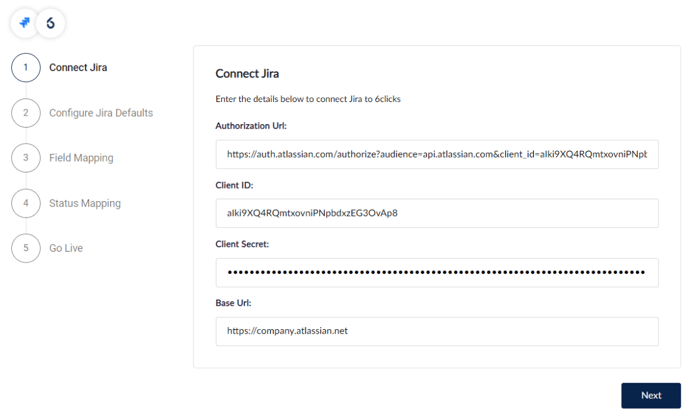
- Complete all fields and click Next. This will redirect you authorize the integration.
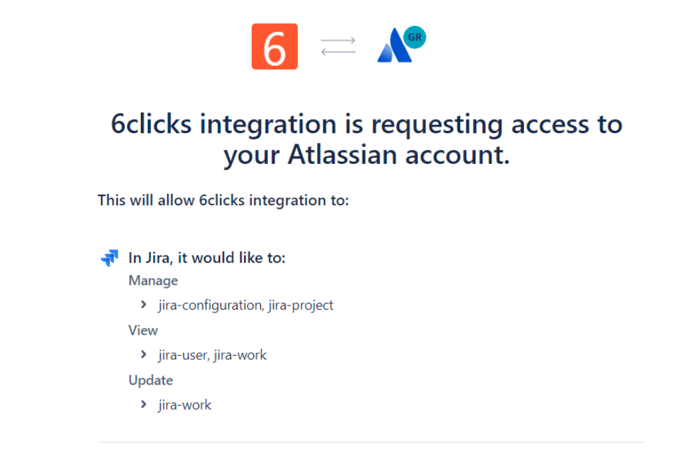
- Verify that you are authorizing the correct app, and click Accept
- To Configure Jira Defaults:
- Choose the Project you wish to create Jira issues under
- Select the Type of issue you wish to create
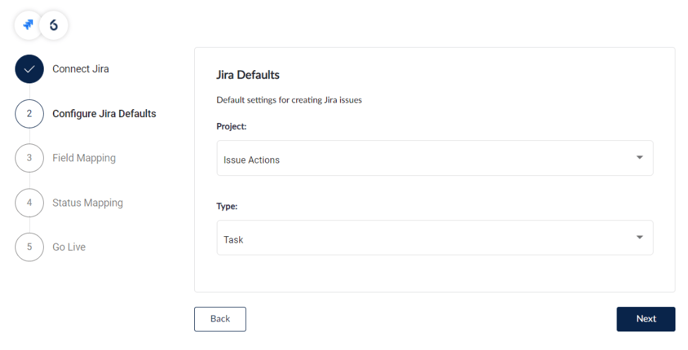
- Then click Next
- For Field Mapping, you will need to map each 6clicks Issue Action field to a valid Jira Issue field. Only compatible fields will be shown in the drop down box.
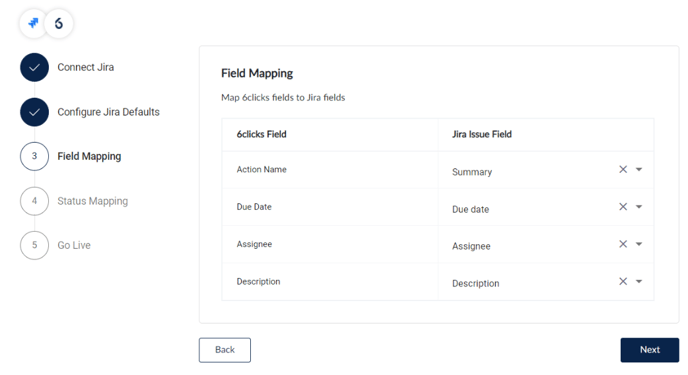
- Click Next
- For Status Mapping, you will need to map a corresponding 6clicks status for each Jira Status.
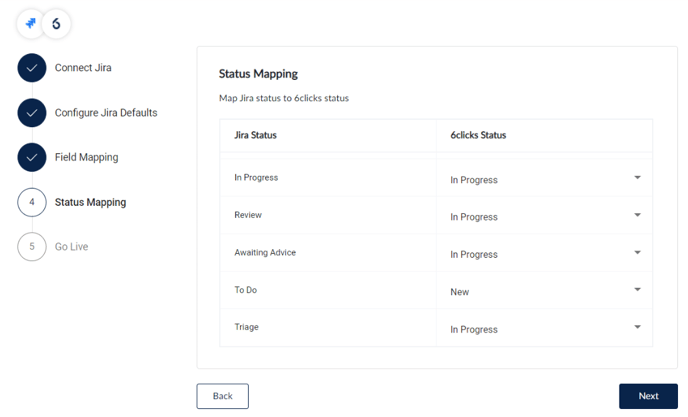
- Click Next
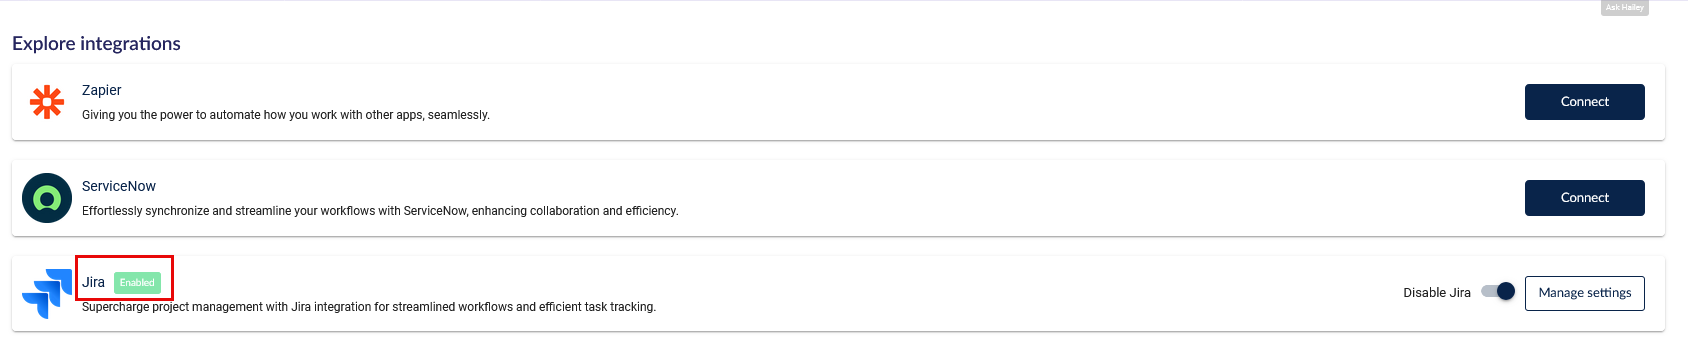
- Finally, once you have confirmed all configuration is complete, click Go Live.
- Jira should now show as Enabled
Enabling/disabling the integration
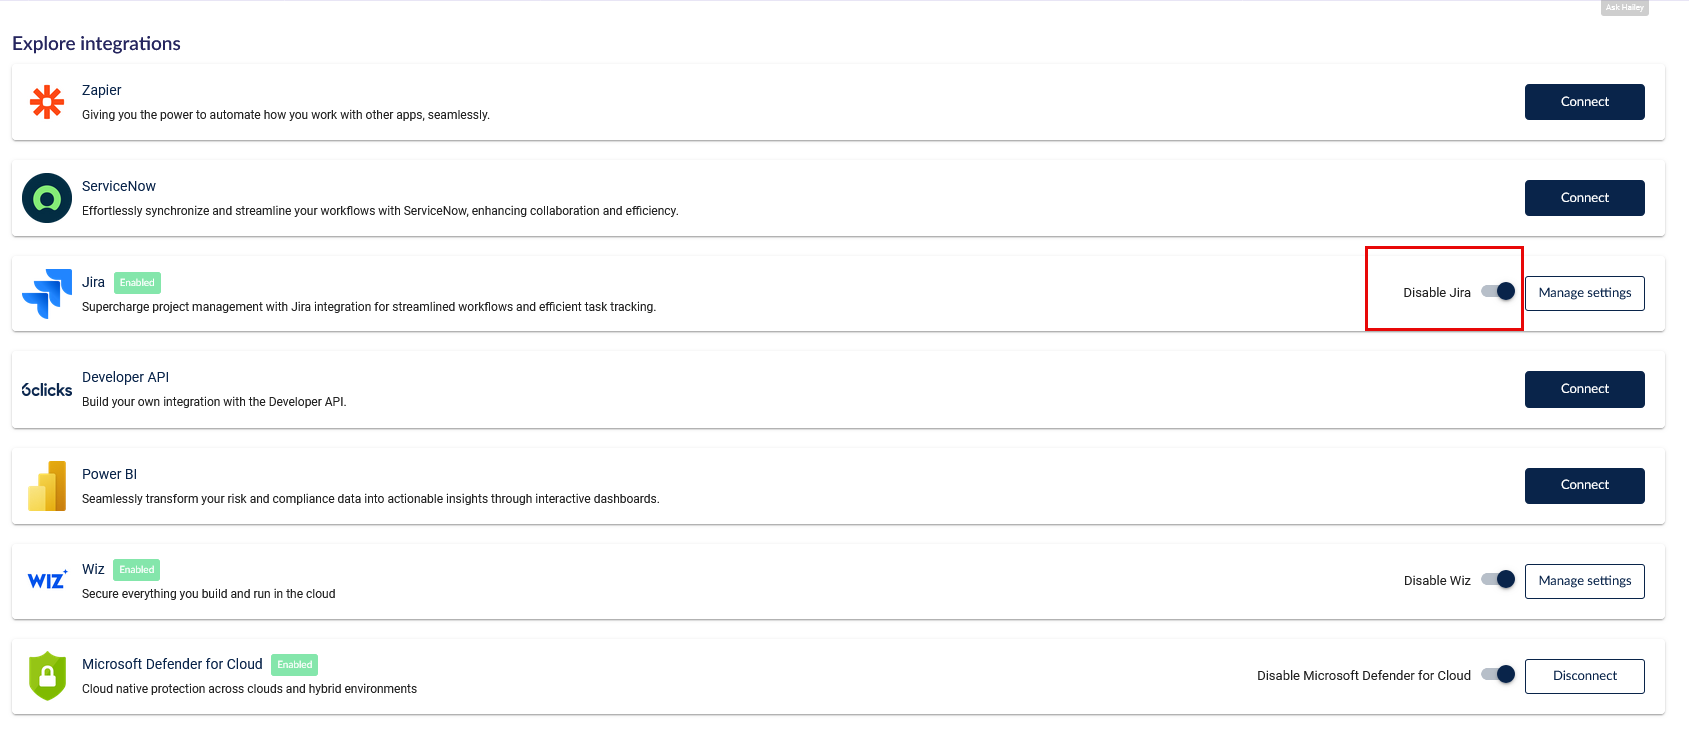
To temporarily enable or disable the Jira integration you can toggle the switch under Administration > Integrations > Jira.
Using the integration to create or link Jira issues to Issue Tasks
With the Jira integration enabled, you will now see additional options when creating an issue task:
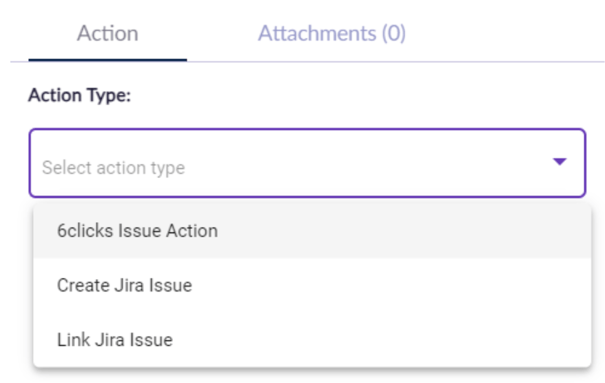
- 6clicks Issue Task – creates a regular 6clicks Issue Task
- Create Jira Issue – allows you to create a Jira Issue directly from 6clicks, as an Action
- Link Jira Issue – allows you to enter in valid Jira Issue ID and link it as an Action
- Once a Jira Issue has been connected as an Action it will appear in the center table

- Task fields will automatically reflect name, dates, assignment and status from Jira as they progress
How to disconnect Jira and the consequences of doing so
Please note disconnecting Jira will delete the integration, and remove all linked Jira issues from 6clicks – this action cannot be undone. To disable Jira temporarily, follow the steps above.
- Navigate to Administration > Integrations > Jira
- Click Manage Settings
- Click Disconnect
- Accept the warning and the integration will be permanently removed