To create a new 6clicks application (type: SPA OpenID Connect) in Microsoft Entra ID, you will need administrative permissions. The entire setup falls under Entra ID in your Azure portal. The steps are as follows:
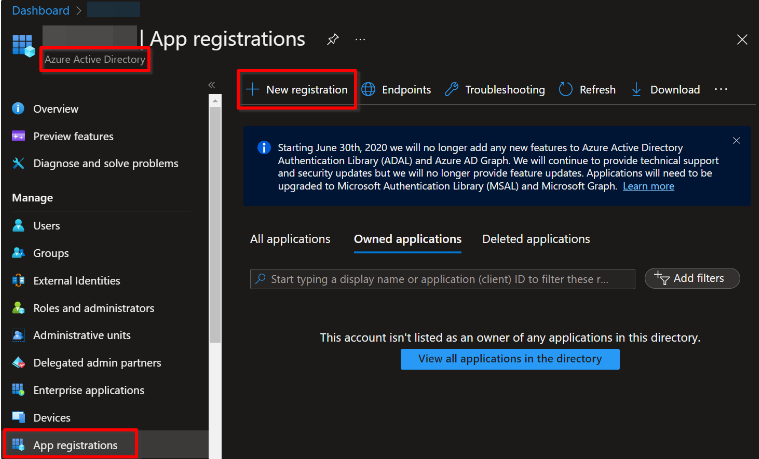
1. Register the application
In your Azure portal, head to Microsoft Entra ID → App Registrations → + New Registration
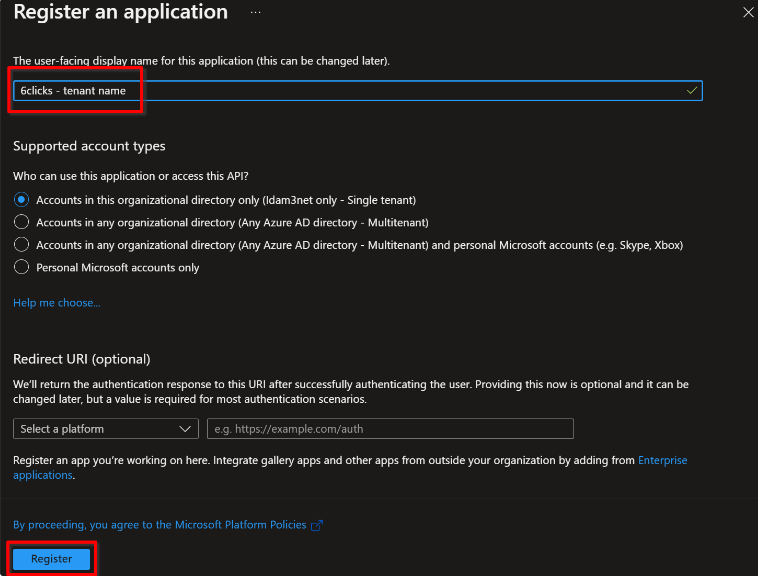
Enter the application name (e.g. 6clicks - tenant name) and click Register
Configure authentication
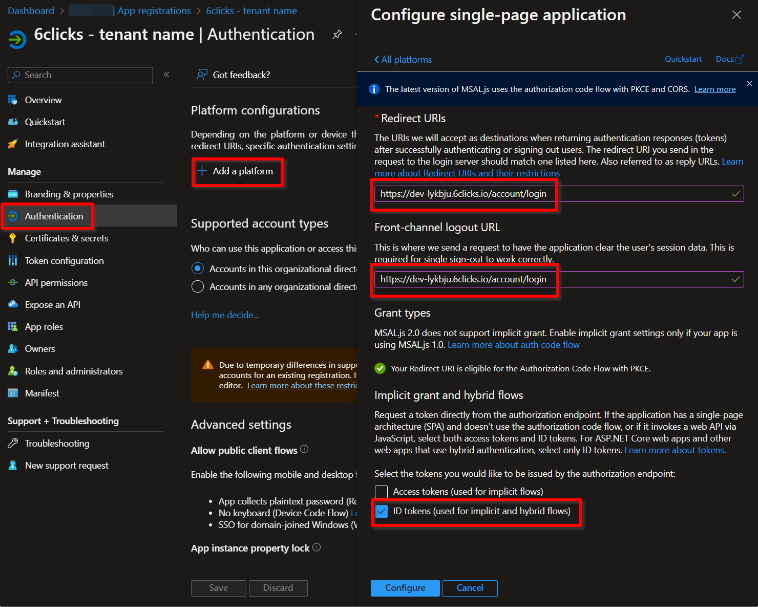
From the navigation menu, select Authentication, then click + Add a Platform and choose Single-Page Application (SPA). Configure the following fields:
-
Redirect URIs: Set to https://{6clicks host name}/account/login (e.g. https://app-au.6clicks.io/account/login)
-
Front-channel logout URL: https://{6clicks host name}/account/login (e.g. https://app-au.6clicks.io/account/login)
-
ID Tokens: Tick the box for ID tokens
Note: The Redirect URI and Front-channel logout URL information for your tenant is available in the 6clicks Administration/Single Sign-On fields Callback URI and Logout URI, respectively.
Click Configure
Set up 6clicks roles
The next step is setting up the 6clicks roles, which will appear in the tokens as a part of the SSO process. This is done on the App Roles page:
-
Display Name: This is a free-form text field, but we suggest using the 6clicks role name
-
Allowed Member Types: Tick the Users/Groups option
-
Value: The group name you set up in Entra should follow the role name you are mapping to in 6clicks using the following format: "6clicks-role-<role name>".
For example:
-
6clicks-role-Administrator
-
6clicks-role-Users
-
6clicks-role-CustomRole1
-

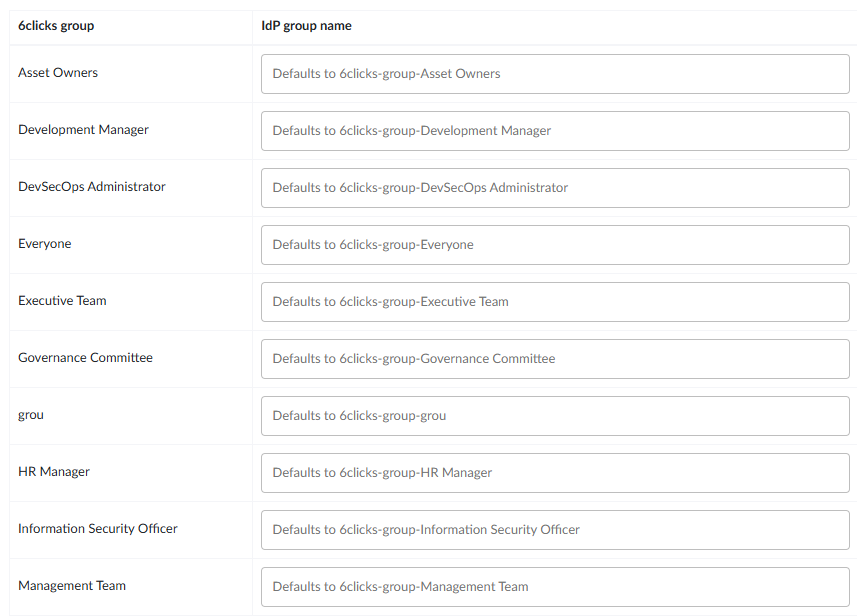
For customers using SSO and taking advantage of just-in-time (JIT) provisioning, you can synchronize your IdP's groups with 6clicks user groups. The capability works similarly to IdP group to 6clicks role synchronization, with the ability to use a convention-based mapping or an explicit mapping.
-
Description: This is a free-form text field. We suggest specifying a description that explains what the role is and how it is used.
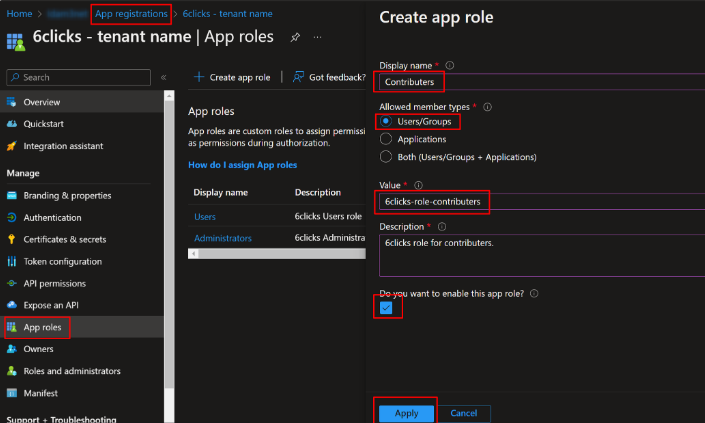
Make sure to tick the checkbox to enable the app role. Once complete, click Apply to proceed.
Add in Branding & Properties
On the Branding & Properties page which you can select from the navigation menu, you can add in terms of service URIs and upload a logo. This step is optional.
You can download the 6clicks logo from our Media Kit.
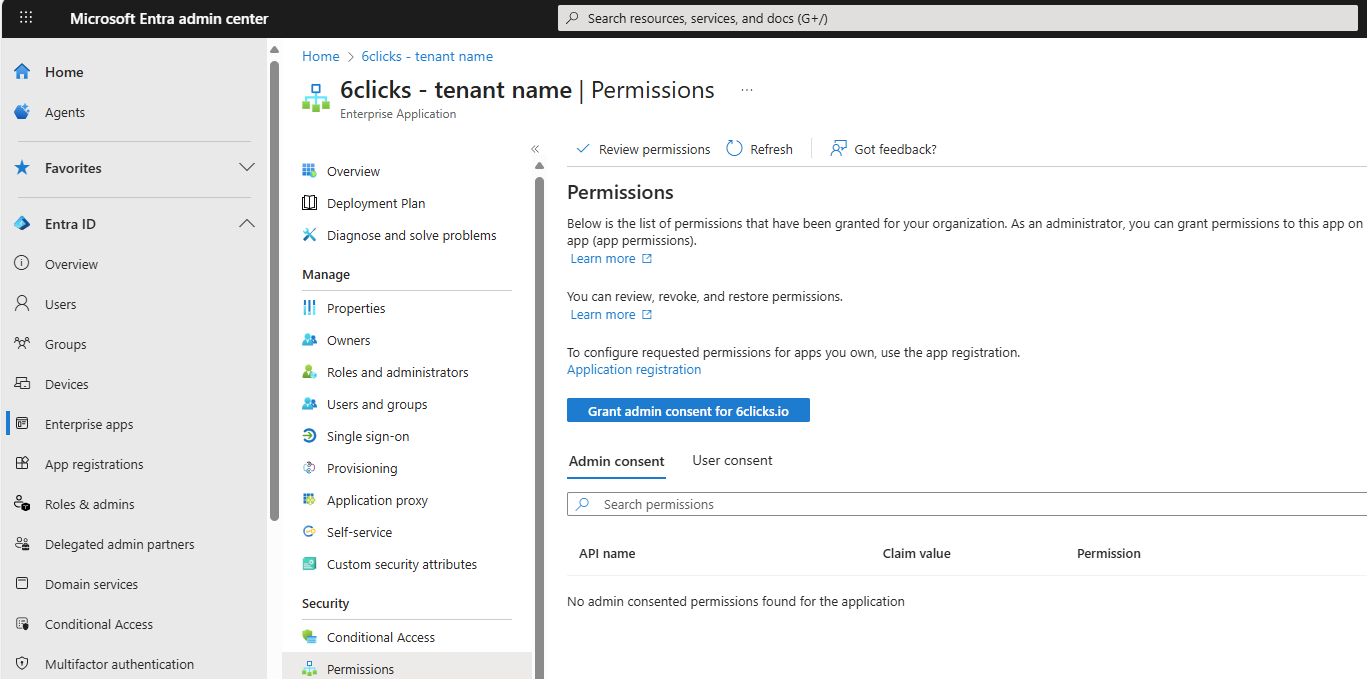
2. Configure the enterprise application
Under Microsoft Entra ID → Enterprise Applications, search and find your new 6clicks application
Assign users or groups to the roles
Next, select Users and Groups, then + Add User/Group
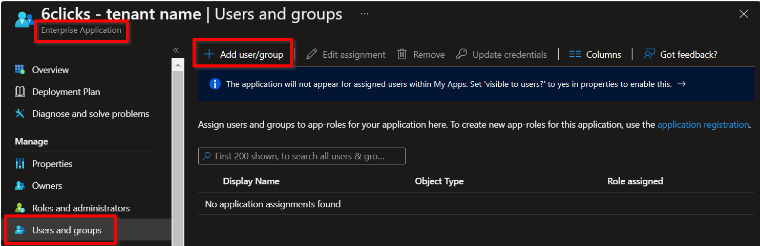
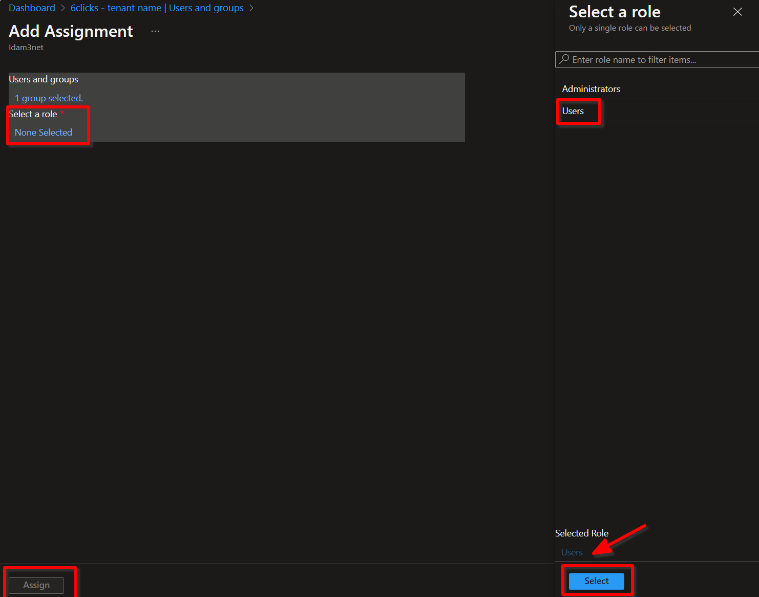
Match the users or groups to the roles you previously defined
Please note: the "Email" field must have a value set otherwise it will not work with SSO. Setting a value in the "Other emails" will not work as that functionality is not used to authenticate with SSO. 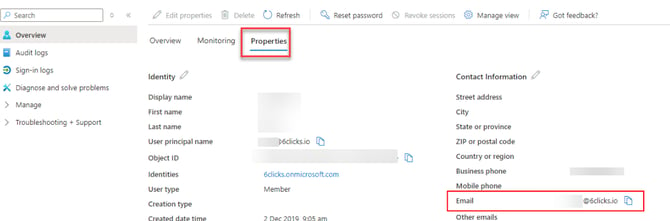
3. Configure SSO in 6clicks
In Azure, open the App Registrations → Overview page corresponding to your new app. You will need to copy information from this page into 6clicks.
Copy Client ID
The Application (client) ID is found on the Overview screen
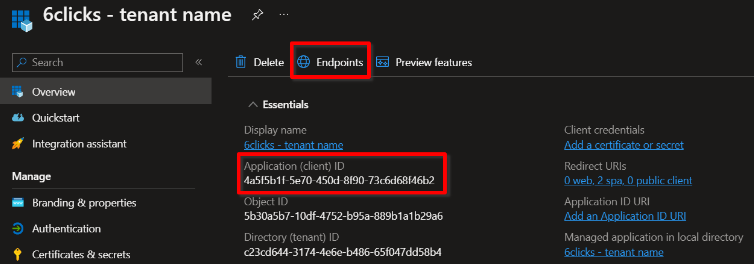
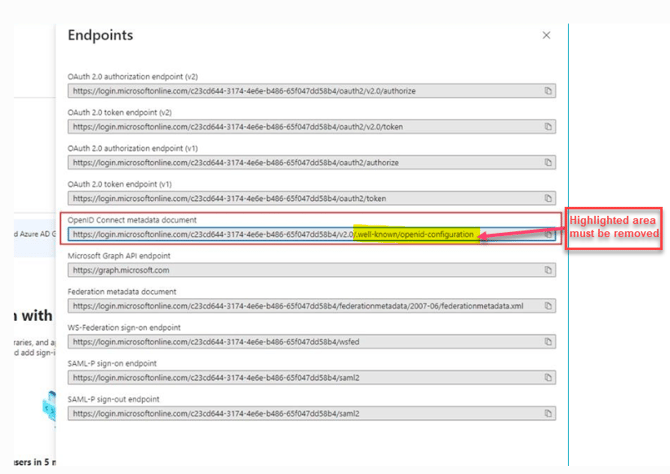
Copy Issuer URL
The Issuer URL is found by clicking the Endpoints tab in the Overview. The value of the Issuer URL should be the value of the OpenID Connect Metadata Document field in the Endpoints screen but without the "/.well-known/openid-configuration" portion as per the below example. Based on the example, the Issuer URL would be https://login.microsoftonline.com/c23cd644-3174-4e6e-b486-65f047dd58b4/v2.0.
Finish the SSO setup in 6clicks
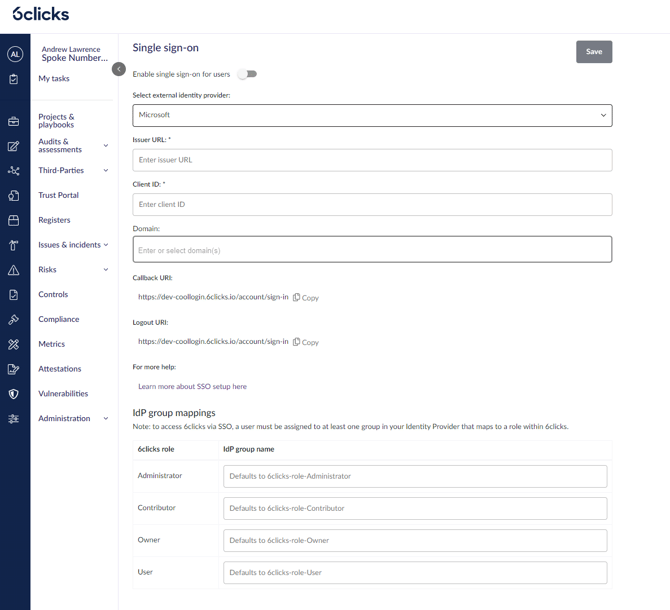
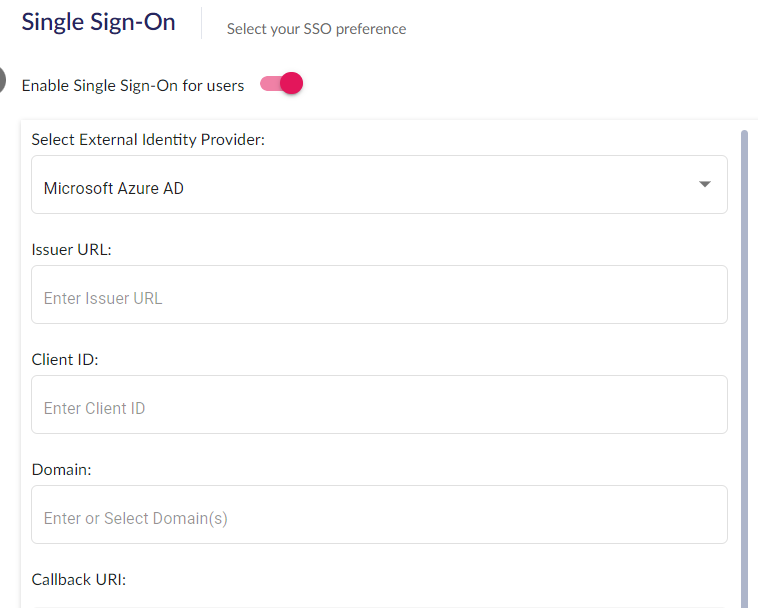
Once you have the Issuer URL and the Client (application) ID, return to the 6clicks SSO page to complete the configuration.
Go to Administration → Single Sign-on, and choose Enable Single Sign-on for users.
Select Microsoft from the drop-down list.
Enter the Issuer URL and Client (application) ID using the values obtained in the previous step, and the Domain(s) used by your organization to login.
If your organization has multiple domains, you will need to enter them in the Domain box below. To add multiple domains please enter each domain name and press enter.
4. Enable login from Azure Dashboard
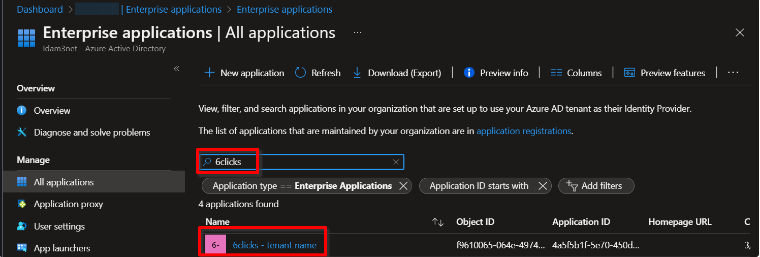
Back in Azure, go to Microsoft Entra ID → Enterprise Applications
.png?width=670&height=305&name=MicrosoftTeams-image%20(2).png)
Find your app by searching it.
.png?width=670&height=303&name=MicrosoftTeams-image%20(3).png)
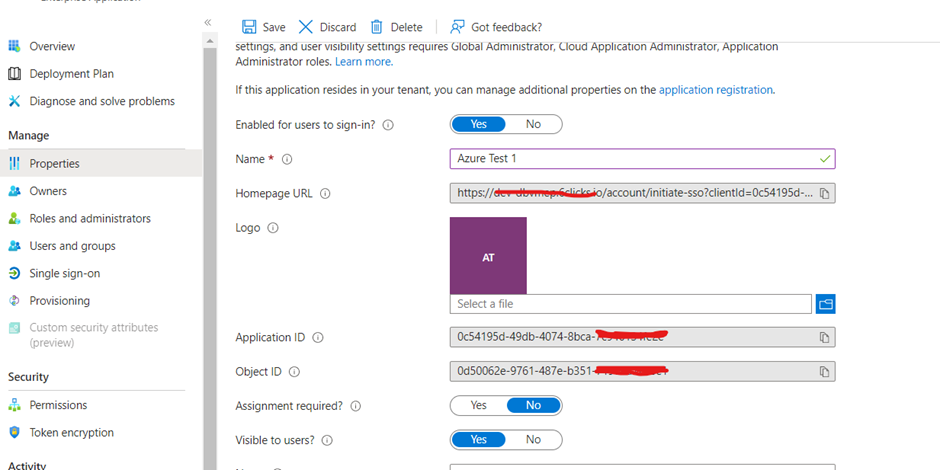
Open the app. Go to Properties, find the Visible to users? field and select Yes.
Update the Homepage URL to https://{6clicks host name}/account/initiate-sso?clientId={client Id of application}
In some instances, the Homepage URL is entered instead within App Registrations > Branding & Properties.
Users with access to the application should now be able to see it on their dashboard at https://myapplications.microsoft.com/.
Once configured, it can take up to 15 minutes for the application to appear.
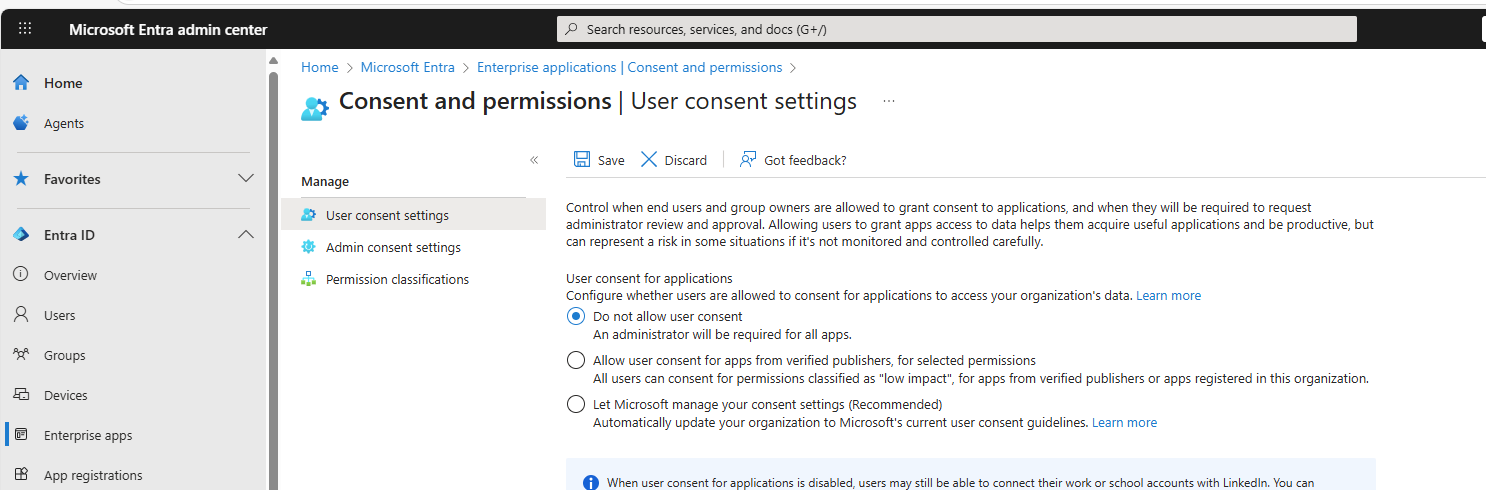
For automatic login approvals, you can enable this on the below screen so each user does not have to manually request login approval for the first time.