Table of contents:
- Getting access to the Developer API
- Using the Developer API
- Authentication mechanism
- Creating an API user account
- Creating an API key
- Managing API keys
- Exchanging an API key for a JWT
- Using the JWT in subsequent requests
- Testing integrations via Swagger (optional)
- Accessing the full API documentation
Getting access to the Developer API
If the Developer API is not visible to you as an administrator/advisor/user with the applicable permissions, you will need to contact 6clicks Support to enable API access for your instance.
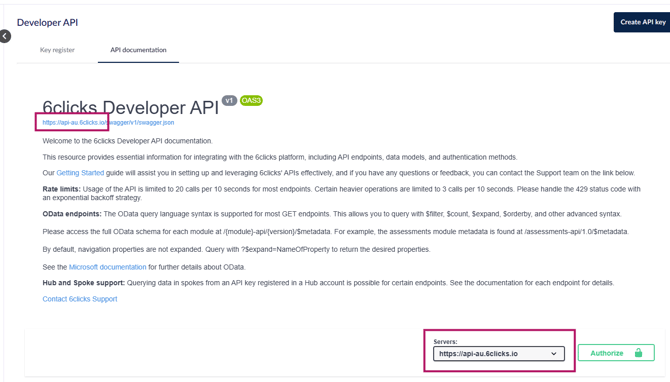
Accessing the full API documentation
The full API reference can be found under Administration > Integrations > Developer API > API Documentation tab.

Here you will find a complete reference for all API endpoints in OpenAPI (Swagger) format.
Using the Developer API
The 6clicks Developer API authenticates using an API key representing an active user in the system, wrapped in JSON Web Tokens (JWTs) for enhanced security. JWTs encapsulate user information and access privileges, offering advantages over simple API keys by incorporating expiry times and supplementary user data.
Creating an API user account
You should create a dedicated API user account, with the necessary permissions for your integration requirements. This user will need a valid email address to receive the invitation.
- Create a new user via Administration > Users
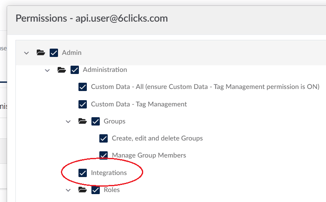
- Set the appropriate role or permissions for the API user account. NOTE: The Integrations permission is required in order to access the Developer API and to create API keys in the next step.
Creating an API key
- Log into 6clicks with the API user account
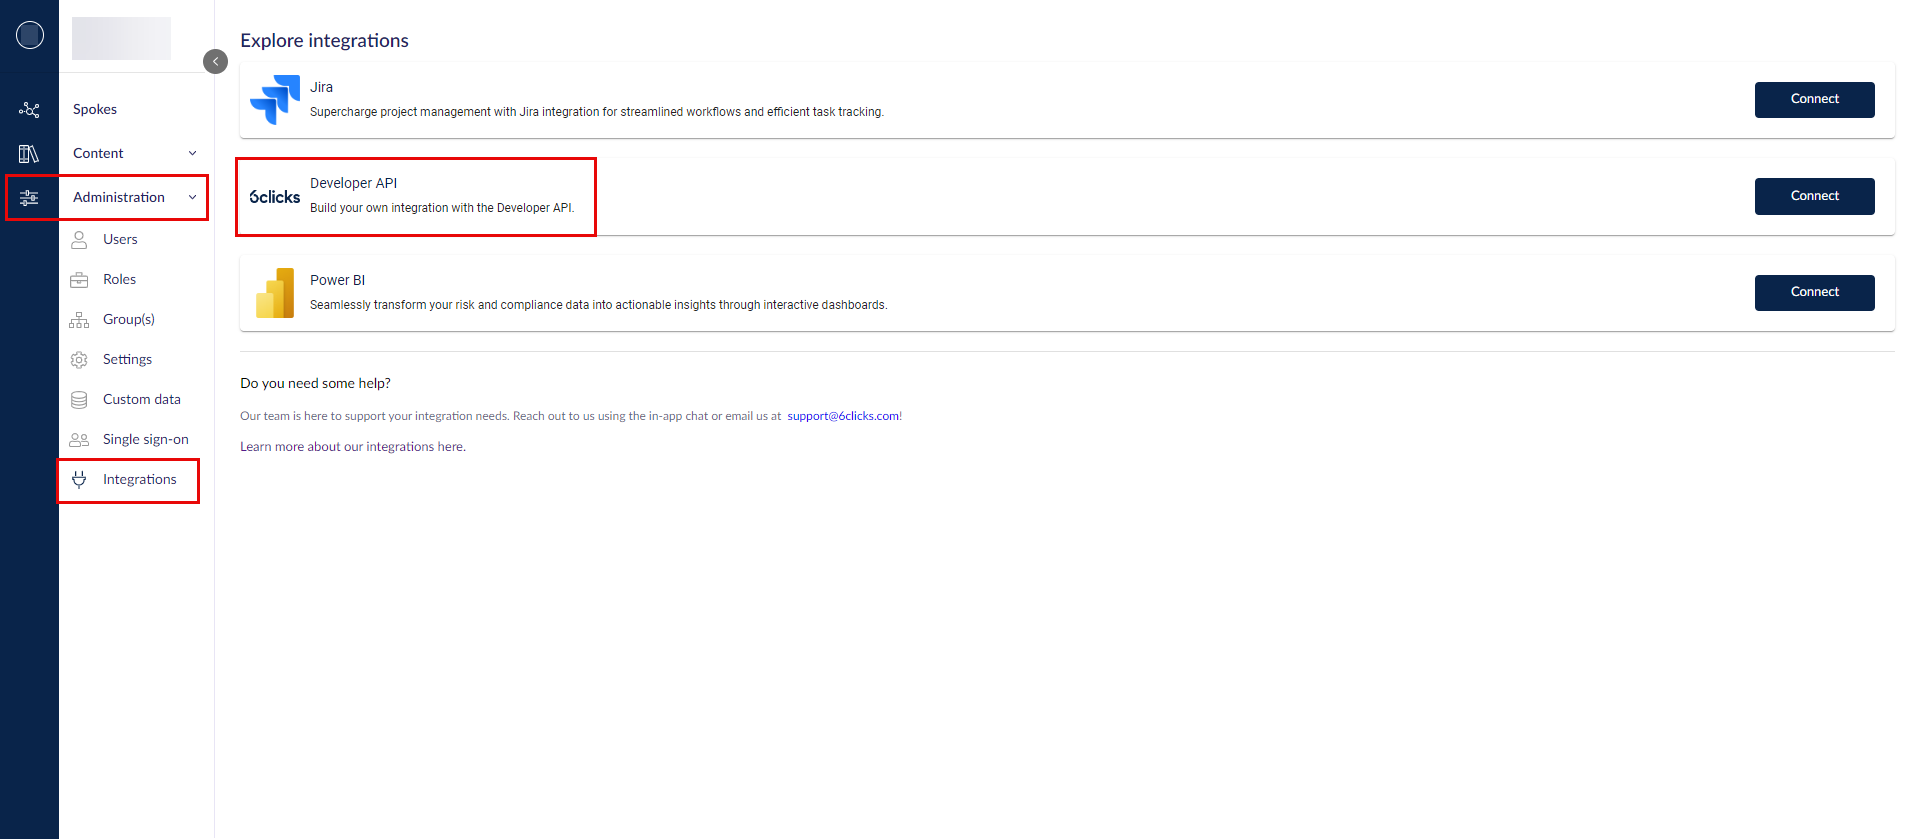
- In the main menu, navigate to Administration > Integrations
- From the list, select 6clicks Developer API and click Connect
- Click Create API Key
- Give the API key a name. We recommend creating a key for each specific integration you plan to use.

- Configure IP Address restrictions if needed. We particularly recommend IP Address if you are planning on using long-lived tokens for integrations such as SCIM Provisioning.
- Click Create to save and take note of the key. This is the only time you will be able to copy and save this key.
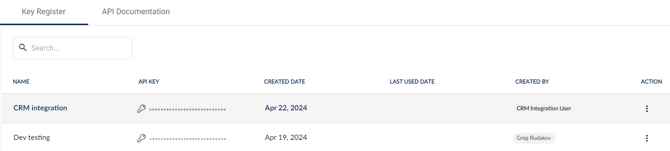
Managing API keys
- API keys can only be created and deleted. Although you can change the IP restrictions and name, the key itself cannot be viewed or edited again.
- IMPORTANT: API keys are proxies of and carry the same permissions as the user under which they were created.
Generally as security best practice, API keys should be created using a separate service account so that they are not tied to a specific user.
Admin privileges are needed for the account to initially create the key, however once created, admin privileges can be removed from the service account by another admin so that only permissions needed for the API key remains on the service account.
You can whitelist IP ranges for API keys by clicking on the 3 dots to the right of any key then selecting Edit.
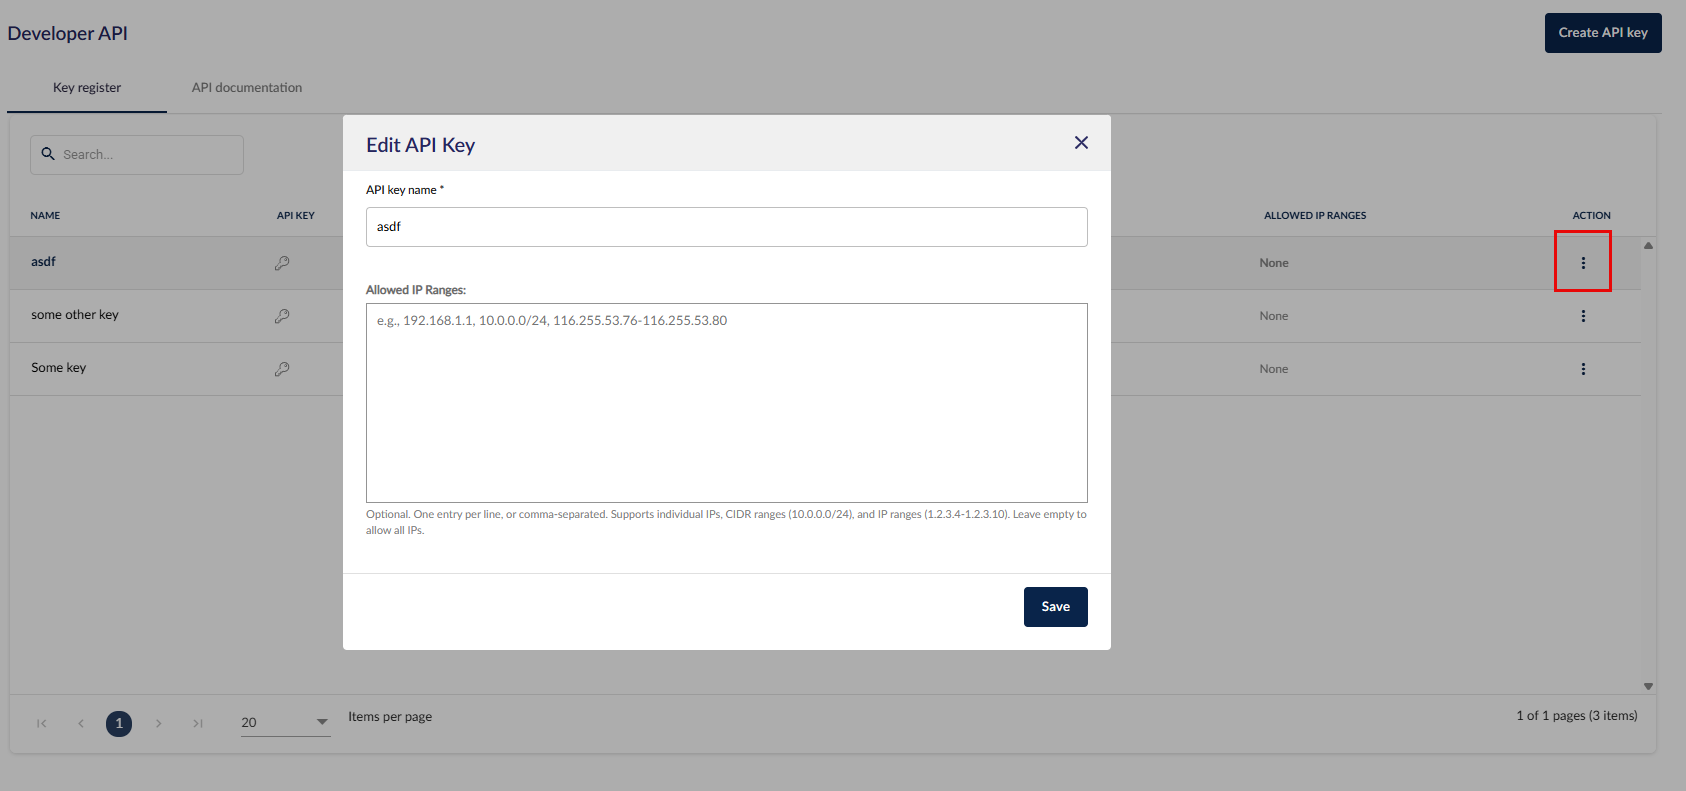
If you see this error message, ensure that you have not hit the character limit of 2000 characters.

Finding your API domain
Your API domain can be found in the Swagger documentation in the "Servers" drop down.
Exchanging an API key for a JWT
Send a POST request to the Auth Controller "token" endpoint, with the API key in the 6Clicks-Api-Key header.
Example:
POST https://api-au.6clicks.io/auth-api/1.0/auth/token
Headers:
6Clicks-Api-Key: <Your_API_Key>
Upon successful validation of the API key, the API will return a JWT signed by the API provider. This JWT contains details regarding the user's access rights and includes an expiry time: the default is 24 hours.
Example:
"accessToken": "eyJhbGciOiJIUzI1NiIsInR5cCI6IkpXVCJ9.eyJzdWIiOiI4NTcxIiwibmFtZSI6ImdyZWcucnVkYWtvdkA2Y2xpY2tzLmNvbSIsImh0dHA6Ly9zY2hlbWFzLnhtbHNvYXAub3JnL3dzLzIwMDUvMDUvaWRlbnRpdHkvY2xhaW1zL2VtYWlsYWRkcmVzcyI6ImdyZWcucnVkYWtvdkA2Y2xpY2tzLmNvbSIsIkFzcE5ldC5JZGVudGl0eS5TZWN1cml0eVN0YW1wIjoiUUtWTVAzWlc1RklFT0pOWk5FRjQ2SlY1QklSQ0xDWVAiLCJodHRwOi8vd3d3LmFzcG5ldGJvaWxlcnBsYXRlLmNvbS9pZGVudGl0eS9jbGFpbXMvdGVuYW50SWQiOiIxNDE4IiwianRpIjoiZDcxZWNlOGYtMDFhMC00NDg0LWJlZjktZDI5NmZmZTE4MTg5IiwiaWF0IjoxNzEyMTExNDEzLCJ0b2tlbl92YWxpZGl0eV9rZXkiOiIxYmQ0NzhmOC02ZjdmLTRmYmItYTg3Ny01MjliNTQ0OTYwMmUiLCJ1c2VyX2lkZW50aWZpZXIiOiI4NTcxIiwibmJmIjoxNzEyMTExNDEzLCJleHAiOjE3MTIxOTc4MTMsImlzcyI6IjZjbGlja3MiLCJhdWQiOiJMZWdhbFJlZ1RlY2gifQ.SfaXT7Xpr_mqr15cH7GJ5uwZPieYxHHFcSlVwImd-Ww"
Using the JWT in subsequent requests
Include the JWT value within the authorization header of any subsequent API requests using the Bearer method.
Example:
GET https://api-au.6clicks.io/assessments-api/1.0/assessments
Authorization: Bearer <Your_JWT_Token_Value>
Headers:
Content-Type: application/json
Body:
{
  "sorting": "Name",
  "maxResultCount": 10,
  "skipCount": 0
}
Testing integrations via Swagger (optional)
If using Swagger for API testing, you can also include the JWT for authorization.
- Click on the Authorize button within Swagger
- Paste the JWT in the value window
- This allows Swagger to include the JWT in subsequent API requests for testing and documentation purposes
Webhooks (Event Triggers)
See event triggers for information on registering webhooks (event triggers) for use with the Custom Workflow Builder or other integrations.