- Import a scan with a new mapping
- Map the source fields
- Map the severity fields and import
- Import a scan with an existing mapping
1. Import a scan with a new mapping
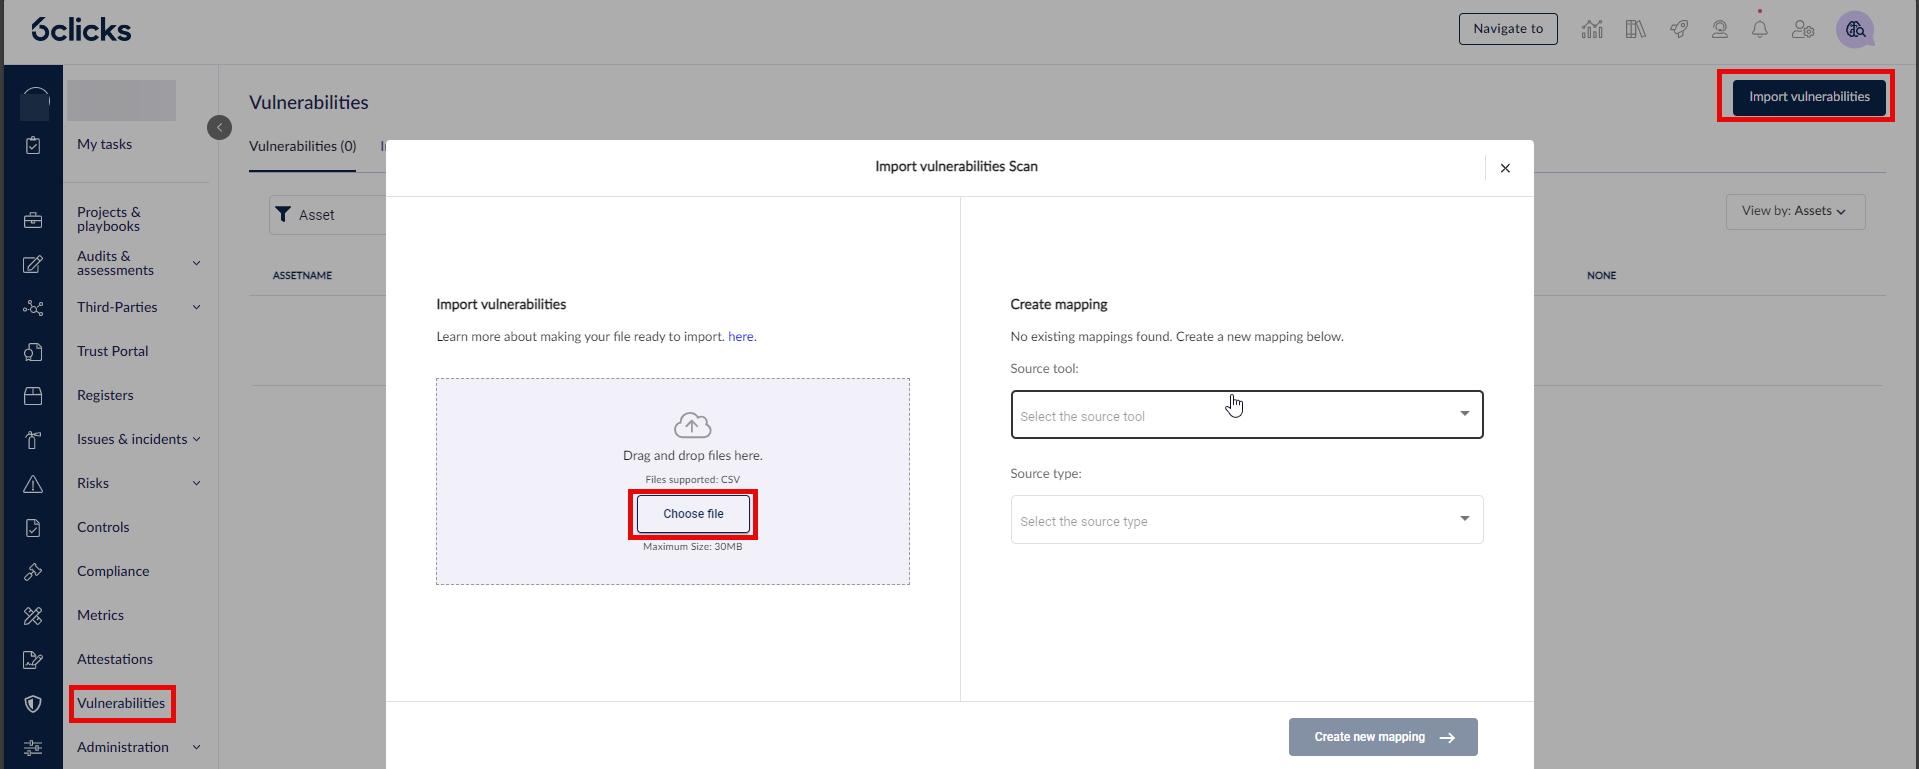
Navigate to Vulnerabilities via the left navigation panel
Select Import Vulnerabilities at the top right
Select Choose File from the pop-up modal. Ensure the uploaded file is in CSV format. The maximum file size is 30MB. If your file size is larger, consider breaking it down into multiple files for import.
Qualys network scan Excel format example
What follows is an example of a Qualys network scan CSV file. The CSV file uploaded into the tool should match the example in that the headers must be placed on the 8th row, followed by the vulnerabilities. 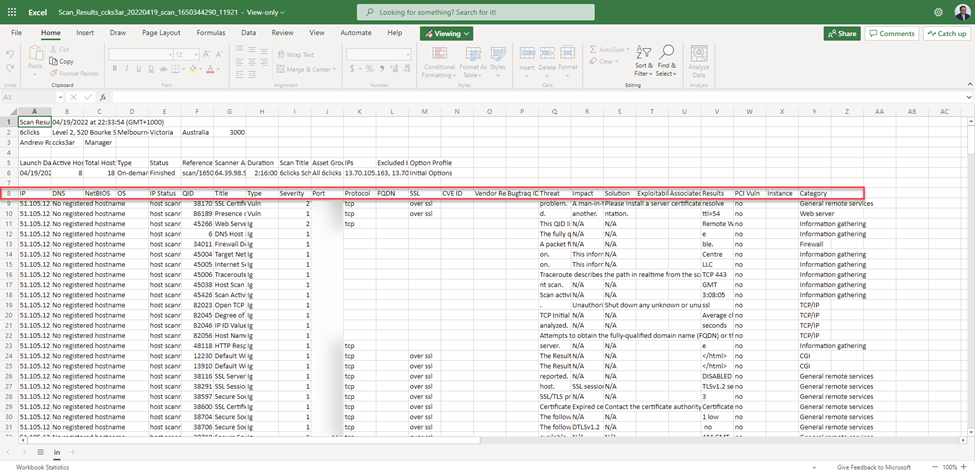
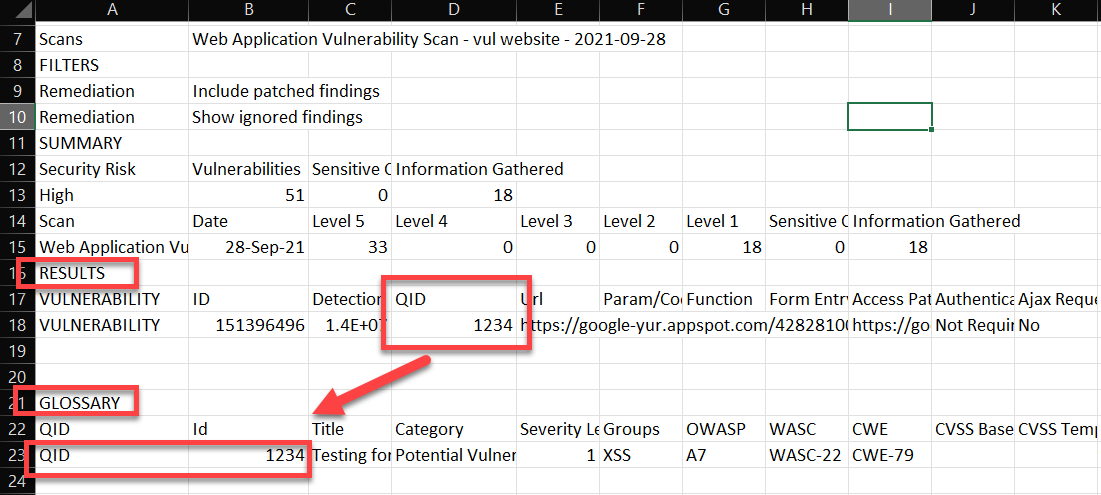
Qualys web application scan (WAS) Excel format example
What follows is an example of a Qualys web application scan CSV file. The CSV file uploaded into the tool should match the example. When a QID is mapped to the Source ID 6clicks field, our system will derive the vulnerability details referencing the Glossary section in the import file using the QID. When uploading the Qualys WAS scan, ensure the Results table containing the QID and the Glossary table are in the import file.
Click on Choose File to select the file you wish to upload. In the right pane, click on Select a mapping and then click on Create new mapping from the dropdown list. Select the appropriate Source Tool (Qualys) and Source Type (Network Scan or Web Application Scan), and then select Create New Mapping.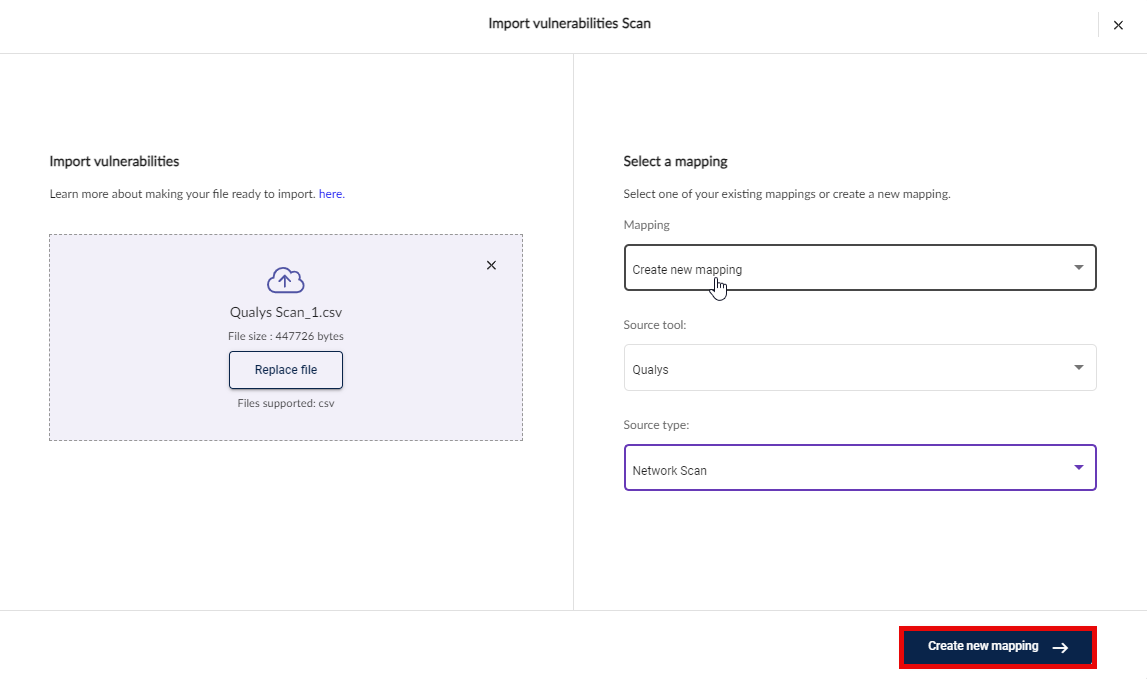
2. Map the source fields
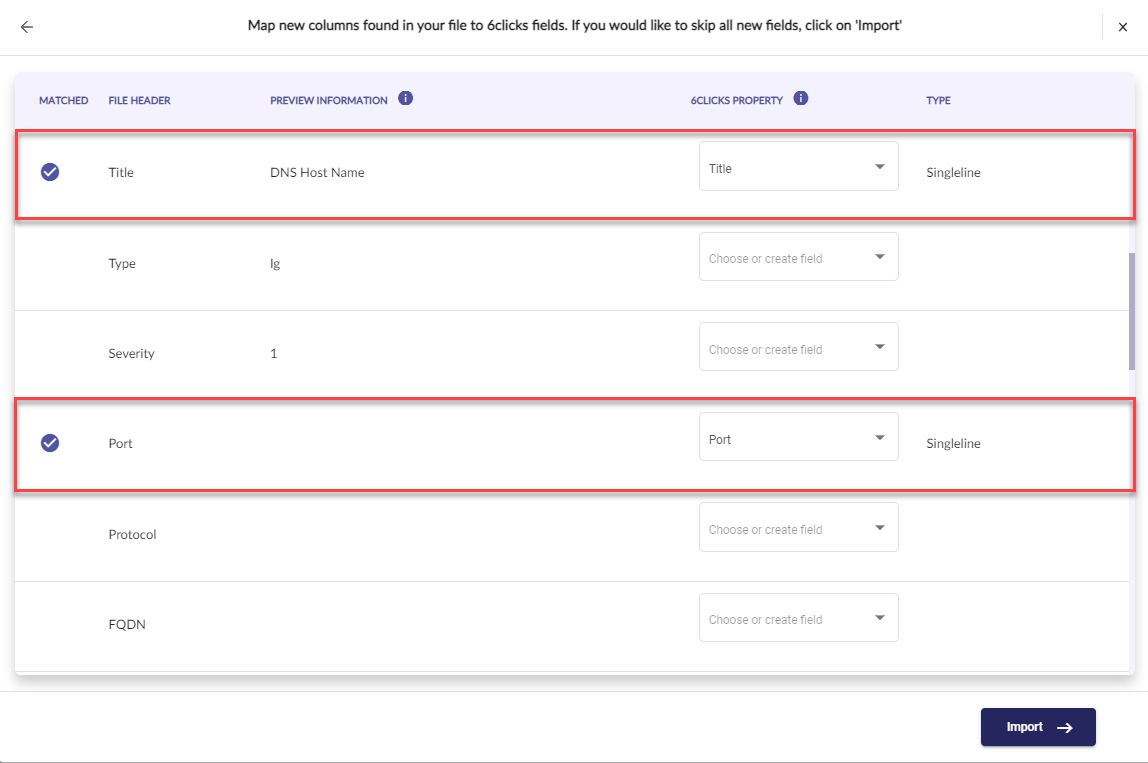
Map the source fields with an existing 6clicks Field or create a New Field. You will need to map the mandatory fields noted below and we suggest that you map the recommended fields. These mandatory and recommended fields apply to both Qualys Network and Qualys WAS (Web application) scans.
Mandatory:
- Title (6clicks field) must be mapped to Name (import file field)
- Host IP (6clicks field) must be mapped to Host (import file field); OR
- URL (6clicks field) must be mapped to URL (import file field)
Recommended:
- Source ID (6clicks field) mapped to QID (import file field). When a source ID is mapped, our system references the source ID for comparing and updating the vulnerability records of the respective asset upon import. If not mapped, the system references the Title for comparison and updates.
- Port (import file field) mapped to Port (6clicks field). Because the scanned asset could have multiple ports, the same vulnerability for the asset may appear over multiple lines for each port. Mapping the ports allows 6clicks to consolidate all the ports into one asset and vulnerability.

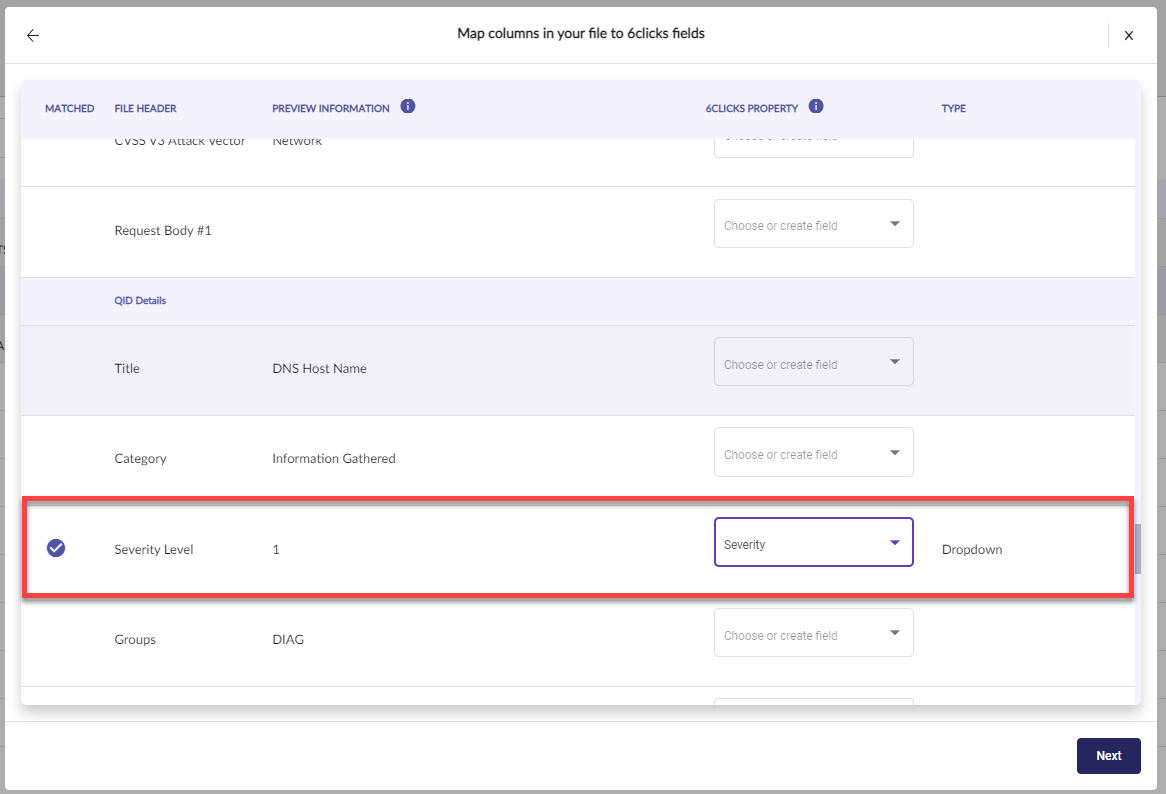
Map the Severity Fields and Import
Different tools have different names for the severity rating of a vulnerability. 6clicks uses a common naming convention as per NIST. The default severity ratings are:
- None
- Low
- Medium
- High
- Critical
To correctly map the import file severity rating to the 6clicks default ratings, ensure you map the Severity header in the import file to the Severity 6clicks property.
 Once you have completed the mapping process for all properties, click Next
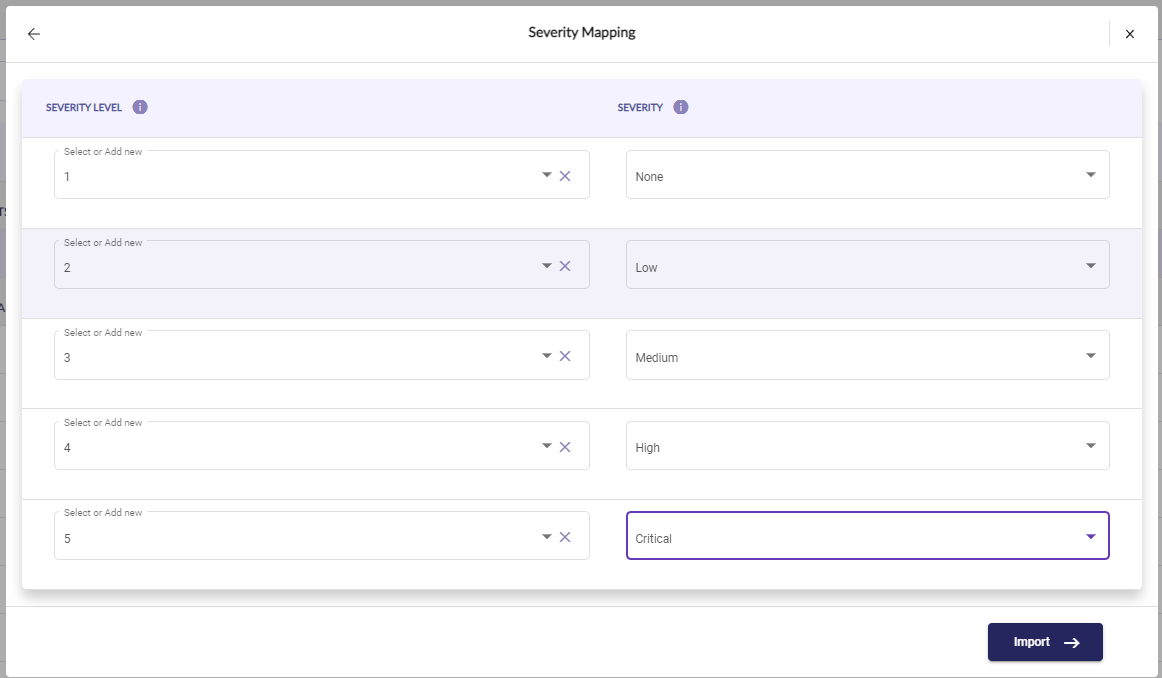
If you have mapped the severity ratings, you will be shown the Severity Mapping screen. Here you can map the values in your import file to the 6clicks default values. Below is an example where the import file used a 1-5 to indicate severity. In some cases, your file may not include all severity values, so you will need to create them in the left column of fields. This is important for future scan imports where the severity rating does appear.
Once the scan has been imported successfully, a message will appear. Click View Summary to view the imported scan. 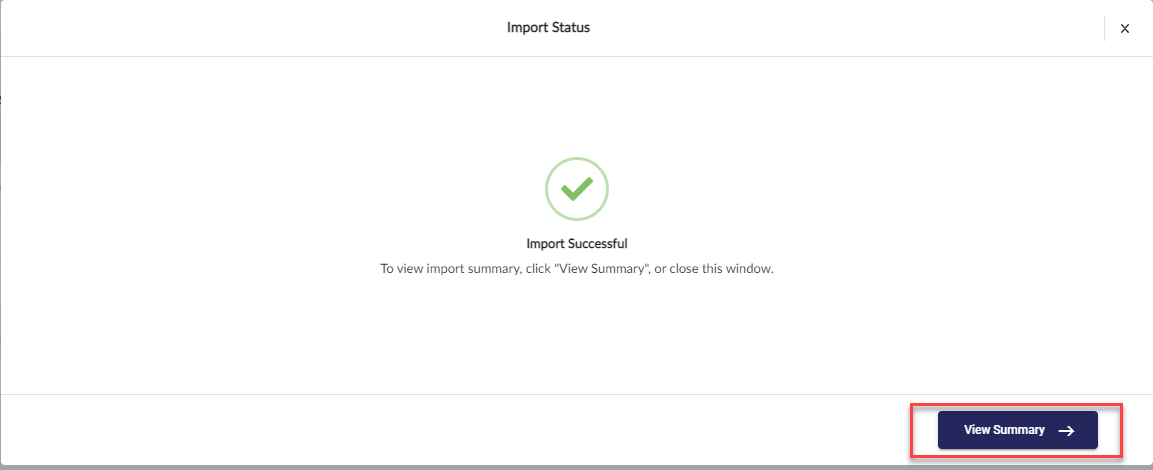
The imported scan will show under the Imported Scans tab.
The list of vulnerabilities will be found under the Vulnerabilities tab.
Newly created mapping details can be found under the Scan Mappings tab.
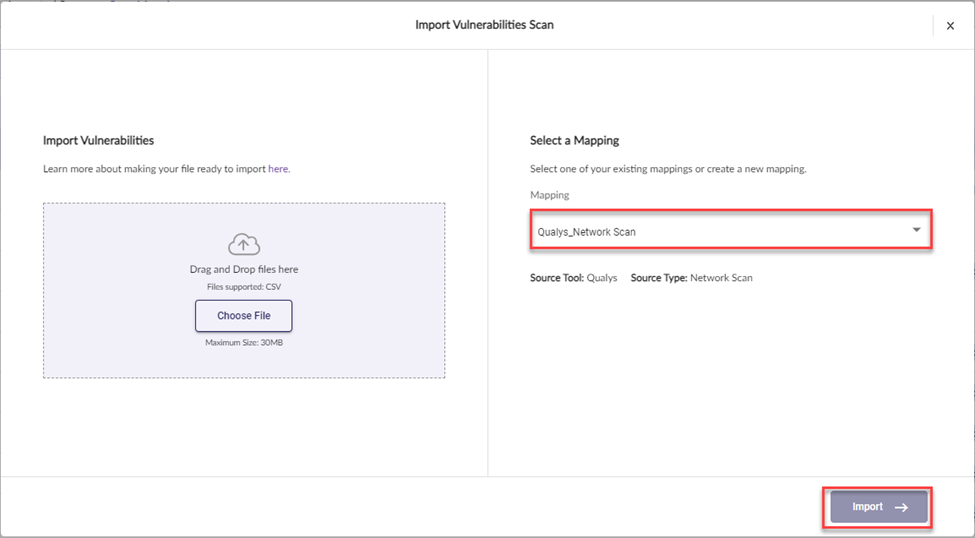
Import a Scan with an Existing Mapping
Once you have created a mapping for a particular type of scan you use, you can use it again for consistency when importing future scans of the same format.
Navigate to Vulnerabilities via the left navigation panel
Select Import Vulnerabilities at the top righy
Select Choose a File from the pop-up modal. Ensure the uploaded file is in the appropriate CSV format.
Select an existing scan from the list, then select Import. In the example below, we are using Qualys_Network Scan.
Once the scan has been imported successfully, a message will appear. Click View Summary to view the imported scan.
The imported scan will show under the Imported Scans tab.
For more information on managing and maintaining vulnerabilities, click here.