Table of contents
Color and logo customization
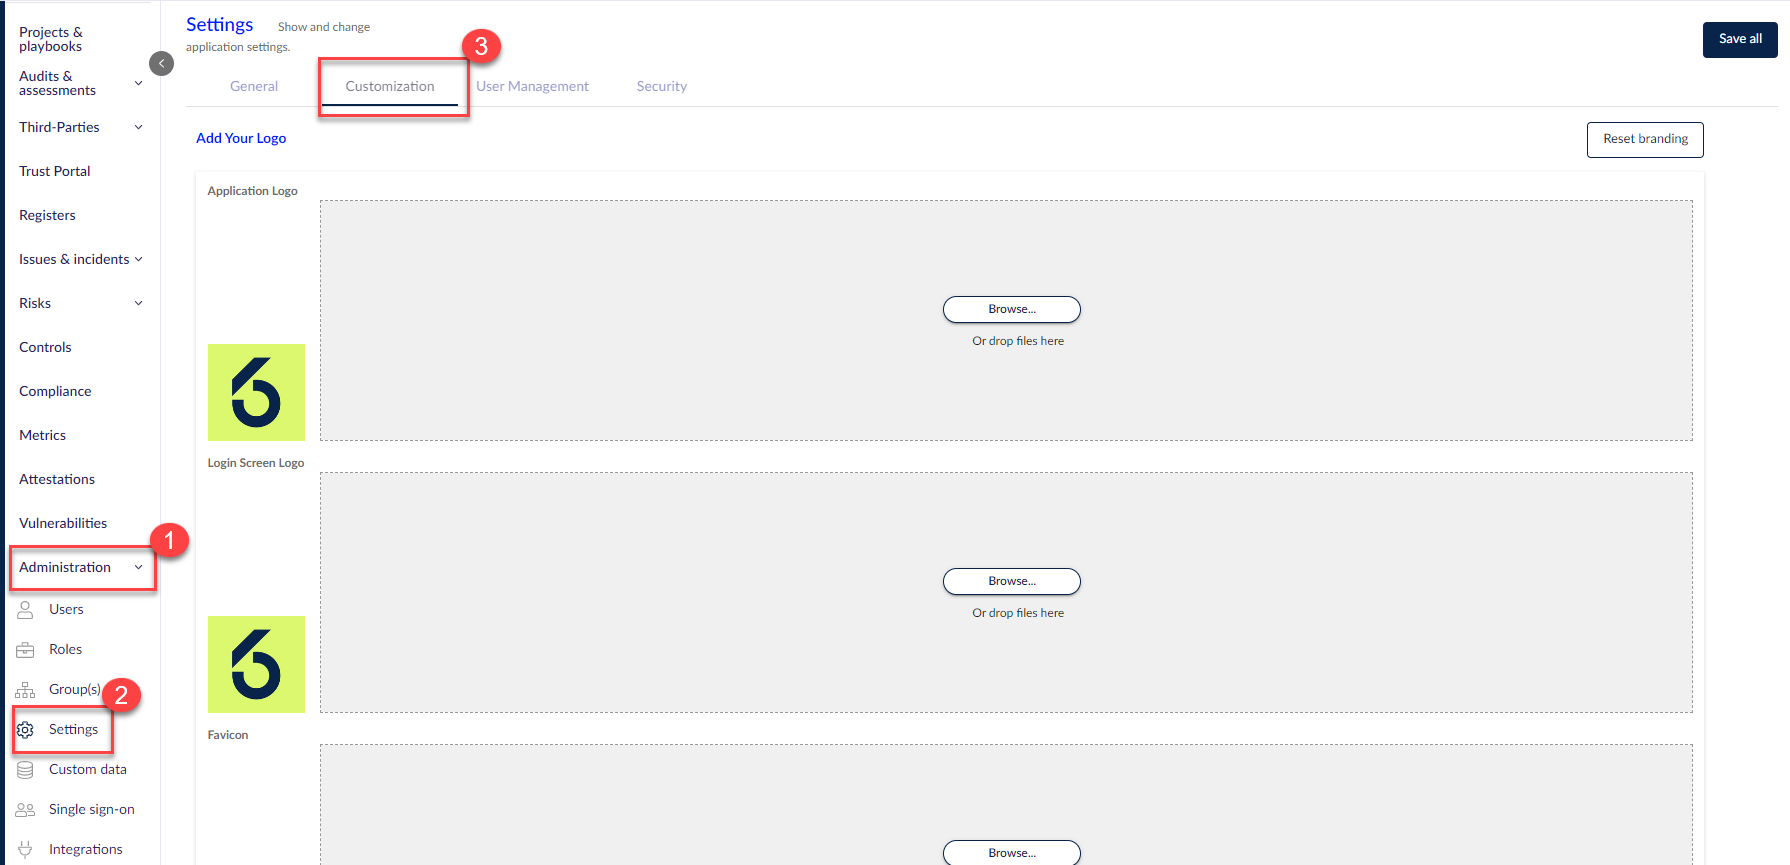
Click Administration (1) in the sidebar menu, then select the Settings (2) option and navigate to the Customization(3) tab.
On this screen, you can change the active logos and adjust the application color scheme to match your bespoke branding.
Logos
Recommended Image Sizes:
(1) Application Logo – Minimum 200px x 100px; Aspect Ratio = 2:1
(2) Login Screen Logo – Minimum 230px x 100px; Aspect Ratio = 2.33:1
(3) Favicon – Minimum 100px x 100px; Aspect Ratio = 1:1
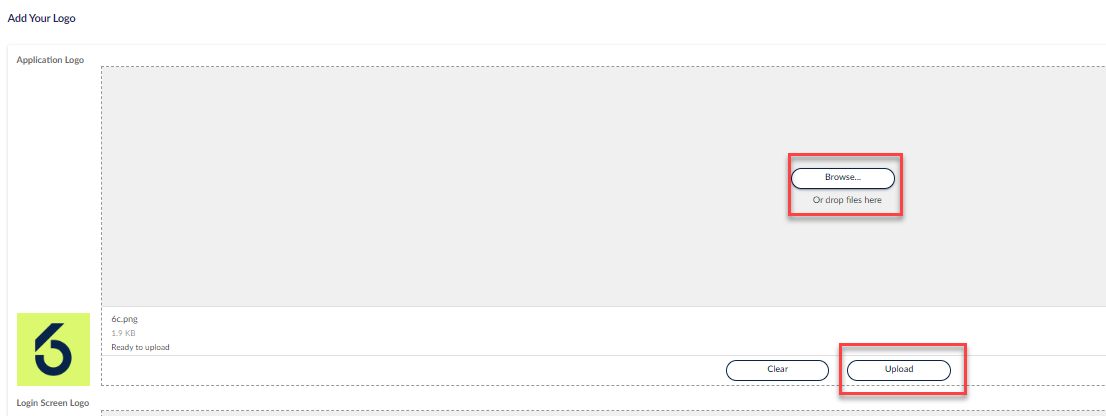
Select Browse or drag the desired image file to the respective logo upload.
Select Upload to upload the logo file to the 6clicks app.
After the upload is complete, make sure to select the Save All button (as seen below) to apply and save the changes.

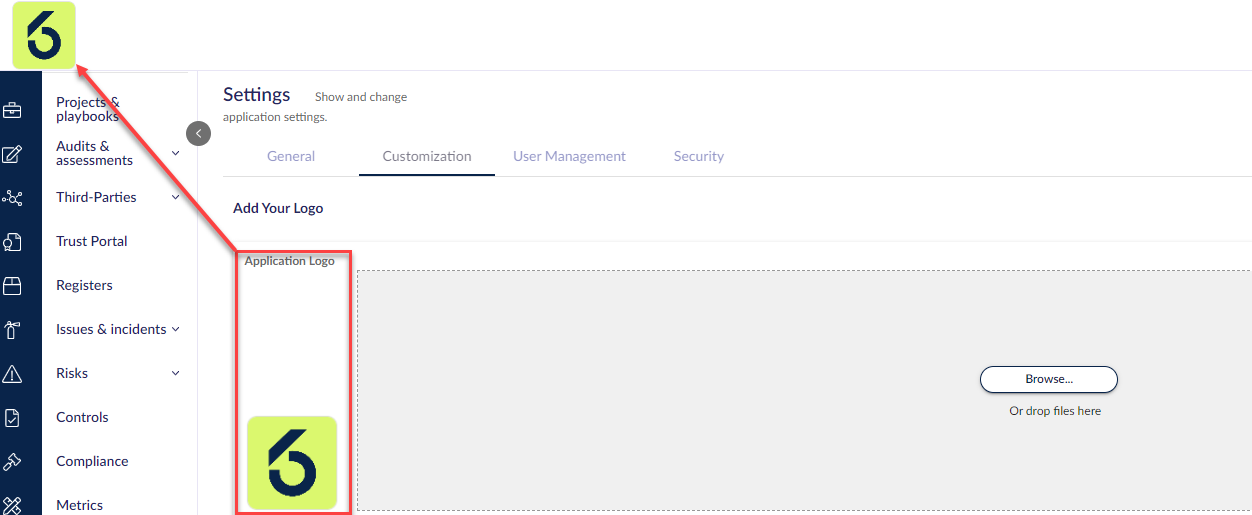
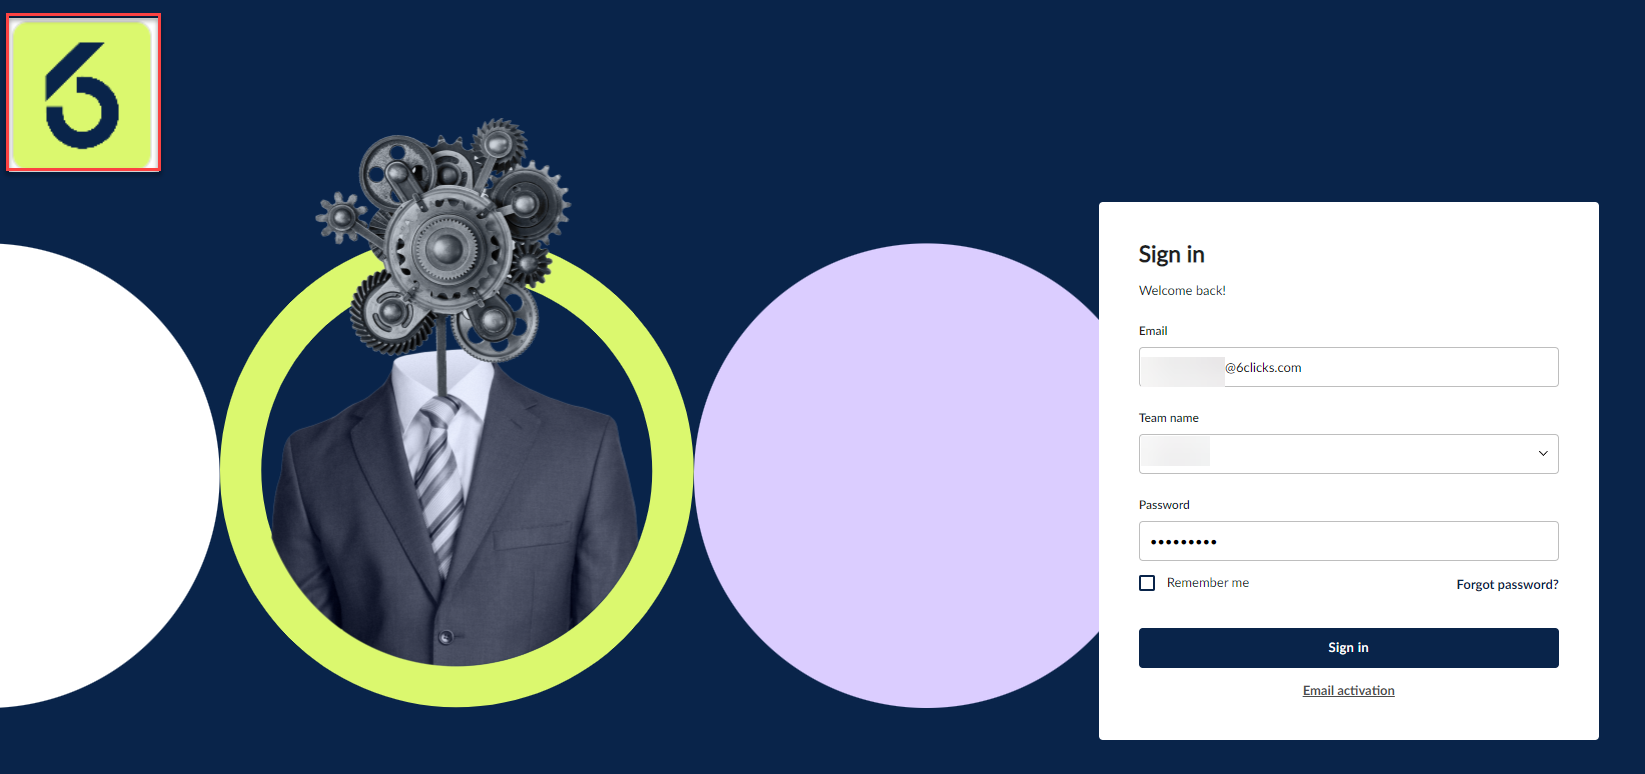
Your logos should appear in the corresponding parts of 6clicks,
Application Logo (seen on all screens after login)
Login Screen Logo (seen on login page)
Favicon (seen in the associated browser tab)
Colors
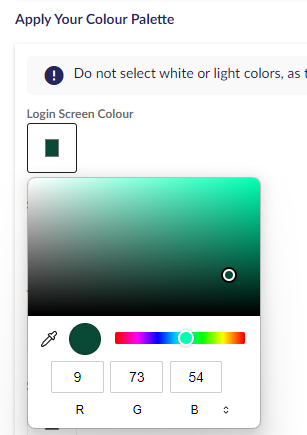
1. Click on the color box corresponding to the section you wish to change.
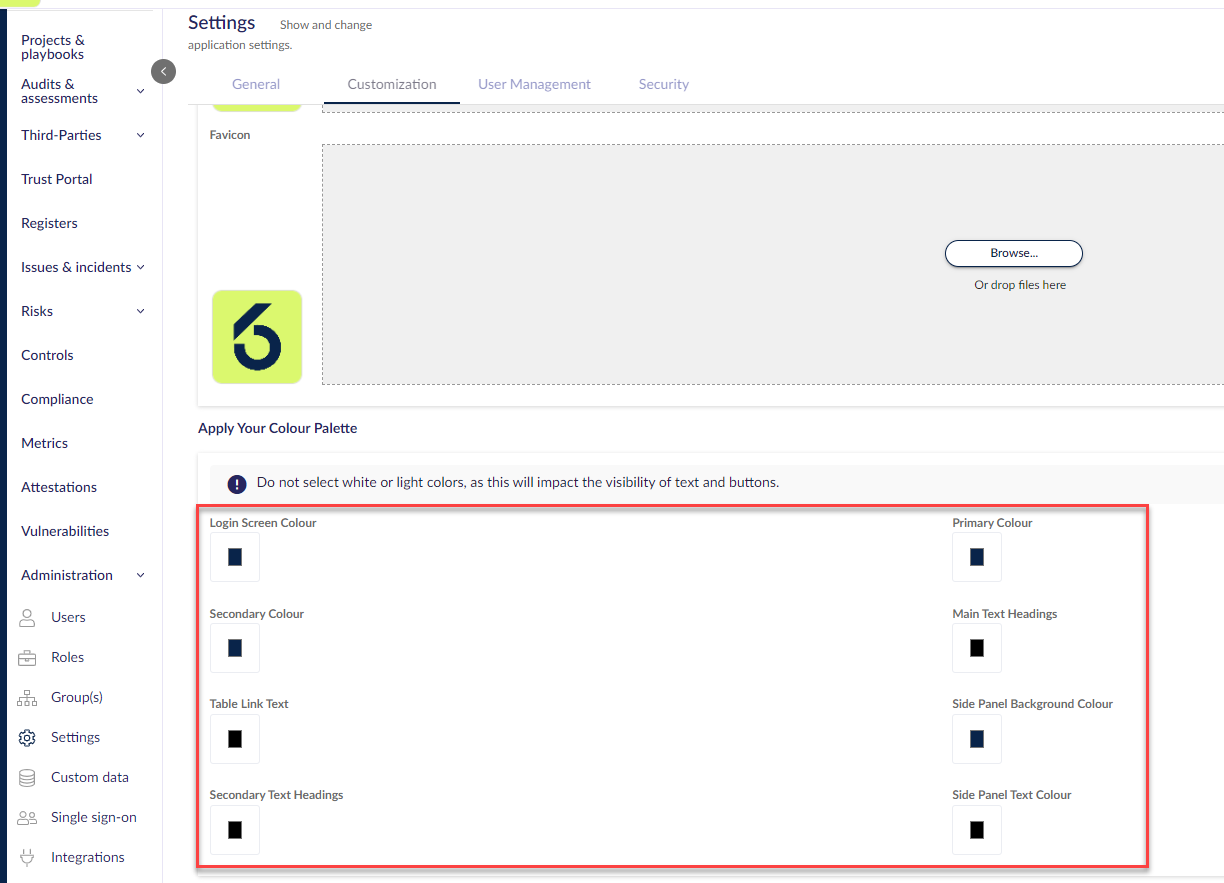
2. Once selected, a color palette will appear which allows you to select your desired colors.
The color palette tool that appears will depend on your computer’s operating system.
Repeat for each color option you wish to change.
After any changes make sure you click on Save All button to apply and save all changes made.
Resetting all active branding
This cannot be undone, so please ensure you wish to completely reset BOTH the active logos and colorway.
1. If you wish to reset the logo AND color branding that has been applied to your tenant, select the Reset branding button in the top right of the Customization tab.
2. To confirm the tenant branding reset, select the Yes button in the pop-up window.
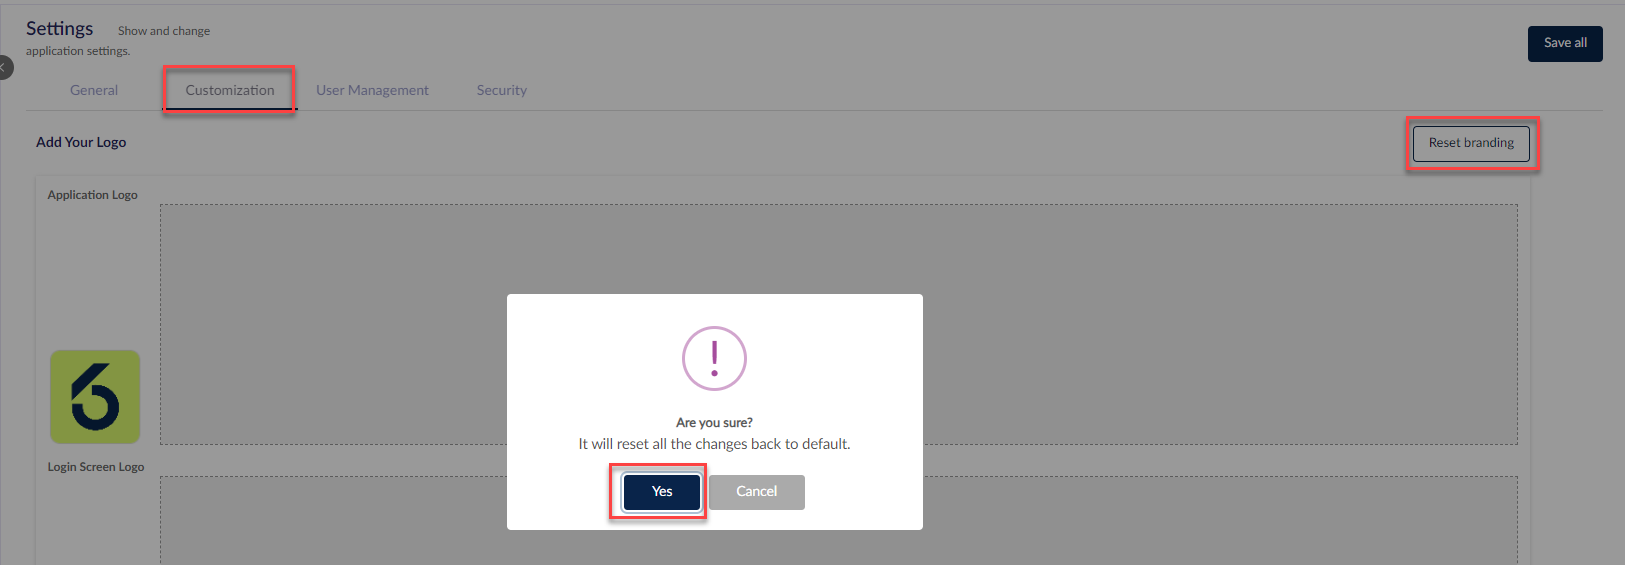 3. After confirmation, your tenant will revert to the 6clicks default branding.
Color palette examples
Below shows how each color section, when changed, affects the branding of your local 6clicks instance.
The red boxes in the following in-app screenshots highlight how the colors are rendered for each tenant.
When each color is changed, this may alter different components across the different app modules.
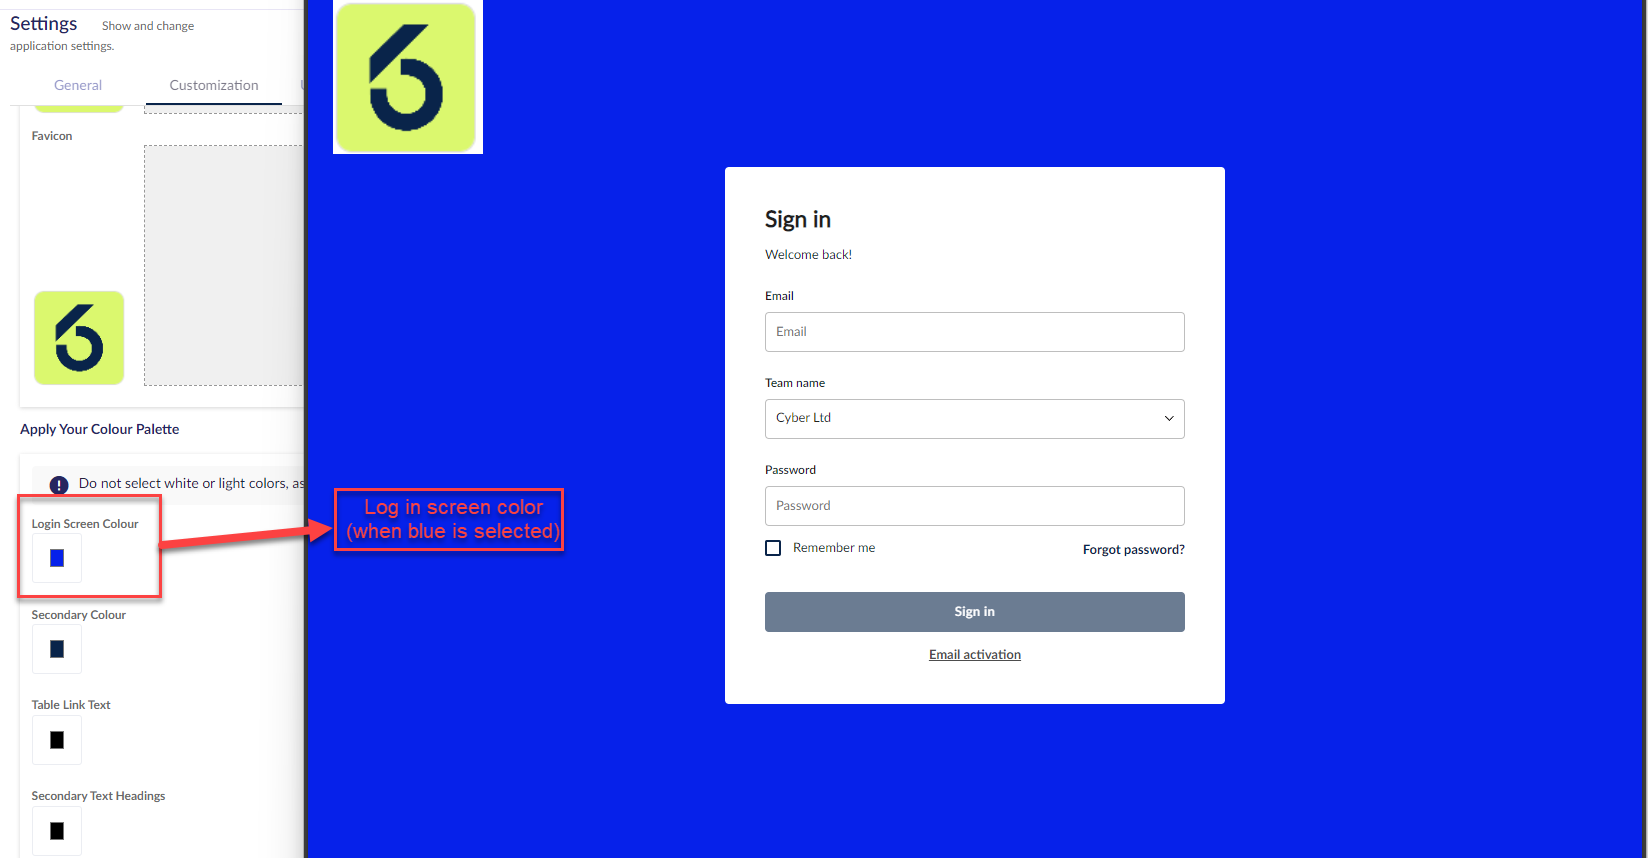
Login screen color:
This is only applicable to the login screen.
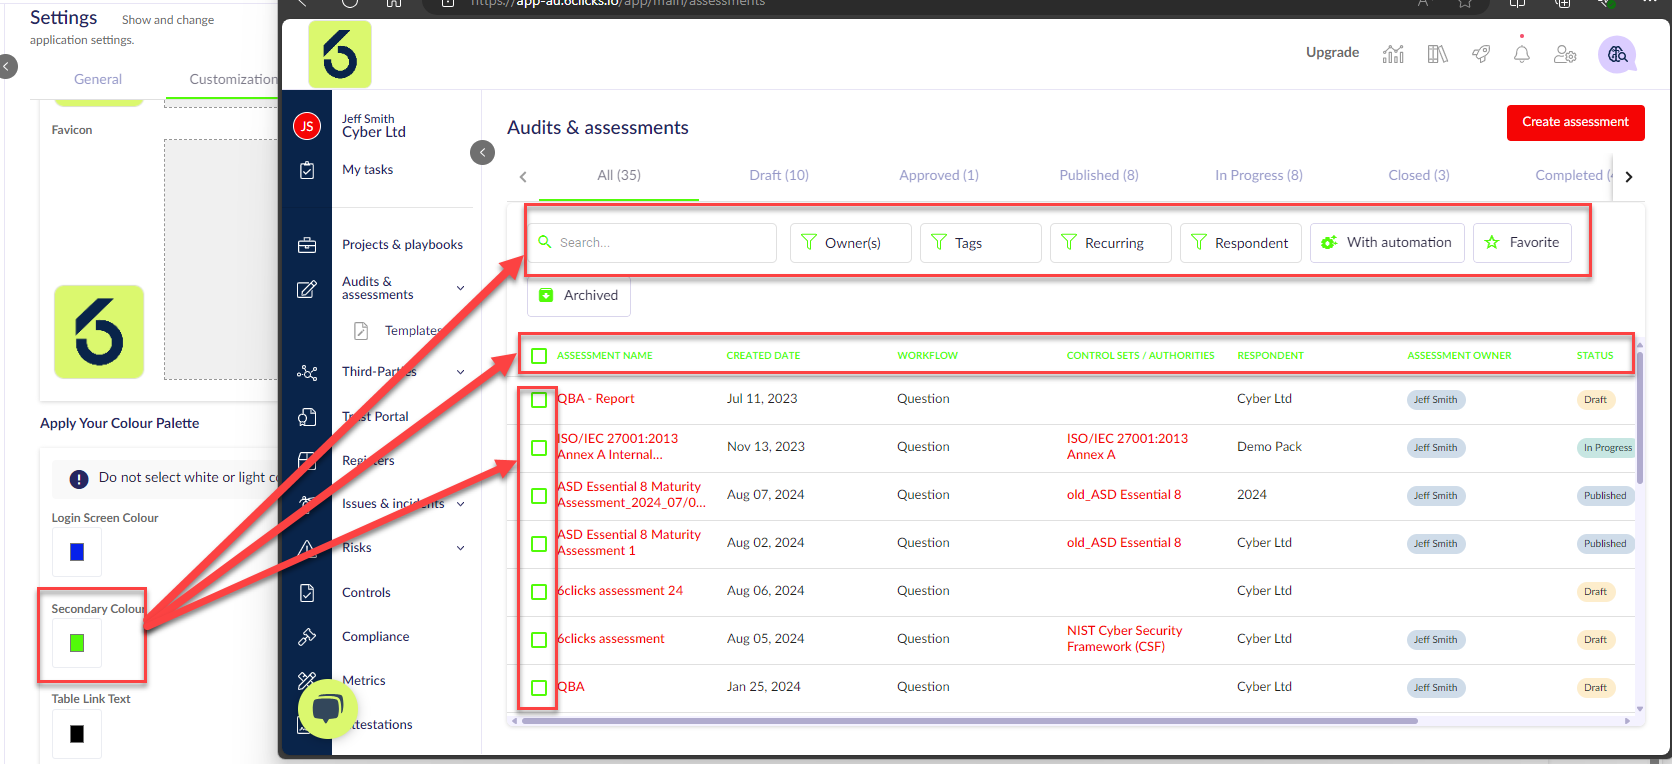
Primary color:
Secondary color:
Custom domain
You can change the domain/URL of your environment to a branded domain instead of the default [instance].6clicks.io so that it is more recognizable to your users and vendors.
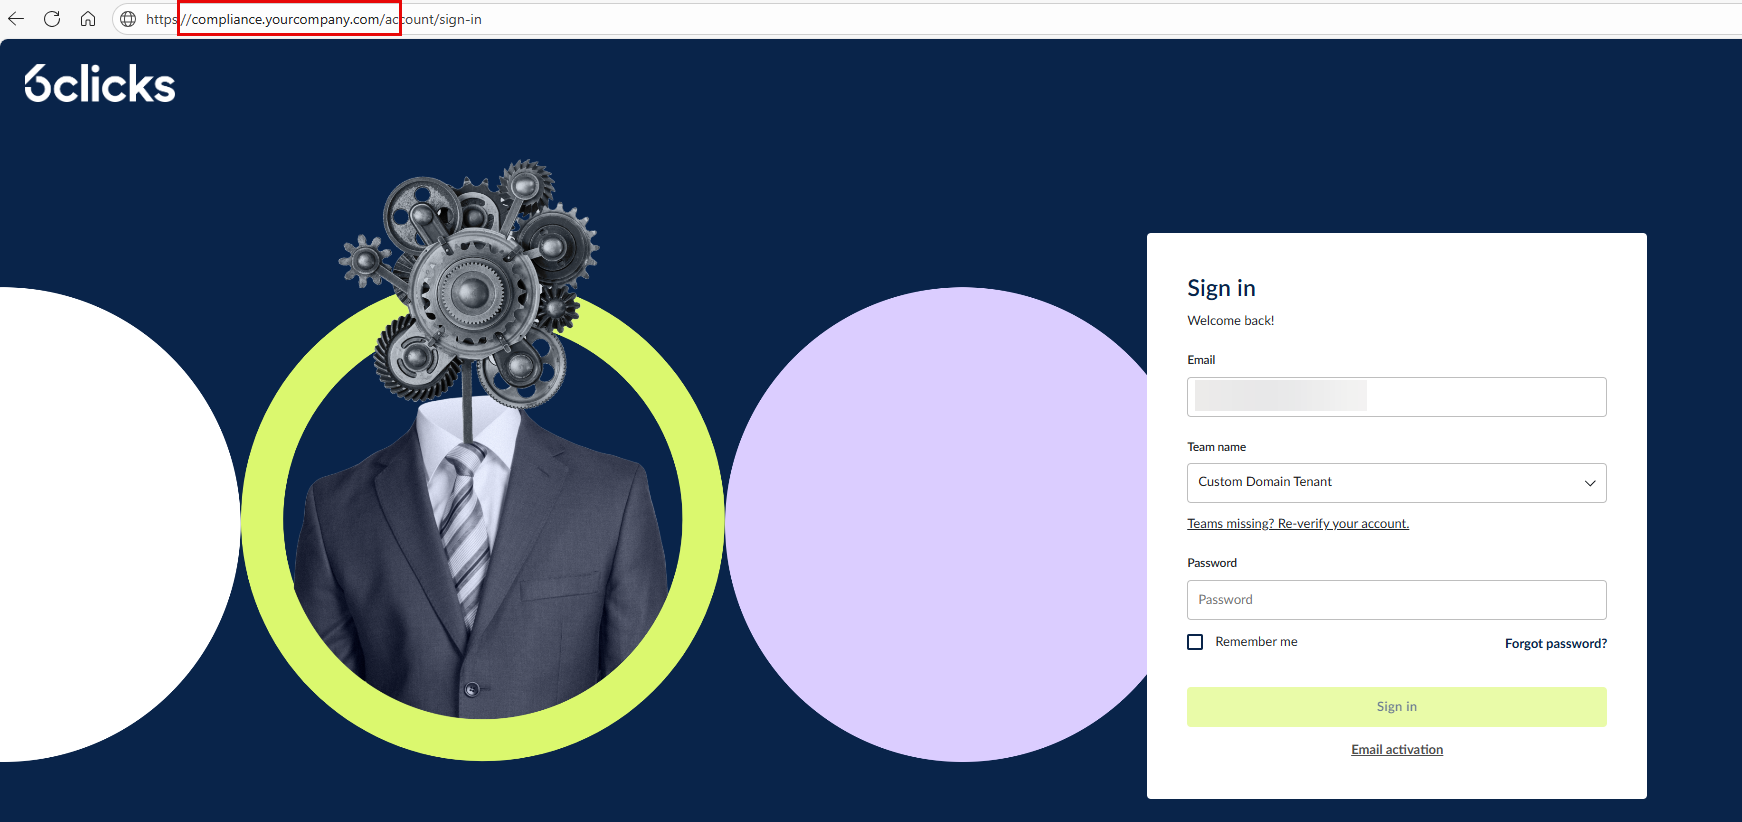
This currently requires a manual process. During this process, we will need to confirm your ownership of the custom domain by providing DNS records, which you will need to add to your DNS provider.
You can reach out to support@6clicks.com to set up a custom domain/URL.
For Hub & Spoke environments
Custom domains are currently set up manually for each environment. Spokes do not automatically inherit the Hub’s custom domain.
If you’d like a Spoke to use the same custom domain as the Hub, please contact our support team, and we’ll be happy to help configure it for you.
Automatic inheritance of Hub domains by Spokes is planned for a future release.
When migrating an existing team to a custom domain, users can still log in through the standard domain, where they will see a banner prompting them to use the new domain instead. For a seamless transition, we recommend:
- Updating all bookmarks, links, and documentation to reflect the new URL
- Notifying users about the domain change before migration
- Sharing the new login URL directly with everyone
Similarly, you can brand notification emails from your environment to users and vendors with a custom email domain.