Table of contents
- Getting started
- Editing the authority's details
- Creating provisions
- Defining provision fields
- Editing provisions
- Publishing your custom authority
Getting started
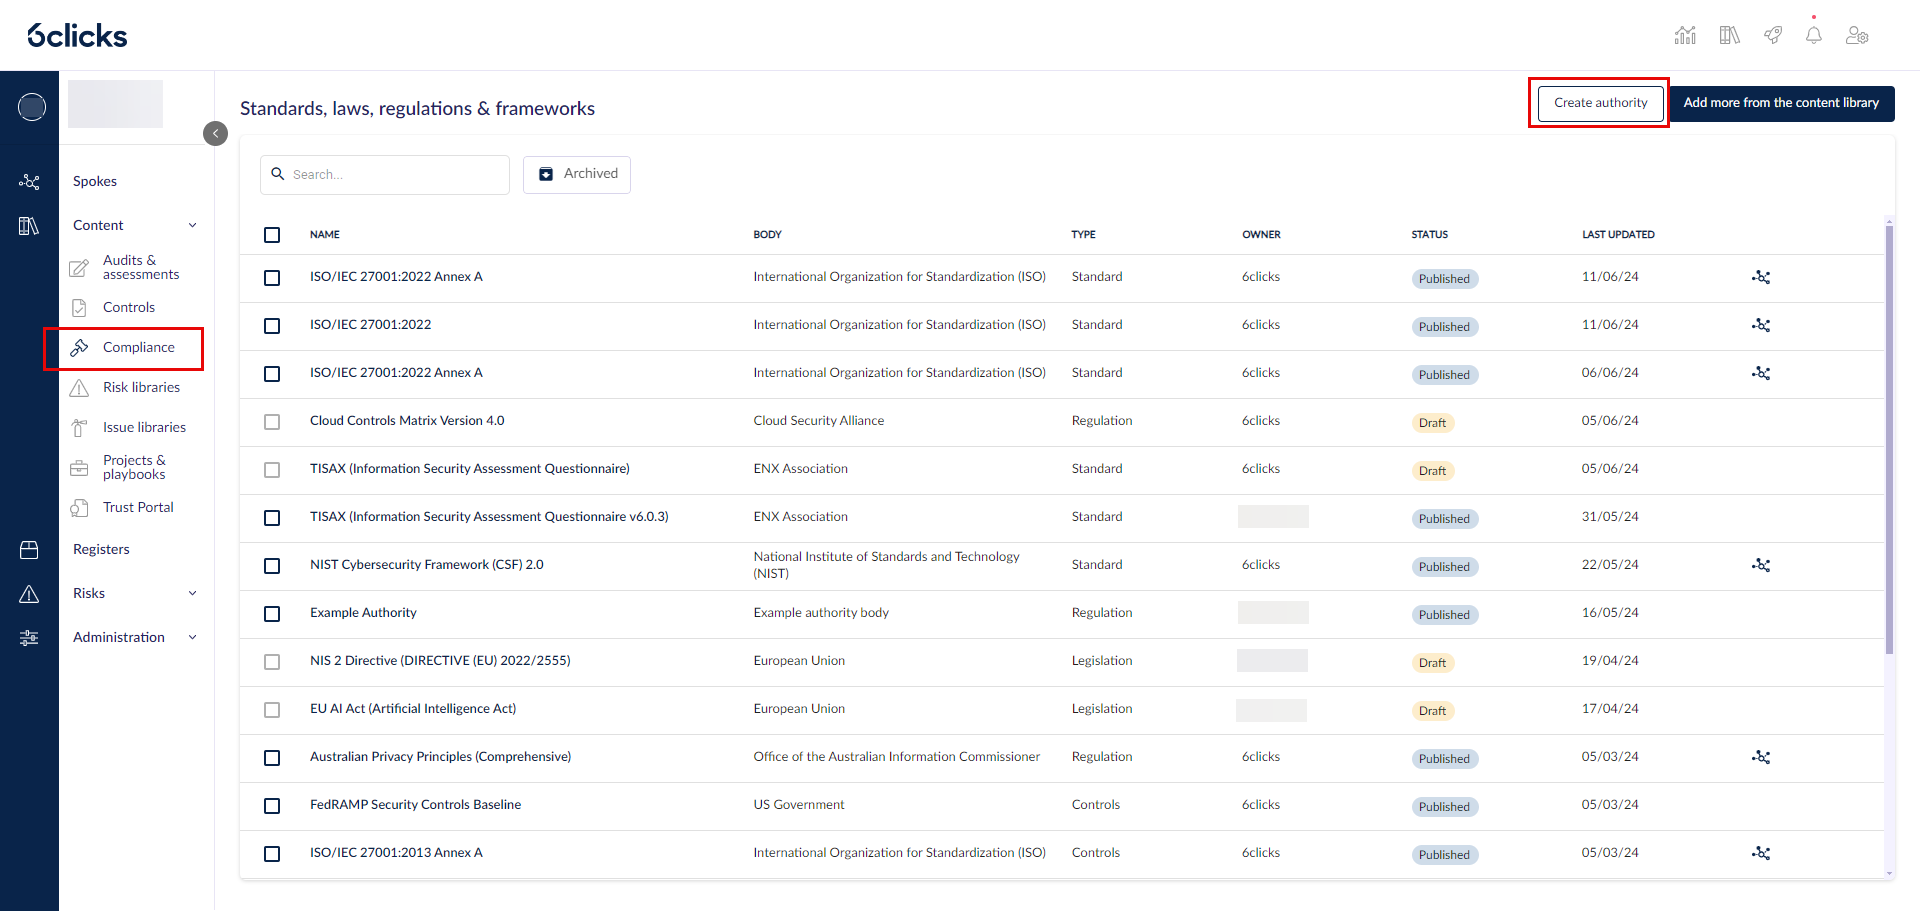
To create your own authority, head to the Compliance module using the left-hand side menu.
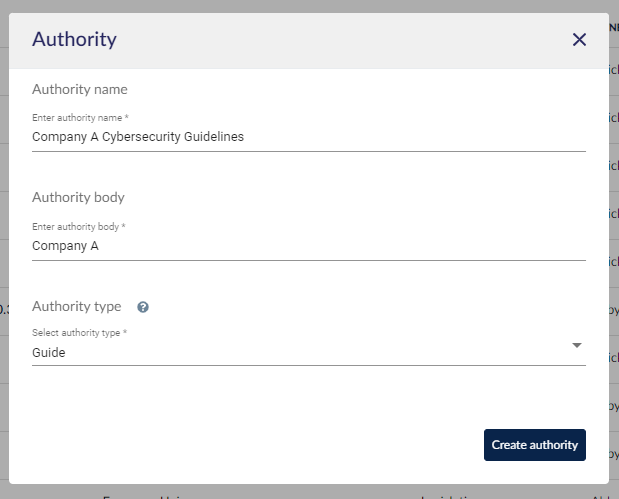
Click Create authority. The authority creation modal will appear.
In the authority creation modal, enter the authority's name, authority body, and type. These can also be edited in the next step. Click Create authority.
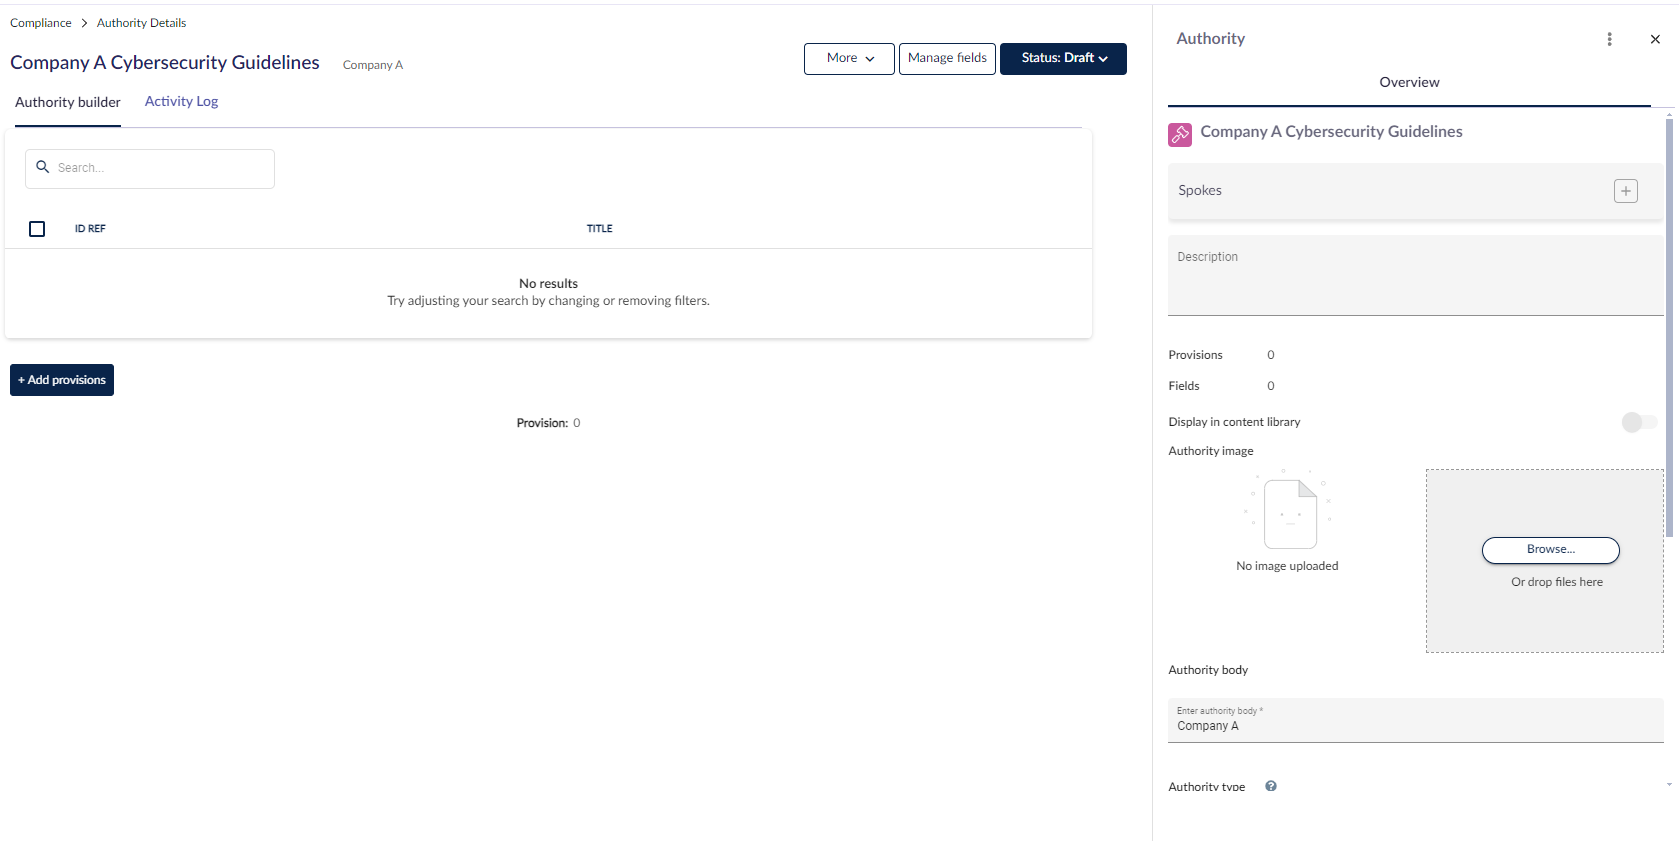
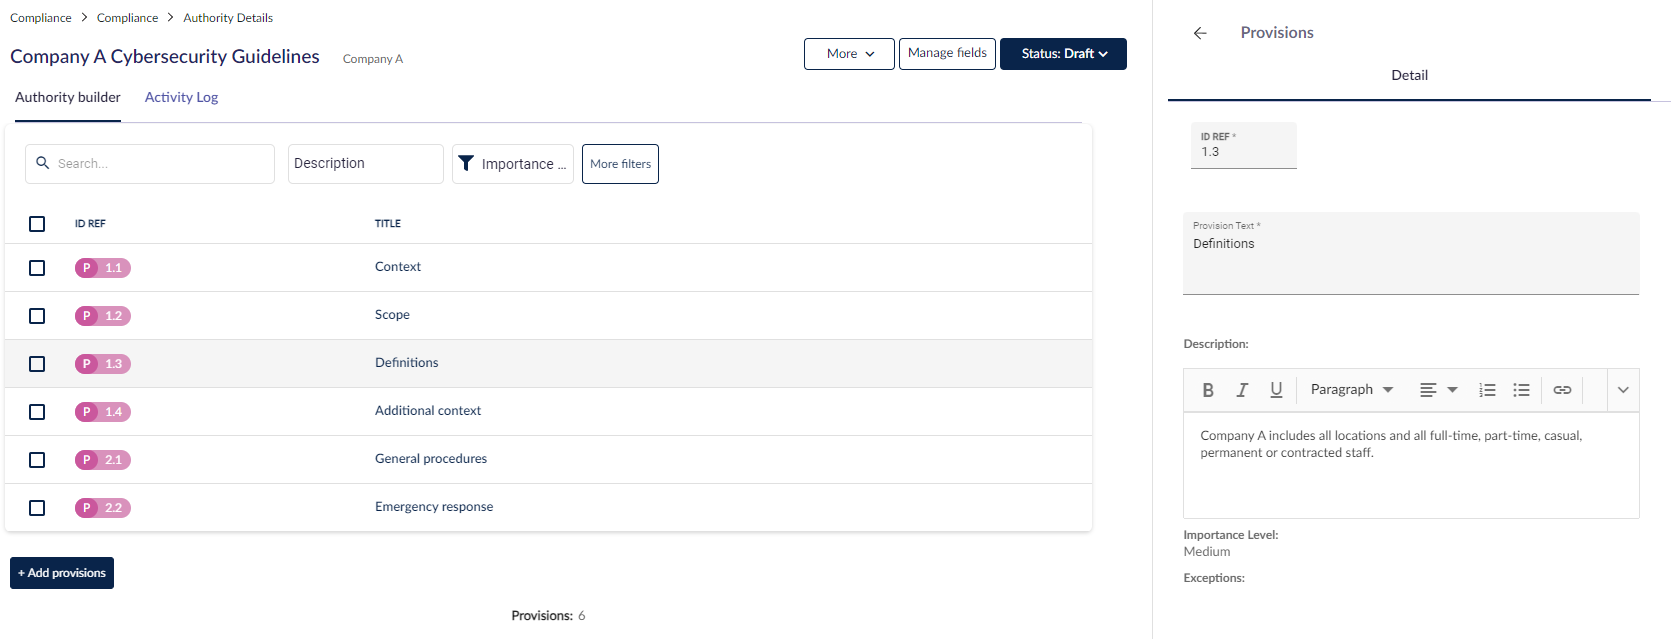
After creating the authority, you will be navigated to the authority builder, where you can:
- Create and view provisions
- View/edit authority details in the side panel
- View/edit provision details in the side panel (once you click on a provision)
Editing the authority's details
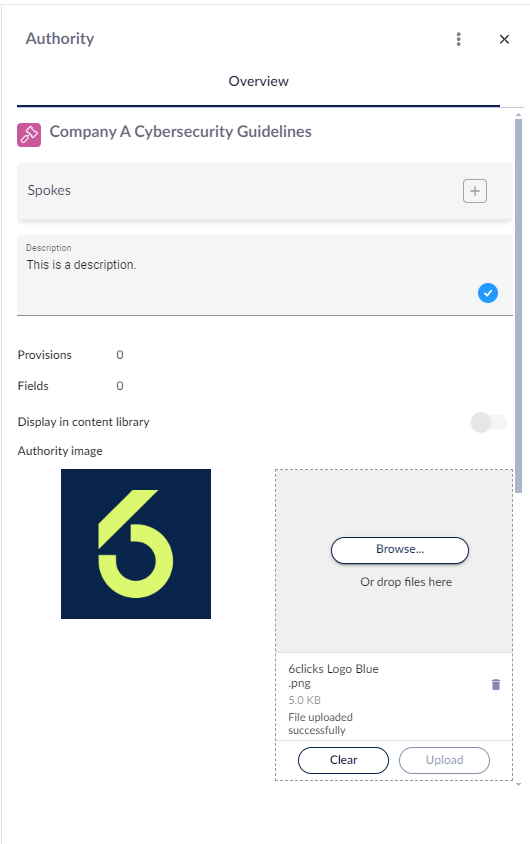
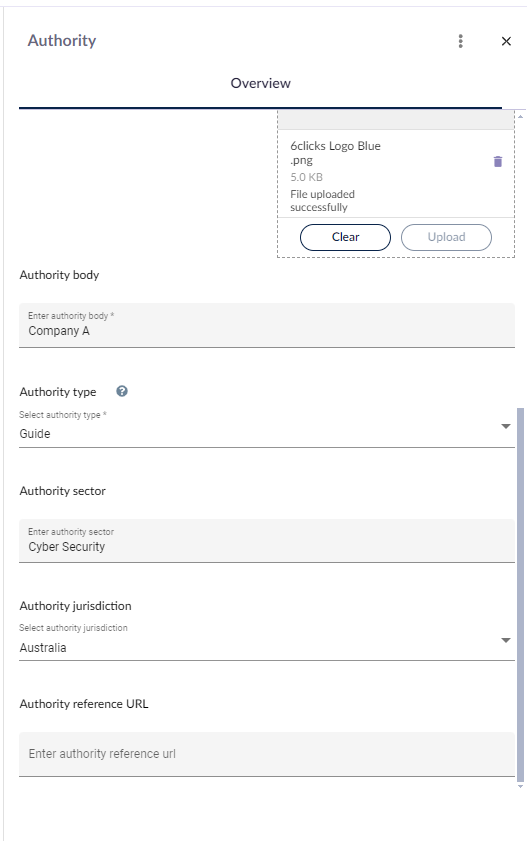
In the side panel menu, you can view and update the authority's details, such as:
- Description - This will be displayed as a short description in the Content Library
- Authority Image - This image will be displayed in the Content Library and trust portal
- Authority Body - The organization that has created and maintains the authority
- Authority Type - Type of authority, e.g. regulation, legislation, controls, standard, or guide
- Authority Sector - The applicable sector or sectors
- Authority Jurisdiction - The applicable jurisdiction or jurisdictions
- Authority Reference URL - The URL of the authority document
Creating provisions
There are two ways to create provisions:
- Adding individual provisions within the platform
- Bulk importing provisions by making an Excel spreadsheet template
You can also customize provision fields before adding provisions.
Adding individual provisions
To add an individual provision, click on the + Add Provisions button below the table.
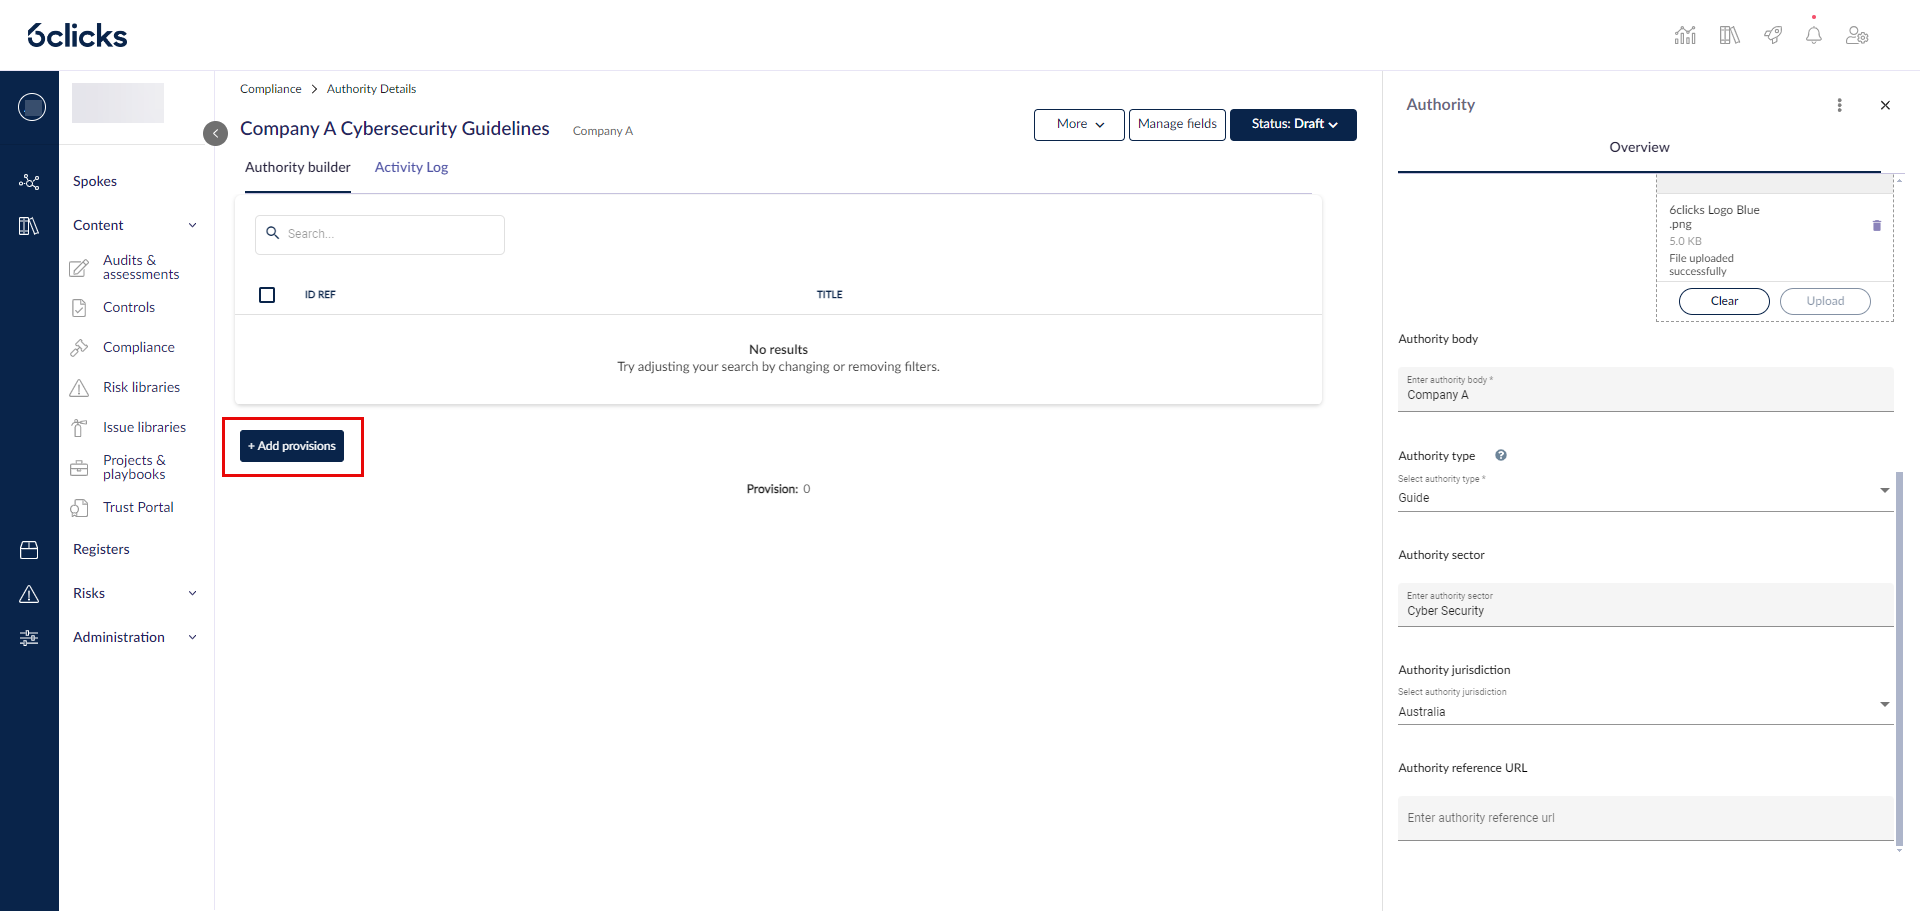
You will then be able to add the details of the new provision in the side panel menu.
By default, the details include two fields, which are the reference ID (ID REF) and a title/name text field (provision text).
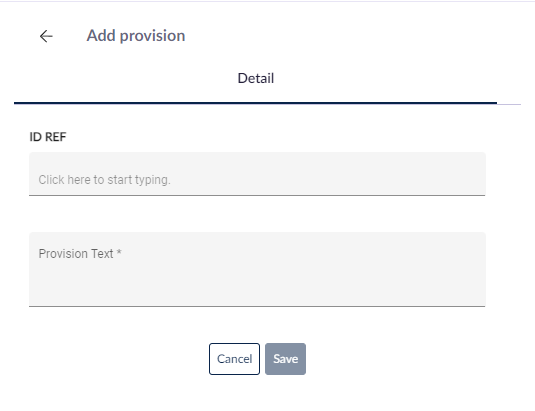
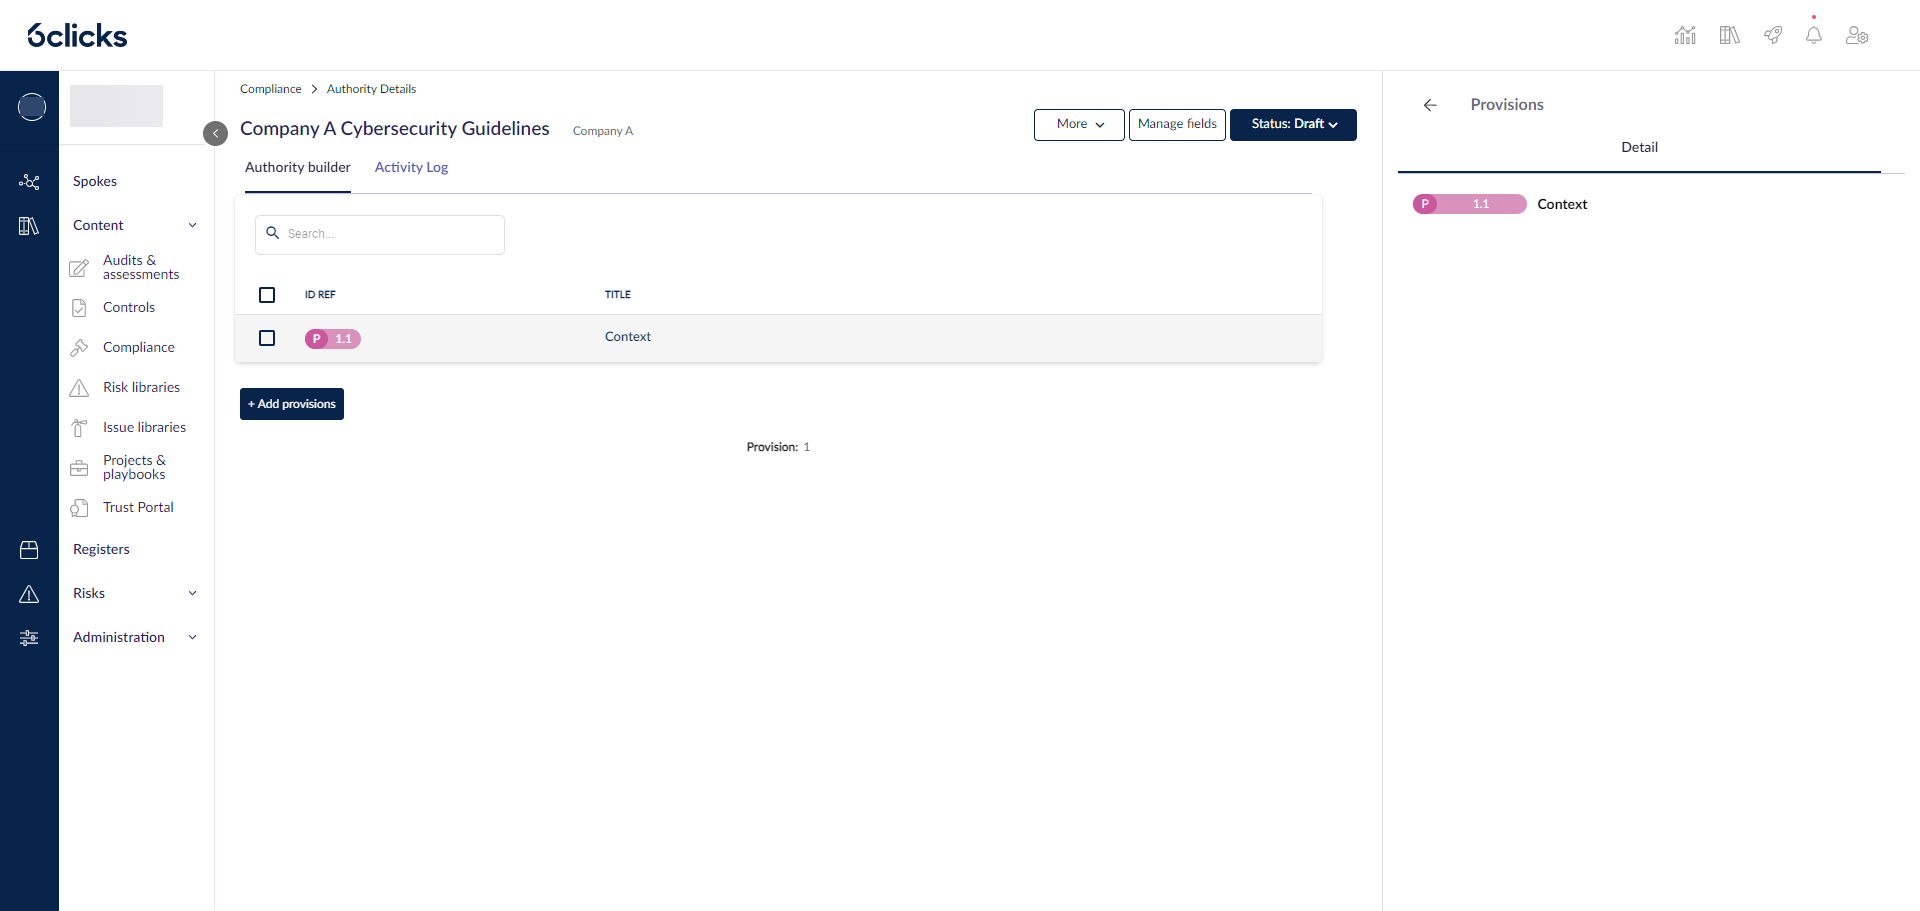
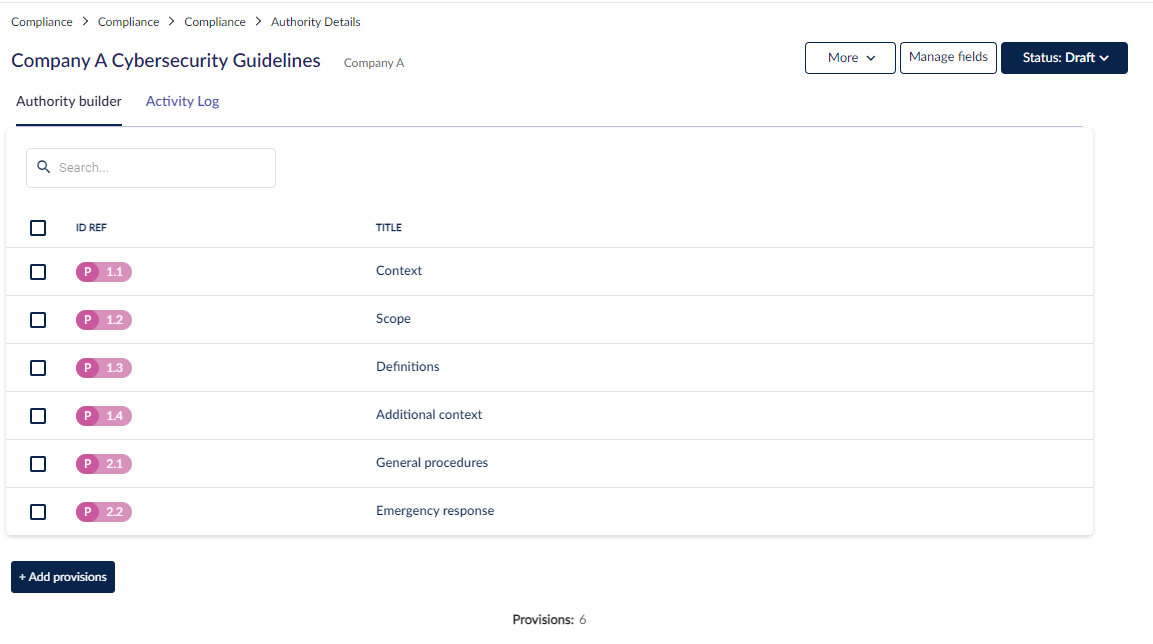
After clicking Save, the provision will appear in the table.
Important: To categorize provisions by specific fields, such as Domain or Section, these fields must be defined before manually adding provisions. For guidance on defining fields, please refer to the Defining provision fields section.
Bulk importing provisions using Excel
Importing provisions will update any existing provisions previously added to the authority, and/or add new provisions if they previously did not exist.
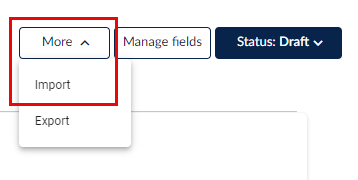
To bulk import provisions, select More > Import.
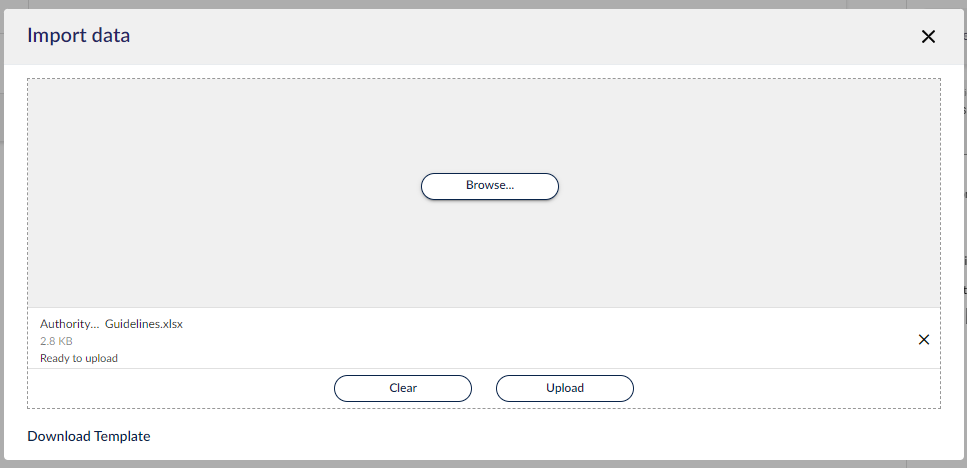
Download the template from the import modal. The template includes default fields and any custom fields you may have added.

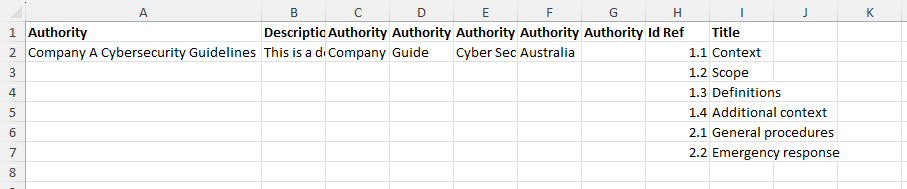
The Excel template has the following default fields.
- Authority
- Description
- Authority Body
- Authority Type
- Authority Sector
- Authority Jurisdiction
- Authority Reference URL
- Provision ID Ref
- Provisions Title
The authority details, i.e. columns A to G, will only need to be populated in the first line.
Select Export instead of Import to get an Excel spreadsheet that also includes provisions you have already put into the platform so you can add more provisions, for example:

Each row in the template will be a provision in the authority.
When importing provisions, each provision must be assigned a unique ID reference number. This ensures that all provisions are correctly recognised and processed by the system. If duplicate ID reference numbers exist, the system will only import the first instance found in the list. Any subsequent provisions with the same ID reference number will be skipped and not imported.
Once you have filled out the authority template, import the provisions by uploading the file.
The provisions will be added to the authority.
Defining provision fields
Because authorities across the globe are not standardized, 6clicks allows you to define provision fields to capture all the necessary information. To add fields, click on Manage fields > + Add field.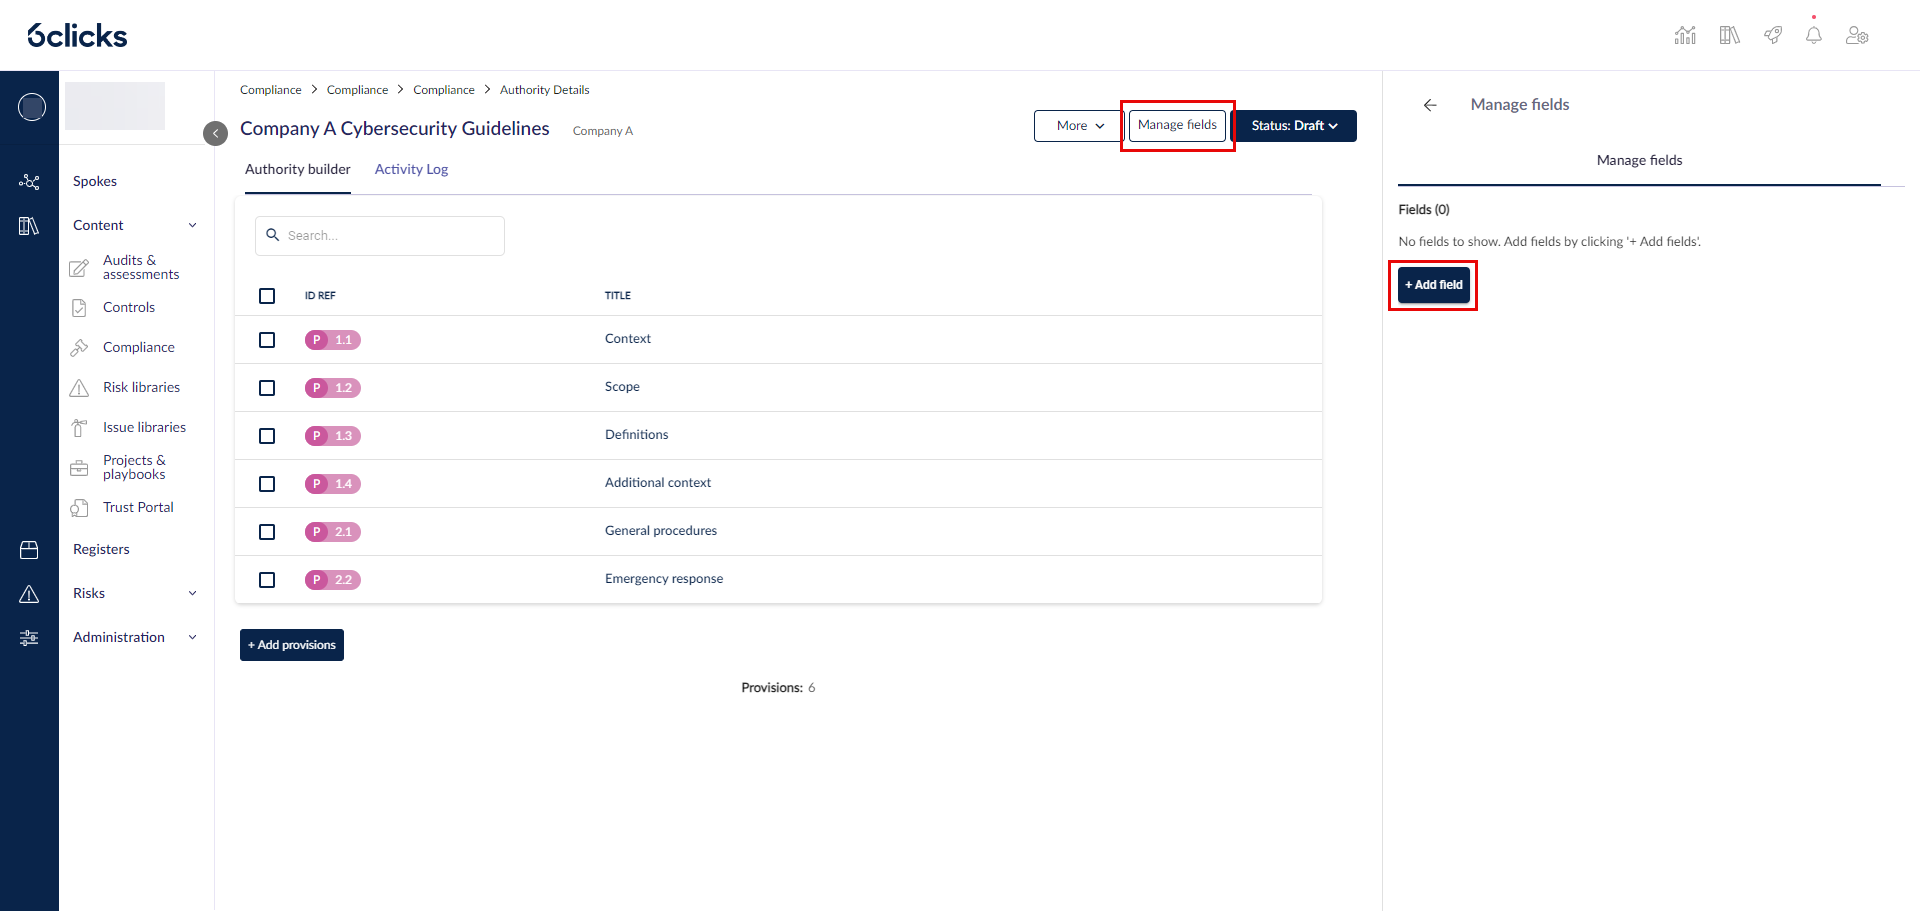
Enter the name of the field and hit enter on your keyboard.
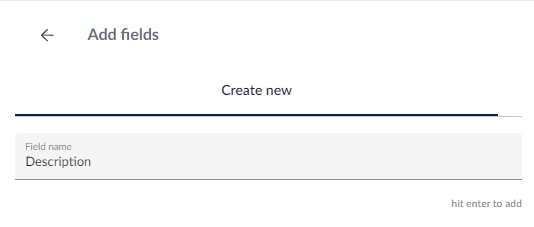
Next, select the type of field and hit save. There are two types of authority fields:
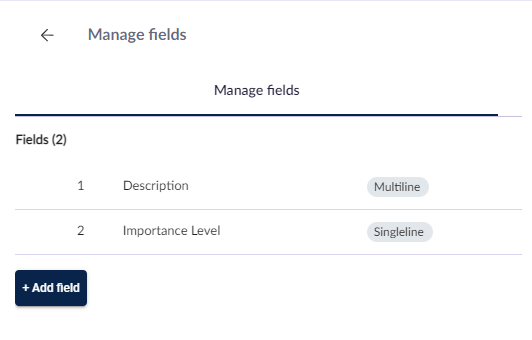
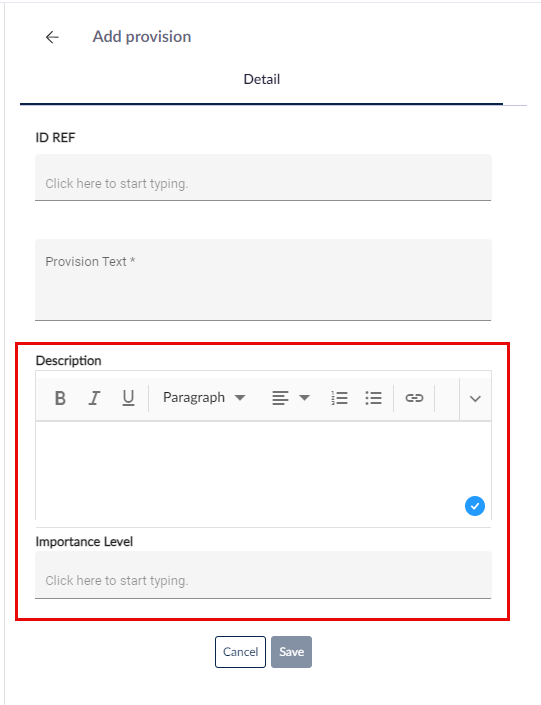
- Multiline - used for text that spans multiple lines, such as descriptions.
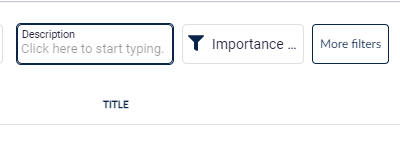
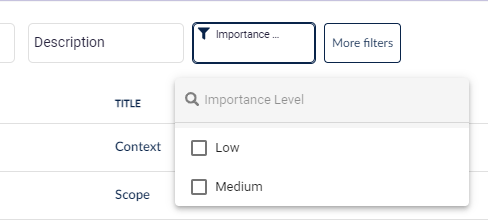
- Singleline - used for single words and sentences. This type of field turns into a dropdown filter, so it is handy for categories.
The field will be added to the list of fields. You can add as many fields as you like.
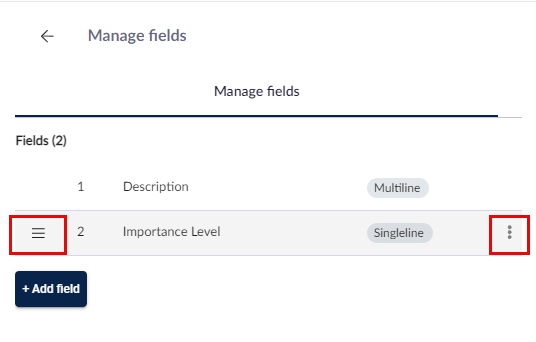
You can also reorder the fields by clicking and dragging the three bars on the left, as well as edit the fields.
When creating and editing provisions, these fields will now be visible.
When importing provisions, custom fields will appear in the import file. The custom fields have 'ML' and 'SL' before their names. These stand for Multiline and Singleline respectively. Add the details for each provision and then upload.

Lastly, you can also create custom fields using the import file by populating additional columns.

If you add a field to the import template without using ML or SL, the field will automatically be added as a single-line (SL) field.
Multiline fields are searchable, and Singleline fields act as dropdown filters in the authority and when being used in assessments.
Editing provisions
You can edit provisions by selecting the provision and then by clicking on any of the fields (including REF ID and provision name).
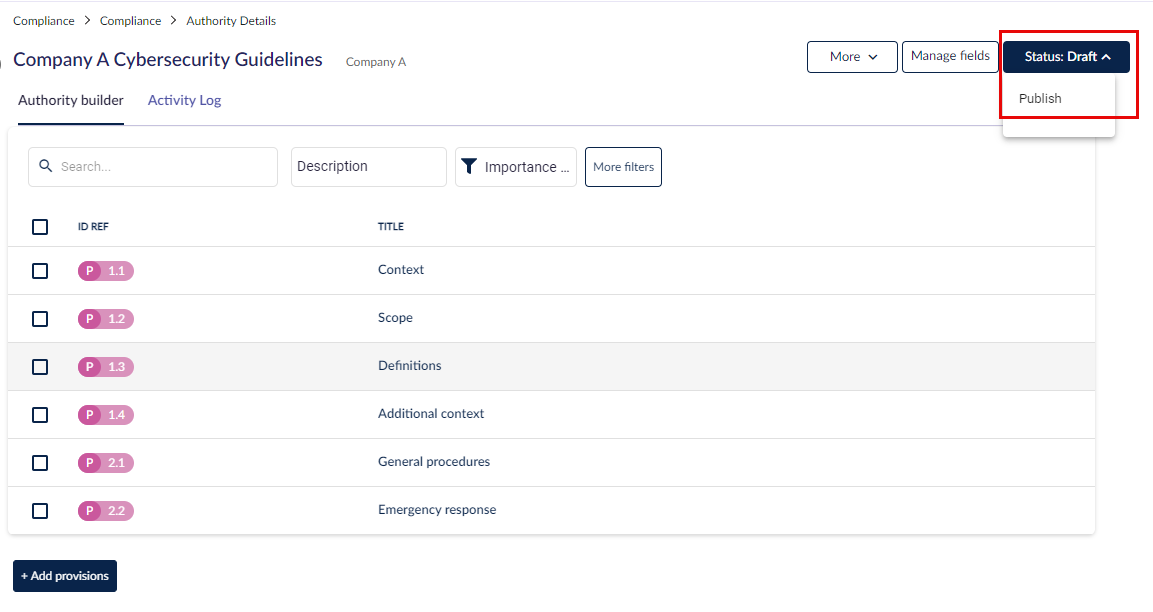
Publishing your custom authority
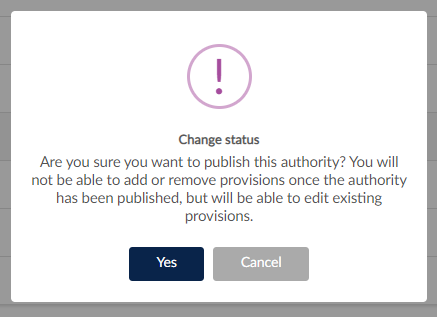
Once your authority is ready for use, change the status of the authority from Draft to Published.
After publishing the authority, you will be able to view its details, but not edit.
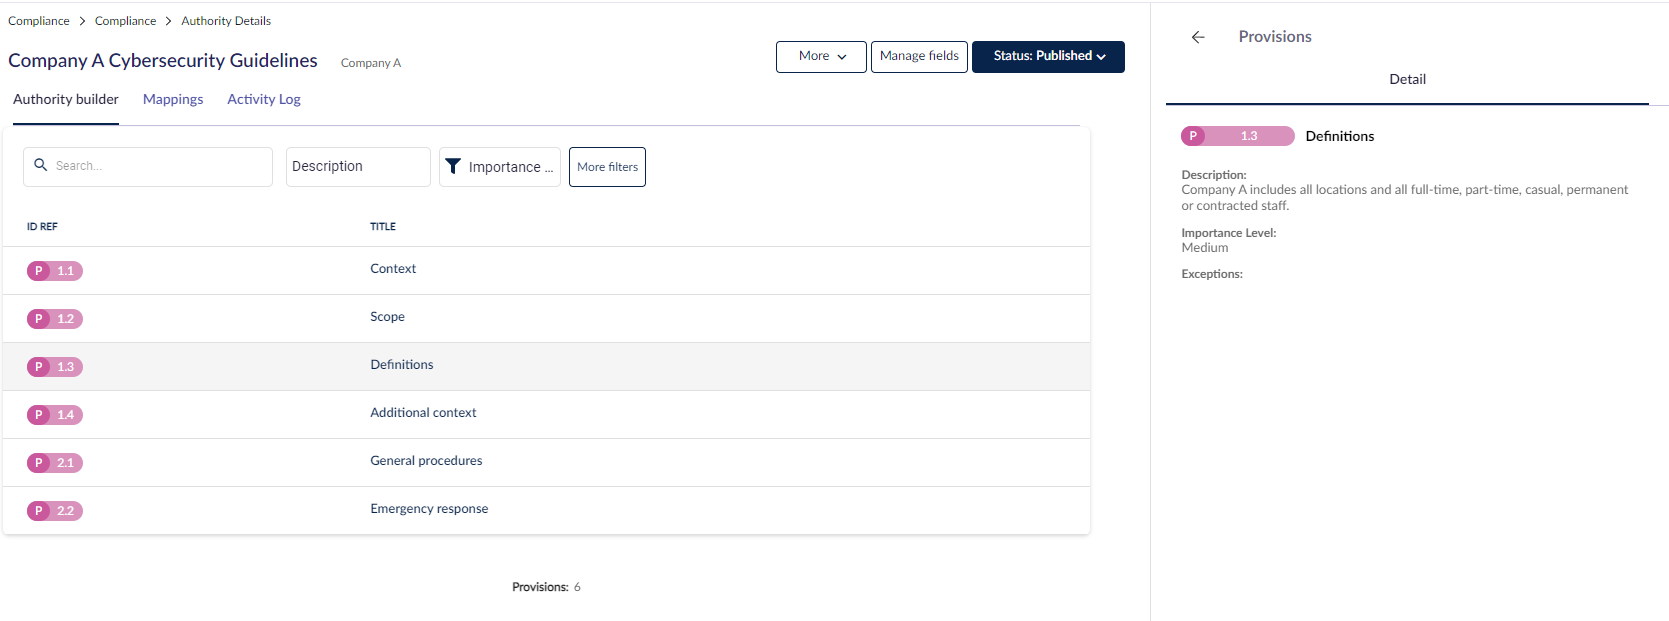
To edit the authority, return the authority to Draft using the Status dropdown. Once an authority has already been published, you will only be able to:
- Edit authority details
- Edit provision details
- Create and edit fields
You will not be able to delete or add new provisions. Note that any changes will be reflected immediately across any team/spoke using the custom authority.
To learn how to publish the authority to your Content Library for your spokes to use, head here.