Table of contents
If you wish to enable self-service reporting for your account/tenant, please ask your 6clicks administrator to contact 6clicks support with your name/email, the tenant name, and the provision location (e.g., US, UK, AU) with that request.
Creating a calculated field
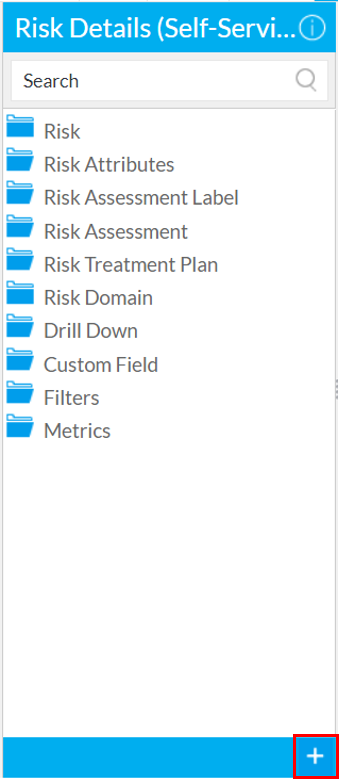
To create a calculated field, go to the Data tab and click the + button at the bottom right of the Fields area.
This will open a dialogue box where the calculated field can be configured. Start by giving the field a name.
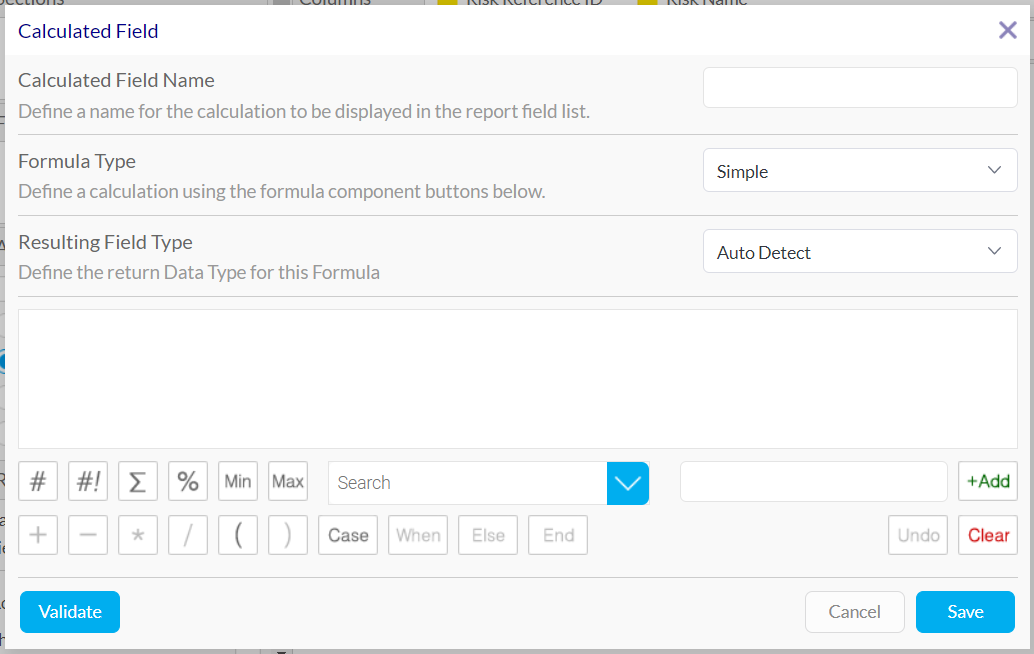
The Formula Type dropdown will determine how the calculated field will be configured. The available options are:
- Simple - allows the user to build basic SQL queries to configure the field
- Pre-Defined - pre-defined calculations where the user only needs to select simple inputs / settings
- Freehand SQL - allows the user to write SQL queries to accomplish more advanced calculations
Refer to the sections below for more information on how to use each of these.
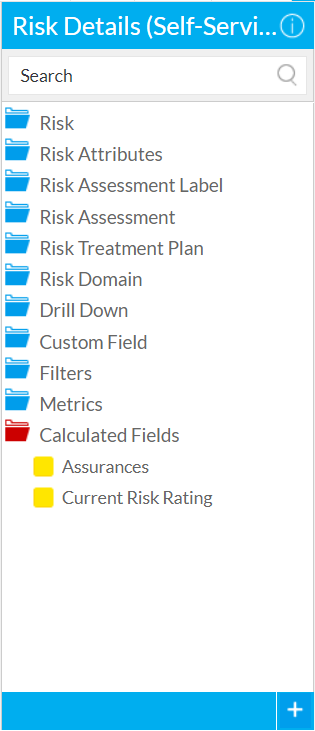
Once a calculated field has been created, it will appear in a new folder in the Fields area and can be used as any other field.
Simple calculated fields
Selecting the Simple Formula Type will activate a GUI (general user interface) where basic SQL queries can be defined by clicking buttons instead of coding.
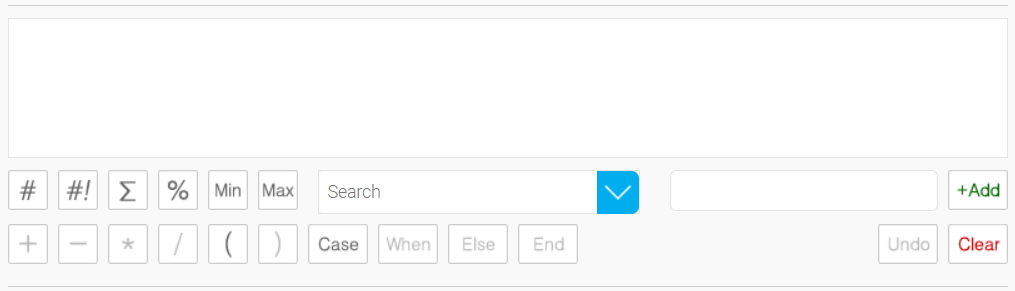
Case-When Statements are the most powerful feature of Simple Calculated Fields. To create a Case-When Statement, click the Case button, then the When button.
This will open a new dialogue box where both the When and Then statements can be configured.
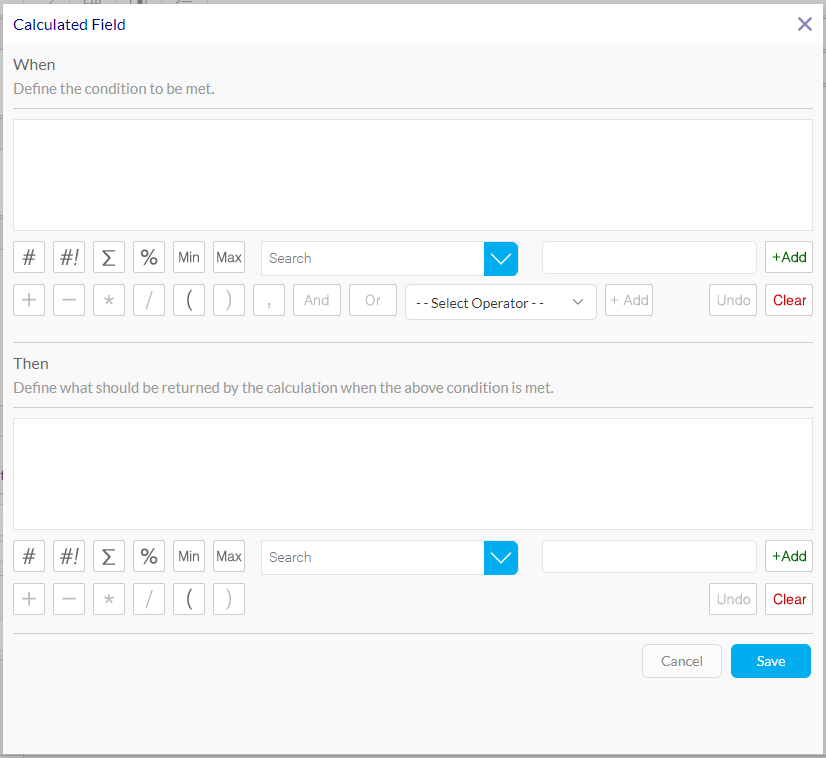
Click Save when complete to return to the first dialogue box.
Case-When Statements can include Else Statements to loop through multiple conditions and returning calculations.
Case-When Statements must finish with an End function. When saving, a prompt will appear that the SQL is invalid if the Statement is incomplete. This can be checked at anytime by pressing the Validate button.
Below are some examples for how Simple Calculated Fields can be configured for common outcomes.
Example: Adding custom fields to reports
Without using calculated fields, custom fields can be added to a report but will be sideways i.e. name of the field in one column, value of the field in another column. To make it so that they are the right way up like any other default field, we will need to calculate them.
In this Example, a custom field in the Risk Module called 'Assurances' will be added to the report.
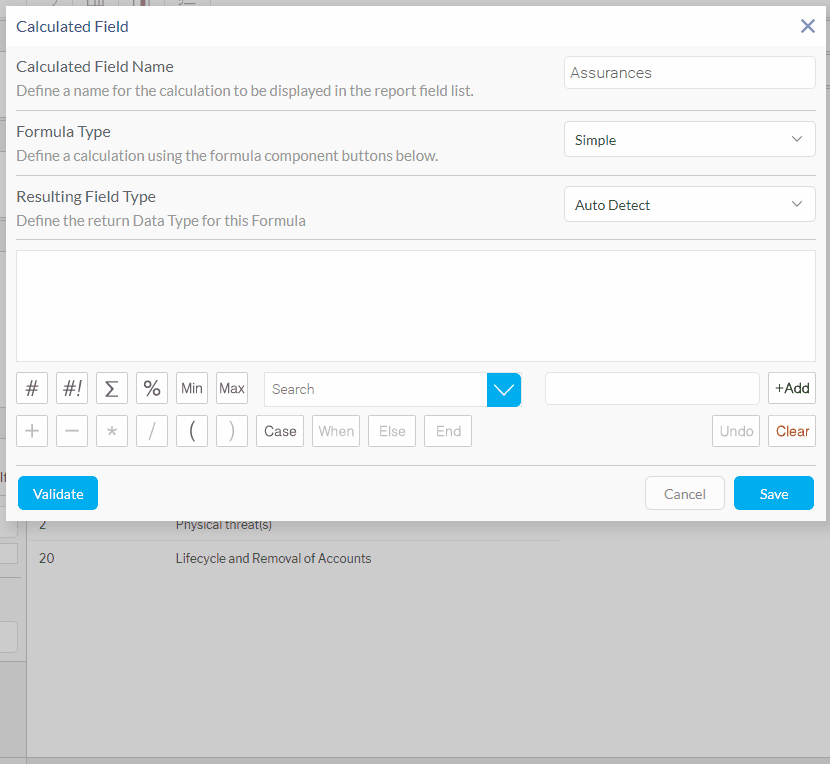
Below is an extract of the Simple SQL query.
MAX ( CASE WHEN Risk Custom Fields = 'Assurances' THEN Risk Custom Values END )
The Max function is necessary where two or more custom fields are used within the one report.
The Max function is sometimes not necessary e.g. in the case of a multiselect field or when the field is used as a filter.
Example: Showing risk ratings by assessment label
In this Example, a calculated field will be created to only show Current Risk Ratings.
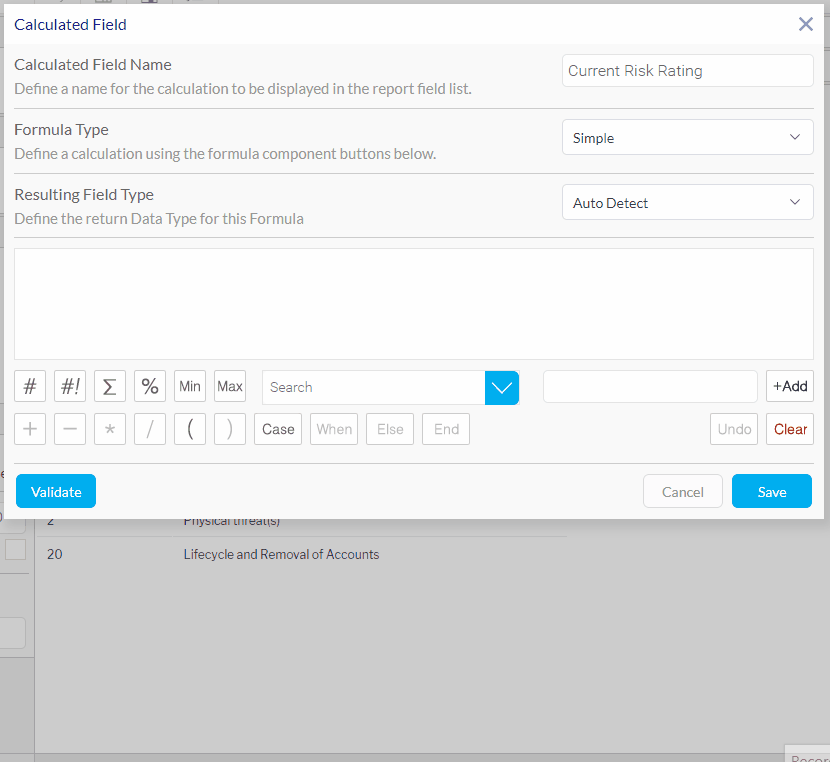
Below is an extract of the Simple SQL query.
MAX ( CASE WHEN Risk Assessment Label = 'Current' THEN Risk Rating END )
The Max function is necessary where two or more assessment labels are used within the one report.
Pre-defined calculated fields
Selecting the Pre-Defined Formula Type will activate a GUI (general user interface) where a pre-defined function can be selected for the calculated field.
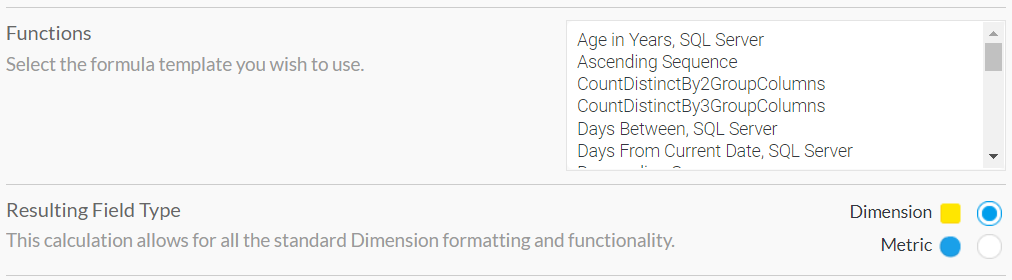
Once selected, additional sections may appear to configure inputs to the function.
Below are some examples for how Pre-Defined Calculated Fields can be configured for common outcomes.
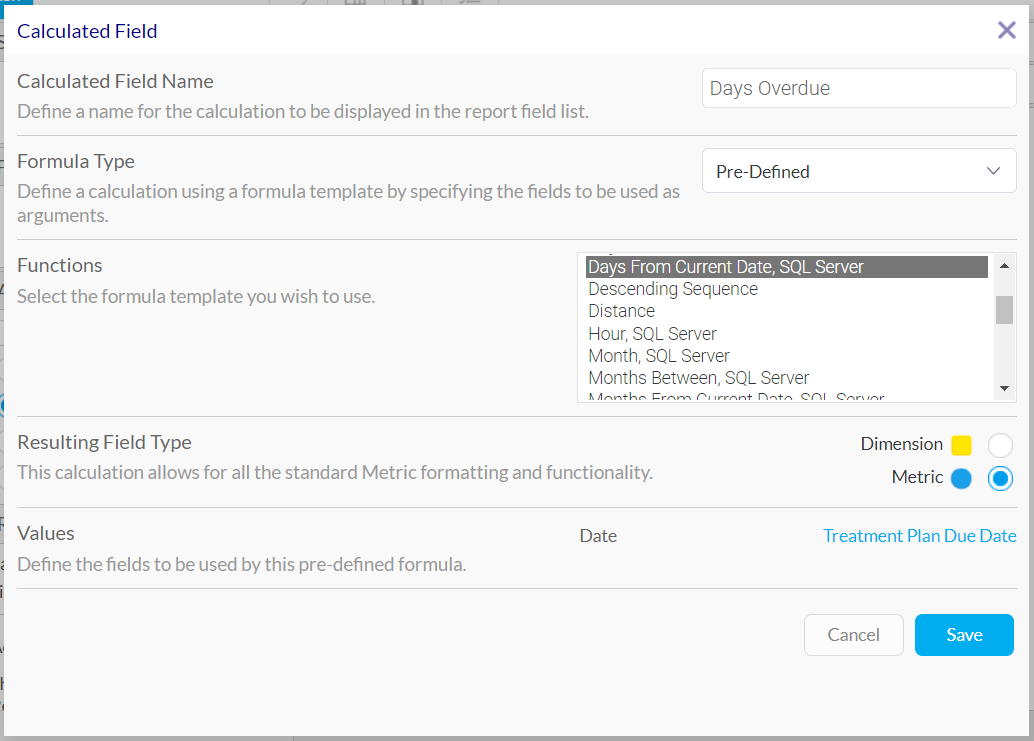
Example: Calculating days overdue
In this Example, a calculated field will be created to show the number of days overdue for risk treatment plans.
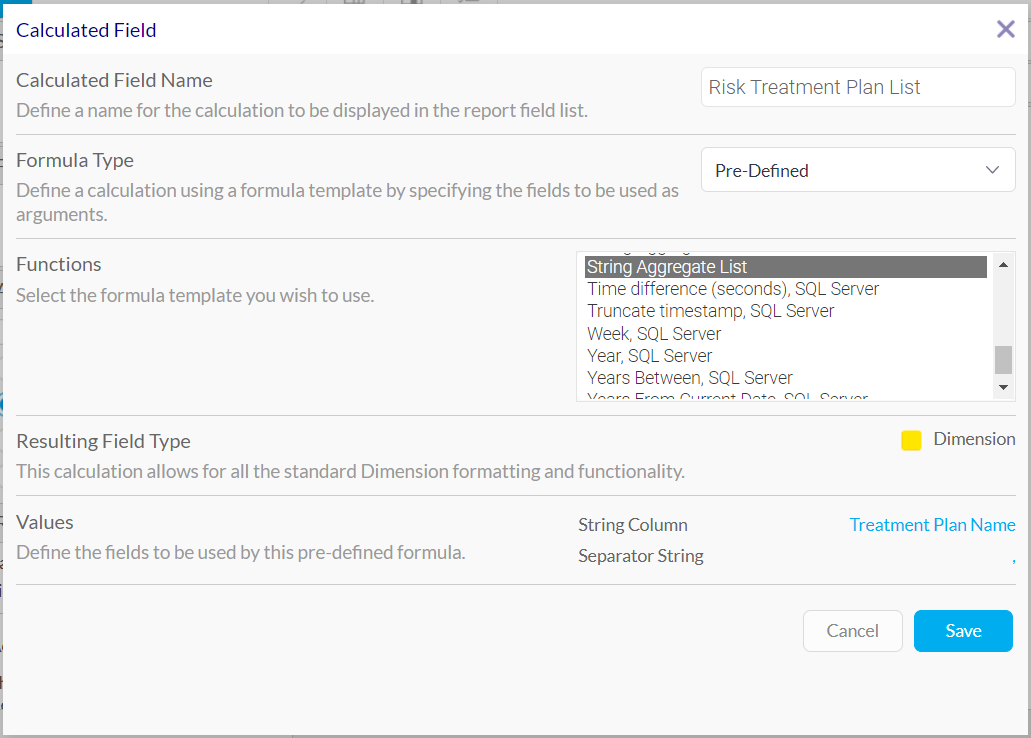
Example: Creating a list
In this Example, a single field will be created which will list all risk treatment plans linked to a risk and comma-separated.
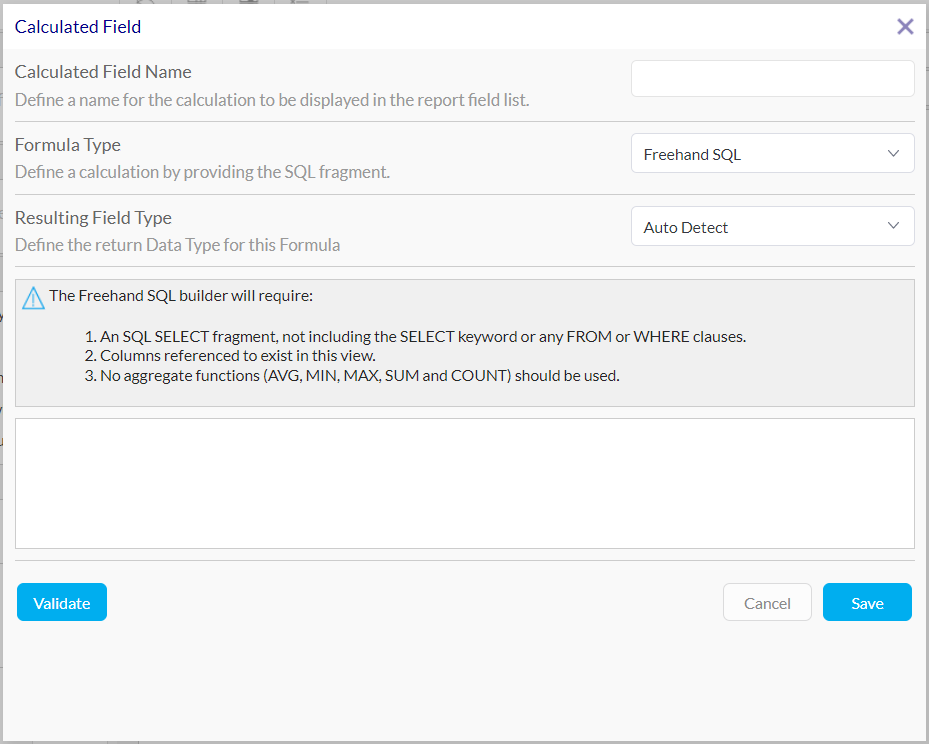
Freehand SQL calculated fields
For users with advanced knowledge of SQL, the Freehand SQL Formula Type will allow them to code freely in SQL using the data within the selected Self-Service View.
When selecting this option, the dialogue box will change to include an area to type in SQL code.
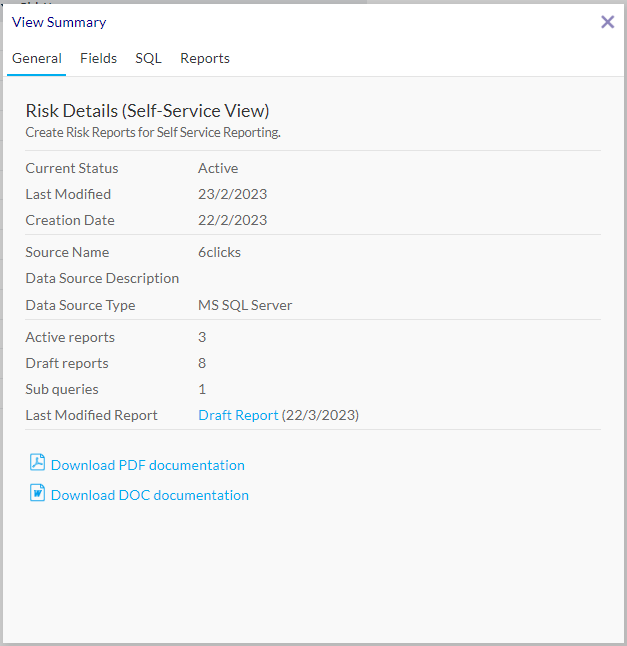
Using this Formula Type requires understanding the data schema within the Self-Service View being used. This information can be accessed by clicking the Information icon next to the View name.
![]()
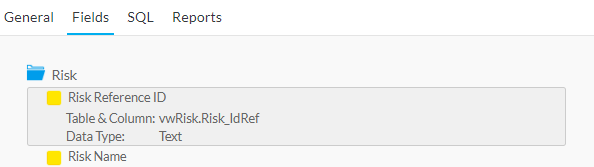
Go to the Fields tab and click on a field to view details on that field.
This, and other information within this dialogue box, will provide the necessary knowledge of the Self-Service View to enable Freehand SQL to be used.